Tutorial: Use GitHub Actions to deploy to App Service and connect to a database
Learn how to set up a GitHub Actions workflow to deploy a ASP.NET Core application with an Azure SQL Database backend. When you're finished, you have an ASP.NET app running in Azure and connected to SQL Database. You'll first use an ARM template to create resources.
This tutorial does not use containers. If you want to deploy to a containerized ASP.NET Core application, see Use GitHub Actions to deploy to App Service for Containers and connect to a database.
In this tutorial, you learn how to:
- Use a GitHub Actions workflow to add resources to Azure with a Azure Resource Manager template (ARM template)
- Use a GitHub Actions workflow to build an ASP.NET Core application
If you don't have an Azure subscription, create an Azure free account before you begin.
Prerequisites
To complete this tutorial, you'll need:
- An Azure account with an active subscription. Create an account for free.
- A GitHub account. If you don't have one, sign up for free.
- A GitHub repository to store your Resource Manager templates and your workflow files. To create one, see Creating a new repository.
Download the sample
Fork the sample project in the Azure Samples repo.
https://github.com/Azure-Samples/dotnetcore-sqldb-ghactions
Create the resource group
Open the Azure Cloud Shell at https://shell.azure.com. You can alternately use the Azure CLI if you've installed it locally. (For more information on Cloud Shell, see the Cloud Shell Overview.)
az group create --name {resource-group-name} --location {resource-group-location}
Generate deployment credentials
OpenID Connect is an authentication method that uses short-lived tokens. Setting up OpenID Connect with GitHub Actions is more complex process that offers hardened security.
If you do not have an existing application, register a new Microsoft Entra application and service principal that can access resources.
az ad app create --display-name myAppThis command will output JSON with an
appIdthat is yourclient-id. TheobjectIdisAPPLICATION-OBJECT-IDand it will be used for creating federated credentials with Graph API calls. Save the value to use as theAZURE_CLIENT_IDGitHub secret later.Create a service principal. Replace the
$appIDwith the appId from your JSON output. This command generates JSON output with a differentobjectIdwill be used in the next step. The newobjectIdis theassignee-object-id.This command generates JSON output with a different
objectIdand will be used in the next step. The newobjectIdis theassignee-object-id.Copy the
appOwnerTenantIdto use as a GitHub secret forAZURE_TENANT_IDlater.az ad sp create --id $appIdCreate a new role assignment by subscription and object. By default, the role assignment will be tied to your default subscription. Replace
$subscriptionIdwith your subscription ID,$resourceGroupNamewith your resource group name, and$assigneeObjectIdwith generatedassignee-object-id(the newly created service principal object id).az role assignment create --role contributor --subscription $subscriptionId --assignee-object-id $assigneeObjectId --assignee-principal-type ServicePrincipal --scope /subscriptions/$subscriptionId/resourceGroups/$resourceGroupNameRun the following command to create a new federated identity credential for your Microsoft Entra application.
- Replace
APPLICATION-OBJECT-IDwith the objectId (generated while creating app) for your Microsoft Entra application. - Set a value for
CREDENTIAL-NAMEto reference later. - Set the
subject. The value of this is defined by GitHub depending on your workflow:- Jobs in your GitHub Actions environment:
repo:< Organization/Repository >:environment:< Name > - For Jobs not tied to an environment, include the ref path for branch/tag based on the ref path used for triggering the workflow:
repo:< Organization/Repository >:ref:< ref path>. For example,repo:n-username/ node_express:ref:refs/heads/my-branchorrepo:n-username/ node_express:ref:refs/tags/my-tag. - For workflows triggered by a pull request event:
repo:< Organization/Repository >:pull_request.
- Jobs in your GitHub Actions environment:
az ad app federated-credential create --id <APPLICATION-OBJECT-ID> --parameters credential.json ("credential.json" contains the following content) { "name": "<CREDENTIAL-NAME>", "issuer": "https://token.actions.githubusercontent.com", "subject": "repo:octo-org/octo-repo:environment:Production", "description": "Testing", "audiences": [ "api://AzureADTokenExchange" ] }- Replace
To learn how to create an active directory application, service principal, and federated credentials in Azure portal, see Connect GitHub and Azure.
Configure the GitHub secret for authentication
You need to provide your application's Client ID, Tenant ID, and Subscription ID to the login action. These values can either be provided directly in the workflow or can be stored in GitHub secrets and referenced in your workflow. Saving the values as GitHub secrets is the more secure option.
In GitHub, go to your repository.
Go to Settings in the navigation menu.
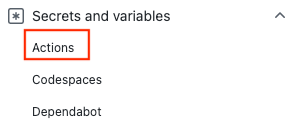
Select Security > Secrets and variables > Actions.
Select New repository secret.
Create secrets for
AZURE_CLIENT_ID,AZURE_TENANT_ID, andAZURE_SUBSCRIPTION_ID. Use these values from your Microsoft Entra application for your GitHub secrets:GitHub secret Microsoft Entra application AZURE_CLIENT_ID Application (client) ID AZURE_TENANT_ID Directory (tenant) ID AZURE_SUBSCRIPTION_ID Subscription ID Save each secret by selecting Add secret.
Add GitHub secrets for your build
Create two new secrets in your GitHub repository for
SQLADMIN_PASSandSQLADMIN_LOGIN. Make sure you choose a complex password, otherwise the create step for the SQL database server will fail. You won't be able to access this password again so save it separately.Create an
AZURE_SUBSCRIPTION_IDsecret for your Azure subscription ID. If you do not know your subscription ID, use this command in the Azure Shell to find it. Copy the value in theSubscriptionIdcolumn.az account list -o table
Create Azure resources
The create Azure resources workflow runs an ARM template to deploy resources to Azure. The workflow:
- Checks out source code with the Checkout action.
- Logs into Azure with the Azure Login action and gathers environment and Azure resource information.
- Deploys resources with the Azure Resource Manager Deploy action.
To run the create Azure resources workflow:
Open the
infraworkflow.ymlfile in.github/workflowswithin your repository.Update the value of
AZURE_RESOURCE_GROUPto your resource group name.Set the input for
regionin your ARM Deploy actions to your region.- Open
templates/azuredeploy.resourcegroup.parameters.jsonand update thergLocationproperty to your region.
- Open
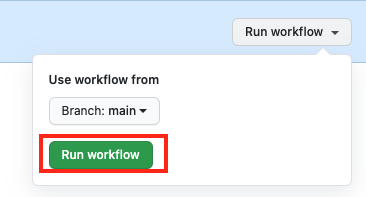
Go to Actions and select Run workflow.
Verify that your action ran successfully by checking for a green checkmark on the Actions page.
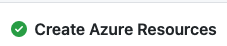
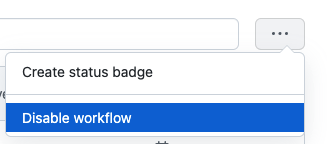
After you've created your resources, go to Actions, select Create Azure Resources, disable the workflow.
Create a publish profile secret
In the Azure portal, open your new staging App Service (Slot) created with the
Create Azure Resourcesworkflow.Select Get Publish Profile.
Open the publish profile file in a text editor and copy its contents.
Create a new GitHub secret for
AZURE_WEBAPP_PUBLISH_PROFILE.
Build and deploy your app
To run the build and deploy workflow:
Open your
workflow.yamlfile in.github/workflowswithin your repository.Verify that the environment variables for
AZURE_RESOURCE_GROUP,AZURE_WEBAPP_NAME,SQLSERVER_NAME, andDATABASE_NAMEmatch the ones ininfraworkflow.yml.Verify that your app deployed by visiting the URL in the Swap to production slot output. You should see a sample app, My TodoList App.
Clean up resources
If you no longer need your sample project, delete your resource group in the Azure portal and delete your repository on GitHub.
Next steps
Feedback
Coming soon: Throughout 2024 we will be phasing out GitHub Issues as the feedback mechanism for content and replacing it with a new feedback system. For more information see: https://aka.ms/ContentUserFeedback.
Submit and view feedback for