Quickstart: Add feature flags to an ASP.NET Core app
In this quickstart, you'll create a feature flag in Azure App Configuration and use it to dynamically control the availability of a new web page in an ASP.NET Core app without restarting or redeploying it.
The feature management support extends the dynamic configuration feature in App Configuration. The example in this quickstart builds on the ASP.NET Core app introduced in the dynamic configuration tutorial. Before you continue, finish the quickstart, and the tutorial to create an ASP.NET Core app with dynamic configuration first.
Prerequisites
Follow the documents to create an ASP.NET Core app with dynamic configuration.
- Quickstart: Create an ASP.NET Core app with App Configuration
- Tutorial: Use dynamic configuration in an ASP.NET Core app
Create a feature flag
Add a feature flag called Beta to the App Configuration store and leave Label and Description with their default values. For more information about how to add feature flags to a store using the Azure portal or the CLI, go to Create a feature flag.

Use a feature flag
Navigate into the project's directory, and run the following command to add a reference to the Microsoft.FeatureManagement.AspNetCore NuGet package.
dotnet add package Microsoft.FeatureManagement.AspNetCoreOpen Program.cs, and add a call to the
UseFeatureFlagsmethod inside theAddAzureAppConfigurationcall.// Load configuration from Azure App Configuration builder.Configuration.AddAzureAppConfiguration(options => { options.Connect(connectionString) // Load all keys that start with `TestApp:` and have no label .Select("TestApp:*", LabelFilter.Null) // Configure to reload configuration if the registered sentinel key is modified .ConfigureRefresh(refreshOptions => refreshOptions.Register("TestApp:Settings:Sentinel", refreshAll: true)); // Load all feature flags with no label options.UseFeatureFlags(); });Tip
When no parameter is passed to the
UseFeatureFlagsmethod, it loads all feature flags with no label in your App Configuration store. The default refresh interval of feature flags is 30 seconds. You can customize this behavior via theFeatureFlagOptionsparameter. For example, the following code snippet loads only feature flags that start with TestApp: in their key name and have the label dev. The code also changes the refresh interval time to 5 minutes. Note that this refresh interval time is separate from that for regular key-values.options.UseFeatureFlags(featureFlagOptions => { featureFlagOptions.Select("TestApp:*", "dev"); featureFlagOptions.CacheExpirationInterval = TimeSpan.FromMinutes(5); });Add feature management to the service collection of your app by calling
AddFeatureManagement.Update Program.cs with the following code.
// Existing code in Program.cs
// ... ...

builder.Services.AddRazorPages();

// Add Azure App Configuration middleware to the container of services.
builder.Services.AddAzureAppConfiguration();

// Add feature management to the container of services.
builder.Services.AddFeatureManagement();

// Bind configuration "TestApp:Settings" section to the Settings object
builder.Services.Configure<Settings>(builder.Configuration.GetSection("TestApp:Settings"));

var app = builder.Build();

// The rest of existing code in program.cs
// ... ...
Add
using Microsoft.FeatureManagement;at the top of the file if it's not present.Note
For Blazor applications, see instructions for enabling feature management as scoped services.
Add a new empty Razor page named Beta under the Pages directory. It includes two files Beta.cshtml and Beta.cshtml.cs.
Open Beta.cshtml, and update it with the following markup:
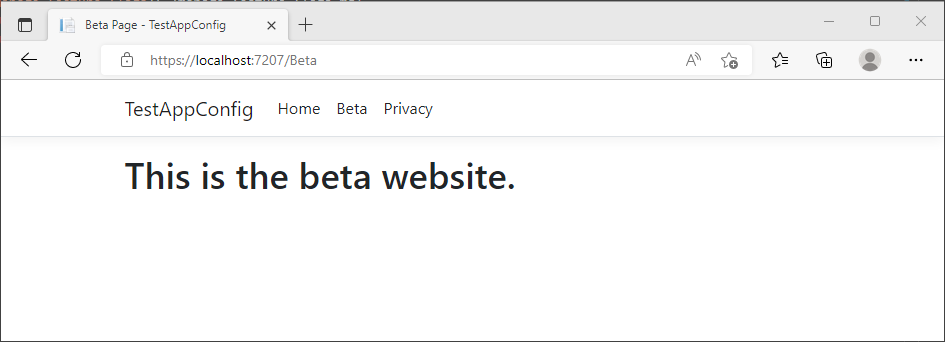
@page
@model TestAppConfig.Pages.BetaModel
@{
    ViewData["Title"] = "Beta Page";
}

<h1>This is the beta website.</h1>
Open Beta.cshtml.cs, and add
FeatureGateattribute to theBetaModelclass. TheFeatureGateattribute ensures the Beta page is accessible only when the Beta feature flag is enabled. If the Beta feature flag isn't enabled, the page will return 404 Not Found.using Microsoft.AspNetCore.Mvc.RazorPages; using Microsoft.FeatureManagement.Mvc; namespace TestAppConfig.Pages { [FeatureGate("Beta")] public class BetaModel : PageModel { public void OnGet() { } } }Open Pages/_ViewImports.cshtml, and register the feature manager Tag Helper using an
@addTagHelperdirective:@addTagHelper *, Microsoft.FeatureManagement.AspNetCoreThe preceding code allows the
<feature>Tag Helper to be used in the project's .cshtml files.Open _Layout.cshtml in the Pages\Shared directory. Insert a new
<feature>tag in between the Home and Privacy navbar items, as shown in the highlighted lines below.<nav class="navbar navbar-expand-sm navbar-toggleable-sm navbar-light bg-white border-bottom box-shadow mb-3"> <div class="container"> <a class="navbar-brand" asp-area="" asp-page="/Index">TestAppConfigNet3</a> <button class="navbar-toggler" type="button" data-toggle="collapse" data-target=".navbar-collapse" aria-controls="navbarSupportedContent" aria-expanded="false" aria-label="Toggle navigation"> <span class="navbar-toggler-icon"></span> </button> <div class="navbar-collapse collapse d-sm-inline-flex flex-sm-row-reverse"> <ul class="navbar-nav flex-grow-1"> <li class="nav-item"> <a class="nav-link text-dark" asp-area="" asp-page="/Index">Home</a> </li> <feature name="Beta"> <li class="nav-item"> <a class="nav-link text-dark" asp-area="" asp-page="/Beta">Beta</a> </li> </feature> <li class="nav-item"> <a class="nav-link text-dark" asp-area="" asp-page="/Privacy">Privacy</a> </li> </ul> </div> </div> </nav>The
<feature>tag ensures the Beta menu item is shown only when the Beta feature flag is enabled.
Build and run the app locally
To build the app by using the .NET Core CLI, run the following command in the command shell:
dotnet buildAfter the build successfully completes, run the following command to run the web app locally:
dotnet runOpen a browser window, and go to the URL shown in the
dotnet runoutput. Your browser should display a page similar to the image below.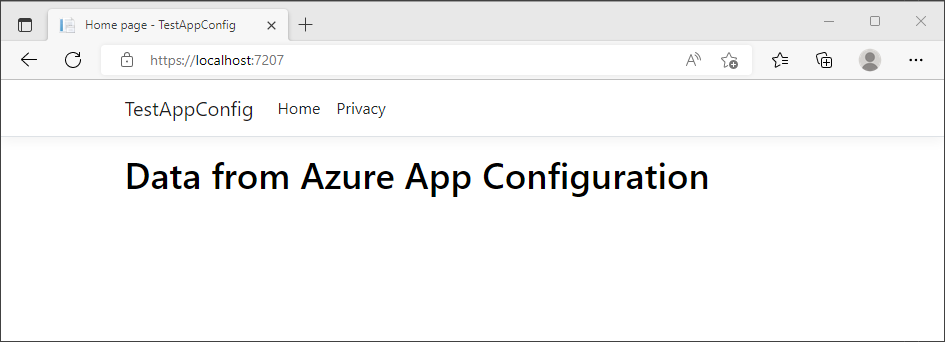
Sign in to the Azure portal. Select All resources, and select the App Configuration store that you created previously.
Select Feature manager and locate the Beta feature flag. Enable the flag by selecting the checkbox under Enabled.
Refresh the browser a few times. When the refresh interval time window passes, the page will show with updated content.
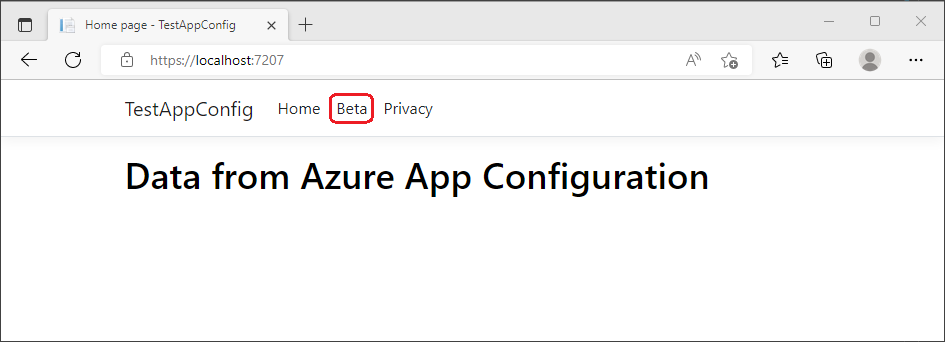
Select the Beta menu. It will bring you to the beta website that you enabled dynamically.
Clean up resources
If you don't want to continue using the resources created in this article, delete the resource group you created here to avoid charges.
Important
Deleting a resource group is irreversible. The resource group and all the resources in it are permanently deleted. Ensure that you don't accidentally delete the wrong resource group or resources. If you created the resources for this article inside a resource group that contains other resources you want to keep, delete each resource individually from its respective pane instead of deleting the resource group.
- Sign in to the Azure portal, and select Resource groups.
- In the Filter by name box, enter the name of your resource group.
- In the result list, select the resource group name to see an overview.
- Select Delete resource group.
- You're asked to confirm the deletion of the resource group. Enter the name of your resource group to confirm, and select Delete.
After a few moments, the resource group and all its resources are deleted.
Next steps
In this quickstart, you added feature management capability to an ASP.NET Core app on top of dynamic configuration. The Microsoft.FeatureManagement.AspNetCore library offers rich integration for ASP.NET Core apps, including feature management in MVC controller actions, razor pages, views, routes, and middleware. For more information, continue to the following tutorial.
While a feature flag allows you to activate or deactivate functionality in your app, you may want to customize a feature flag based on your app's logic. Feature filters allow you to enable a feature flag conditionally. For more information, continue to the following tutorial.
Azure App Configuration offers built-in feature filters that enable you to activate a feature flag only during a specific period or to a particular targeted audience of your app. For more information, continue to the following tutorial.
To enable feature management capability for other types of apps, continue to the following tutorials.
To learn more about managing feature flags in Azure App Configuration, continue to the following tutorial.
Feedback
Coming soon: Throughout 2024 we will be phasing out GitHub Issues as the feedback mechanism for content and replacing it with a new feedback system. For more information see: https://aka.ms/ContentUserFeedback.
Submit and view feedback for