Quickstart: Add feature flags to a Spring Boot app
In this quickstart, you incorporate Azure App Configuration into a Spring Boot web app to create an end-to-end implementation of feature management. You can use App Configuration to centrally store all your feature flags and control their states.
The Spring Boot Feature Management libraries extend the framework with comprehensive feature flag support. These libraries do not have a dependency on any Azure libraries. They seamlessly integrate with App Configuration through its Spring Boot configuration provider.
Prerequisites
- An Azure account with an active subscription. Create one for free.
- An App Configuration store. Create a store.
- A supported Java Development Kit SDK with version 11.
- Apache Maven version 3.0 or above.
Add a feature flag
Add a feature flag called Beta to the App Configuration store and leave Label and Description with their default values. For more information about how to add feature flags to a store using the Azure portal or the CLI, go to Create a feature flag.

Create a Spring Boot app
To create a new Spring Boot project:
Browse to the Spring Initializr.
Specify the following options:
- Generate a Maven project with Java.
- Specify a Spring Boot version that's equal to or greater than 2.0.
- Specify the Group and Artifact names for your application. This article uses
com.exampleanddemo. - Add the Spring Web dependency.
After you specify the previous options, select Generate Project. When prompted, download the project to your local computer.
Add feature management
After you extract the files on your local system, your Spring Boot application is ready for editing. Locate pom.xml in the root directory of your app.
Open the pom.xml file in a text editor and add the following to the list of
<dependencies>:<dependency> <groupId>com.azure.spring</groupId> <artifactId>spring-cloud-azure-appconfiguration-config-web</artifactId> </dependency> <dependency> <groupId>com.azure.spring</groupId> <artifactId>spring-cloud-azure-feature-management-web</artifactId> </dependency> <dependency> <groupId>org.springframework.boot</groupId> <artifactId>spring-boot-starter-thymeleaf</artifactId> </dependency> <dependencyManagement> <dependencies> <dependency> <groupId>com.azure.spring</groupId> <artifactId>spring-cloud-azure-dependencies</artifactId> <version>5.8.0</version> <type>pom</type> <scope>import</scope> </dependency> </dependencies> </dependencyManagement>
Note
- There is a non-web Feature Management Library that doesn't have a dependency on spring-web. Refer to GitHub's documentation for differences.
Connect to an App Configuration store
Navigate to the
resourcesdirectory of your app and openbootstrap.properties. If the file does not exist, create it. Add the following line to the file.spring.cloud.azure.appconfiguration.stores[0].connection-string= ${APP_CONFIGURATION_CONNECTION_STRING} spring.cloud.azure.appconfiguration.stores[0].feature-flags.enabled=trueSet an environment variable named APP_CONFIGURATION_CONNECTION_STRING, and set it to the connection string to your App Configuration store. At the command line, run the following command and restart the command prompt to allow the change to take effect:
To build and run the app locally using the Windows command prompt, run the following command:
setx APP_CONFIGURATION_CONNECTION_STRING "connection-string-of-your-app-configuration-store"Restart the command prompt to allow the change to take effect. Print the value of the environment variable to validate that it is set properly.
Create a new Java file named HelloController.java in the package directory of your app.
package com.example.demo;

import org.springframework.boot.context.properties.ConfigurationProperties;
import org.springframework.stereotype.Controller;
import org.springframework.ui.Model;

import com.azure.spring.cloud.feature.management.FeatureManager;
import org.springframework.web.bind.annotation.GetMapping;


@Controller
@ConfigurationProperties("controller")
public class HelloController {

    private FeatureManager featureManager;

    public HelloController(FeatureManager featureManager) {
        this.featureManager = featureManager;
    }

    @GetMapping("/welcome")
    public String mainWithParam(Model model) {
        model.addAttribute("Beta", featureManager.isEnabledAsync("Beta").block());
        return "welcome";
    }
}
Create a new HTML file named welcome.html in the templates directory of your app.
<!DOCTYPE html> <html lang="en" xmlns:th="http://www.thymeleaf.org"> <head> <meta charset="utf-8"> <meta name="viewport" content="width=device-width, initial-scale=1, shrink-to-fit=no"> <title>Feature Management with Spring Cloud Azure</title> <link rel="stylesheet" href="/css/main.css"> <link rel="stylesheet" href="https://stackpath.bootstrapcdn.com/bootstrap/4.3.1/css/bootstrap.min.css" integrity="sha384-ggOyR0iXCbMQv3Xipma34MD+dH/1fQ784/j6cY/iJTQUOhcWr7x9JvoRxT2MZw1T" crossorigin="anonymous"> <script src="https://code.jquery.com/jquery-3.6.0.min.js" integrity="sha256-/xUj+3OJU5yExlq6GSYGSHk7tPXikynS7ogEvDej/m4=" crossorigin="anonymous"></script> <script src="https://unpkg.com/@popperjs/core@2"></script> <script src="https://cdn.jsdelivr.net/npm/bootstrap@5.1.3/dist/js/bootstrap.bundle.min.js" integrity="sha384-ka7Sk0Gln4gmtz2MlQnikT1wXgYsOg+OMhuP+IlRH9sENBO0LRn5q+8nbTov4+1p" crossorigin="anonymous"></script> </head> <body> <header> <!-- Fixed navbar --> <nav class="navbar navbar-expand-md navbar-dark fixed-top bg-dark"> <a class="navbar-brand" href="#">TestFeatureFlags</a> <button class="navbar-toggler" aria-expanded="false" aria-controls="navbarCollapse" aria-label="Toggle navigation" type="button" data-target="#navbarCollapse" data-toggle="collapse"> <span class="navbar-toggler-icon"></span> </button> <div class="collapse navbar-collapse" id="navbarCollapse"> <ul class="navbar-nav mr-auto"> <li class="nav-item active"> <a class="nav-link" href="#">Home <span class="sr-only">(current)</span></a> </li> <li class="nav-item" th:if="${Beta}"> <a class="nav-link" href="#">Beta</a> </li> <li class="nav-item"> <a class="nav-link" href="#">Privacy</a> </li> </ul> </div> </nav> </header> <div class="container body-content"> <h1 class="mt-5">Welcome</h1> <p>Learn more about <a href="https://github.com/Azure/azure-sdk-for-java/tree/main/sdk/spring/spring-cloud-azure-feature-management/README.md">Feature Management with Spring Cloud Azure</a></p> </div> <footer class="footer"> <div class="container"> <span class="text-muted">© 2019 - Projects</span> </div> </footer> </body> </html>Create a new folder named CSS under
staticand inside of it a new CSS file named main.css.html { position: relative; min-height: 100%; } body { margin-bottom: 60px; } .footer { position: absolute; bottom: 0; width: 100%; height: 60px; line-height: 60px; background-color: #f5f5f5; } body > .container { padding: 60px 15px 0; } .footer > .container { padding-right: 15px; padding-left: 15px; } code { font-size: 80%; }
Build and run the app locally
Build your Spring Boot application with Maven and run it.
mvn clean package
mvn spring-boot:run
Open a browser window, and go to the URL:
http://localhost:8080/welcome.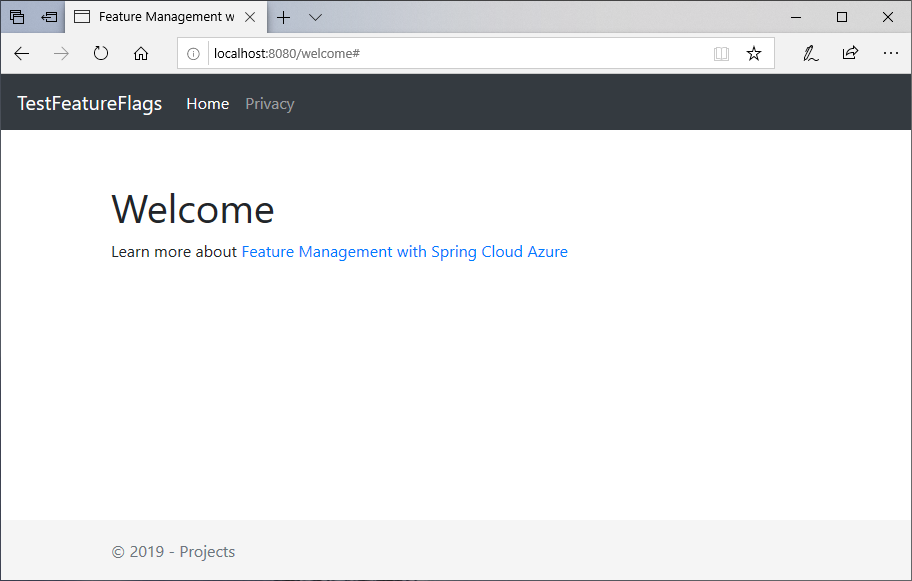
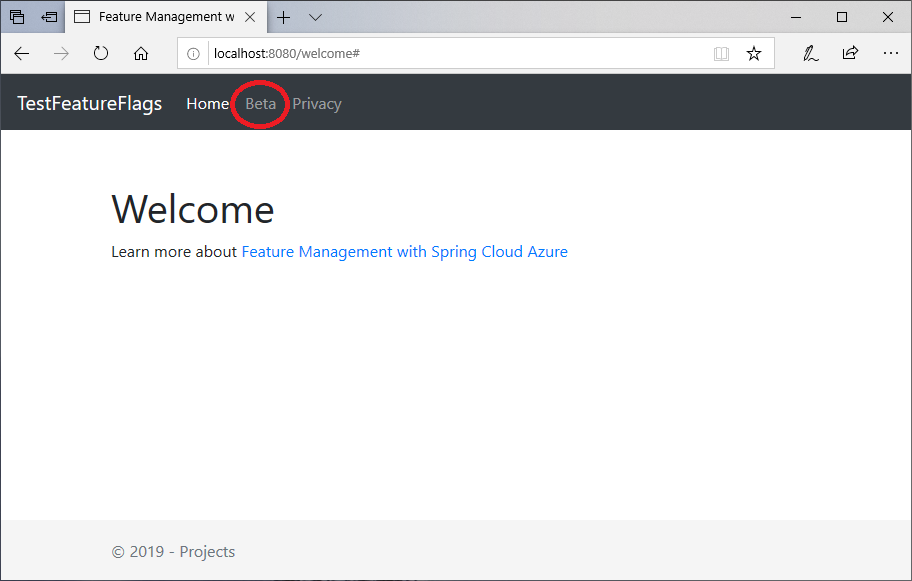
In the App Configuration portal select Feature Manager, and change the state of the Beta key to On:
Key State Beta On Refresh the browser page to see the new configuration settings.
Clean up resources
If you don't want to continue using the resources created in this article, delete the resource group you created here to avoid charges.
Important
Deleting a resource group is irreversible. The resource group and all the resources in it are permanently deleted. Ensure that you don't accidentally delete the wrong resource group or resources. If you created the resources for this article inside a resource group that contains other resources you want to keep, delete each resource individually from its respective pane instead of deleting the resource group.
- Sign in to the Azure portal, and select Resource groups.
- In the Filter by name box, enter the name of your resource group.
- In the result list, select the resource group name to see an overview.
- Select Delete resource group.
- You're asked to confirm the deletion of the resource group. Enter the name of your resource group to confirm, and select Delete.
After a few moments, the resource group and all its resources are deleted.
Next steps
In this quickstart, you created a new App Configuration store and used it to manage features in a Spring Boot web app via the Feature Management libraries.
- Library reference documentation
- Learn more about feature management.
- Manage feature flags.
- Use feature flags in a Spring Boot Core app.
Feedback
Coming soon: Throughout 2024 we will be phasing out GitHub Issues as the feedback mechanism for content and replacing it with a new feedback system. For more information see: https://aka.ms/ContentUserFeedback.
Submit and view feedback for