Quickstart: Create a Go or Rust function in Azure using Visual Studio Code
In this article, you use Visual Studio Code to create a custom handler function that responds to HTTP requests. After testing the code locally, you deploy it to the serverless environment of Azure Functions.
Custom handlers can be used to create functions in any language or runtime by running an HTTP server process. This article supports both Go and Rust.
Completing this quickstart incurs a small cost of a few USD cents or less in your Azure account.
Configure your environment
Before you get started, make sure you have the following requirements in place:
An Azure account with an active subscription. Create an account for free.
Visual Studio Code on one of the supported platforms.
The Azure Functions extension for Visual Studio Code.
Go, latest version recommended. Use the
go versioncommand to check your version.
Install or update Core Tools
The Azure Functions extension for Visual Studio Code integrates with Azure Functions Core Tools so that you can run and debug your functions locally in Visual Studio Code using the Azure Functions runtime. Before getting started, it's a good idea to install Core Tools locally or update an existing installation to use the latest version.
In Visual Studio Code, select F1 to open the command palette, and then search for and run the command Azure Functions: Install or Update Core Tools.
This command starts a package-based installation of the latest version of Core Tools.
Create your local project
In this section, you use Visual Studio Code to create a local Azure Functions custom handlers project. Later in this article, you'll publish your function code to Azure.
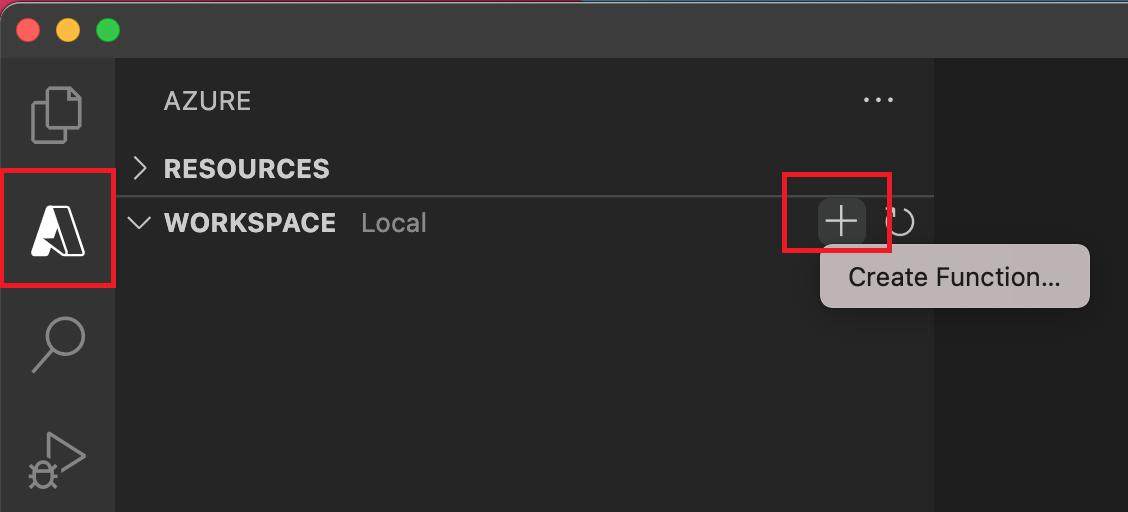
Choose the Azure icon in the Activity bar. Then in the Workspace (local) area, select the + button, choose Create Function in the dropdown. When prompted, choose Create new project.
Choose the directory location for your project workspace and choose Select. You should either create a new folder or choose an empty folder for the project workspace. Don't choose a project folder that is already part of a workspace.
Provide the following information at the prompts:
Prompt Selection Select a language for your function project Choose Custom Handler.Select a template for your project's first function Choose HTTP trigger.Provide a function name Type HttpExample.Authorization level Choose Anonymous, which enables anyone to call your function endpoint. To learn about authorization level, see Authorization keys.Select how you would like to open your project Choose Open in current window.Using this information, Visual Studio Code generates an Azure Functions project with an HTTP trigger. You can view the local project files in the Explorer.
Create and build your function
The function.json file in the HttpExample folder declares an HTTP trigger function. You complete the function by adding a handler and compiling it into an executable.
Press Ctrl + N (Cmd + N on macOS) to create a new file. Save it as handler.go in the function app root (in the same folder as host.json).
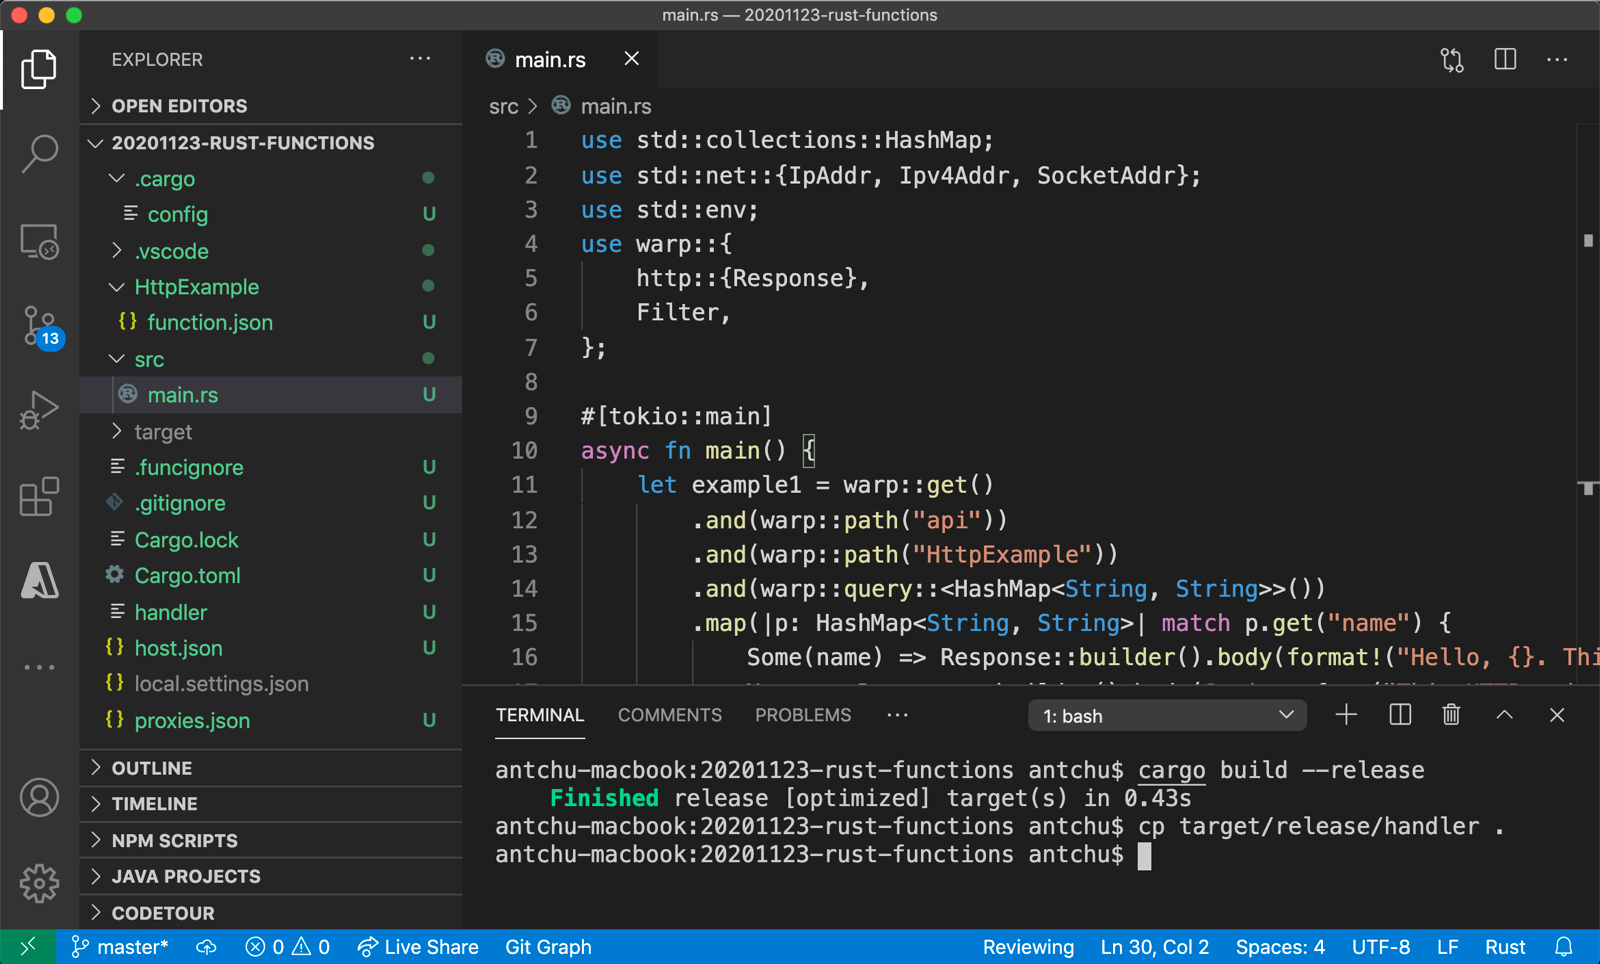
In handler.go, add the following code and save the file. This is your Go custom handler.
package main

import (
    "fmt"
    "log"
    "net/http"
    "os"
)

func helloHandler(w http.ResponseWriter, r *http.Request) {
    message := "This HTTP triggered function executed successfully. Pass a name in the query string for a personalized response.\n"
    name := r.URL.Query().Get("name")
    if name != "" {
        message = fmt.Sprintf("Hello, %s. This HTTP triggered function executed successfully.\n", name)
    }
    fmt.Fprint(w, message)
}

func main() {
    listenAddr := ":8080"
    if val, ok := os.LookupEnv("FUNCTIONS_CUSTOMHANDLER_PORT"); ok {
        listenAddr = ":" + val
    }
    http.HandleFunc("/api/HttpExample", helloHandler)
    log.Printf("About to listen on %s. Go to https://127.0.0.1%s/", listenAddr, listenAddr)
    log.Fatal(http.ListenAndServe(listenAddr, nil))
}
Press Ctrl + Shift + ` or select New Terminal from the Terminal menu to open a new integrated terminal in VS Code.
Compile your custom handler using the following command. An executable file named
handler(handler.exeon Windows) is output in the function app root folder.go build handler.go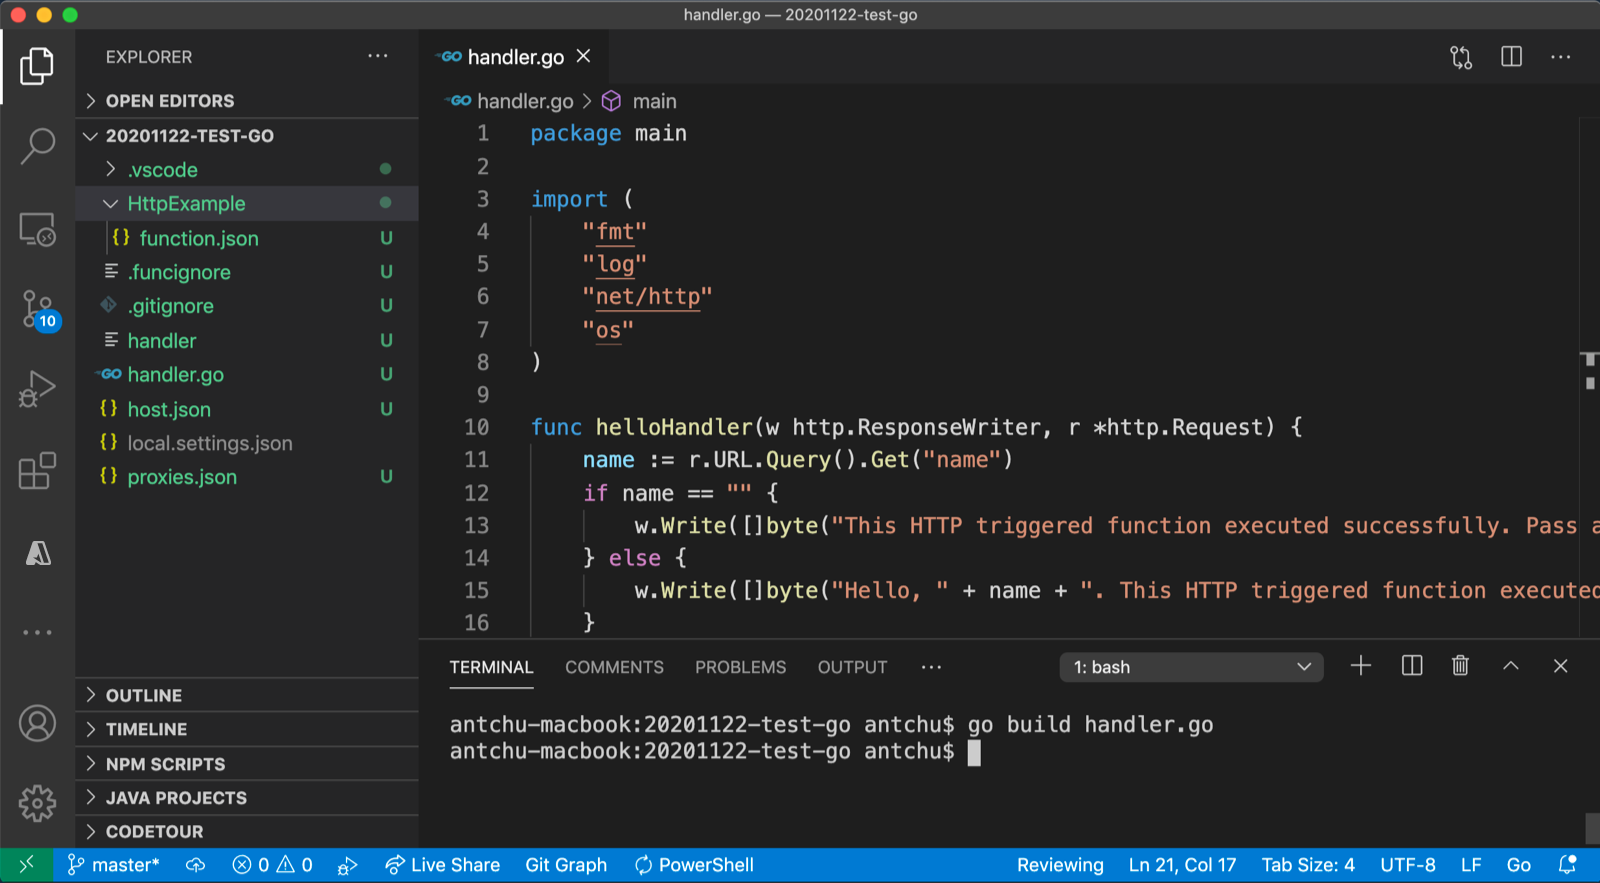
Configure your function app
The function host needs to be configured to run your custom handler binary when it starts.
Open host.json.
In the
customHandler.descriptionsection, set the value ofdefaultExecutablePathtohandler(on Windows, set it tohandler.exe).In the
customHandlersection, add a property namedenableForwardingHttpRequestand set its value totrue. For functions consisting of only an HTTP trigger, this setting simplifies programming by allow you to work with a typical HTTP request instead of the custom handler request payload.Confirm the
customHandlersection looks like this example. Save the file."customHandler": { "description": { "defaultExecutablePath": "handler", "workingDirectory": "", "arguments": [] }, "enableForwardingHttpRequest": true }
The function app is configured to start your custom handler executable.
Run the function locally
You can run this project on your local development computer before you publish to Azure.
In the integrated terminal, start the function app using Azure Functions Core Tools.
func startWith Core Tools running, navigate to the following URL to execute a GET request, which includes
?name=Functionsquery string.http://localhost:7071/api/HttpExample?name=FunctionsA response is returned, which looks like the following in a browser:

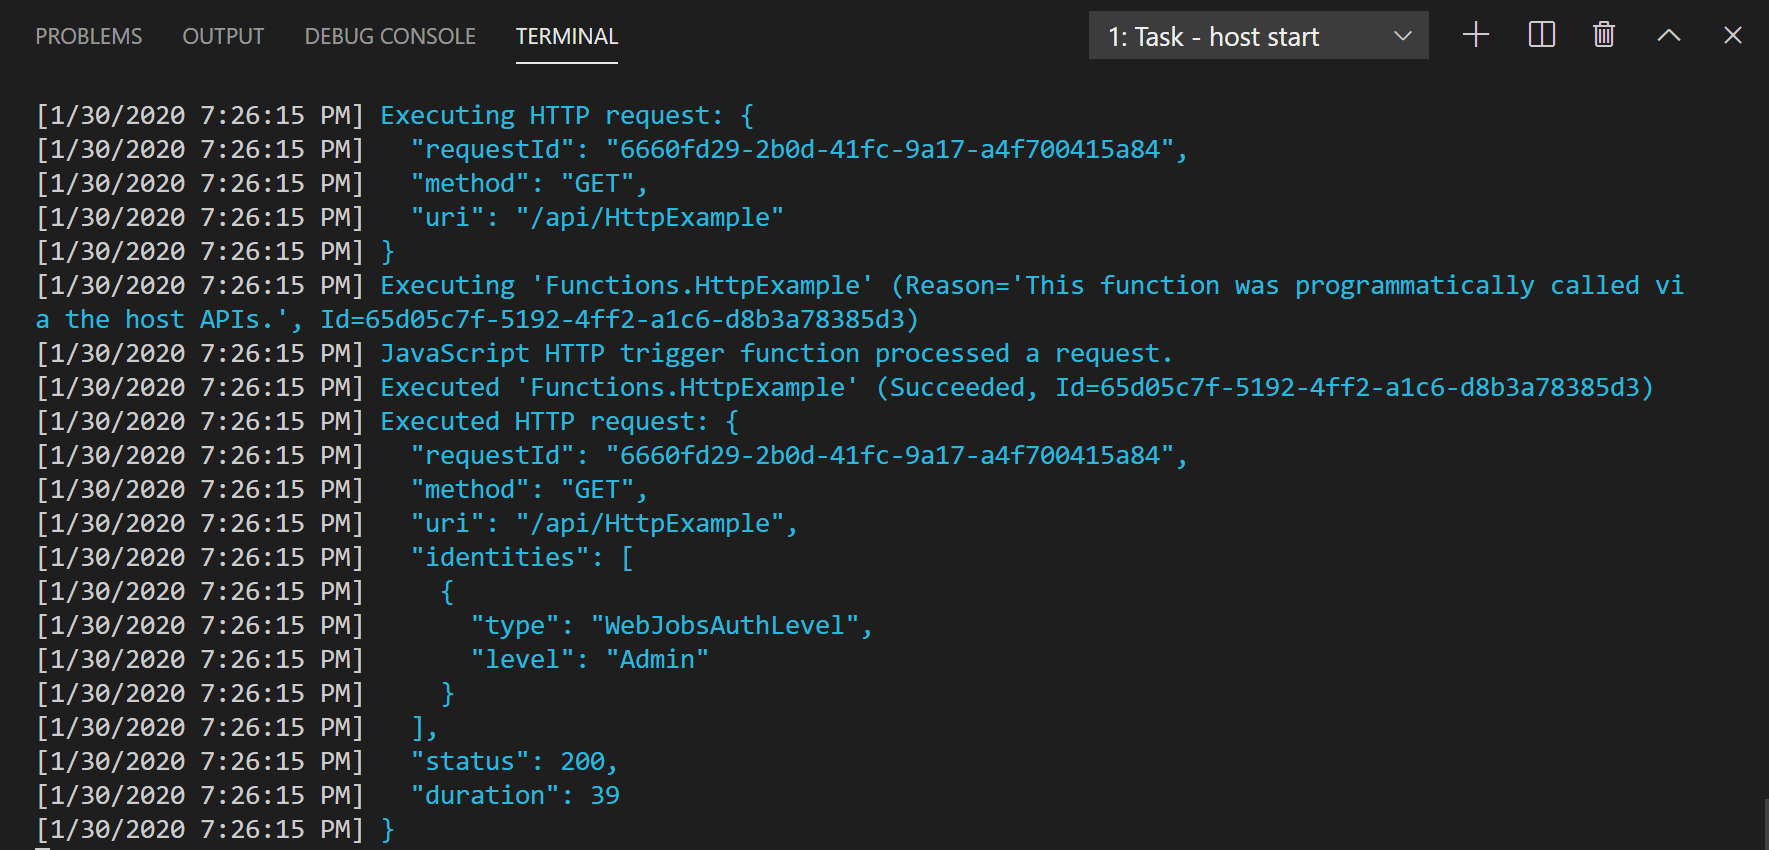
Information about the request is shown in Terminal panel.
Press Ctrl + C to stop Core Tools.
After you've verified that the function runs correctly on your local computer, it's time to use Visual Studio Code to publish the project directly to Azure.
Sign in to Azure
Before you can create Azure resources or publish your app, you must sign in to Azure.
If you aren't already signed in, choose the Azure icon in the Activity bar. Then in the Resources area, choose Sign in to Azure....

If you're already signed in and can see your existing subscriptions, go to the next section. If you don't yet have an Azure account, choose Create an Azure Account.... Students can choose Create an Azure for Students Account....
When prompted in the browser, choose your Azure account and sign in using your Azure account credentials. If you create a new account, you can sign in after your account is created.
After you've successfully signed in, you can close the new browser window. The subscriptions that belong to your Azure account are displayed in the sidebar.
Compile the custom handler for Azure
In this section, you publish your project to Azure in a function app running Linux. In most cases, you must recompile your binary and adjust your configuration to match the target platform before publishing it to Azure.
In the integrated terminal, compile the handler to Linux/x64. A binary named
handleris created in the function app root.
Create the function app in Azure
In this section, you create a function app and related resources in your Azure subscription.
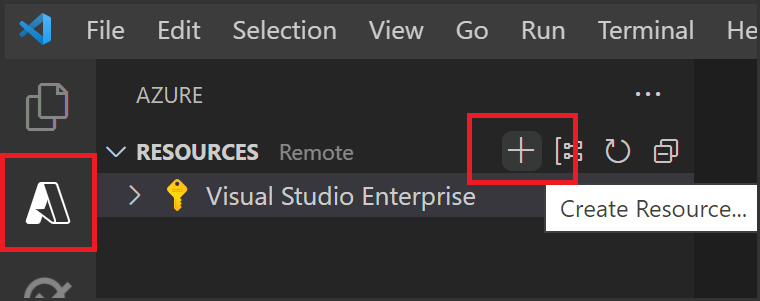
Choose the Azure icon in the Activity bar. Then in the Resources area, select the + icon and choose the Create Function App in Azure option.
Provide the following information at the prompts:
Prompt Selection Select subscription Choose the subscription to use. You won't see this when you have only one subscription visible under Resources. Enter a globally unique name for the function app Type a name that is valid in a URL path. The name you type is validated to make sure that it's unique in Azure Functions. Select a runtime stack Choose Custom Handler. Select a location for new resources For better performance, choose a region near you. The extension shows the status of individual resources as they are being created in Azure in the Azure: Activity Log panel.

When the creation is complete, the following Azure resources are created in your subscription. The resources are named based on your function app name:
- A resource group, which is a logical container for related resources.
- A standard Azure Storage account, which maintains state and other information about your projects.
- A function app, which provides the environment for executing your function code. A function app lets you group functions as a logical unit for easier management, deployment, and sharing of resources within the same hosting plan.
- An App Service plan, which defines the underlying host for your function app.
- An Application Insights instance connected to the function app, which tracks usage of your functions in the app.
A notification is displayed after your function app is created and the deployment package is applied.
Tip
By default, the Azure resources required by your function app are created based on the function app name you provide. By default, they're also created in the same new resource group with the function app. If you want to either customize the names of these resources or reuse existing resources, you need to publish the project with advanced create options instead.
Deploy the project to Azure
Important
Deploying to an existing function app always overwrites the contents of that app in Azure.
In the Resources area of the Azure activity, locate the function app resource you just created, right-click the resource, and select Deploy to function app....
When prompted about overwriting previous deployments, select Deploy to deploy your function code to the new function app resource.
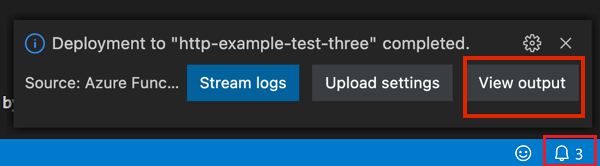
After deployment completes, select View Output to view the creation and deployment results, including the Azure resources that you created. If you miss the notification, select the bell icon in the lower right corner to see it again.
Run the function in Azure
Back in the Resources area in the side bar, expand your subscription, your new function app, and Functions. Right-click (Windows) or Ctrl - click (macOS) the
HttpExamplefunction and choose Execute Function Now....
In Enter request body you see the request message body value of
{ "name": "Azure" }. Press Enter to send this request message to your function.When the function executes in Azure and returns a response, a notification is raised in Visual Studio Code.
Clean up resources
When you continue to the next step and add an Azure Storage queue binding to your function, you'll need to keep all your resources in place to build on what you've already done.
Otherwise, you can use the following steps to delete the function app and its related resources to avoid incurring any further costs.
In Visual Studio Code, press F1 to open the command palette. In the command palette, search for and select
Azure: Open in portal.Choose your function app and press Enter. The function app page opens in the Azure portal.
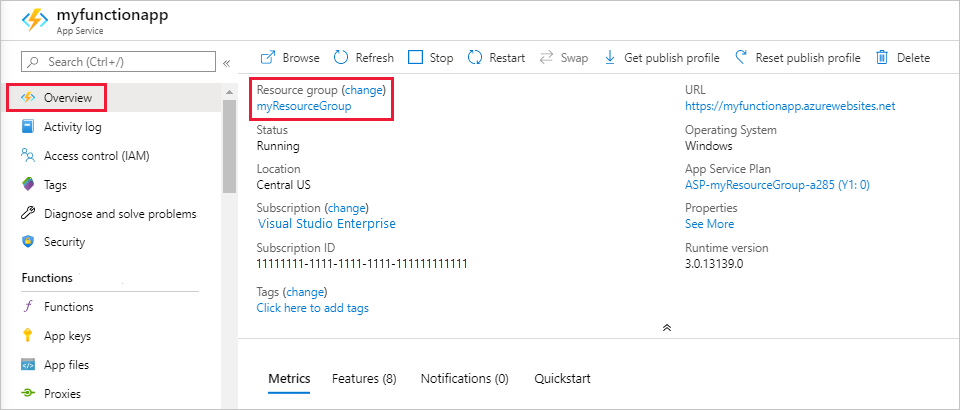
In the Overview tab, select the named link next to Resource group.
On the Resource group page, review the list of included resources, and verify that they're the ones you want to delete.
Select Delete resource group, and follow the instructions.
Deletion may take a couple of minutes. When it's done, a notification appears for a few seconds. You can also select the bell icon at the top of the page to view the notification.
For more information about Functions costs, see Estimating Consumption plan costs.
Next steps
Feedback
Coming soon: Throughout 2024 we will be phasing out GitHub Issues as the feedback mechanism for content and replacing it with a new feedback system. For more information see: https://aka.ms/ContentUserFeedback.
Submit and view feedback for