Use Azure Functions to connect to an Azure SQL Database
This article shows you how to use Azure Functions to create a scheduled job that connects to an Azure SQL Database or Azure SQL Managed Instance. The function code cleans up rows in a table in the database. The new C# function is created based on a pre-defined timer trigger template in Visual Studio 2019. To support this scenario, you must also set a database connection string as an app setting in the function app. For Azure SQL Managed Instance you need to enable public endpoint to be able to connect from Azure Functions. This scenario uses a bulk operation against the database.
If this is your first experience working with C# Functions, you should read the Azure Functions C# developer reference.
Prerequisites
Complete the steps in the article Create your first function using Visual Studio to create a local function app that targets version 2.x or a later version of the runtime. You must also have published your project to a function app in Azure.
This article demonstrates a Transact-SQL command that executes a bulk cleanup operation in the SalesOrderHeader table in the AdventureWorksLT sample database. To create the AdventureWorksLT sample database, complete the steps in the article Create a database in Azure SQL Database using the Azure portal.
You must add a server-level firewall rule for the public IP address of the computer you use for this quickstart. This rule is required to be able access the SQL Database instance from your local computer.
Get connection information
You need to get the connection string for the database you created when you completed Create a database in Azure SQL Database using the Azure portal.
Sign in to the Azure portal.
Select SQL Databases from the left-hand menu, and select your database on the SQL databases page.
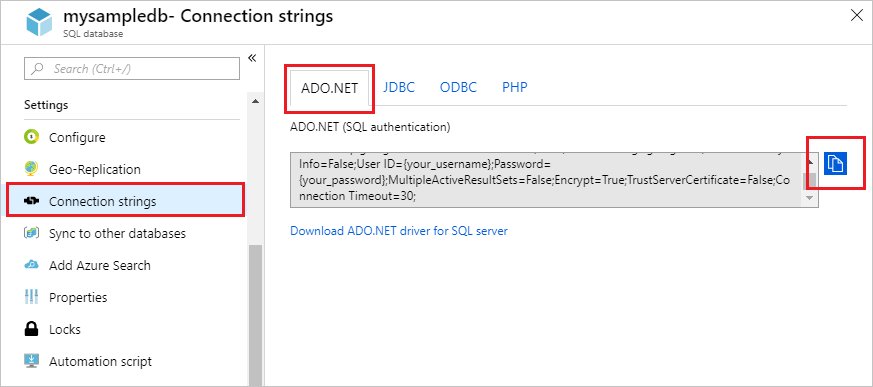
Select Connection strings under Settings and copy the complete ADO.NET connection string. For Azure SQL Managed Instance copy connection string for public endpoint.
Set the connection string
A function app hosts the execution of your functions in Azure. As a best security practice, store connection strings and other secrets in your function app settings. Using application settings prevents accidental disclosure of the connection string with your code. You can access app settings for your function app right from Visual Studio.
You must have previously published your app to Azure. If you haven't already done so, Publish your function app to Azure.
In Solution Explorer, right-click the function app project and choose Publish.
On the Publish page, select the ellipses (
...) in the Hosting area, and choose Manage Azure App Service settings.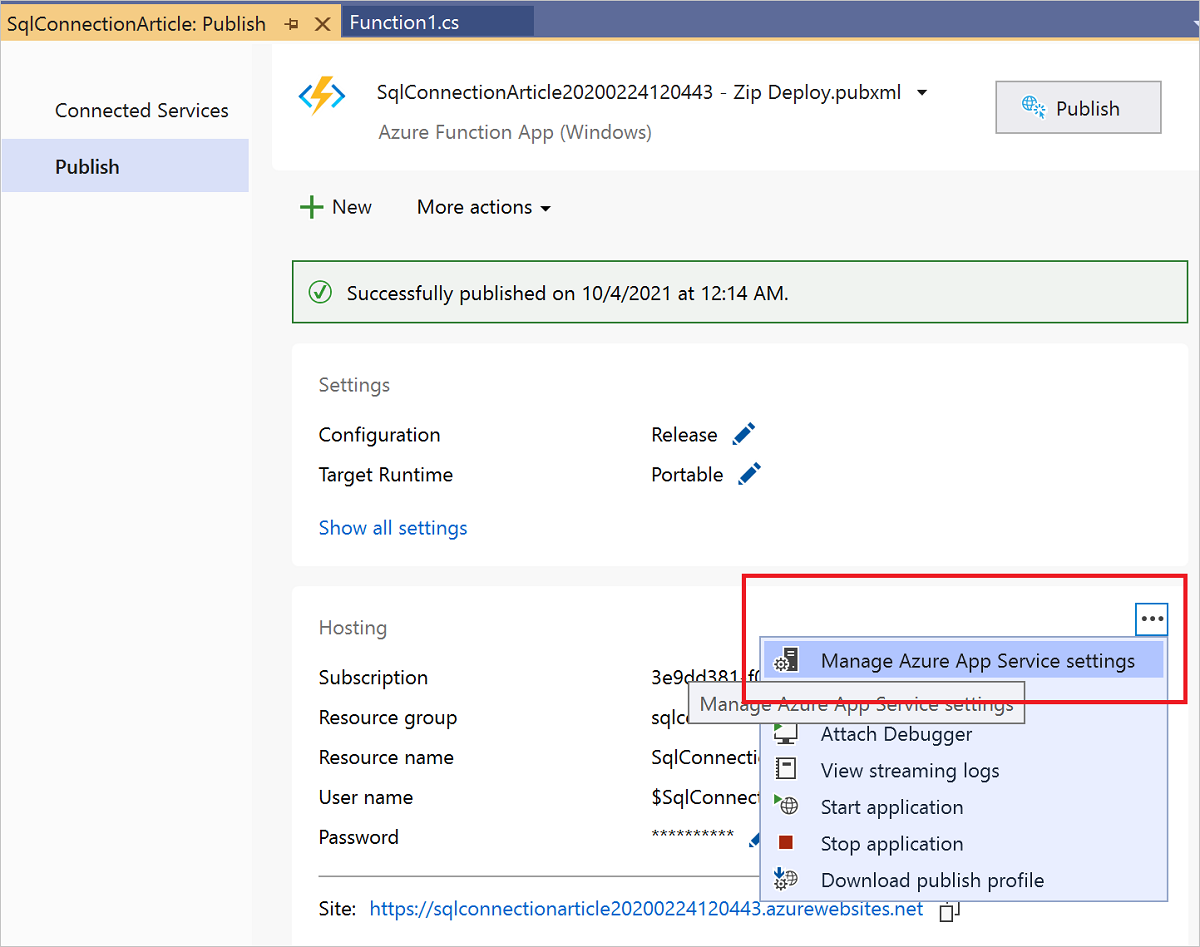
In Application Settings select Add setting, in New app setting name type
sqldb_connection, and select OK.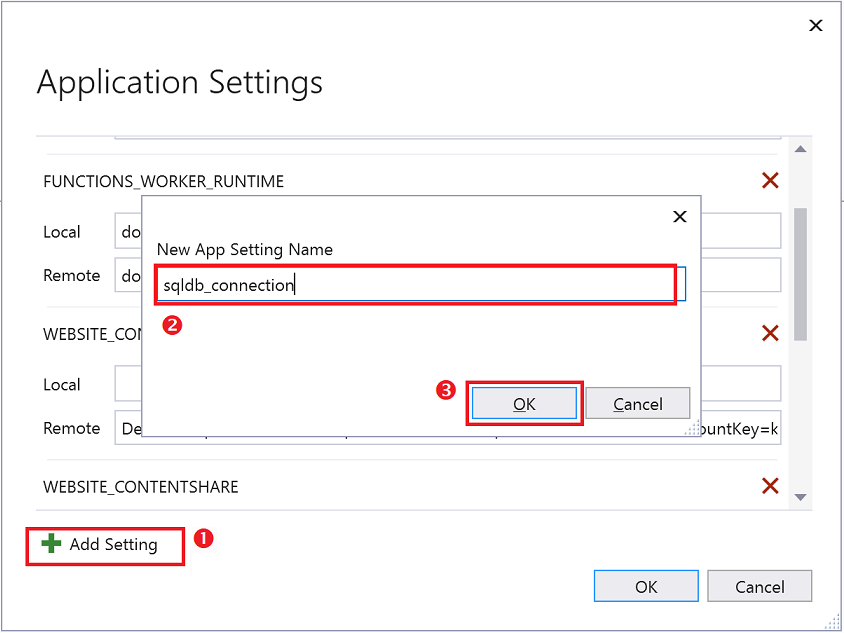
In the new sqldb_connection setting, paste the connection string you copied in the previous section into the Local field and replace
{your_username}and{your_password}placeholders with real values. Select Insert value from local to copy the updated value into the Remote field, and then select OK.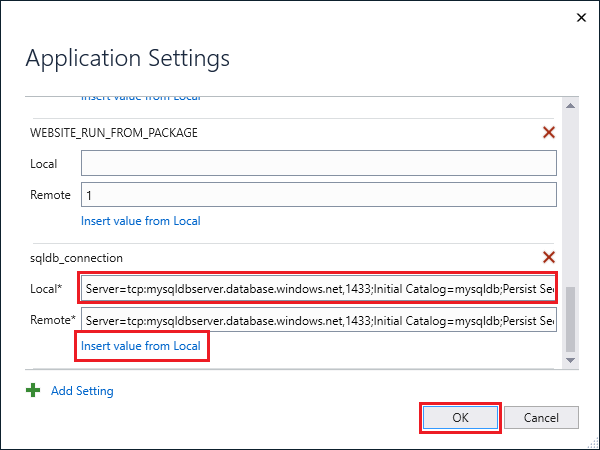
The connection strings are stored encrypted in Azure (Remote). To prevent leaking secrets, the local.settings.json project file (Local) should be excluded from source control, such as by using a .gitignore file.
Add the SqlClient package to the project
You need to add the NuGet package that contains the SqlClient library. This data access library is needed to connect to SQL Database.
Open your local function app project in Visual Studio 2022.
In Solution Explorer, right-click the function app project and choose Manage NuGet Packages.
On the Browse tab, search for
Microsoft.Data.SqlClientand, when found, select it.In the Microsoft.Data.SqlClient page, select version
5.1.0and then click Install.When the install completes, review the changes and then click OK to close the Preview window.
If a License Acceptance window appears, click I Accept.
Now, you can add the C# function code that connects to your SQL Database.
Add a timer triggered function
In Solution Explorer, right-click the function app project and choose Add > New Azure function.
With the Azure Functions template selected, name the new item something like
DatabaseCleanup.csand select Add.In the New Azure function dialog box, choose Timer trigger and then Add. This dialog creates a code file for the timer triggered function.
Open the new code file and add the following using statements at the top of the file:
using Microsoft.Data.SqlClient;
using System.Threading.Tasks;
Replace the existing
Runfunction with the following code:[FunctionName("DatabaseCleanup")] public static async Task Run([TimerTrigger("*/15 * * * * *")]TimerInfo myTimer, ILogger log) { // Get the connection string from app settings and use it to create a connection. var str = Environment.GetEnvironmentVariable("sqldb_connection"); using (SqlConnection conn = new SqlConnection(str)) { conn.Open(); var text = "UPDATE SalesLT.SalesOrderHeader " + "SET [Status] = 5 WHERE ShipDate < GetDate();"; using (SqlCommand cmd = new SqlCommand(text, conn)) { // Execute the command and log the # rows affected. var rows = await cmd.ExecuteNonQueryAsync(); log.LogInformation($"{rows} rows were updated"); } } }This function runs every 15 seconds to update the
Statuscolumn based on the ship date. To learn more about the Timer trigger, see Timer trigger for Azure Functions.Press F5 to start the function app. The Azure Functions Core Tools execution window opens behind Visual Studio.
At 15 seconds after startup, the function runs. Watch the output and note the number of rows updated in the SalesOrderHeader table.
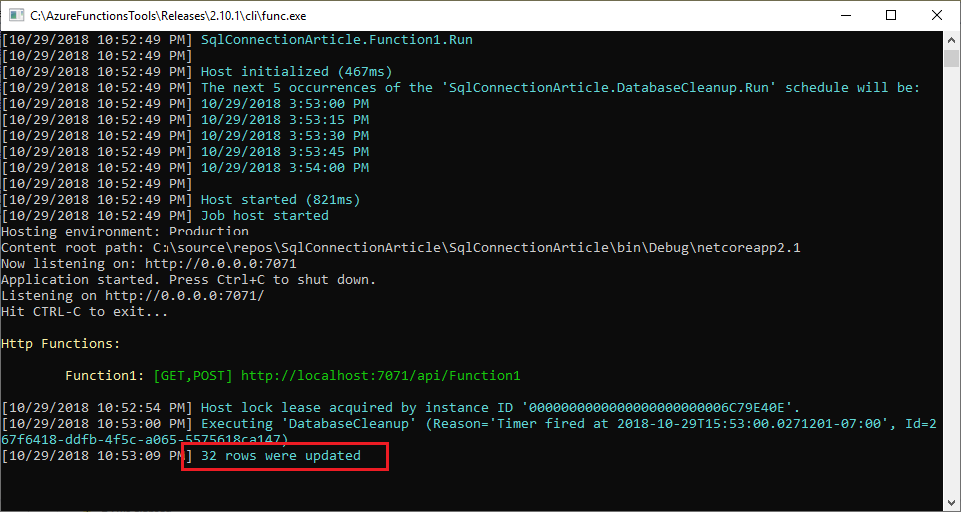
On the first execution, you should update 32 rows of data. Following runs update no data rows, unless you make changes to the SalesOrderHeader table data so that more rows are selected by the
UPDATEstatement.
If you plan to publish this function, remember to change the TimerTrigger attribute to a more reasonable cron schedule than every 15 seconds. You also need to make sure that your function app can access the Azure SQL Database or Azure SQL Managed Instance. For more information, see one of the following links based on your type of Azure SQL:
Next steps
Next, learn how to use. Functions with Logic Apps to integrate with other services.
For more information about Functions, see the following articles:
- Azure Functions developer reference
Programmer reference for coding functions and defining triggers and bindings. - Testing Azure Functions
Describes various tools and techniques for testing your functions.
Feedback
Coming soon: Throughout 2024 we will be phasing out GitHub Issues as the feedback mechanism for content and replacing it with a new feedback system. For more information see: https://aka.ms/ContentUserFeedback.
Submit and view feedback for