Secure a single page application with user sign-in
The following guide pertains to an application that is hosted on a content server or has minimal web server dependencies. The application provides protected resources secured only to Microsoft Entra users. The objective of the scenario is to enable the web application to authenticate to Microsoft Entra ID and call Azure Maps REST APIs on behalf of the user.
To view your Azure Maps account authentication details in the Azure portal:
Sign in to the Azure portal.
Navigate to the Azure portal menu. Select All resources, and then select your Azure Maps account.
Under Settings in the left pane, select Authentication.
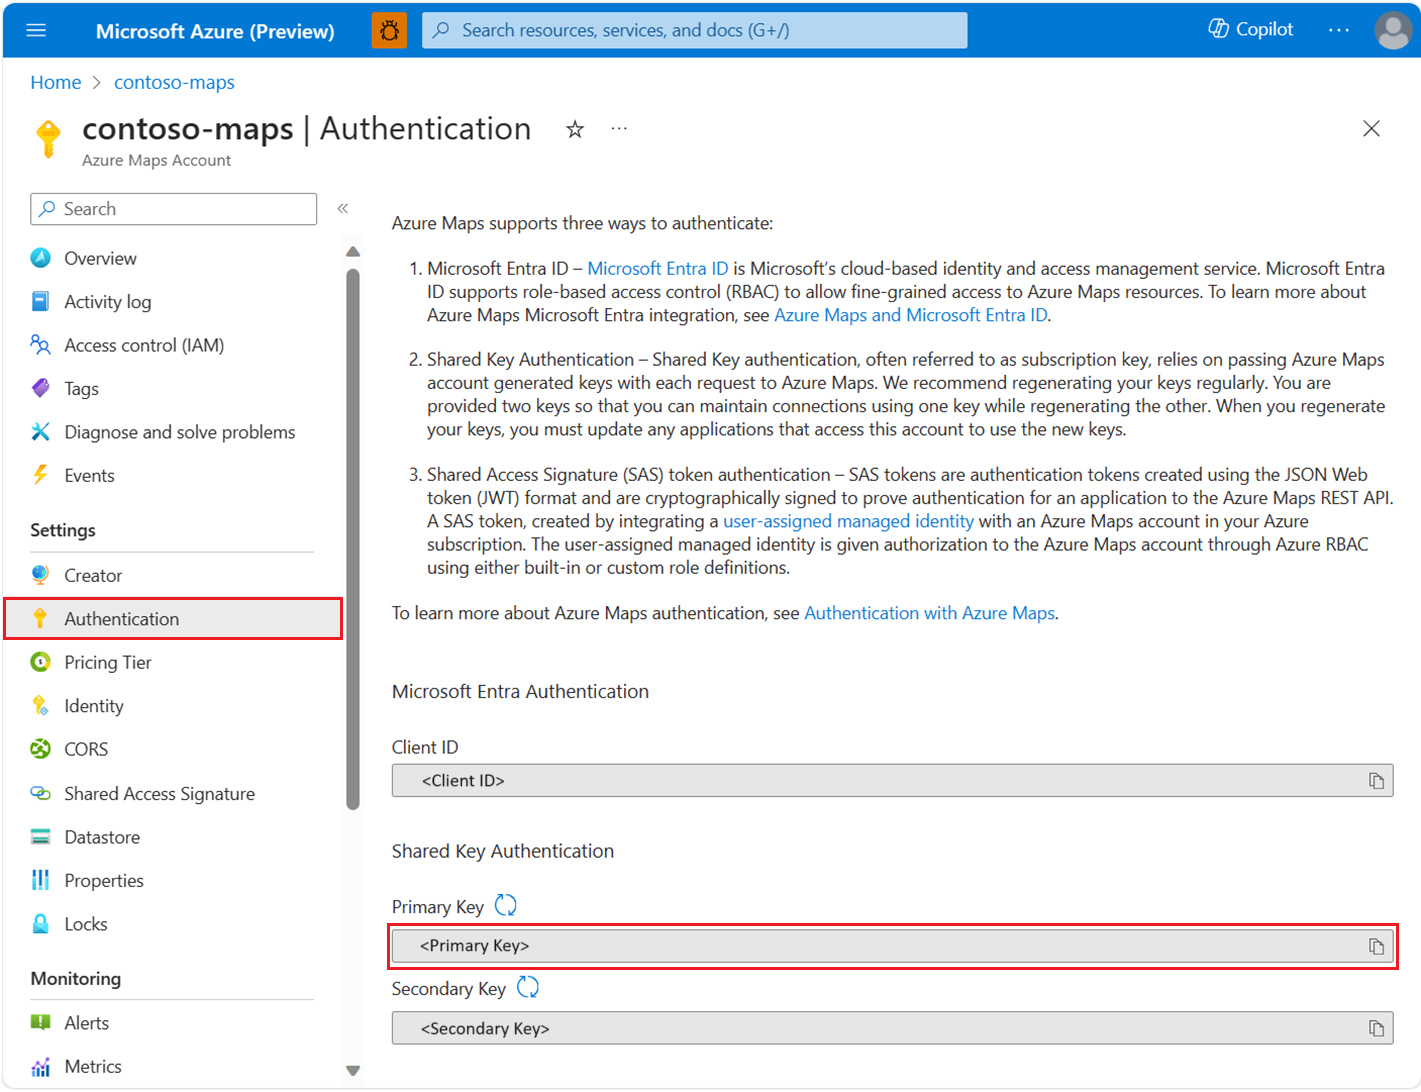

Three values are created when the Azure Maps account is created. They're used to support two types of authentication in Azure Maps:
- Microsoft Entra authentication: The
Client IDrepresents the account that is to be used for REST API requests. TheClient IDvalue should be stored in application configuration, and then it should be retrieved before making Azure Maps HTTP requests that use Microsoft Entra authentication. - Shared Key Authentication: The
Primary KeyandSecondary Keyare used as the subscription key for Shared Key authentication. Shared Key authentication relies on passing the key generated by the Azure Maps account with each request to Azure Maps. We recommend that you regularly regenerate your keys. To maintain current connections during regeneration, two keys are provided. One key can be in use, while regenerating the other. When you regenerate your keys, you must update any applications that access this account to use the new keys. For more information, see Authentication with Azure Maps
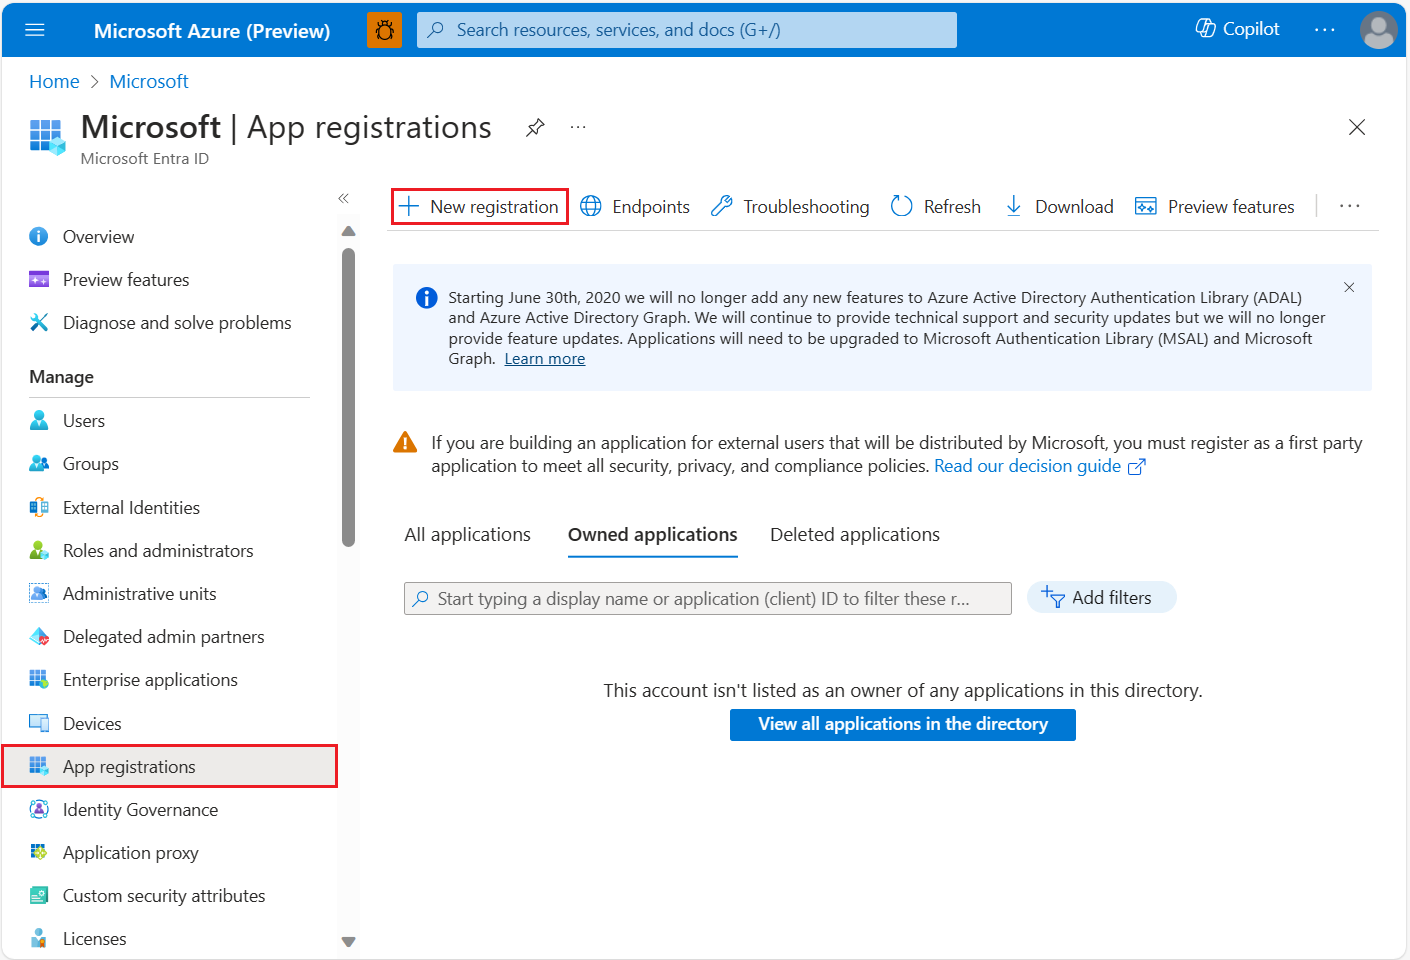
Create an application registration in Microsoft Entra ID
Create the web application in Microsoft Entra ID for users to sign in. The web application delegates user access to Azure Maps REST APIs.
In the Azure portal, in the list of Azure services, select Microsoft Entra ID > App registrations > New registration.
Enter a Name, choose a Support account type, provide a redirect URI that represents the url which Microsoft Entra ID issues the token and is the url where the map control is hosted. For a detailed sample, see Azure Maps Microsoft Entra ID samples. Then select Register.
To assign delegated API permissions to Azure Maps, go to the application. Then under App registrations, select API permissions > Add a permission. Under APIs my organization uses, search for and select Azure Maps.
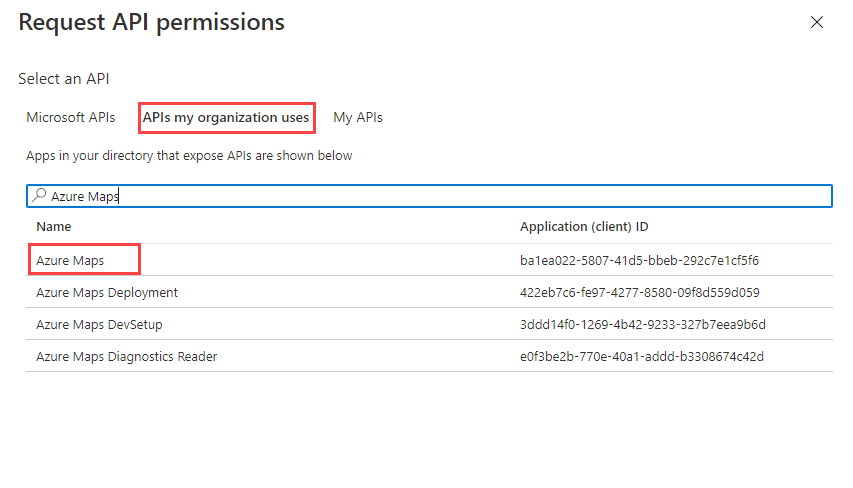
Select the check box next to Access Azure Maps, and then select Add permissions.

Enable
oauth2AllowImplicitFlow. To enable it, in the Manifest section of your app registration, setoauth2AllowImplicitFlowtotrue.Copy the Microsoft Entra app ID and the Microsoft Entra tenant ID from the app registration to use in the Web SDK. Add the Microsoft Entra app registration details and the
x-ms-client-idfrom the Azure Map account to the Web SDK.<link rel="stylesheet" href="https://atlas.microsoft.com/sdk/javascript/mapcontrol/3/atlas.min.css" type="text/css" /> <script src="https://atlas.microsoft.com/sdk/javascript/mapcontrol/3/atlas.min.js" /> <script> var map = new atlas.Map("map", { center: [-122.33, 47.64], zoom: 12, language: "en-US", authOptions: { authType: "aad", clientId: "<insert>", // azure map account client id aadAppId: "<insert>", // azure ad app registration id aadTenant: "<insert>", // azure ad tenant id aadInstance: "https://login.microsoftonline.com/" } }); </script>Configure Azure role-based access control (Azure RBAC) for users or groups. See the following sections to enable Azure RBAC.

Grant role-based access for users to Azure Maps
You can grant Azure role-based access control (Azure RBAC) by assigning a Microsoft Entra group or security principal to one or more Azure Maps role definitions.
To view the available Azure role definitions for Azure Maps, see View built-in Azure Maps role definitions.
For detailed steps about how to assign an available Azure Maps role to the created managed identity or the service principal, see Assign Azure roles using the Azure portal
To efficiently manage the Azure Maps app and resource access of a large amount of users, see Microsoft Entra groups.
Important
For users to be allowed to authenticate to an application, the users must first be created in Microsoft Entra ID. For more information, see Add or delete users using Microsoft Entra ID.
To learn about how to effectively manage a large directory for users, see Microsoft Entra ID.
Warning
Azure Maps built-in role definitions provide a very large authorization access to many Azure Maps REST APIs. To restrict APIs access to a minimum, see create a custom role definition and assign the system-assigned identity to the custom role definition. This enables the least privilege necessary for the application to access Azure Maps.
Next steps
Further understanding of single page application scenario:
Find the API usage metrics for your Azure Maps account:
Explore samples that show how to integrate Microsoft Entra ID with Azure Maps:
Feedback
Coming soon: Throughout 2024 we will be phasing out GitHub Issues as the feedback mechanism for content and replacing it with a new feedback system. For more information see: https://aka.ms/ContentUserFeedback.
Submit and view feedback for