Quickstart: Create an Android app with Azure Maps
This article shows you how to add the Azure Maps to an Android app. It walks you through these basic steps:
- Set up your development environment.
- Create your own Azure Maps account.
- Get your primary Azure Maps key to use in the app.
- Reference the Azure Maps libraries from the project.
- Add an Azure Maps control to the app.
Note
Azure Maps Android SDK retirement
The Azure Maps Native SDK for Android is now deprecated and will be retired on 3/31/25. To avoid service disruptions, migrate to the Azure Maps Web SDK by 3/31/25. For more information, see The Azure Maps Android SDK migration guide.
Prerequisites
A subscription to Microsoft Azure. If you don't have an Azure subscription, create a free account before you begin.
Android Studio. If you don't have Android Studio, you can get it for free from Google.
Note
Many of the instructions in this quickstart were created using Android Studio Arctic Fox (2020.3.1). If you use a different version of Android Studio, the steps specific to Android Studio may vary.
Create an Azure Maps account
Create a new Azure Maps account using the following steps:
In the upper left-hand corner of the Azure portal, select Create a resource.
In the Search the Marketplace box, type Azure Maps, then select Azure Maps from the search results.
Select the Create button.
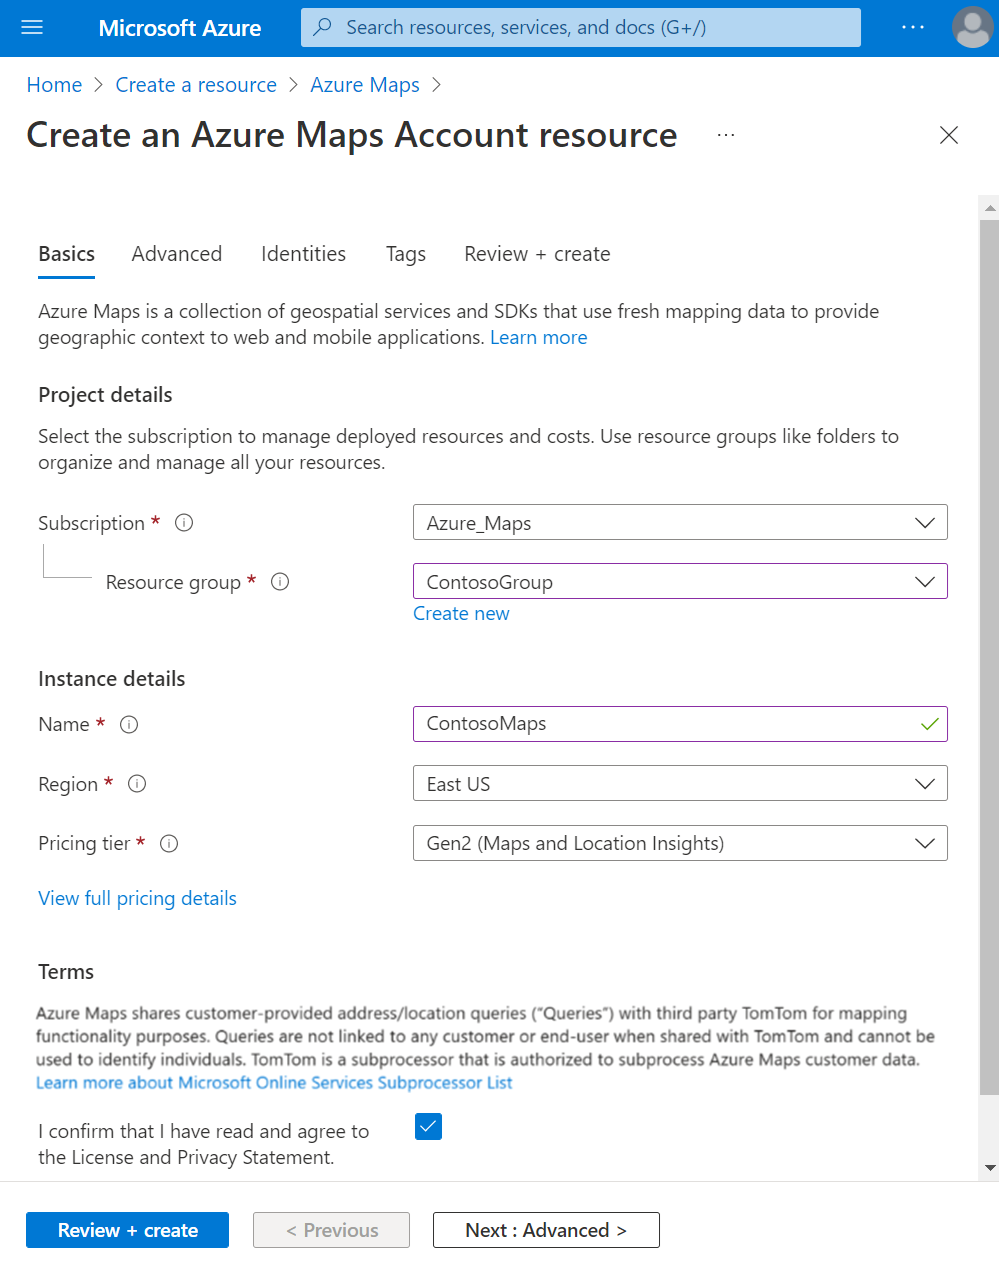
On the Create Maps Account page, enter the following values:
- The Subscription that you want to use for this account.
- The Resource group name for this account. You may choose to Create new or Use existing resource group.
- The Name of your new account.
- The Pricing tier for this account. Select Gen2.
- Read the Terms, and check the checkbox to confirm that you have read and agree to the License and Privacy Statement.
- Select the Review + create button.
- Once you've ensured that everything is correct in the Review + create page, select the Create button.
Get the subscription key for your account
Once your Azure Maps account is successfully created, retrieve the subscription key that enables you to query the Maps APIs.
- Open your Azure Maps account in the portal.
- In the left pane, select Authentication.
- Copy the Primary Key and save it locally to use later in this tutorial.
Note
For security purposes, it is recommended that you rotate between your primary and secondary keys. To rotate keys, update your app to use the secondary key, deploy, then press the cycle/refresh button beside the primary key to generate a new primary key. The old primary key will be disabled. For more information on key rotation, see Set up Azure Key Vault with key rotation and auditing.

Create a project in Android Studio
Complete the following steps to create a new project with an empty activity in Android Studio:
Start Android Studio and select New from the File menu, then New Project...
In the New Project screen, select Phone and Tablet from the Templates list on the left side of the screen.
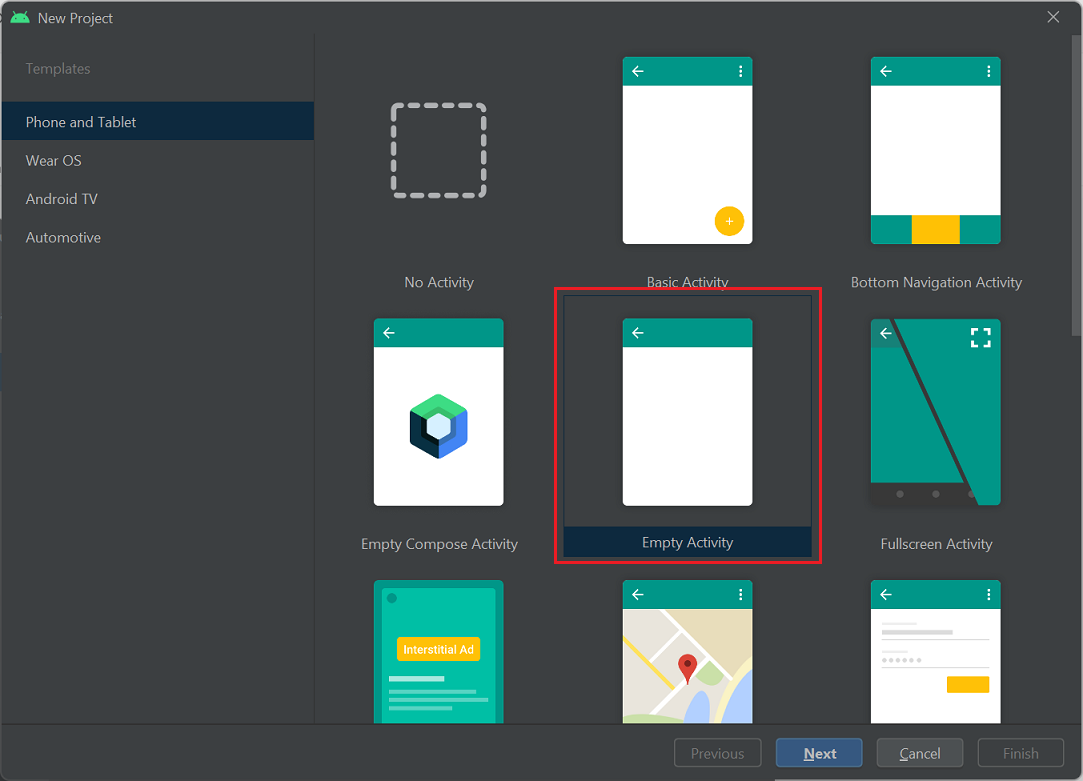
Select Empty Activity from the list of templates, then Next.

In the Empty Activity screen, enter values for the following fields:
- Name. Enter AzureMapsApp.
- Package name. Use the default com.example.azuremapsapp.
- Save location. Use the default or select a new location to save your project files. Avoid using spaces in the path or filename due to potential problems with the NDK tools.
- Language. Select Kotlin or Java.
- Minimum SDK. Select
API 21: Android 5.0.0 (Lollipop)as the minimum SDK. It's the earliest version supported by the Azure Maps Android SDK.
Select Finish to create your new project.
See the Android Studio documentation for more help with installing Android Studio and creating a new project.
Set up a virtual device
Android Studio lets you set up a virtual Android device on your computer. Doing so can help you test your application during development.
To set up an Android Virtual Device (AVD):
- Select AVD Manager in the Tools menu.
- The Android Virtual Device Manager appears. Select Create Virtual Device.
- In the Phones category, select Nexus 5X, and then select Next.
For more information about setting up an AVD, see Create and manage virtual devices in the Android Studio documentation.

Install the Azure Maps Android SDK
The next step in building your application is to install the Azure Maps Android SDK. Complete these steps to install the SDK:
Open the project settings file settings.gradle and add the following code to the repositories section:
maven {url "https://atlas.microsoft.com/sdk/android"}In the same project settings file settings.gradle, change repositoriesMode to
PREFER_SETTINGS:repositoriesMode.set(RepositoriesMode.PREFER_SETTINGS)Your project settings file should now appear as follows:

Open the project's gradle.properties file, verify that
android.useAndroidXandandroid.enableJetifierare both set totrue.If the gradle.properties file doesn't include
android.useAndroidXandandroid.enableJetifier, add the next two lines to the end of the file:android.useAndroidX=true android.enableJetifier=trueOpen the application build.gradle file and do the following:
Verify your project's minSdk is 21 or higher.
Ensure that your
compileOptionsin theAndroidsection are as follows:compileOptions { sourceCompatibility JavaVersion.VERSION_1_8 targetCompatibility JavaVersion.VERSION_1_8 }Update your dependencies block and add a new implementation dependency for the latest Azure Maps Android SDK:
implementation 'com.azure.android:azure-maps-control:1.+'Select Sync Project with Gradle Files from the File menu.

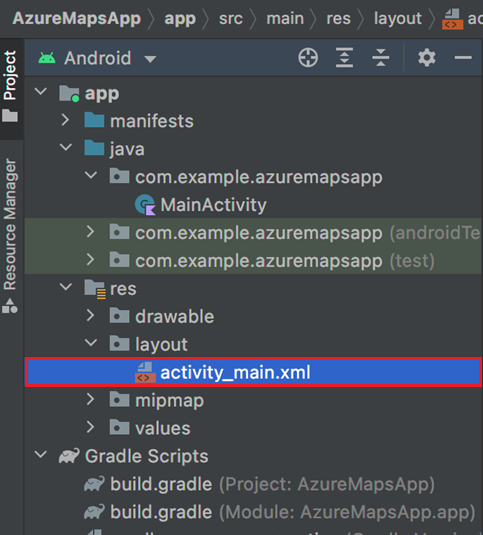
Add a map fragment to the main activity:
<com.azure.android.maps.control.MapControl
    android:id="@+id/mapcontrol"
    android:layout_width="match_parent"
    android:layout_height="match_parent"
    />
To update the main activity, select app > res > layout > activity_main.xml in the Project navigator:
In the MainActivity.java file:
- Add imports for the Azure Maps SDK.
- Set your Azure Maps authentication information.
- Get the map control instance in the onCreate method.
Tip
By setting the authentication information globally in the
AzureMapsclass using thesetSubscriptionKeyorsetAadPropertiesmethods, you won't need to add your authentication information in every view.The map control contains its own lifecycle methods for managing Android's OpenGL lifecycle. These lifecycle methods must be called directly from the containing Activity. To correctly call the map control's lifecycle methods, override the following lifecycle methods in the Activity that contains the map control, then call the respective map control method.
onCreate(Bundle)onDestroy()onLowMemory()onPause()onResume()onSaveInstanceState(Bundle)onStart()onStop()
Edit the MainActivity.java file as follows:
package com.example.azuremapsapp;

import androidx.appcompat.app.AppCompatActivity;
import android.os.Bundle;
import com.azure.android.maps.control.AzureMaps;
import com.azure.android.maps.control.MapControl;
import com.azure.android.maps.control.layer.SymbolLayer;
import com.azure.android.maps.control.options.MapStyle;
import com.azure.android.maps.control.source.DataSource;

public class MainActivity extends AppCompatActivity {

static {
    AzureMaps.setSubscriptionKey("<Your-Azure-Maps-Primary-Subscription-Key>");

    //Alternatively use Azure Active Directory authenticate.
    //AzureMaps.setAadProperties("<Your-AAD-clientId>", "<Your-AAD-appId>", "<Your-AAD-tenant>");
}

MapControl mapControl;

@Override
protected void onCreate(Bundle savedInstanceState) {
    super.onCreate(savedInstanceState);
    setContentView(R.layout.activity_main);

    mapControl = findViewById(R.id.mapcontrol);

    mapControl.onCreate(savedInstanceState);

    //Wait until the map resources are ready.
    mapControl.onReady(map -> {

        //Add your post map load code here.

    });
}

@Override
public void onResume() {
    super.onResume();
    mapControl.onResume();
}

@Override
protected void onStart(){
    super.onStart();
    mapControl.onStart();
}

@Override
public void onPause() {
    super.onPause();
    mapControl.onPause();
}

@Override
public void onStop() {
    super.onStop();
    mapControl.onStop();
}

@Override
public void onLowMemory() {
    super.onLowMemory();
    mapControl.onLowMemory();
}

@Override
protected void onDestroy() {
    super.onDestroy();
    mapControl.onDestroy();
}

@Override
protected void onSaveInstanceState(Bundle outState) {
    super.onSaveInstanceState(outState);
    mapControl.onSaveInstanceState(outState);
}}
In the MainActivity.kt file:
- add imports for the Azure Maps SDK
- set your Azure Maps authentication information
- get the map control instance in the onCreate method
Tip
By setting the authentication information globally in the
AzureMapsclass using thesetSubscriptionKeyorsetAadPropertiesmethods, you won't need to add your authentication information in every view.The map control contains its own lifecycle methods for managing Android's OpenGL lifecycle. These lifecycle methods must be called directly from the containing Activity. To correctly call the map control's lifecycle methods, override the following lifecycle methods in the Activity that contains the map control. And, you must call the respective map control method.
onCreate(Bundle)onDestroy()onLowMemory()onPause()onResume()onSaveInstanceState(Bundle)onStart()onStop()
Edit the MainActivity.kt file as follows:
package com.example.azuremapsapp;

import androidx.appcompat.app.AppCompatActivity
import android.os.Bundle
import com.azure.android.maps.control.AzureMap
import com.azure.android.maps.control.AzureMaps
import com.azure.android.maps.control.MapControl
import com.azure.android.maps.control.events.OnReady

class MainActivity : AppCompatActivity() {

    companion object {
        init {
            AzureMaps.setSubscriptionKey("<Your-Azure-Maps-Primary-Subscription-Key>");

            //Alternatively use Azure Active Directory authenticate.
            //AzureMaps.setAadProperties("<Your-AAD-clientId>", "<Your-AAD-appId>", "<Your-AAD-tenant>");
        }
    }

    var mapControl: MapControl? = null

    override fun onCreate(savedInstanceState: Bundle?) {
        super.onCreate(savedInstanceState)
        setContentView(R.layout.activity_main)

        mapControl = findViewById(R.id.mapcontrol)

        mapControl?.onCreate(savedInstanceState)

        //Wait until the map resources are ready.
        mapControl?.onReady(OnReady { map: AzureMap -> })
    }

    public override fun onStart() {
        super.onStart()
        mapControl?.onStart()
    }

    public override fun onResume() {
        super.onResume()
        mapControl?.onResume()
    }

    public override fun onPause() {
        mapControl?.onPause()
        super.onPause()
    }

    public override fun onStop() {
        mapControl?.onStop()
        super.onStop()
    }

    override fun onLowMemory() {
        mapControl?.onLowMemory()
        super.onLowMemory()
    }

    override fun onDestroy() {
        mapControl?.onDestroy()
        super.onDestroy()
    }

    override fun onSaveInstanceState(outState: Bundle) {
        super.onSaveInstanceState(outState)
        mapControl?.onSaveInstanceState(outState)
    }
}
Select the run button from the toolbar, as shown in the following image (or press
Control+Ron a Mac), to build your application.
Android Studio takes a few seconds to build the application. After the build is complete, you can test your application in the emulated Android device. You should see a map like this one:

Tip
By default, Android reloads the activity when the orientation changes or the keyboard is hidden. This results in the map state being reset (reload the map which resets the view and reloads data to initial state). To prevent this from happening, add the following to the mainfest: android:configChanges="orientation|keyboardHidden". This will stop the activity from reloading and instead call onConfigurationChanged() when the orientation has changed or the keyboard is hidden.
Clean up resources
Warning
The tutorials listed in the Next Steps section detail how to use and configure Azure Maps with your account. Don't clean up the resources created in this quickstart if you plan to continue to the tutorials.
If you don't plan to continue to the tutorials, take these steps to clean up the resources:
- Close Android Studio and delete the application you created.
- If you tested the application on an external device, uninstall the application from that device.
If you don't plan on continuing to develop with the Azure Maps Android SDK:
- Navigate to the Azure portal page. Select All resources from the main portal page.
- Select your Azure Maps account. At the top of the page, select Delete.
- Optionally, if you don't plan to continue developing Android apps, uninstall Android Studio.
For more code examples, see these guides:
- Manage authentication in Azure Maps
- Change map styles in Android maps
- Add a symbol layer
- Add a line layer
- Add a polygon layer
Next steps
In this quickstart, you created your Azure Maps account and created a demo application. Take a look at the following tutorial to learn more about Azure Maps:
Feedback
Coming soon: Throughout 2024 we will be phasing out GitHub Issues as the feedback mechanism for content and replacing it with a new feedback system. For more information see: https://aka.ms/ContentUserFeedback.
Submit and view feedback for