Workbook time parameters
With time parameters, you can set the time context of analysis, which is used by almost all reports. Time parameters are simple to set up and use. You can use them to specify the time ranges to show in a dropdown list. You can also create custom time ranges.
Create a time parameter
Start with an empty workbook in edit mode.
Select Add parameters > Add Parameter.
In the new parameter pane that opens, enter:
- Parameter name:
TimeRange - Parameter type:
Time range picker - Required:
checked - Available time ranges:
Last hour,Last 12 hours,Last 24 hours,Last 48 hours,Last 3 days,Last 7 days, andAllow custom time range selection.
- Parameter name:
Select Save to create the parameter.

This is what the workbook looks like in read mode.
Reference a time parameter
You can reference time parameters with bindings, KQL, or text.
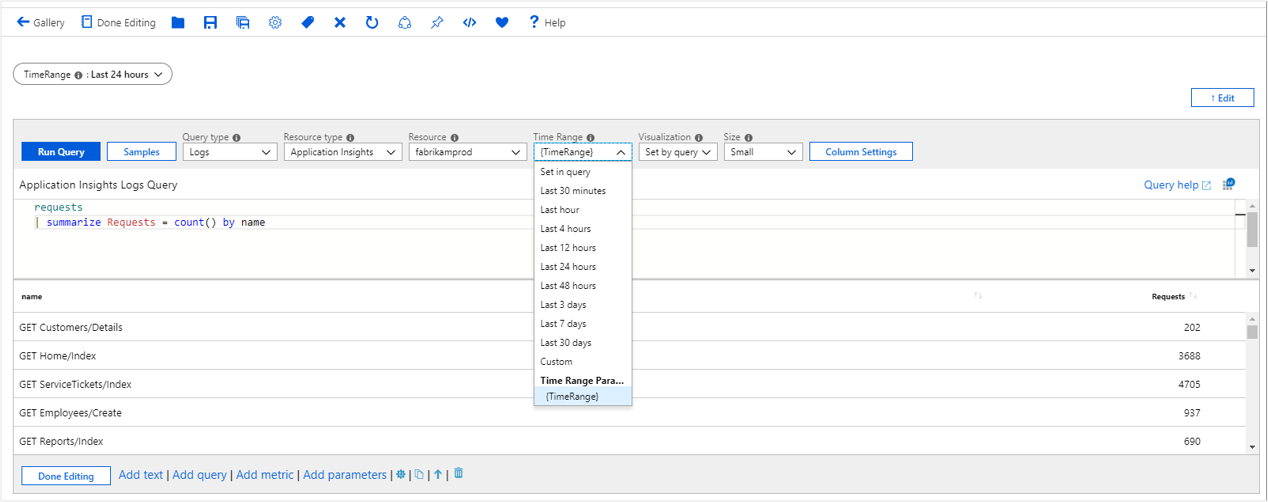
Reference a time parameter with bindings
Select Add query to add a query control, and then select an Application Insights resource.
Most workbook controls support a Time Range scope picker. Open the Time Range dropdown list and select the
{TimeRange}in the Time Range Parameters group at the bottom:- This control binds the time range parameter to the time range of the chart.
- The time scope of the sample query is now Last 24 hours.
Run the query to see the results.
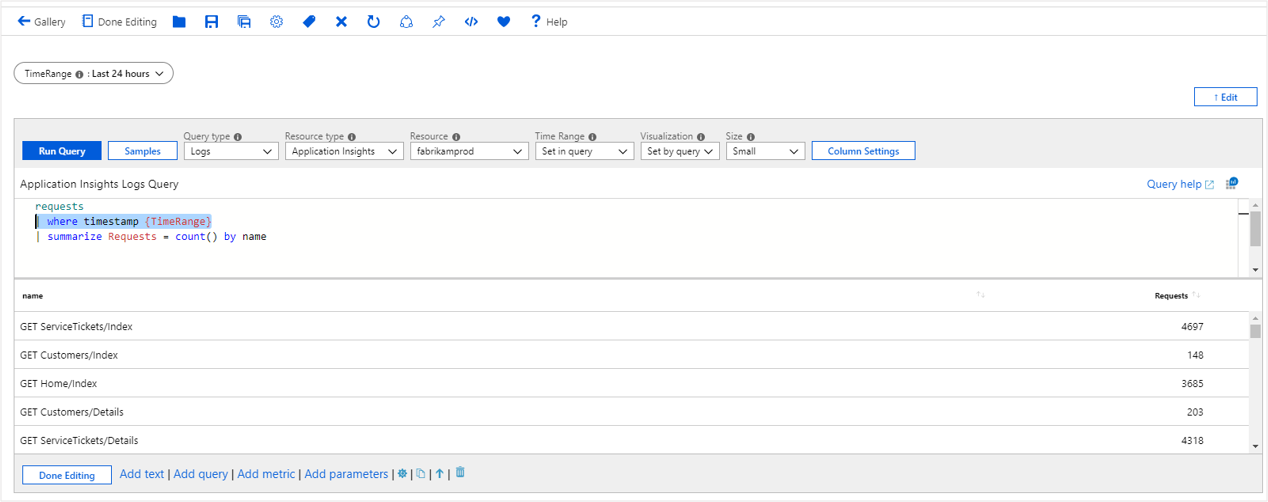
Reference a time parameter with KQL
Select Add query to add a query control, and then select an Application Insights resource.
Open the Time Range dropdown list and select the
Set in queryin the Time Range group. In the KQL, enter a time scope filter by using the parameter| where timestamp {TimeRange}:- This parameter expands on the query evaluation time to
| where timestamp > ago(1d). - This option is the time range value of the parameter.
- This parameter expands on the query evaluation time to
Run the query to see the results.
Reference a time parameter in text
- Add a text control to the workbook.
- In the Markdown, enter
The chosen time range is {TimeRange:label}. - Select Done Editing.
- The text control shows the text The chosen time range is Last 24 hours.
Time parameter options
| Parameter | Description | Example |
|---|---|---|
{TimeRange} |
Time range label | Last 24 hours |
{TimeRange:label} |
Time range label | Last 24 hours |
{TimeRange:value} |
Time range value | > ago (1d) |
{TimeRange:query} |
Time range query | > ago (1d) |
{TimeRange:start} |
Time range start time | 3/20/2019 4:18 PM |
{TimeRange:end} |
Time range end time | 3/21/2019 4:18 PM |
{TimeRange:grain} |
Time range grain | 30 m |
Use parameter options in a query
requests
| make-series Requests = count() default = 0 on timestamp from {TimeRange:start} to {TimeRange:end} step {TimeRange:grain}
Next steps
Feedback
Coming soon: Throughout 2024 we will be phasing out GitHub Issues as the feedback mechanism for content and replacing it with a new feedback system. For more information see: https://aka.ms/ContentUserFeedback.
Submit and view feedback for