Integrate Azure Relay with Azure Private Link
Azure Private Link Service enables you to access Azure services (for example, Azure Relay, Azure Service Bus, Azure Event Hubs, Azure Storage, and Azure Cosmos DB) and Azure hosted customer/partner services over a private endpoint in your virtual network. For more information, see What is Azure Private Link?
A private endpoint is a network interface that allows your workloads running in a virtual network to connect privately and securely to a service that has a private link resource (for example, a Relay namespace). The private endpoint uses a private IP address from your VNet, effectively bringing the service into your VNet. All traffic to the service can be routed through the private endpoint, so no gateways, NAT devices, ExpressRoute, VPN connections, or public IP addresses are needed. Traffic between your virtual network and the service traverses over the Microsoft backbone network, eliminating exposure from the public Internet. You can provide a level of granularity in access control by allowing connections to specific Azure Relay namespaces.
Note
If you use the relay listener over a private link, open ports 9400-9599 for outgoing communication along with the standard relay ports. Note that you need to do this step only for the relay listener.
Add a private endpoint using Azure portal
Prerequisites
To integrate an Azure Relay namespace with Azure Private Link, you need the following entities or permissions:
- An Azure Relay namespace.
- An Azure virtual network.
- A subnet in the virtual network.
- Owner or contributor permissions on the virtual network.
Your private endpoint and virtual network must be in the same region. When you select a region for the private endpoint using the portal, it will automatically filter only virtual networks that are in that region. Your namespace can be in a different region.
Your private endpoint uses a private IP address in your virtual network.
Configure private access for a Relay namespace
The following procedure provides step-by-step instructions for disabling public access to a Relay namespace and then adding a private endpoint to the namespace.
Sign in to the Azure portal.
In the search bar, type in Relays.
Select the namespace from the list to which you want to add a private endpoint.
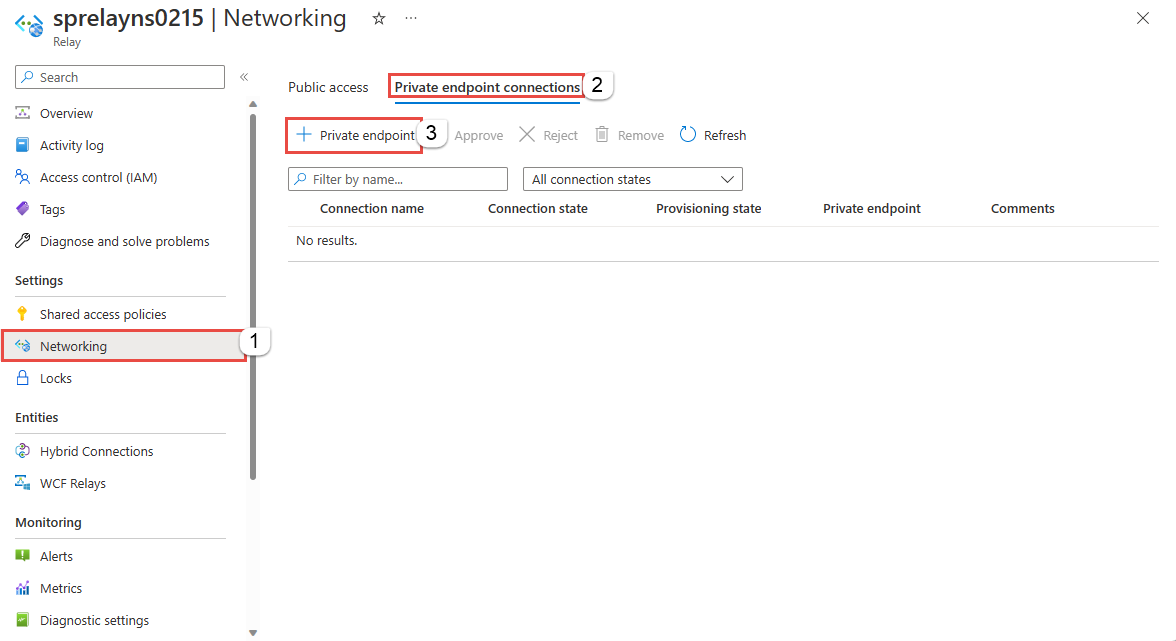
On the left menu, select the Networking tab under Settings.
On the Networking page, for Public network access, select Disabled if you want the namespace to be accessed only via private endpoints.
For Allow trusted Microsoft services to bypass this firewall, select Yes if you want to allow trusted Microsoft services to bypass this firewall.

Select the Private endpoint connections tab at the top of the page
Select the + Private Endpoint button at the top of the page.
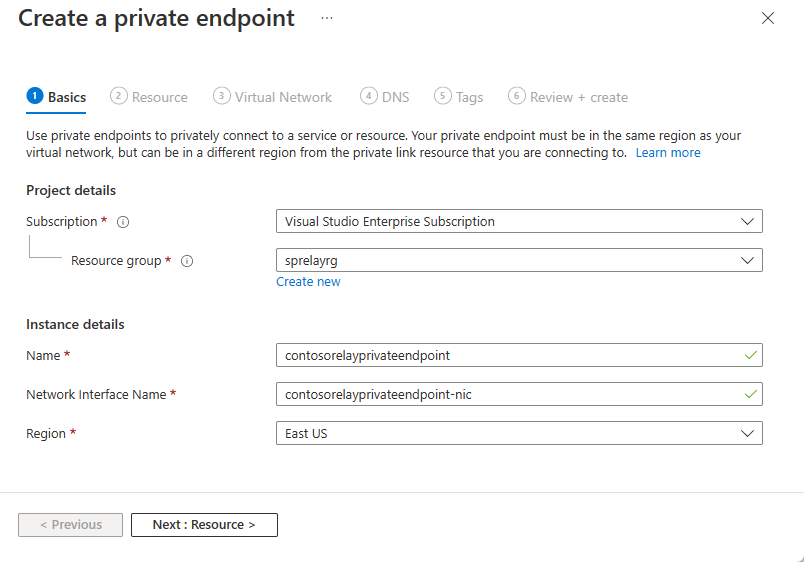
On the Basics page, follow these steps:
Select the Azure subscription in which you want to create the private endpoint.
Select the resource group for the private endpoint resource.
Enter a name for the private endpoint.
Enter a name for the network interface.
Select a region for the private endpoint. Your private endpoint must be in the same region as your virtual network, but can be in a different region from the Azure Relay namespace that you're connecting to.
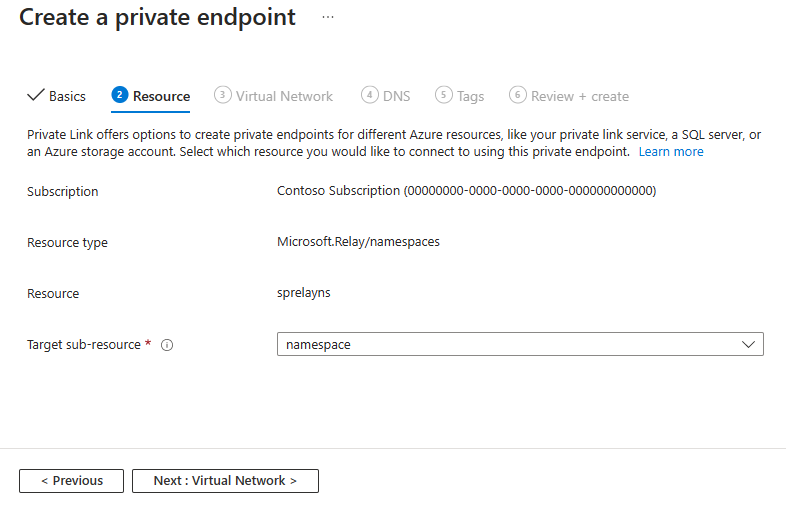
Select Next: Resource > button at the bottom of the page.
Review settings on the Resource page, and select Next: Virtual Network.
On the Virtual Network page, select the virtual network and the subnet where you want to deploy the private endpoint. Only virtual networks in the currently selected subscription and location are listed in the drop-down list.
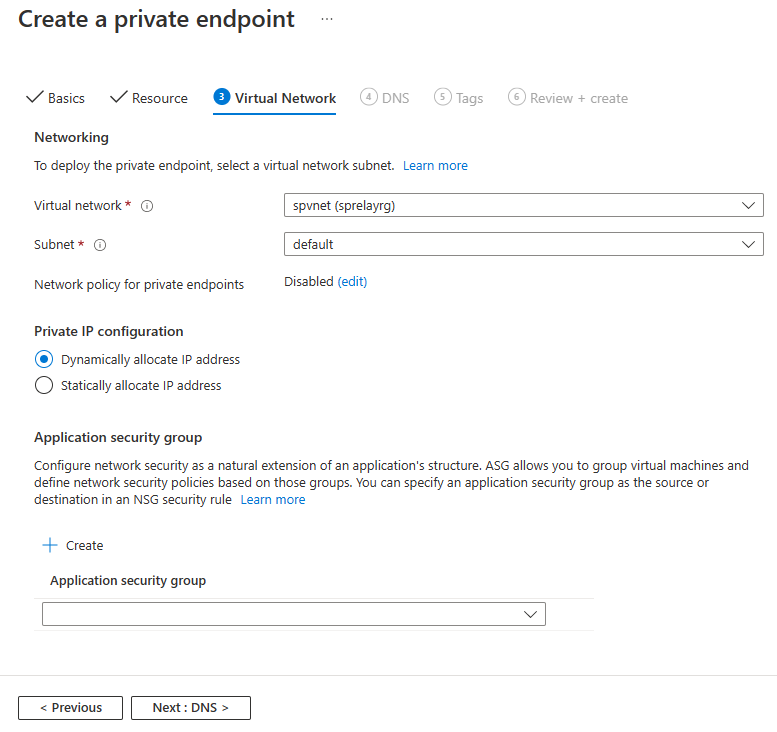
You can configure whether you want to dynamically allocate an IP address or statically allocate an IP address to the private endpoint
You can also associate a new or existing application security group to the private endpoint.
Select Next: DNS to navigate to the DNS page of the wizard. On the DNS page, Integrate with private DNZ zone setting is enabled by default (recommended). You have an option to disable it.

To connect privately with your private endpoint, you need a DNS record. We recommend that you integrate your private endpoint with a private DNS zone. You can also utilize your own DNS servers or create DNS records using the host files on your virtual machines. For more information, see Azure Private Endpoint DNS Configuration.
Select Next: Tags > button at the bottom of the page.
On the Tags page, create any tags (names and values) that you want to associate with the private endpoint and the private DNS zone (if you had enabled the option). Then, select Review + create button at the bottom of the page.
On the Review + create, review all the settings, and select Create to create the private endpoint.
On the Private endpoint page, you can see the status of the private endpoint connection. If you're the owner of the Relay namespace or have the manage access over it and had selected Connect to an Azure resource in my directory option for the Connection method, the endpoint connection should be auto-approved. If it's in the pending state, see the Manage private endpoints using Azure portal section.
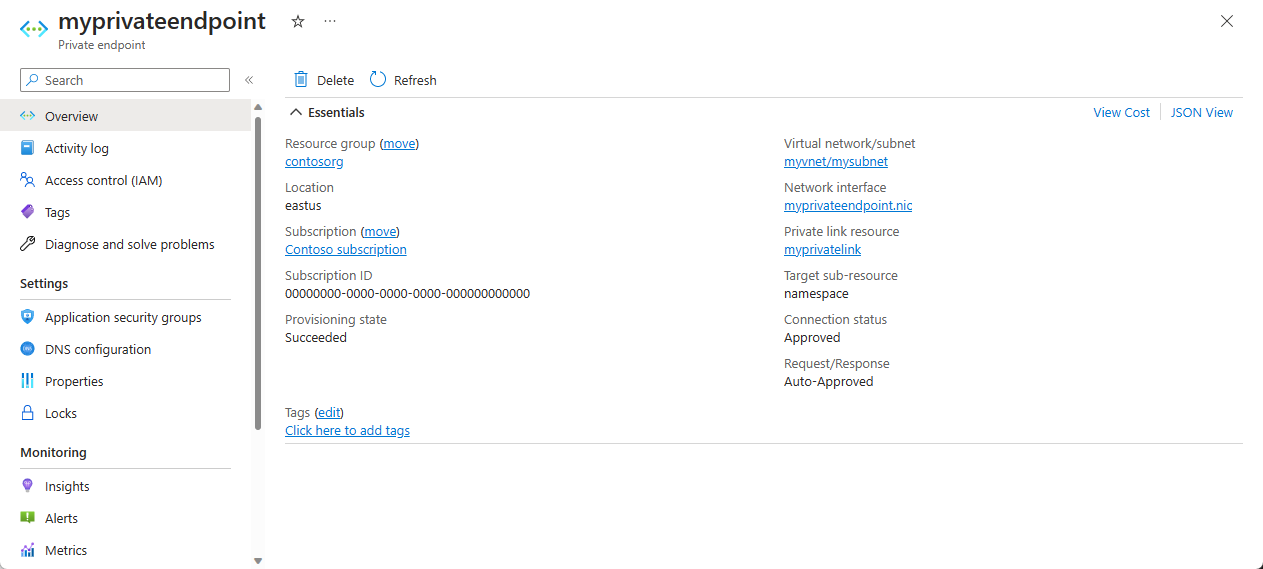
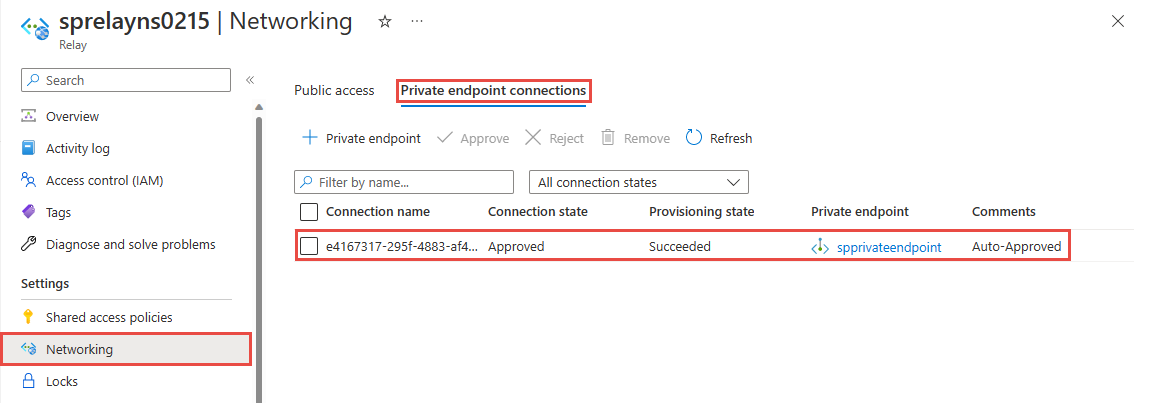
Navigate back to the Networking page of the namespace, and switch to the Private endpoint connections tab. You should see the private endpoint that you created.
Add a private endpoint using PowerShell
The following example shows you how to use Azure PowerShell to create a private endpoint connection to an Azure Relay namespace.
Your private endpoint and virtual network must be in the same region. Your Azure Relay namespace can be in a different region. And, Your private endpoint uses a private IP address in your virtual network.
$rgName = "<RESOURCE GROUP NAME>"
$vnetlocation = "<VNET LOCATION>"
$vnetName = "<VIRTUAL NETWORK NAME>"
$subnetName = "<SUBNET NAME>"
$namespaceLocation = "<NAMESPACE LOCATION>"
$namespaceName = "<NAMESPACE NAME>"
$peConnectionName = "<PRIVATE ENDPOINT CONNECTION NAME>"

# create resource group
New-AzResourceGroup -Name $rgName -Location $vnetLocation

# create virtual network
$virtualNetwork = New-AzVirtualNetwork `
                    -ResourceGroupName $rgName `
                    -Location $vnetlocation `
                    -Name $vnetName `
                    -AddressPrefix 10.0.0.0/16

# create subnet with endpoint network policy disabled
$subnetConfig = Add-AzVirtualNetworkSubnetConfig `
                    -Name $subnetName `
                    -AddressPrefix 10.0.0.0/24 `
                    -PrivateEndpointNetworkPoliciesFlag "Disabled" `
                    -VirtualNetwork $virtualNetwork

# update virtual network
$virtualNetwork | Set-AzVirtualNetwork

# create a relay namespace
$namespaceResource = New-AzResource -Location $namespaceLocation -ResourceName $namespaceName -ResourceGroupName $rgName -Properties @{} -ResourceType "Microsoft.Relay/namespaces"

# create a private link service connection
$privateEndpointConnection = New-AzPrivateLinkServiceConnection `
                                -Name $peConnectionName `
                                -PrivateLinkServiceId $namespaceResource.ResourceId `
                                -GroupId "namespace"

# get subnet object that you'll use in the next step
$virtualNetwork = Get-AzVirtualNetwork -ResourceGroupName  $rgName -Name $vnetName
$subnet = $virtualNetwork | Select -ExpandProperty subnets `
                                | Where-Object  {$_.Name -eq $subnetName}

# now, create private endpoint
$privateEndpoint = New-AzPrivateEndpoint -ResourceGroupName $rgName  `
                                -Name $vnetName   `
                                -Location $vnetlocation `
                                -Subnet  $subnet   `
                                -PrivateLinkServiceConnection $privateEndpointConnection

(Get-AzResource -ResourceId $namespaceResource.ResourceId -ExpandProperties).Properties
Manage private endpoints using Azure portal
When you create a private endpoint, the connection must be approved. If the resource (Relay namespace) for which you're creating a private endpoint is in your directory, you can approve the connection request provided you've manage privileges over the Relay namespace. If you're connecting to a Relay namespace for which you don't have the manage access, you must wait for the owner of that resource to approve your connection request.
There are four provisioning states:
| Service action | Service consumer private endpoint state | Description |
|---|---|---|
| None | Pending | Connection is created manually and is pending approval from the Azure Relay namespace owner. |
| Approve | Approved | Connection was automatically or manually approved and is ready to be used. |
| Reject | Rejected | Connection was rejected by the Azure Relay namespace owner. |
| Remove | Disconnected | Connection was removed by the Azure Relay namespace owner, the private endpoint becomes informative and should be deleted for cleanup. |
Approve, reject, or remove a private endpoint connection
- Sign in to the Azure portal.
- In the search bar, type in Relay.
- Select the namespace that you want to manage.
- Select the Networking tab.
- Go to the appropriate section below based on the operation you want to: approve, reject, or remove.
Approve a private endpoint connection
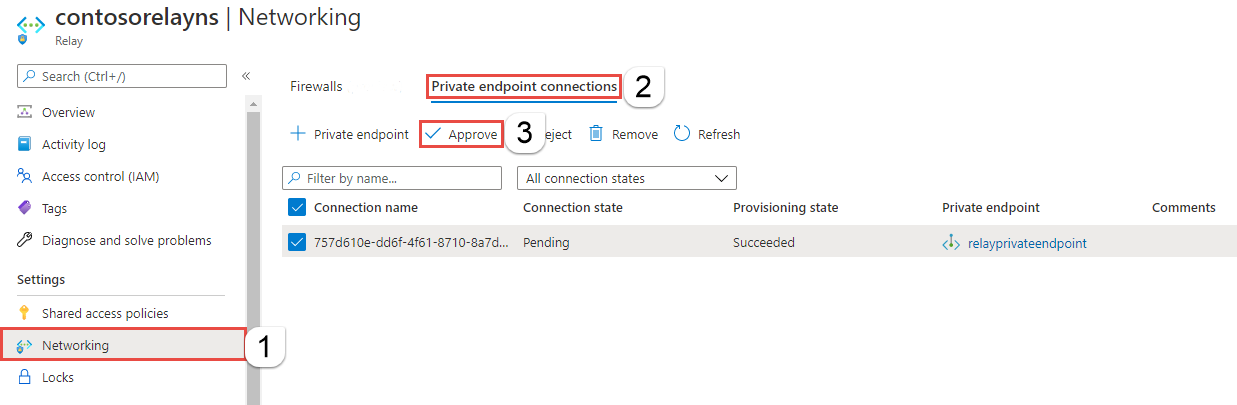
If there are any connections that are pending, you see a connection listed with Pending in the provisioning state.
Select the private endpoint you wish to approve
Select the Approve button.
On the Approve connection page, enter an optional comment, and select Yes. If you select No, nothing happens.
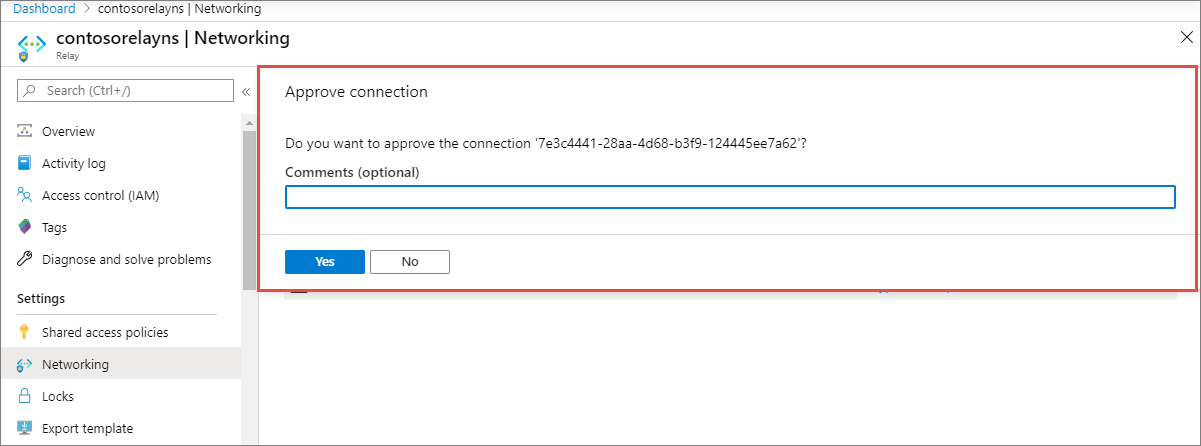
You should see the status of the connection in the list changed to Approved.
Reject a private endpoint connection
If there are any private endpoint connections you want to reject, whether it's a pending request or existing connection that was approved earlier, select the endpoint connection and select the Reject button.

On the Reject connection page, enter an optional comment, and select Yes. If you select No, nothing happens.
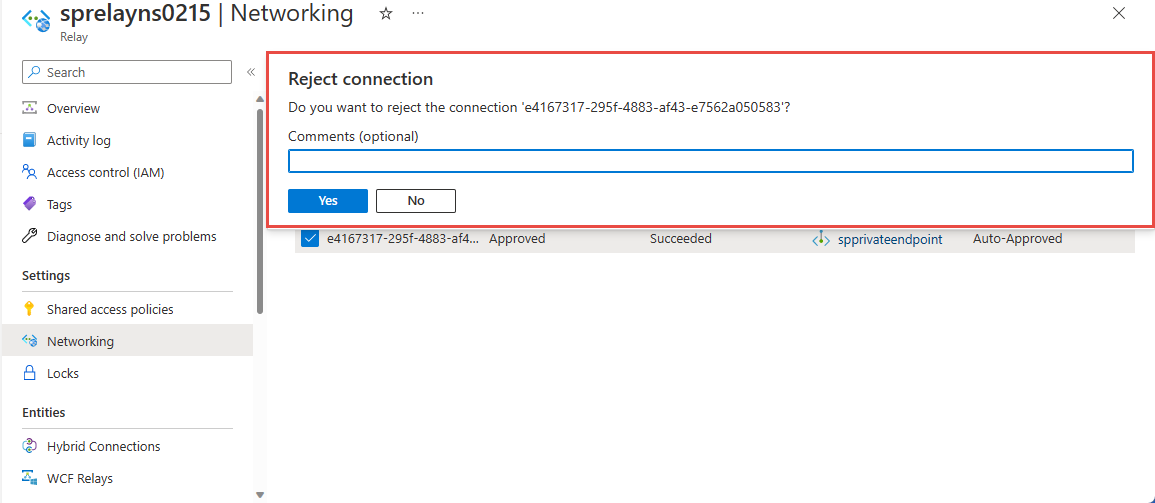
You should see the status of the connection in the list changed Rejected.
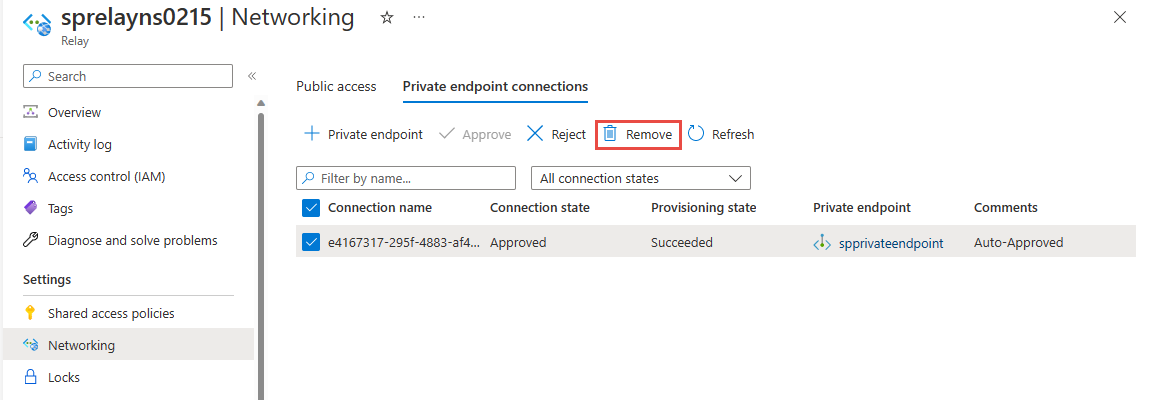
Remove a private endpoint connection
To remove a private endpoint connection, select it in the list, and select Remove on the toolbar.
On the Delete connection page, select Yes to confirm the deletion of the private endpoint. If you select No, nothing happens.
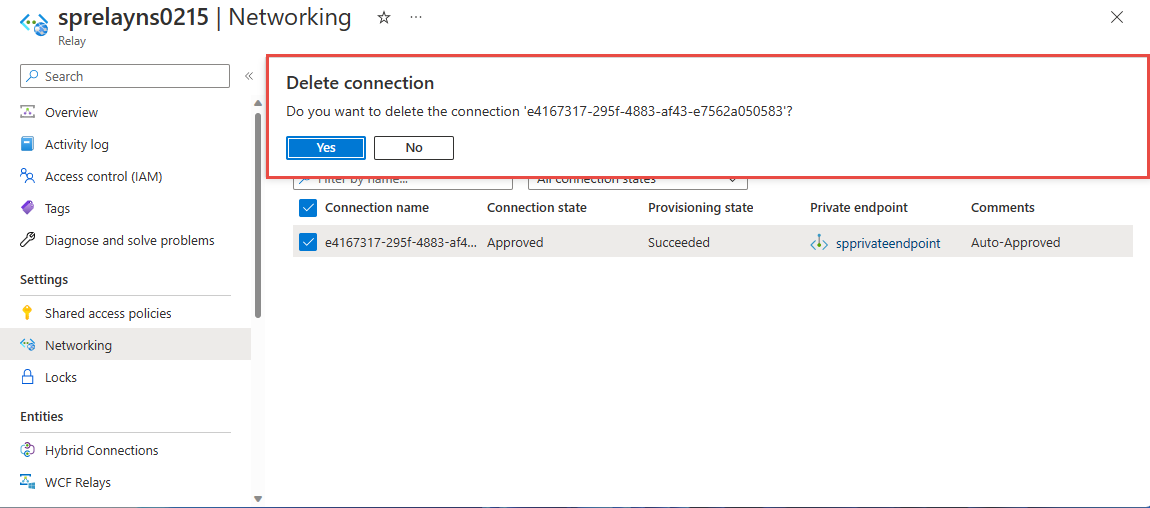
You should see the status changed to Disconnected. Then, you won't see the endpoint in the list.
Validate that the private link connection works
You should validate that resources within the virtual network of the private endpoint are connecting to your Azure Relay namespace over its private IP address.
For this test, create a virtual machine by following the steps in the Create a Windows virtual machine in the Azure portal
In the Networking tab:
- Specify Virtual network and Subnet. Select the Virtual Network on which you deployed the private endpoint.
- Specify a public IP resource.
- For NIC network security group, select None.
- For Load balancing, select No.
Connect to the VM and open the command line and run the following command:
nslookup <your-relay-namespace-name>.servicebus.windows.net
You should see a result that looks like the following.
Non-authoritative answer:
Name:    <namespace-name>.privatelink.servicebus.windows.net
Address:  10.0.0.4 (private IP address associated with the private endpoint)
Aliases:  <namespace-name>.servicebus.windows.net
Limitations and Design Considerations
Design considerations
- For pricing information, see Azure Private Link pricing.
Limitations
- Maximum number of private endpoints per Azure Relay namespace: 64.
- Maximum number of Azure Relay namespaces with private endpoints per subscription: 64.
- Network Security Group (NSG) rules and User-Defined Routes don't apply to Private Endpoint. For more information, see Azure Private Link service: Limitations
Trusted Microsoft services
When you enable the Allow trusted Microsoft services to bypass this firewall setting, the following services are granted access to your Azure Relay resources:
| Trusted service | Supported usage scenarios |
|---|---|
| Azure Machine Learning | AML Kubernetes uses Azure Relay to facilitate communication between AML services and the Kubernetes cluster. Azure Relay is a fully managed service that provides secure bi-directional communication between applications hosted on different networks. This makes it ideal for use in private link environments, where communication between Azure resources and on-premises resources is restricted. |
| Azure Arc | Azure Arc-enabled services associated with the Resource Providers above will be able to connect to the hybrid connections in your Azure Relay namespace as a sender without being blocked by the IP firewall rules set on the Azure Relay namespace. Microsoft.Hybridconnectivity service creates the hybrid connections in your Azure Relay namespace and provides the connection information to the relevant Arc service based on the scenario. These services communicate only with your Azure Relay namespace if you're using Azure Arc, with the following Azure Services: - Azure Kubernetes - Azure Machine Learning - Microsoft Purview |
The other trusted services for Azure Relay can be found below:
- Azure Event Grid
- Azure IoT Hub
- Azure Stream Analytics
- Azure Monitor
- Azure API Management
- Azure Synapse
- Azure Data Explorer
- Azure IoT Central
- Azure Healthcare Data Services
- Azure Digital Twins
Next Steps
- Learn more about Azure Private Link
- Learn more about Azure Relay
Feedback
Coming soon: Throughout 2024 we will be phasing out GitHub Issues as the feedback mechanism for content and replacing it with a new feedback system. For more information see: https://aka.ms/ContentUserFeedback.
Submit and view feedback for