Quickstart: Use Java to create an App showing GitHub star count with Azure Functions and SignalR Service
In this article, you'll use Azure SignalR Service, Azure Functions, and Java to build a serverless application to broadcast messages to clients.
Note
The code in this article is available on GitHub.
Prerequisites
A code editor, such as Visual Studio Code
An Azure account with an active subscription. If you don't already have an account, create an account for free.
Azure Functions Core Tools. Used to run Azure Function apps locally.
- The required SignalR Service bindings in Java are only supported in Azure Function Core Tools version 2.4.419 (host version 2.0.12332) or above.
- To install extensions, Azure Functions Core Tools requires the .NET Core SDK installed. However, no knowledge of .NET is required to build Java Azure Function apps.
Java Developer Kit, version 11
Apache Maven, version 3.0 or above.
This quickstart can be run on macOS, Windows, or Linux.
Create an Azure SignalR Service instance
In this section, you create a basic Azure SignalR instance to use for your app. The following steps use the Azure portal to create a new instance, but you can also use the Azure CLI. For more information, see the az signalr create command in the Azure SignalR Service CLI Reference.
- Sign in to the Azure portal.
- In the upper-left side of the page, select + Create a resource.
- On the Create a resource page, in the Search services and marketplace text box, enter signalr and then select SignalR Service from the list.
- On the SignalR Service page, select Create.
- On the Basics tab, you enter the essential information for your new SignalR Service instance. Enter the following values:
| Field | Suggested Value | Description |
|---|---|---|
| Subscription | Choose your subscription | Select the subscription you want to use to create a new SignalR Service instance. |
| Resource group | Create a resource group named SignalRTestResources | Select or create a resource group for your SignalR resource. It's useful to create a new resource group for this tutorial instead of using an existing resource group. To free resources after completing the tutorial, delete the resource group. Deleting a resource group also deletes all of the resources that belong to the group. This action can't be undone. Before you delete a resource group, make certain that it doesn't contain resources you want to keep. For more information, see Using resource groups to manage your Azure resources. |
| Resource name | testsignalr | Enter a unique resource name to use for the SignalR resource. If testsignalr is already taken in your region, add a digit or character until the name is unique. The name must be a string of 1 to 63 characters and contain only numbers, letters, and the hyphen ( -) character. The name can't start or end with the hyphen character, and consecutive hyphen characters aren't valid. |
| Region | Choose your region | Select the appropriate region for your new SignalR Service instance. Azure SignalR Service isn't currently available in all regions. For more information, see Azure SignalR Service region availability |
| Pricing tier | Select Change and then choose Free (Dev/Test Only). Choose Select to confirm your choice of pricing tier. | Azure SignalR Service has three pricing tiers: Free, Standard, and Premium. Tutorials use the Free tier, unless noted otherwise in the prerequisites. For more information about the functionality differences between tiers and pricing, see Azure SignalR Service pricing |
| Service mode | Choose the appropriate service mode | Use Default when you host the SignalR hub logic in your web apps and use SignalR service as a proxy. Use Serverless when you use Serverless technologies such as Azure Functions to host the SignalR hub logic. Classic mode is only for backward compatibility and isn't recommended to use. For more information, see Service mode in Azure SignalR Service. |
You don't need to change the settings on the Networking and Tags tabs for the SignalR tutorials.
- Select the Review + create button at the bottom of the Basics tab.
- On the Review + create tab, review the values and then select Create. It takes a few moments for deployment to complete.
- When the deployment is complete, select the Go to resource button.
- On the SignalR resource page, select Keys from the menu on the left, under Settings.
- Copy the Connection string for the primary key. You need this connection string to configure your app later in this tutorial.
Configure and run the Azure Function app
Make sure you have Azure Function Core Tools, Java (version 11 in the sample), and Maven installed.
Initialize the project using Maven:
mvn archetype:generate -DarchetypeGroupId=com.microsoft.azure -DarchetypeArtifactId=azure-functions-archetype -DjavaVersion=11Maven asks you for values needed to finish generating the project. Provide the following values:
Prompt Value Description groupId com.signalrA value that uniquely identifies your project across all projects, following the package naming rules for Java. artifactId javaA value that is the name of the jar, without a version number. version 1.0-SNAPSHOTChoose the default value. package com.signalrA value that is the Java package for the generated function code. Use the default. Go to the folder
src/main/java/com/signalrand copy the following code to Function.java:package com.signalr; import com.google.gson.Gson; import com.microsoft.azure.functions.ExecutionContext; import com.microsoft.azure.functions.HttpMethod; import com.microsoft.azure.functions.HttpRequestMessage; import com.microsoft.azure.functions.HttpResponseMessage; import com.microsoft.azure.functions.HttpStatus; import com.microsoft.azure.functions.annotation.AuthorizationLevel; import com.microsoft.azure.functions.annotation.FunctionName; import com.microsoft.azure.functions.annotation.HttpTrigger; import com.microsoft.azure.functions.annotation.TimerTrigger; import com.microsoft.azure.functions.signalr.*; import com.microsoft.azure.functions.signalr.annotation.*; import org.apache.commons.io.IOUtils; import java.io.IOException; import java.io.InputStream; import java.net.URI; import java.net.http.HttpClient; import java.net.http.HttpRequest; import java.net.http.HttpResponse; import java.net.http.HttpResponse.BodyHandlers; import java.nio.charset.StandardCharsets; import java.util.Optional; public class Function { private static String Etag = ""; private static String StarCount; @FunctionName("index") public HttpResponseMessage run( @HttpTrigger( name = "req", methods = {HttpMethod.GET}, authLevel = AuthorizationLevel.ANONYMOUS)HttpRequestMessage<Optional<String>> request, final ExecutionContext context) throws IOException { InputStream inputStream = getClass().getClassLoader().getResourceAsStream("content/index.html"); String text = IOUtils.toString(inputStream, StandardCharsets.UTF_8.name()); return request.createResponseBuilder(HttpStatus.OK).header("Content-Type", "text/html").body(text).build(); } @FunctionName("negotiate") public SignalRConnectionInfo negotiate( @HttpTrigger( name = "req", methods = { HttpMethod.POST }, authLevel = AuthorizationLevel.ANONYMOUS) HttpRequestMessage<Optional<String>> req, @SignalRConnectionInfoInput( name = "connectionInfo", hubName = "serverless") SignalRConnectionInfo connectionInfo) { return connectionInfo; } @FunctionName("broadcast") @SignalROutput(name = "$return", hubName = "serverless") public SignalRMessage broadcast( @TimerTrigger(name = "timeTrigger", schedule = "*/5 * * * * *") String timerInfo) throws IOException, InterruptedException { HttpClient client = HttpClient.newHttpClient(); HttpRequest req = HttpRequest.newBuilder().uri(URI.create("https://api.github.com/repos/azure/azure-signalr")).header("User-Agent", "serverless").header("If-None-Match", Etag).build(); HttpResponse<String> res = client.send(req, BodyHandlers.ofString()); if (res.headers().firstValue("Etag").isPresent()) { Etag = res.headers().firstValue("Etag").get(); } if (res.statusCode() == 200) { Gson gson = new Gson(); GitResult result = gson.fromJson(res.body(), GitResult.class); StarCount = result.stargazers_count; } return new SignalRMessage("newMessage", "Current start count of https://github.com/Azure/azure-signalr is:".concat(StarCount)); } class GitResult { public String stargazers_count; } }Some dependencies need to be added. Open pom.xml and add the following dependencies used in the code:
<dependency>
    <groupId>com.microsoft.azure.functions</groupId>
    <artifactId>azure-functions-java-library-signalr</artifactId>
    <version>1.0.0</version>
</dependency>
<dependency>
    <groupId>commons-io</groupId>
    <artifactId>commons-io</artifactId>
    <version>2.4</version>
</dependency>
<dependency>
    <groupId>com.google.code.gson</groupId>
    <artifactId>gson</artifactId>
    <version>2.8.7</version>
</dependency>
The client interface for this sample is a web page. We read HTML content from content/index.html in the
indexfunction, and then create a new file content/index.html in theresourcesdirectory. Your directory tree should look like this:| - src | | - main | | | - java | | | | - com | | | | | - signalr | | | | | | - Function.java | | | - resources | | | | - content | | | | | - index.html | - pom.xml | - host.json | - local.settings.jsonOpen index.html and copy the following content:
<html>

<body>
    <h1>Azure SignalR Serverless Sample</h1>
    <div id="messages"></div>
    <script src="https://cdnjs.cloudflare.com/ajax/libs/microsoft-signalr/3.1.7/signalr.min.js"></script>
    <script>
    let messages = document.querySelector('#messages');
    const apiBaseUrl = window.location.origin;
    const connection = new signalR.HubConnectionBuilder()
        .withUrl(apiBaseUrl + '/api')
        .configureLogging(signalR.LogLevel.Information)
        .build();
        connection.on('newMessage', (message) => {
        document.getElementById("messages").innerHTML = message;
        });

        connection.start()
        .catch(console.error);
    </script>
</body>

</html>
Azure Functions requires a storage account to work. You can install and run the Azure Storage Emulator.
You're almost done now. The last step is to set a connection string of the SignalR Service to Azure Function settings.
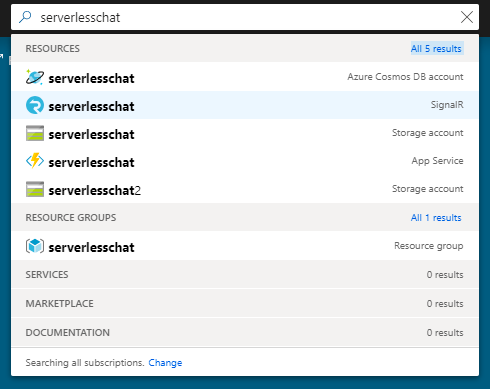
Search for the Azure SignalR instance you deployed earlier using the Search box in Azure portal. Select the instance to open it.
Select Keys to view the connection strings for the SignalR Service instance.
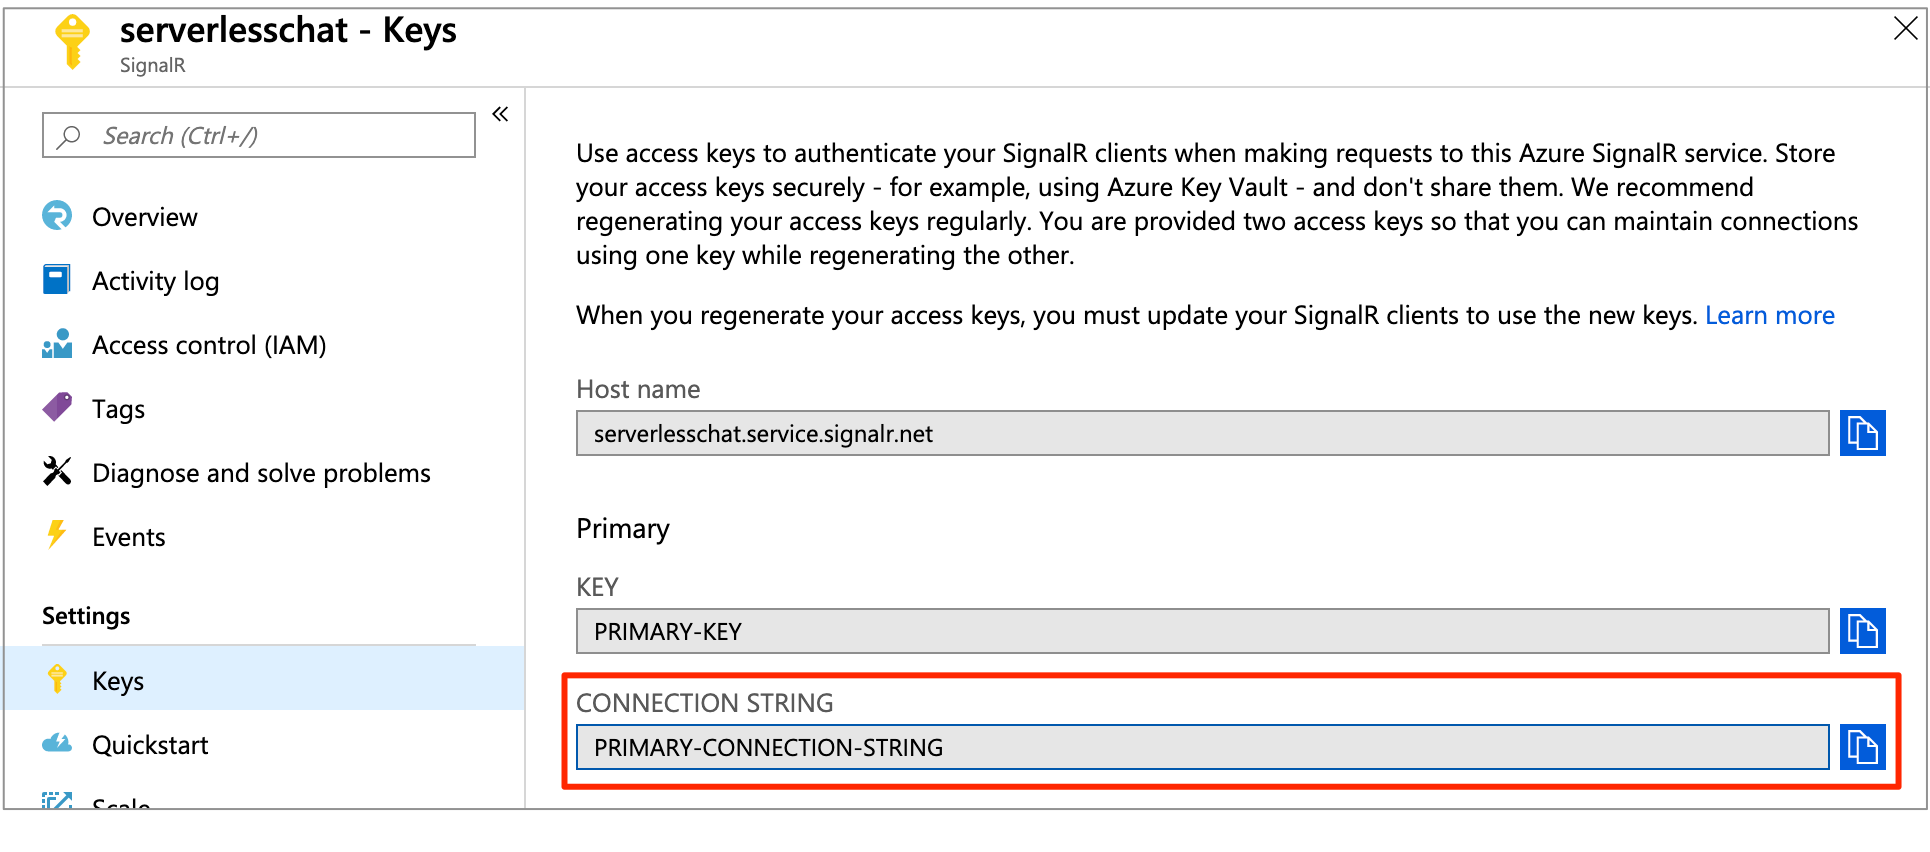
Copy the primary connection string, and then run the following command:
func settings add AzureSignalRConnectionString "<signalr-connection-string>"
# Also we need to set AzureWebJobsStorage as Azure Function's requirement
func settings add AzureWebJobsStorage "UseDevelopmentStorage=true"
Run the Azure Function in local:
mvn clean package
mvn azure-functions:run
After Azure Function is running locally, go to
http://localhost:7071/api/indexand you'll see the current star count. If you star or "unstar" in the GitHub, you'll get a star count refreshing every few seconds.
Clean up resources
If you're not going to continue to use this app, delete all resources created by this quickstart with the following steps so you don't incur any charges:
In the Azure portal, select Resource groups on the far left, and then select the resource group you created. Alternatively, you may use the search box to find the resource group by its name.
In the window that opens, select the resource group, and then click Delete resource group.
In the new window, type the name of the resource group to delete, and then click Delete.
Having issues? Try the troubleshooting guide or let us know.
Next steps
In this quickstart, you built and ran a real-time serverless application in the local host. Next, learn more about how to bi-directional communicating between clients and Azure Function with SignalR Service.
Feedback
Coming soon: Throughout 2024 we will be phasing out GitHub Issues as the feedback mechanism for content and replacing it with a new feedback system. For more information see: https://aka.ms/ContentUserFeedback.
Submit and view feedback for