Upload media files using the Video Indexer website
Important
Due to the Azure Media Services retirement announcement, Azure AI Video Indexer announces Azure AI Video Indexer features adjustments. See Changes related to Azure Media Service (AMS) retirement to understand what this means for your Azure AI Video Indexer account. See the Preparing for AMS retirement: VI update and migration guide.
You can upload media files from your file system or from a URL. You can also configure basic or advanced settings for indexing, such as privacy, streaming quality, language, presets, people and brands models, custom logos and metadata.
This article shows how to upload and index media files (audio or video) using the Azure AI Video Indexer website.
You can also view a video that shows how to upload and index media files.
Prerequisites
- To upload media files, you need an active Azure AI Video Indexer account. If you don't have one, sign up for a free trial account, or create a paid account.
- To upload media files, you need at least contributor-level permission for your account. To manage permissions, see Manage users and groups.
- To upload media files from a URL, you need a publicly accessible URL for the media file. For example, if the file is hosted in an Azure storage account, you need to generate a SAS token URL and paste it in the input box. You can't use URLs from streaming services such as YouTube.
Quick upload
Use these steps to upload and index a media file using the quick upload option.
Sign in to the Video Indexer website.
Select Upload.
Select the file source. You can upload up to 10 files at a time.
To upload from your file system, select Browse files and choose the files you want to upload.
To upload from a URL, select Enter URL, paste the source file URL, and select Add.
Make sure the URL is valid and the file is accessible.
Note
If the file name is marked in red, it means the file has an issue and can't be uploaded.
Configure the basic settings for indexing or use the default configuration. You need to specify the following settings for each file:
- Privacy: Choose whether the video URL will be publicly available or private after indexing.
- Streaming quality: Choose the streaming quality for the video. You can select No streaming, Single bitrate, or Adaptive bitrate. For more information, see the streaming options
- Video source language: Choose the spoken language of the video to ensure high quality transcript and insights extraction. If you don't know the language or there's more than one spoken language, select Auto-detect single language or Auto-detect multi language. For more information, see Language detection.
If it's the first time you upload a media file, you need to check the consent checkbox to agree to the terms and conditions.
Select Upload+index.
Review the summary page that shows the indexing settings and the upload progress.
After the indexing is done, you can view the insights by selecting the video.
Advanced upload
Use these steps to upload and index a media file using the advanced upload option.
Sign in to the Video Indexer website.
Select Upload.
Select the file source. You can upload up to 10 files at a time.
To upload from your file system, select Browse files and choose the files you want to upload. To add more files, select Add file. To remove a file, select Remove on the file name.
To upload from a URL, select Enter URL, paste the source file URL, and select Add.
Make sure the URL is valid and the file is accessible.
Note
If the file name is marked in red, it means the file has an issue and can't be uploaded. You can add URLs from different storages for each file.
Configure the basic settings, for more information, see the quick upload section.
Configure the general settings for indexing. You can rename the file names by rewriting the file name. The updated name is reflected as the file name in Video Indexer.
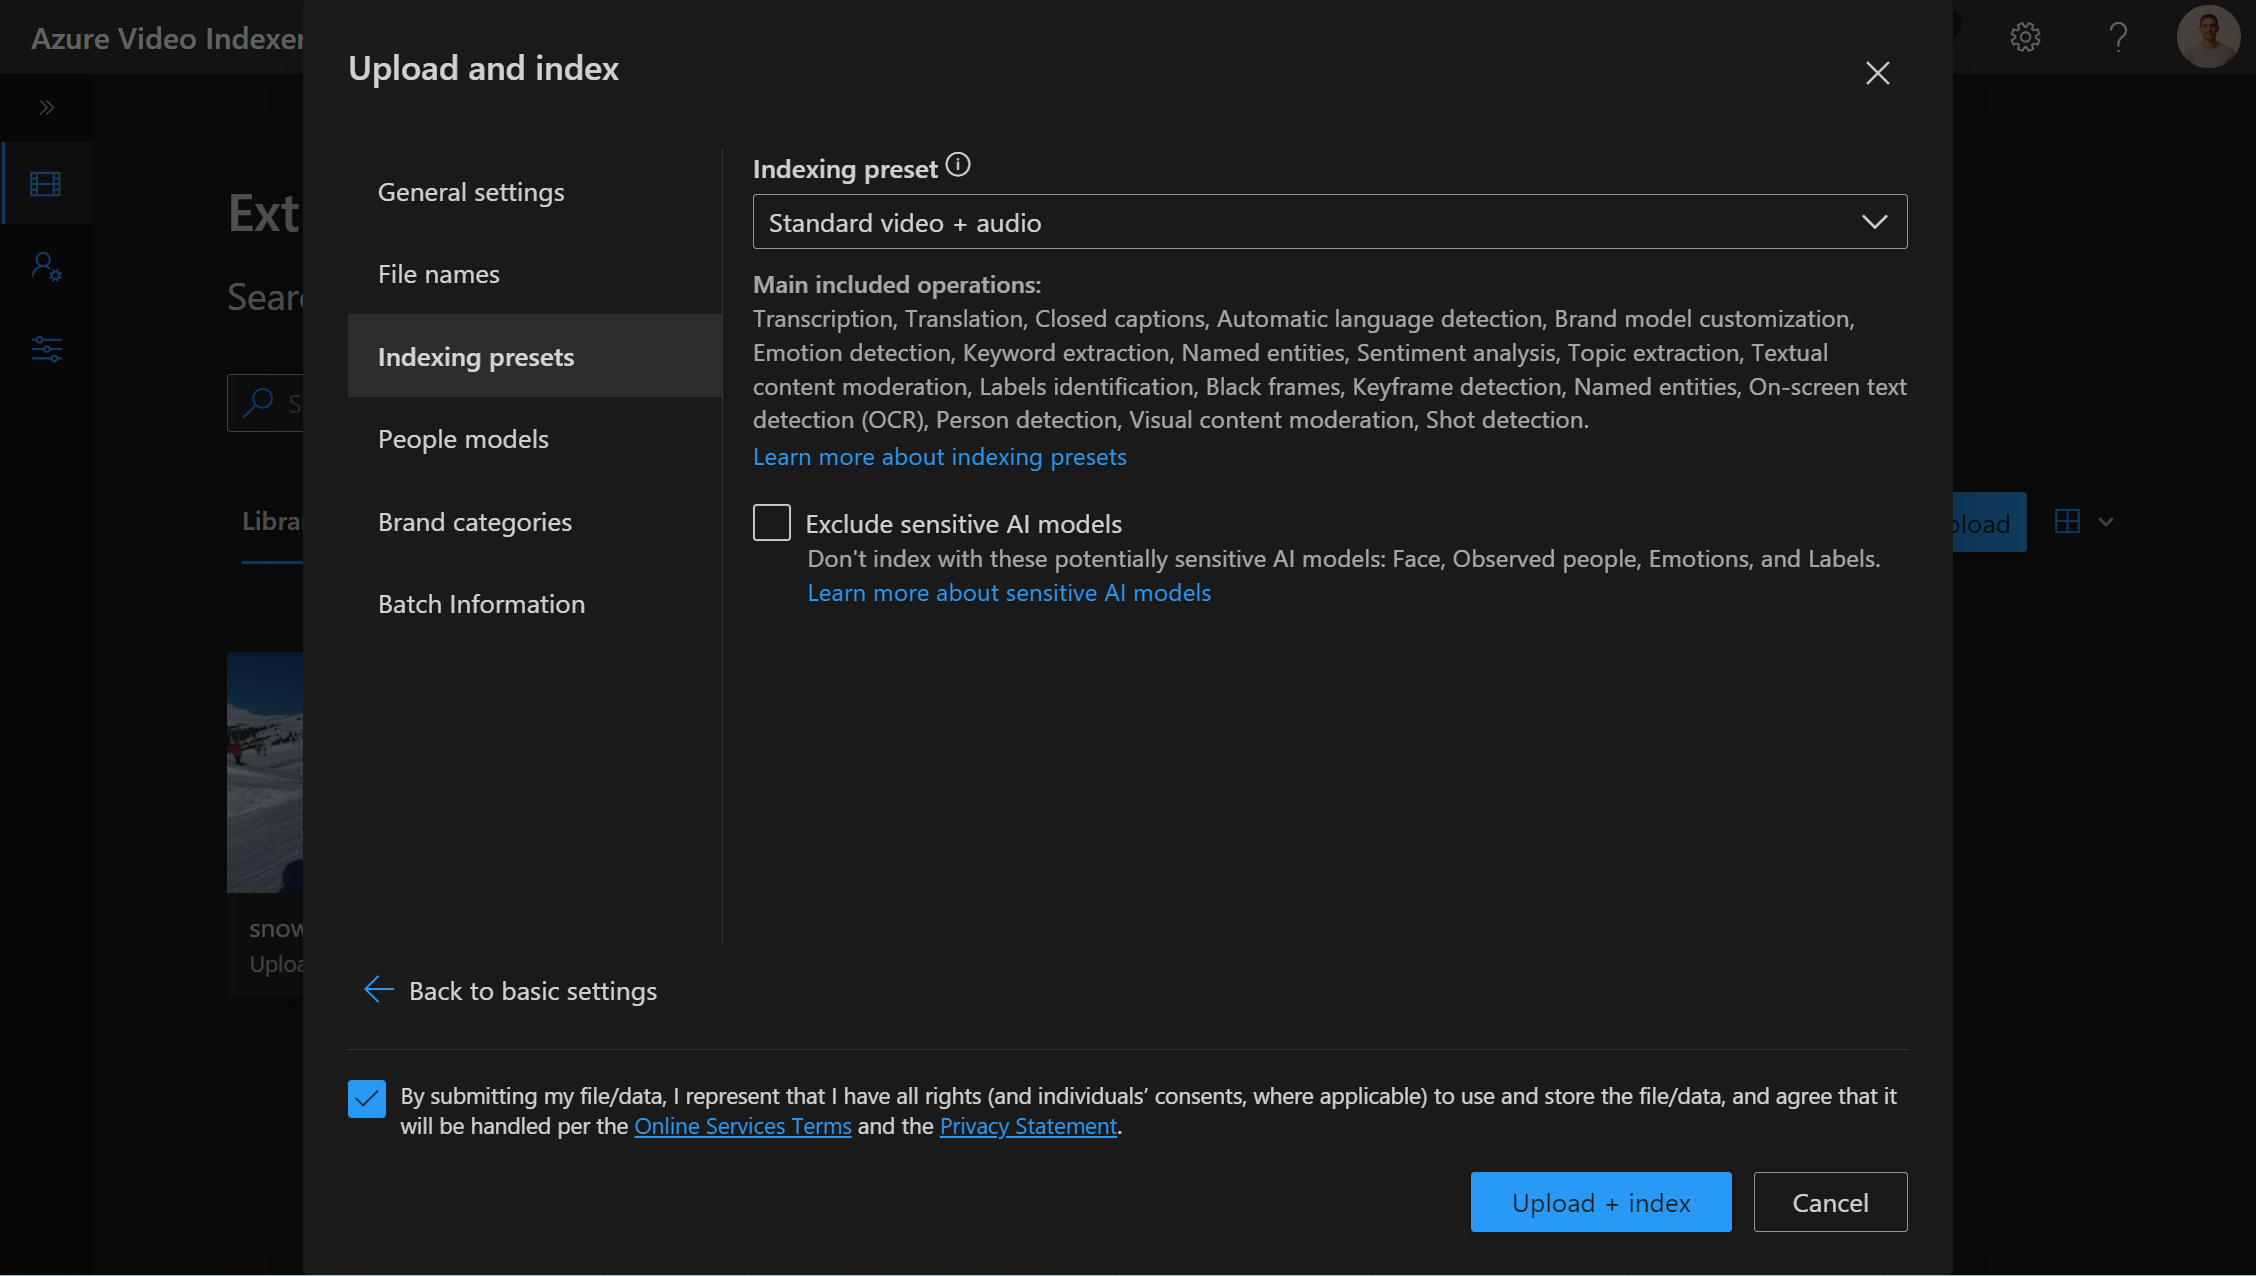
Configure the advanced settings for indexing. The selection of the following settings is for all files in the batch:
- Indexing preset: Choose the preset that fits your scenario. You can also exclude sensitive AI by selecting the checkbox.
- People model: If you're using a customized people model, choose it from the dropdown list.
- Brand categories: If you're using a customized brand model, choose it from the dropdown list.
- File information: If you want to add metadata, enter the free text in the input box. The metadata is shared between all files in the same upload batch. When uploading a single file, you can also add a description.
Select Upload+index.
Review the summary page that shows the indexing settings and the upload progress.
After the indexing is done, you can view the insights by selecting the video.
Troubleshoot upload issues
If you encounter any issues while uploading media files, try the following solutions:
If the Upload button is disabled, hover over the button and check for the indication of the problem. Try to refresh the page.
If you're using a trial account, check that the account quota for daily count, daily duration, or total duration. To view your quota and usage, see the Account settings.
If the upload from URL failed, make sure that the URL is valid and accessible by Video Indexer. Make sure that the URL isn't from a streaming service such as YouTube. Make sure that the media file isn't encrypted, protected by DRM, corrupted, or damaged. Make sure that it's a media file format supported by Video Indexer. For a list of supported formats, see supported media formats.
If the upload from file system failed, make sure that the file size isn't larger than 2 GB. Make sure that you have a stable internet connection.
Feedback
Coming soon: Throughout 2024 we will be phasing out GitHub Issues as the feedback mechanism for content and replacing it with a new feedback system. For more information see: https://aka.ms/ContentUserFeedback.
Submit and view feedback for