Configure GitHub Enterprise Server on Azure VMware Solution
In this article, learn how to set up GitHub Enterprise Server, the "on-premises" version of GitHub.com, on your Azure VMware Solution private cloud. The scenario covers a GitHub Enterprise Server instance that can serve up to 3,000 developers running up to 25 jobs per minute on GitHub Actions. It includes the setup of (at time of writing) preview features, such as GitHub Actions. To customize the setup for your particular needs, review the requirements listed in Installing GitHub Enterprise Server on VMware.
Before you begin
GitHub Enterprise Server requires a valid license key. You can sign up for a trial license. If you're looking to extend the capabilities of GitHub Enterprise Server via an integration, check if you qualify for a free five-seat developer license. Apply for this license through GitHub's Partner Program.
Install GitHub Enterprise Server on VMware
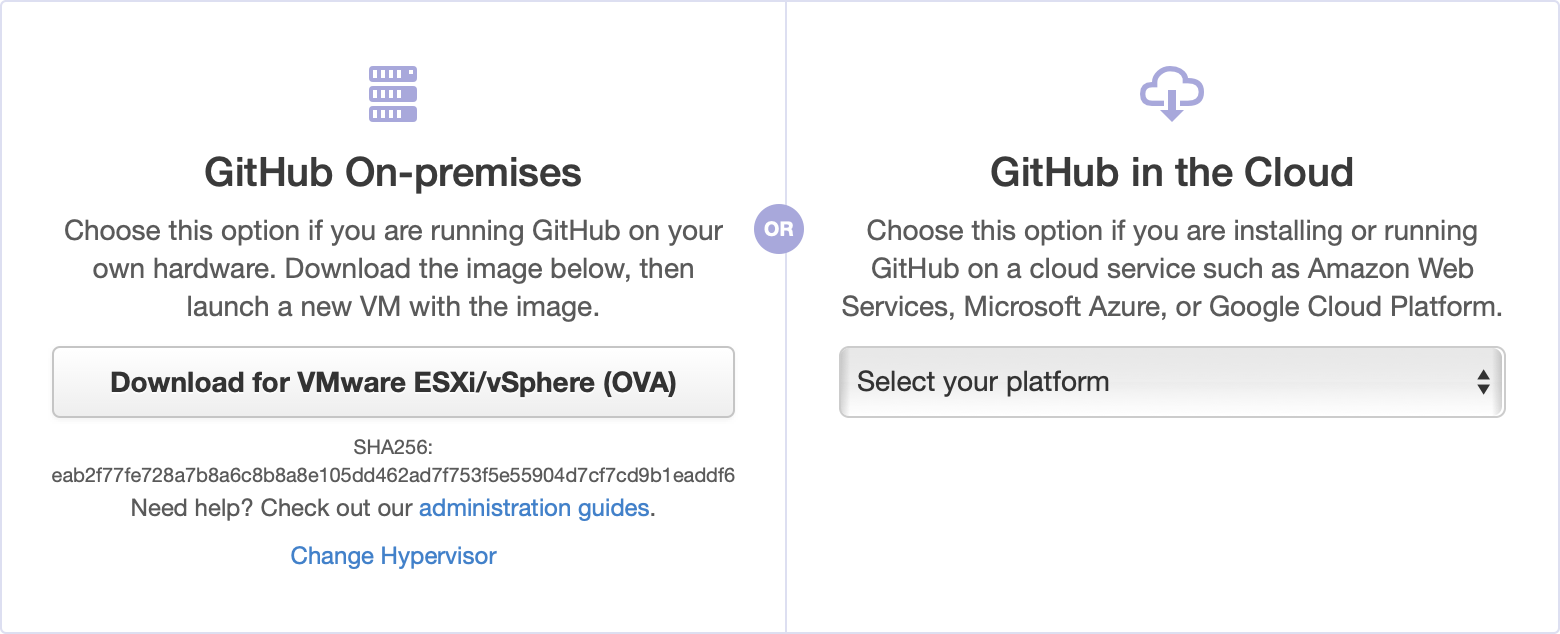
Download the current release of GitHub Enterprise Server for VMware ESXi/vSphere (OVA) and deploy the OVA template you downloaded.
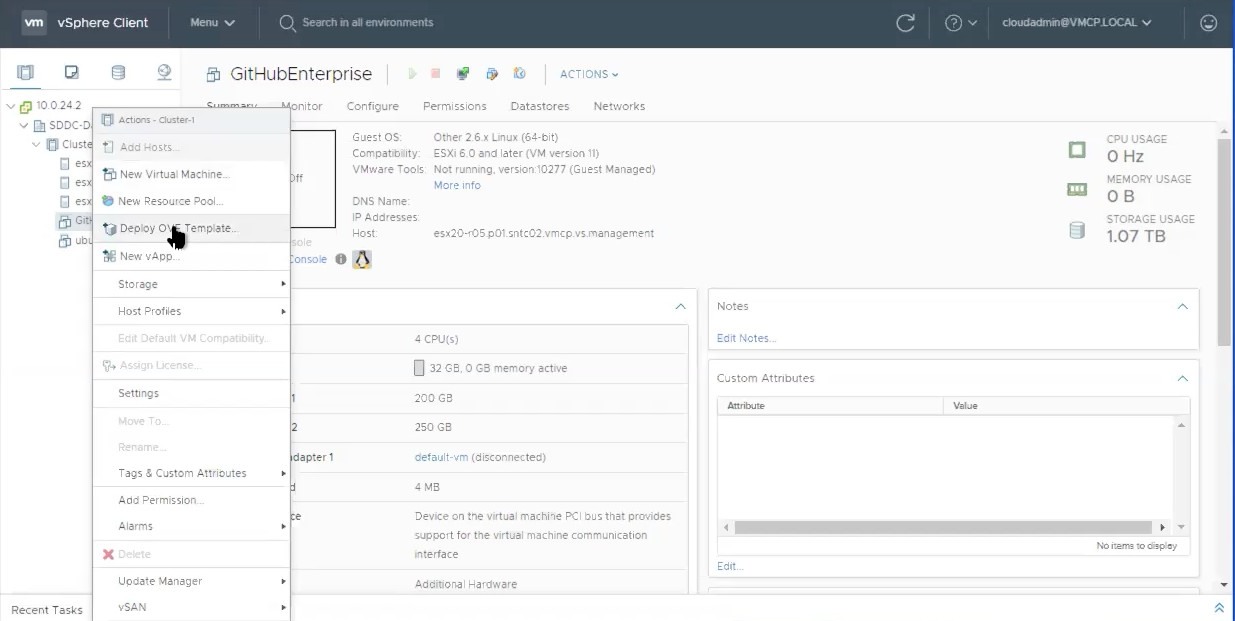
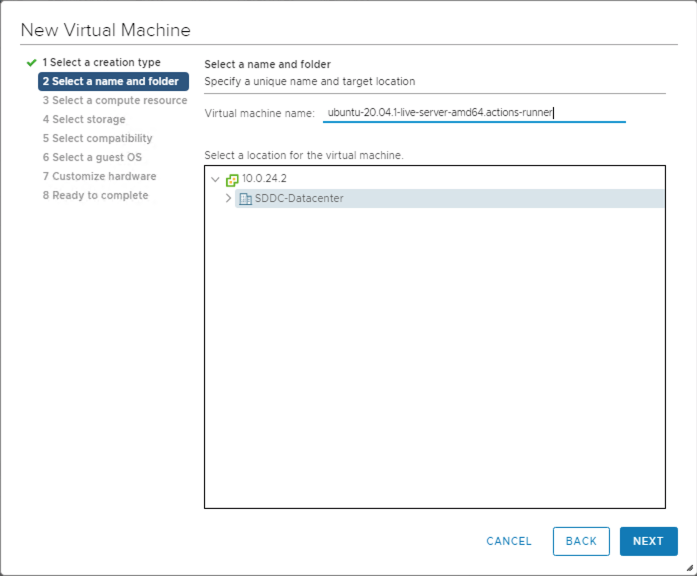
Provide a recognizable name for your new virtual machine, such as GitHubEnterpriseServer. You don't need to include the release details in the VM name, as these details become stale when the instance is upgraded.
Select all the defaults for now (details to be edited later) and wait for the OVA to be imported.
Once imported, adjust the hardware configuration based on your needs. In our example scenario, we need the following configuration.
Resource Standard Setup Standard Set up + "Beta Features" (Actions) vCPUs 4 8 Memory 32 GB 61 GB Attached storage 250 GB 300 GB Root storage 200 GB 200 GB Your needs can vary. Refer to the guidance on hardware considerations in Installing GitHub Enterprise Server on VMware. Also see Adding CPU or memory resources for VMware to customize the hardware configuration based on your situation.
Configure the GitHub Enterprise Server instance
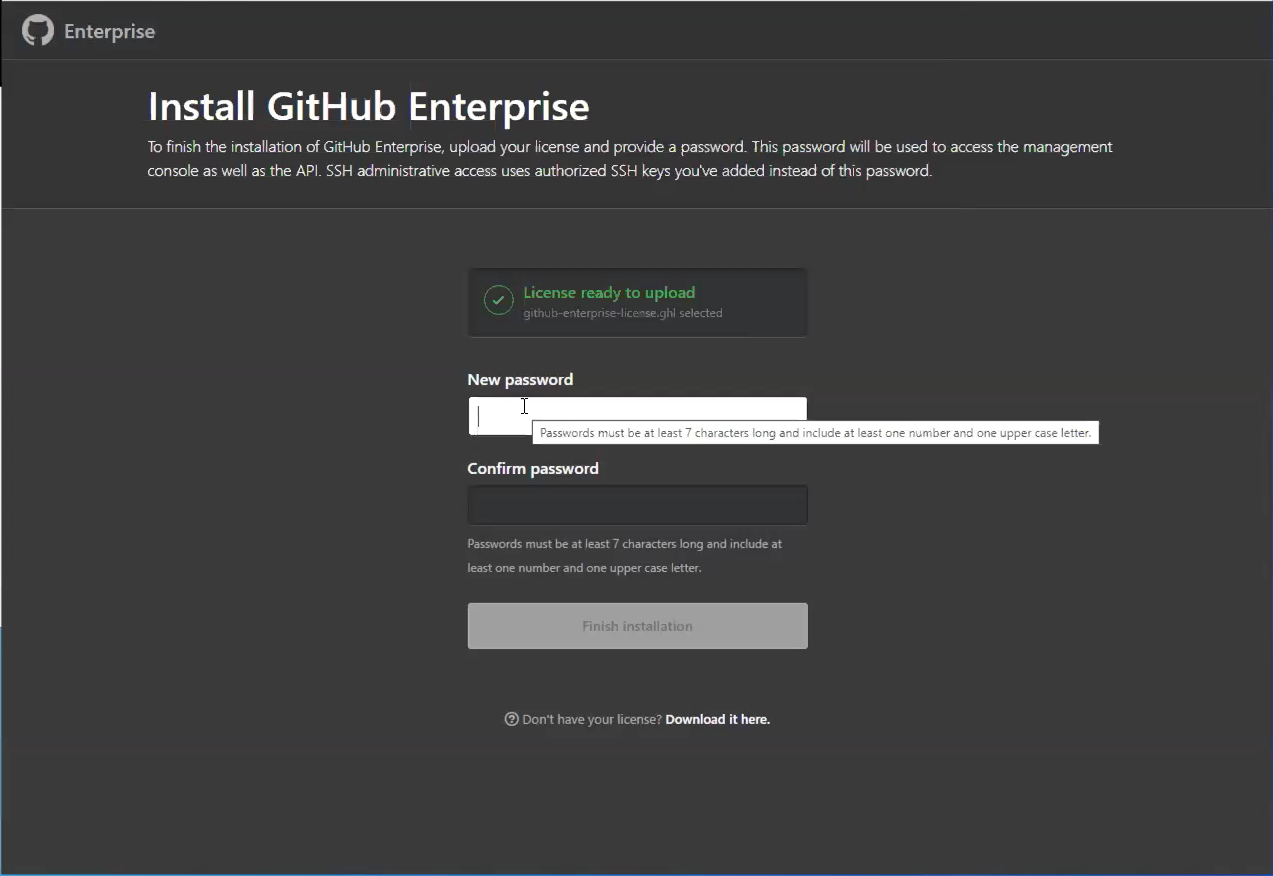
After the newly provisioned virtual machine (VM) is powered on, configure it through your browser. You need to upload your license file and set a management console password. Be sure to write down this password somewhere safe.
We recommend at least take the following steps:
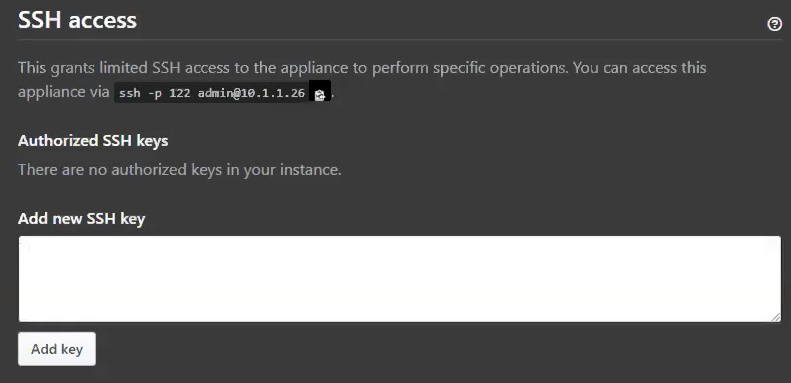
Upload a public SSH key to the management console so that you can access the administrative shell via SSH.
Configure TLS on your instance so that you can use a certificate signed by a trusted certificate authority. Apply your settings.

While the instance restarts, configure blob storage for GitHub Actions.
Note
GitHub Actions is currently available as a limited beta on GitHub Enterprise Server release 2.22.
External blob storage is necessary to enable GitHub Actions on GitHub Enterprise Server (currently available as a "beta" feature). Actions use this external blob storage to store artifacts and logs. Actions on GitHub Enterprise Server supports Azure Blob Storage as a storage provider (and some others). You need to create a new Azure storage account with a storage account type of BlobStorage.
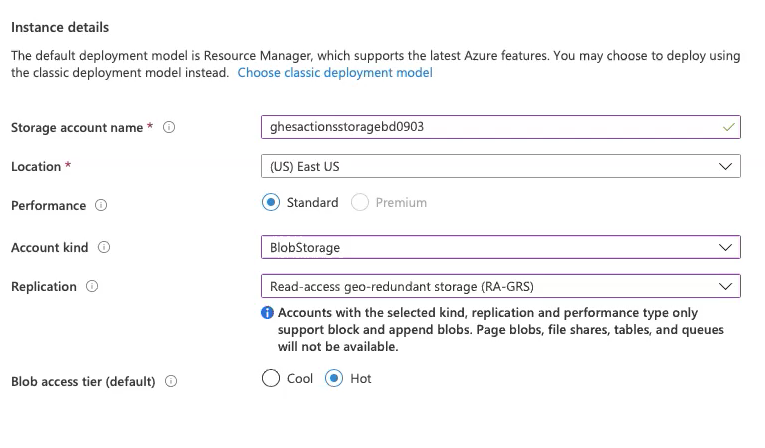
Once the new BlobStorage resource deployment completes, save the connection string (available under Access keys) to use later.
After the instance restarts, create a new admin account on the instance. Be sure to make a note of this user's password as well.

Other configuration steps
To harden your instance for production use, the following optional setup steps are recommended:
Configure high availability for protection against:
- Software crashes (OS or application level)
- Hardware failures (storage, CPU, RAM, and so on)
- Virtualization host system failures
- Logically or physically severed network
Configure backup-utilities, providing versioned snapshots for disaster recovery, hosted in availability that is separate from the primary instance.
Setup subdomain isolation, using a valid TLS certificate, to mitigate cross-site scripting and other related vulnerabilities.
Set up the GitHub Actions runner
Note
GitHub Actions is currently available as a limited beta on GitHub Enterprise Server release 2.22.
At this point, you should have an instance of GitHub Enterprise Server running, with an administrator account created. You should also have external blob storage that GitHub Actions uses for persistence.
Create somewhere for GitHub Actions to run using Azure VMware Solution.
Provision a new VM on the cluster and base it on a recent release of Ubuntu Server.
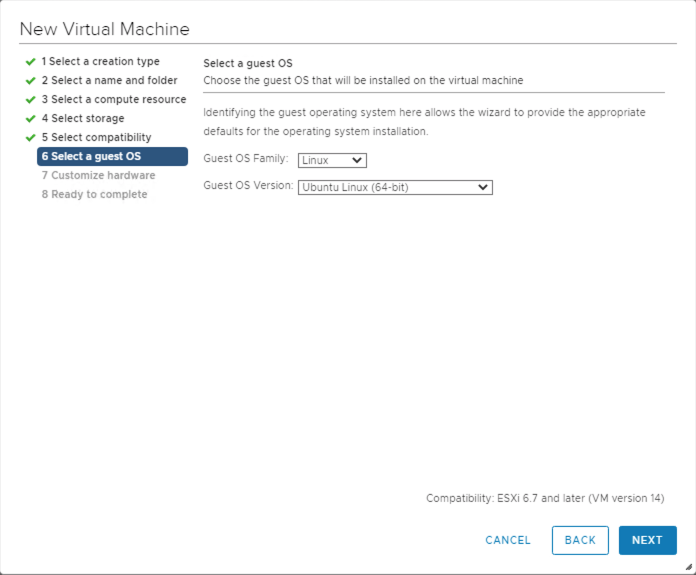
Continue through the setup selecting the compute resource, storage, and compatibility.
Select the guest OS you want installed on the VM.
Once the VM is created, power it up and connect to it via SSH.
Install the Actions runner application, which runs a job from a GitHub Actions workflow. Identify and download the most current Linux x64 release of the Actions runner, either from the releases page or by running the following quick script. This script requires both curl and jq to be present on your VM.
LATEST\_RELEASE\_ASSET\_URL=$( curl https://api.github.com/repos/actions/runner/releases/latest | \

jq -r '.assets | .[] | select(.name | match("actions-runner-linux-arm64")) | .url' )

DOWNLOAD\_URL=$( curl $LATEST\_RELEASE\_ASSET\_URL | \

jq -r '.browser\_download\_url' )

curl -OL $DOWNLOAD\_URL
You should now have a file locally on your VM, actions-runner-linux-arm64-*.tar.gz. Extract this tarball locally:
tar xzf actions-runner-linux-arm64-\*.tar.gzThis extraction unpacks a few files locally, including a
config.shandrun.shscript.
Enable GitHub Actions
Note
GitHub Actions is currently available as a limited beta on GitHub Enterprise Server release 2.22.
Configure and enable GitHub Actions on the GitHub Enterprise Server instance.
Access the GitHub Enterprise Server instance's administrative shell over SSH, and then run the following commands:
Set an environment variable containing your Blob storage connection string.
export CONNECTION\_STRING="<your connection string from the blob storage step>"Configure actions storage.
ghe-config secrets.actions.storage.blob-provider azure

ghe-config secrets.actions.storage.azure.connection-string "$CONNECTION\_STRING`
Apply the settings.
ghe-config-applyExecute a precheck to install more software required by Actions on GitHub Enterprise Server.
ghe-actions-precheck -p azure -cs "$CONNECTION\_STRING"Enable actions, and reapply the configuration.
ghe-config app.actions.enabled true

ghe-config-apply
Check the health of your blob storage.
ghe-actions-check -s blobYou should see output: Blob Storage is healthy.
Now that GitHub Actions is configured, enable it for your users. Sign in to your GitHub Enterprise Server instance as an administrator, and select the
 in the upper right corner of any page.
In the left sidebar, select Enterprise overview, then Policies, Actions, and select the option to enable Actions for all organizations.
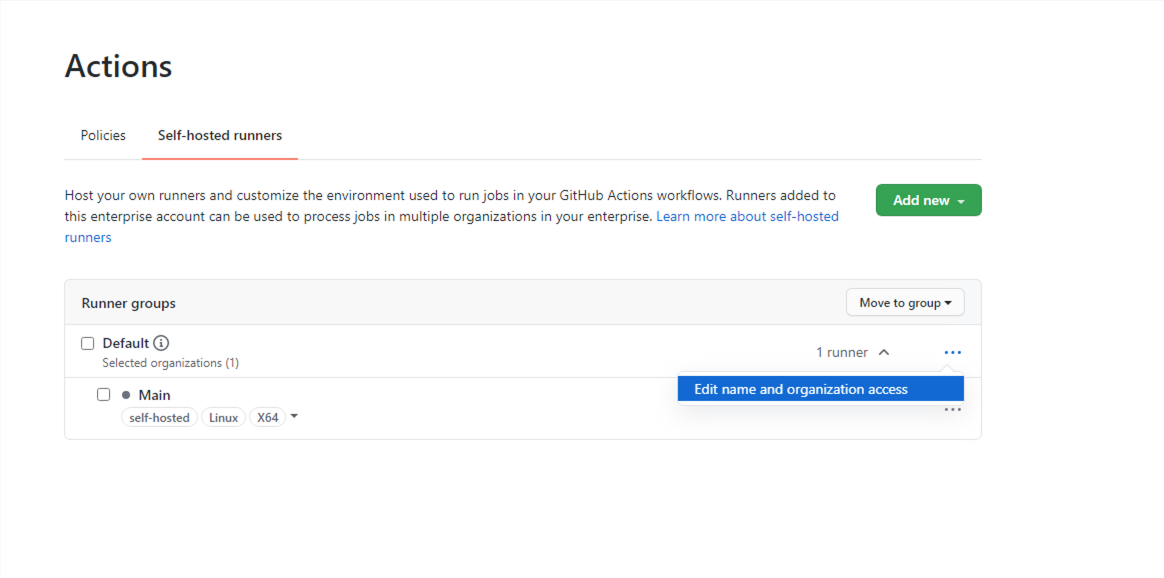
Configure your runner from the Self-hosted runners tab. Select Add new and then New runner from the drop-down. You're presented with a set of commands to run.
Copy the command to configure the runner, for instance:
./config.sh --url https://10.1.1.26/enterprises/octo-org --token AAAAAA5RHF34QLYBDCHWLJC7L73MACopy the
config.shcommand and paste it into a session on your Actions runner (created previously).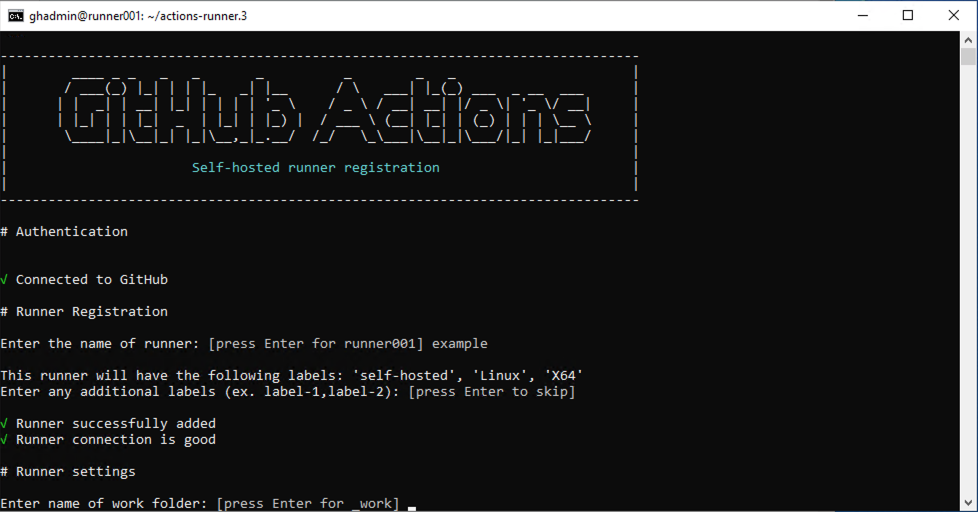
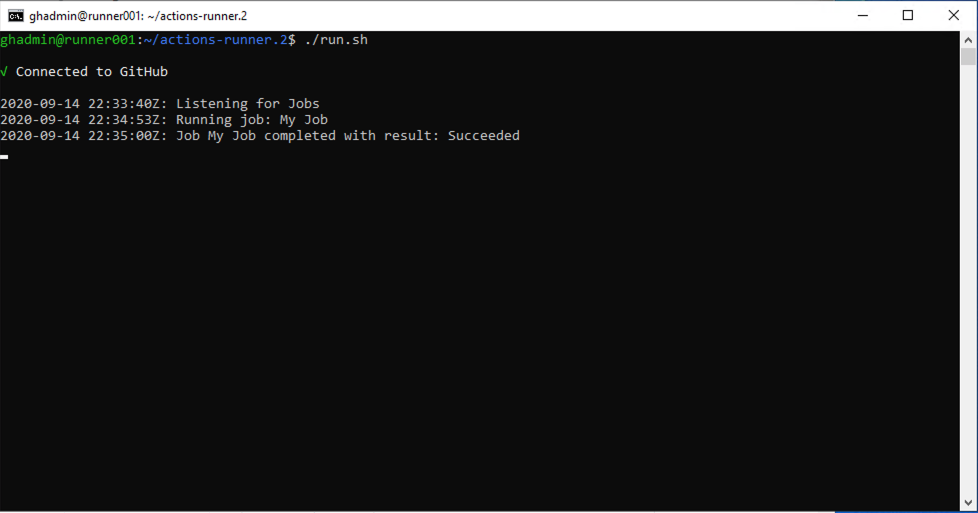
Use the
./run.shcommand to run the runner:Tip
To make this runner available to organizations in your enterprise, edit its organization access. You can limit access to a subset of organizations, and even to specific repositories.
(Optional) Configure GitHub Connect
Although this step is optional, we recommend it if you plan to consume open-source actions available on GitHub.com. It allows you to build on the work of others by referencing these reusable actions in your workflows.
To enable GitHub Connect, follow the steps in Enabling automatic access to GitHub.com actions using GitHub Connect.
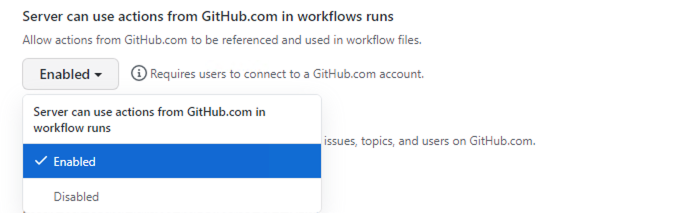
Once GitHub Connect is enabled, select the Server to use actions from GitHub.com in workflow runs option.
Set up and run your first workflow
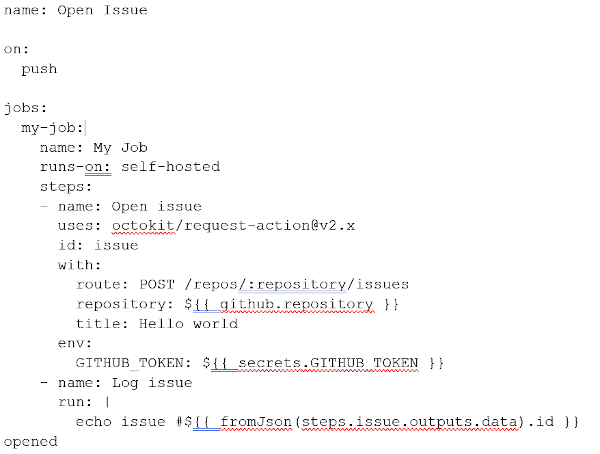
Now that Actions and GitHub Connect is set up, let's put all this work to good use. Here's an example workflow that references the excellent octokit/request-action, allowing us to "script" GitHub through interactions using the GitHub API, powered by GitHub Actions.
In this basic workflow, use octokit/request-action to open an issue on GitHub using the API.
Note
GitHub.com hosts the action, but when it runs on GitHub Enterprise Server, it automatically uses the GitHub Enterprise Server API.
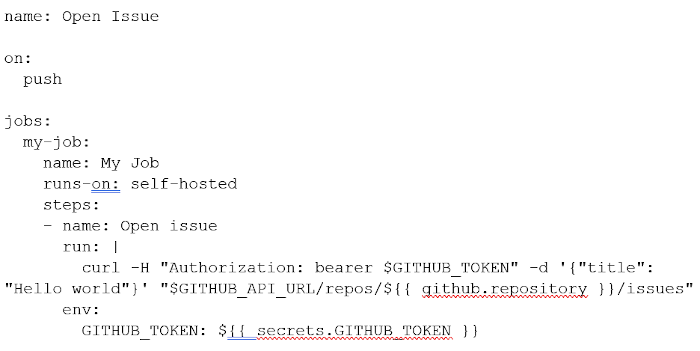
If you chose not to enable GitHub Connect, you could use the following alternative workflow.
Navigate to a repo on your instance, and add the above workflow as:
.github/workflows/hello-world.yml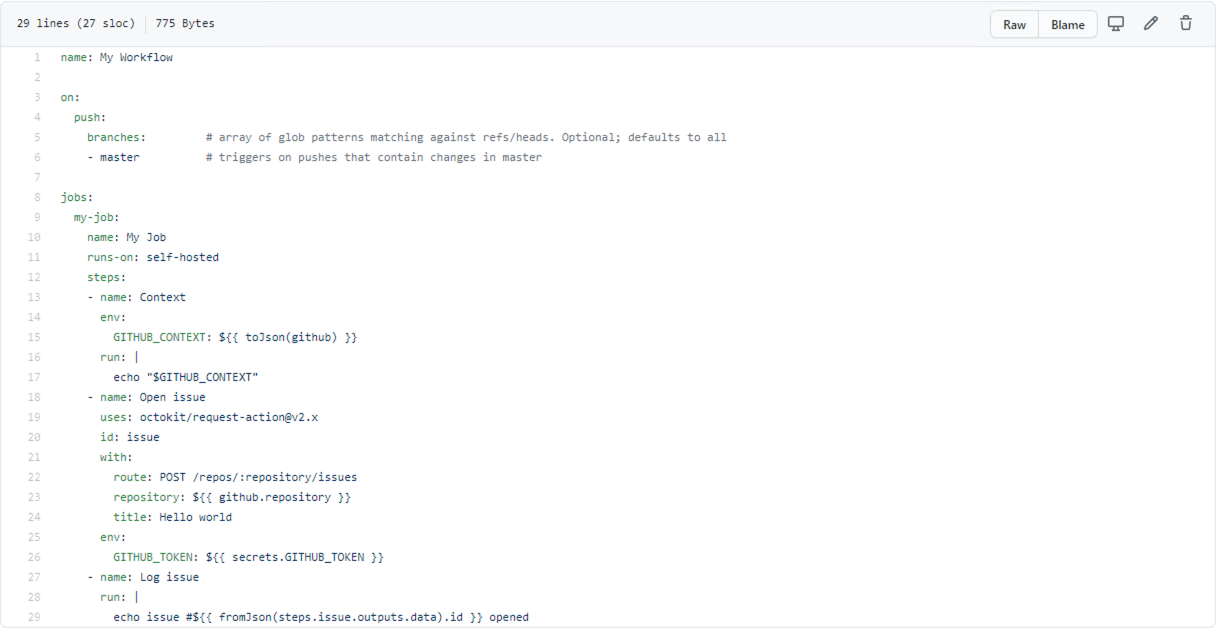
In the Actions tab for your repo, wait for the workflow to execute.
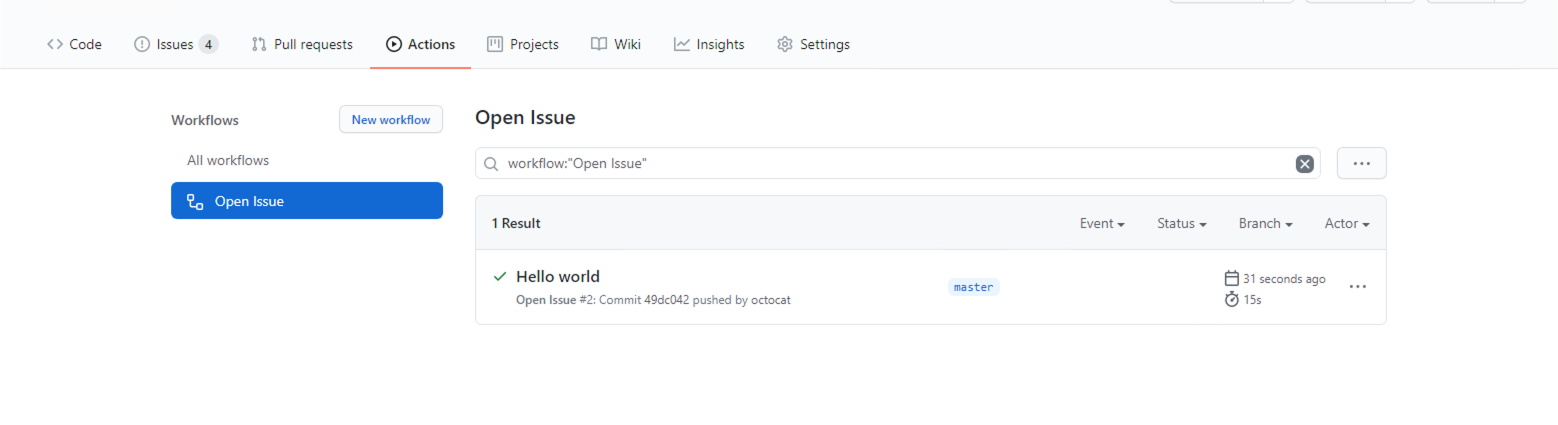
You can see it being processed.
If everything ran successfully, you should see a new issue in your repo, entitled "Hello world."

Congratulations! You just completed your first Actions workflow on GitHub Enterprise Server, running on your Azure VMware Solution private cloud.
This article set up a new instance of GitHub Enterprise Server, the self-hosted equivalent of GitHub.com, on top of your Azure VMware Solution private cloud. The instance includes support for GitHub Actions and uses Azure Blob Storage for persistence of logs and artifacts. But we're just scratching the surface of what you can do with GitHub Actions. Check out the list of Actions on GitHub's Marketplace, or create your own.
Next steps
Now that you covered setting up GitHub Enterprise Server on your Azure VMware Solution private cloud, learn more about:
Feedback
Coming soon: Throughout 2024 we will be phasing out GitHub Issues as the feedback mechanism for content and replacing it with a new feedback system. For more information see: https://aka.ms/ContentUserFeedback.
Submit and view feedback for