Tutorial: Set up a data product batch
In this tutorial, learn how to set up data product services that are already deployed. Use Azure Data Factory to integrate and orchestrate your data, and use Microsoft Purview to discover, manage, and govern data assets.
Learn how to:
- Create and deploy required resources
- Assign roles and access permissions
- Connect resources for data integration
This tutorial helps you become familiar with the services that are deployed in the <DMLZ-prefix>-dev-dp001 sample data product resource group. Experience how the Azure services interface with each other and what security measures are in place.
As you deploy the new components, you'll have a chance to investigate how Purview connects service governance to create a holistic, up-to-date map of your data landscape. The result is automated data discovery, sensitive data classification, and end-to-end data lineage.
Prerequisites
Before you begin setting up your data product batch, make sure you meet these prerequisites:
Azure subscription. If you don't have an Azure subscription, create your Azure free account today.
Permissions to the Azure subscription. To set up Purview and Azure Synapse Analytics for the deployment, you must have the User Access Administrator role or the Owner role in the Azure subscription. You'll set more role assignments for services and service principals in the tutorial.
Deployed resources. To complete the tutorial, these resources must already be deployed in your Azure subscription:
- Data management landing zone. For more information, see the data management landing zone GitHub repository.
- Data landing zone. For more information, see the data landing zone GitHub repository.
- Data product batch. For more information, see the data product batch GitHub repository.
Microsoft Purview account. The account is created as part of your data management landing zone deployment.
Self-hosted integration runtime. The runtime is created as part of your data landing zone deployment.
Note
In this tutorial, placeholders refer to prerequisite resources you deploy before you begin the tutorial:
<DMLZ-prefix>refers to the prefix you entered when you created your data management landing zone deployment.<DLZ-prefix>refers to the prefix you entered when you created your data landing zone deployment.<DP-prefix>refers to the prefix you entered when you created your data product batch deployment.
Create Azure SQL Database instances
To begin this tutorial, create two sample SQL Database instances. You'll use the databases to simulate CRM and ERP data sources in later sections.
In the Azure portal, in the portal global controls, select the Cloud Shell icon to open an Azure Cloud Shell terminal. Select Bash for the terminal type.

In Cloud Shell, run the following script. The script finds the
<DLZ-prefix>-dev-dp001resource group and the<DP-prefix>-dev-sqlserver001Azure SQL server that's in the resource group. Then, the script creates the two SQL Database instances on the<DP-prefix>-dev-sqlserver001server. The databases are prepopulated with AdventureWorks sample data. The data includes the tables you use in this tutorial.Make sure you replace the
subscriptionparameter placeholder value with your own Azure subscription ID.# Azure SQL Database instances setup # Create the AdatumCRM and AdatumERP databases to simulate customer and sales data. # Use the ID for the Azure subscription you used to deployed the data product. az account set --subscription "<your-subscription-ID>" # Get the resource group for the data product. resourceGroupName=$(az group list -o tsv --query "[?contains(@.name, 'dp001')==\`true\`].name") # Get the existing Azure SQL Database server name. sqlServerName=$(az sql server list -g $resourceGroupName -o tsv --query "[?contains(@.name, 'sqlserver001')==\`true\`].name") # Create the first SQL Database instance, AdatumCRM, to create the customer's data source. az sql db create --resource-group $resourceGroupName --server $sqlServerName --name AdatumCRM --service-objective Basic --sample-name AdventureWorksLT # Create the second SQL Database instance, AdatumERP, to create the sales data source. az sql db create --resource-group $resourceGroupName --server $sqlServerName --name AdatumERP --service-objective Basic --sample-name AdventureWorksLT
When the script is finished running, on the <DP-prefix>-dev-sqlserver001 Azure SQL server, you have two new SQL Database instances, AdatumCRM and AdatumERP. Both databases are on the Basic compute tier. The databases are located in the same <DLZ-prefix>-dev-dp001 resource group you used to deploy the data product batch.
Set up Purview to catalog the data product batch
Next, complete the steps to set up Purview to catalog the data product batch. You begin by creating a service principal. Then, you set up required resources and assign roles and access permissions.
Create a service principal
In the Azure portal, in the portal global controls, select the Cloud Shell icon to open an Azure Cloud Shell terminal. Select Bash for the terminal type.
Revise the following script:
- Replace the
subscriptionIdparameter placeholder value with your own Azure subscription ID. - Replace the
spnameparameter placeholder value with the name you want to use for your service principal. The service principal name must be unique in the subscription.
After you update the parameter values, run the script in Cloud Shell.
# Replace the parameter values with the name you want to use for your service principal name and your Azure subscription ID. spname="<your-service-principal-name>" subscriptionId="<your-subscription-id>" # Set the scope to the subscription. scope="/subscriptions/$subscriptionId" # Create the service principal. az ad sp create-for-rbac \ --name $spname \ --role "Contributor" \ --scope $scope- Replace the
Check the JSON output for a result that's similar to the following example. Note or copy the values in the output to use in later steps.
{
  "appId": "<your-app-id>",
  "displayName": "<service-principal-display-name>",
  "name": "<your-service-principal-name>",
  "password": "<your-service-principal-password>",
  "tenant": "<your-tenant>"
}
Set up service principal access and permissions
From the JSON output generated in the preceding step, get the following returned values:
- service principal ID (
appId) - service principal key (
password)
The service principal must have the following permissions:
- Storage Blob Data Reader role on the storage accounts.
- Data Reader permissions on the SQL Database instances.
To set up the service principal with the required role and permissions, complete the following steps.
Azure Storage account permissions
In the Azure portal, go to the
<DLZ-prefix>devrawAzure Storage account. In the resource menu, select Access Control (IAM).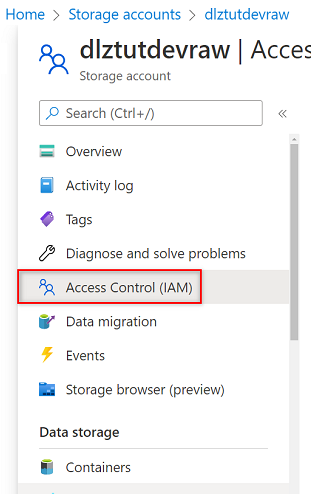
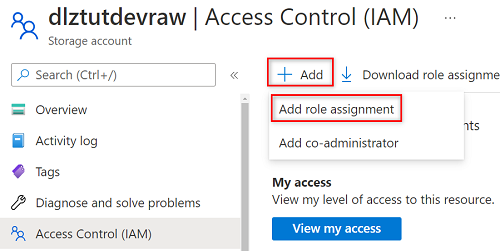
Select Add > Add role assignment.
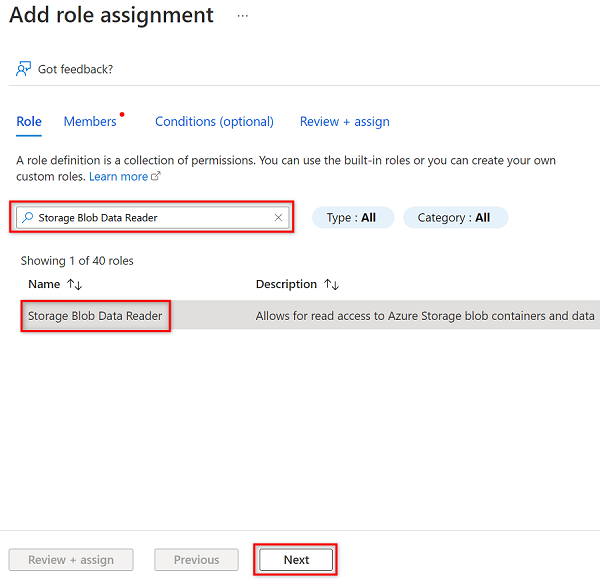
In Add role assignment, on the Role tab, search for and select Storage Blob Data Reader. Then, select Next.
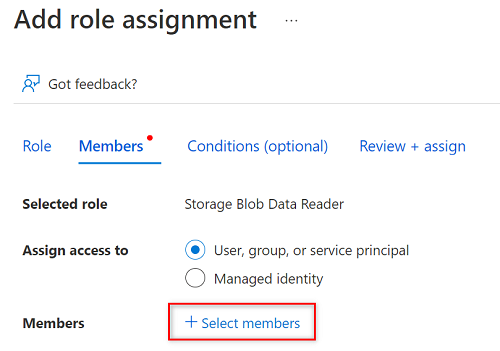
In Members, choose Select members.
In Select members, search for the name of the service principal you created.
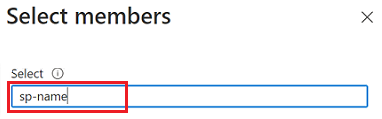
In the search results, select the service principal, and then choose Select.

To complete the role assignment, select Review + assign twice.
Repeat the steps in this section for the remaining storage accounts:
<DLZ-prefix>devencur<DLZ-prefix>devwork
SQL Database permissions
To set SQL Database permissions, you connect to the Azure SQL virtual machine by using the query editor. Because all the resources are behind a private endpoint, you must first sign in to the Azure portal by using an Azure Bastion host virtual machine.
In the Azure portal, connect to the virtual machine that's deployed in the <DMLZ-prefix>-dev-bastion resource group. If you're not sure how to connect to the virtual machine by using the Bastion host service, see Connect to a VM.
To add the service principal as a user in the database, you might first need to add yourself as the Microsoft Entra admin. In steps 1 and 2, you add yourself as the Microsoft Entra admin. In steps 3 to 5, you give the service principal permissions to a database. When you're signed in to the portal from the Bastion host virtual machine, search for Azure SQL virtual machines in the Azure portal.
Go to the
<DP-prefix>-dev-sqlserver001Azure SQL virtual machine. In the resource menu under Settings, select Microsoft Entra ID.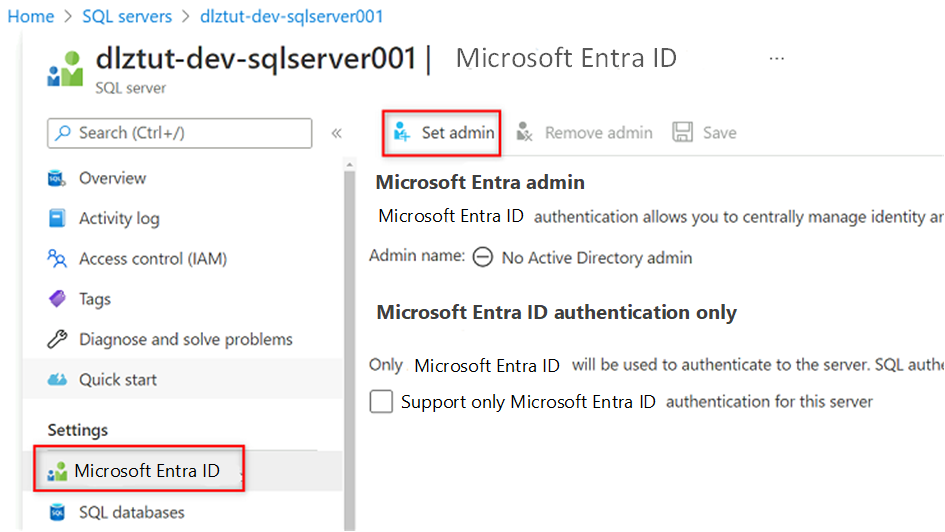
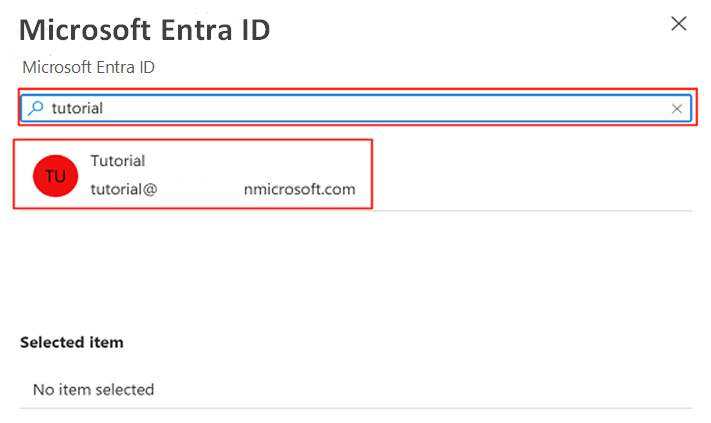
In the command bar, select Set admin. Search for and select your own account. Choose Select.
In the resource menu, select SQL databases, and then select the
AdatumCRMdatabase.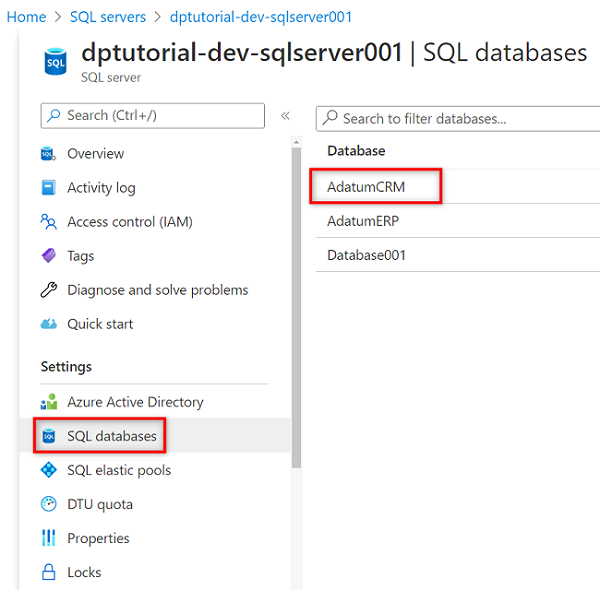
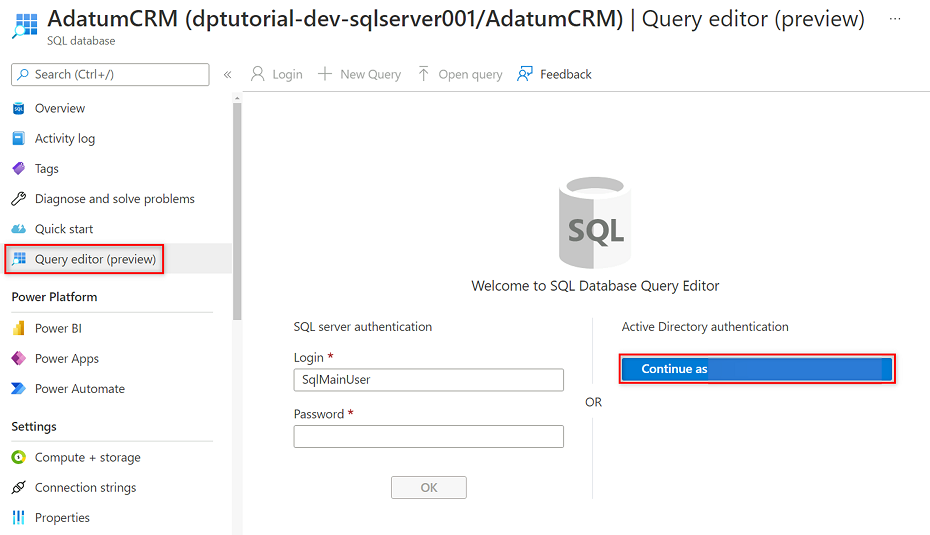
In the AdatumCRM resource menu, select Query editor (preview). Under Active Directory authentication, select the Continue as button to sign in.
In the query editor, revise the following statements to replace
<service principal name>with the name of the service principal you created (for example,purview-service-principal). Then, run the statements.CREATE USER [<service principal name>] FROM EXTERNAL PROVIDER GO EXEC sp_addrolemember 'db_datareader', [<service principal name>] GO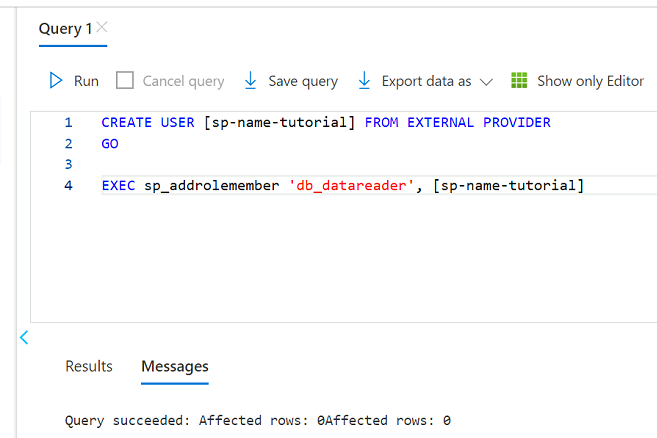
Repeat steps 3 to 5 for the AdatumERP database.
Set up the key vault
Purview reads the service principal key from an instance of Azure Key Vault. The key vault is created in your data management landing zone deployment. The following steps are required to set up the key vault:
Add the service principal key to the key vault as a secret.
Give the Purview MSI Secrets Reader permissions in the key vault.
Add the key vault to Purview as a key vault connection.
Create a credential in Purview that points to the key vault secret.
Add permissions to add secret to the key vault
In the Azure portal, go to the Azure Key Vault service. Search for the
<DMLZ-prefix>-dev-vault001key vault.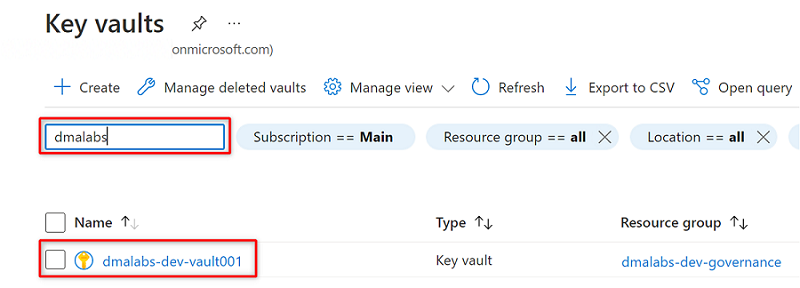
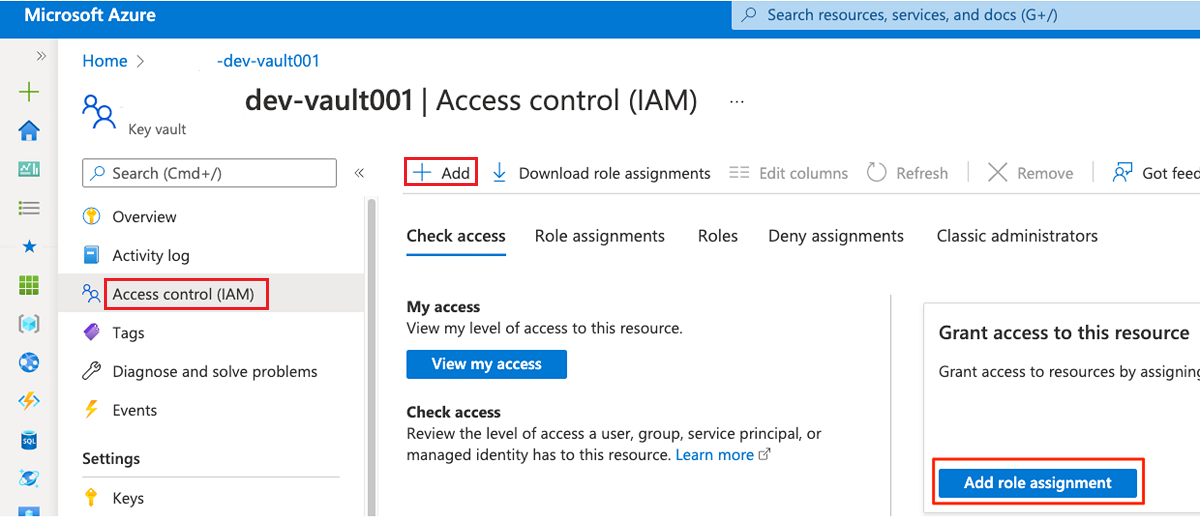
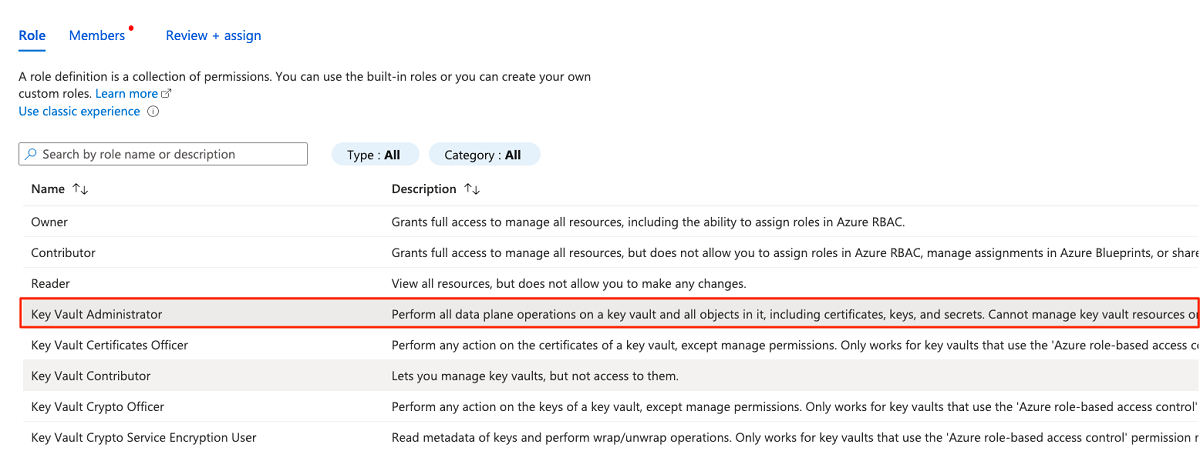
In the resource menu, select Access control (IAM). In the command bar, select Add, and then select Add role assignment.
On the Role tab, search for and then select Key Vault Administrator. Select Next.
In Members, choose Select members to add the account that's currently signed in.
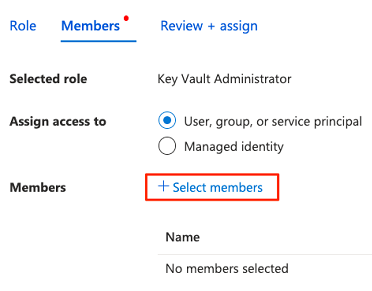
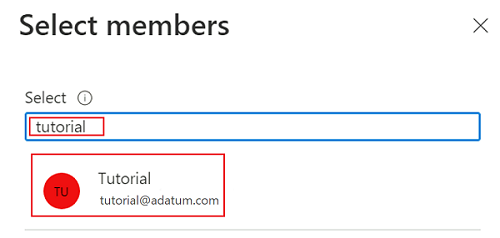
In Select members, search for the account that's currently signed in. Select the account, and then choose Select.
To complete the role assignment process, select Review + assign twice.
Add a secret to the key vault
Complete the following steps to sign in to the Azure portal from the Bastion host virtual machine.
In the
<DMLZ-prefix>-dev-vault001key vault resource menu, select Secrets. In the command bar, select Generate/Import to create a new secret.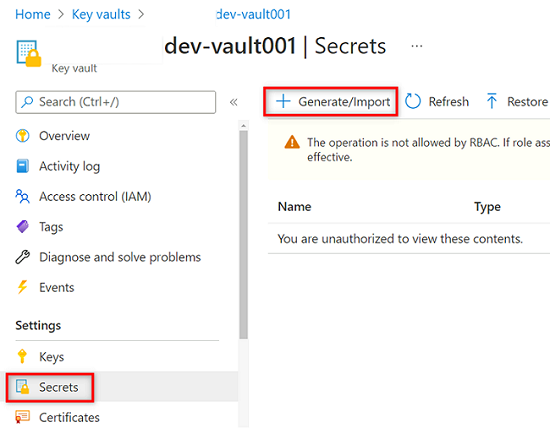
In Create a secret, select or enter the following values:
Setting Action Upload options Select Manual. Name Enter service-principal-secret. Value Enter the service principal password you created earlier. 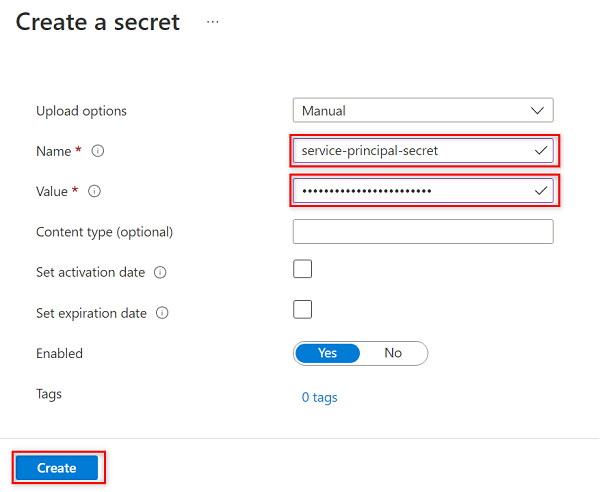
Note
This step creates a secret named
service-principal-secretin the key vault by using the service principal password key. Purview uses the secret to connect to and scan the data sources. If you enter an incorrect password, you won't be able to complete the following sections.Select Create.
Set up Purview permissions in the key vault
For the Purview instance to read the secrets that are stored in the key vault, you must assign Purview the relevant permissions in the key vault. To set the permissions, you add the Purview Managed Identity to the key vault Secrets Reader role.
In the
<DMLZ-prefix>-dev-vault001key vault resource menu, select Access control (IAM).In the command bar, select Add, and then select Add role assignment.

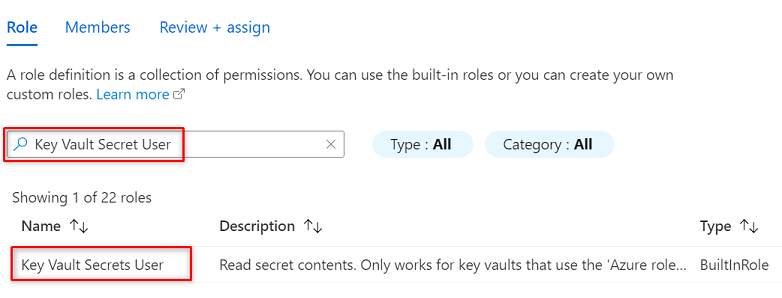
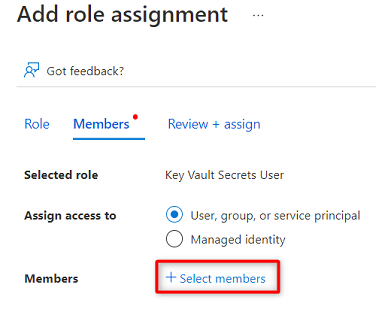
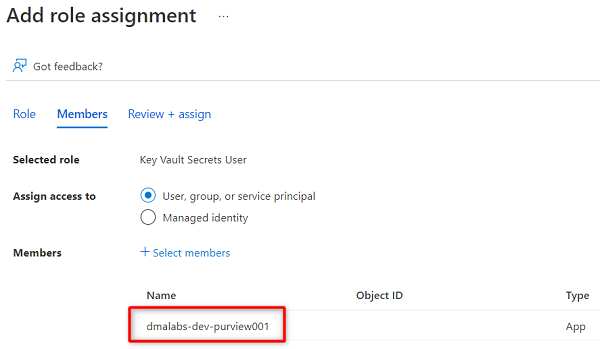
In Role, search for and select Key Vault Secrets User. Select Next.
In Members, choose Select members.
Search for the
<DMLZ-prefix>-dev-purview001Purview instance. Select the instance to add the relevant account. Then, choose Select.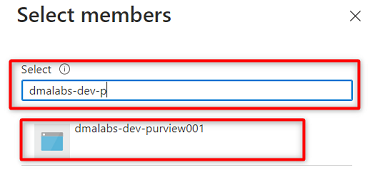
To complete the role assignment process, select Review + assign twice.
Set up a key vault connection in Purview
To set up a key vault connection to Purview, you must sign in to the Azure portal by using an Azure Bastion host virtual machine.
In the Azure portal, go to the
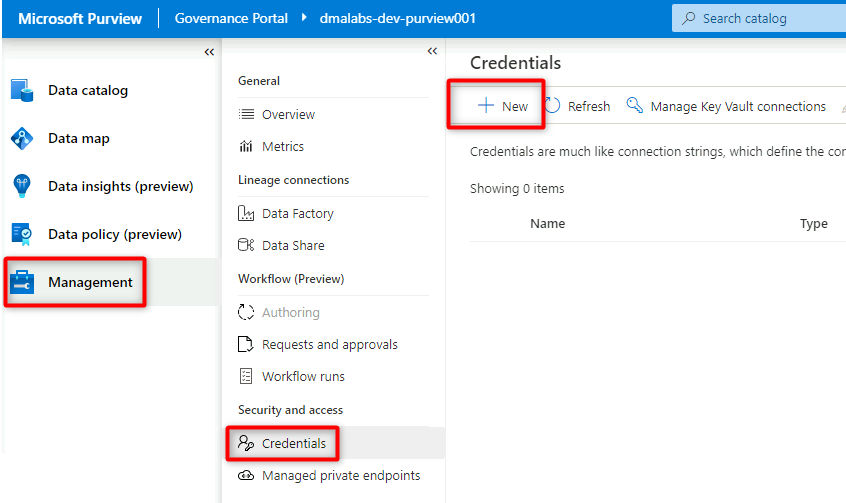
<DMLZ-prefix>-dev-purview001Purview account. Under Getting started, in Open Microsoft Purview Governance Portal, select Open.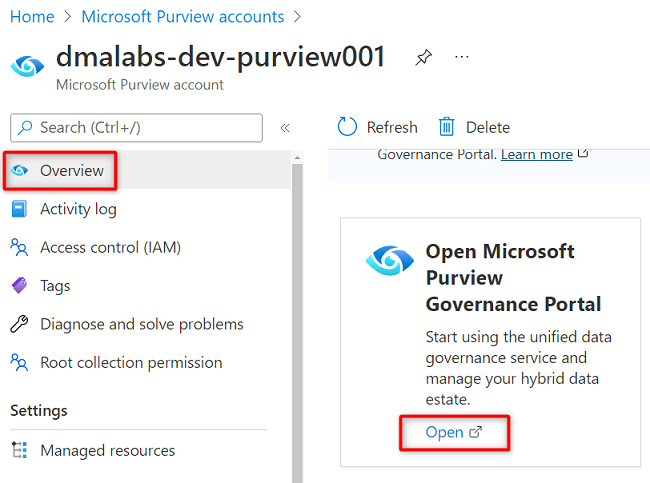
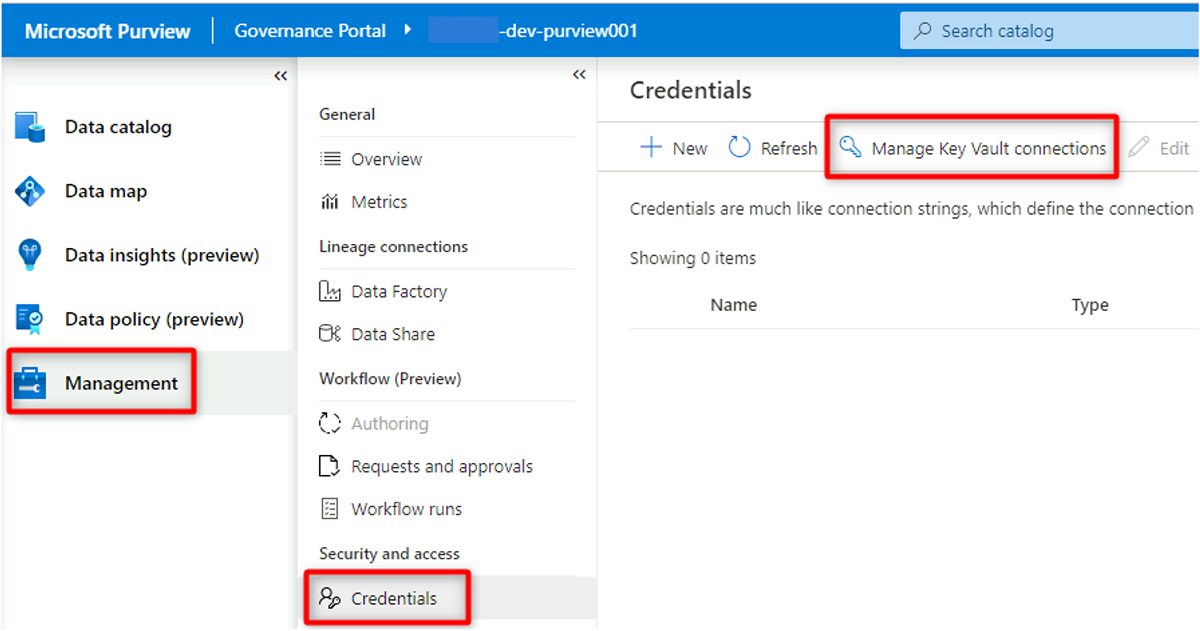
In Purview Studio, select Management > Credentials. In the Credentials command bar, select Manage Key Vault connections, and then select New.
In New key vault connection, select or enter the following information:
Setting Action Name Enter <DMLZ-prefix>-dev-vault001. Azure Subscription Select the subscription that hosts the key vault. Key Vault Name Select the <DMLZ-prefix>-dev-vault001 key vault. 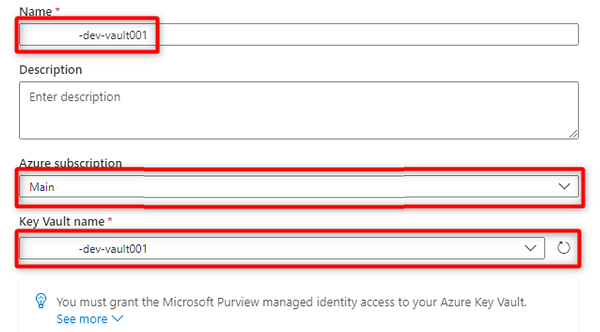
Select Create.
In Confirm granting access, select Confirm.
Create a credential in Purview
The final step to set up key vault is to create a credential in Purview that points to the secret you created in the key vault for the service principal.
In Purview Studio, select Management > Credentials. In the Credentials command bar, select New.
In New credential, select or enter the following information:
Setting Action Name Enter purviewServicePrincipal. Authentication method Select Service principal. Tenant ID The value is automatically populated. Service principal ID Enter the application ID or client ID of the service principal. Key Vault connection Select the key vault connection you created in the preceding section. Secret name Enter the name of the secret in the key vault (service-principal-secret). 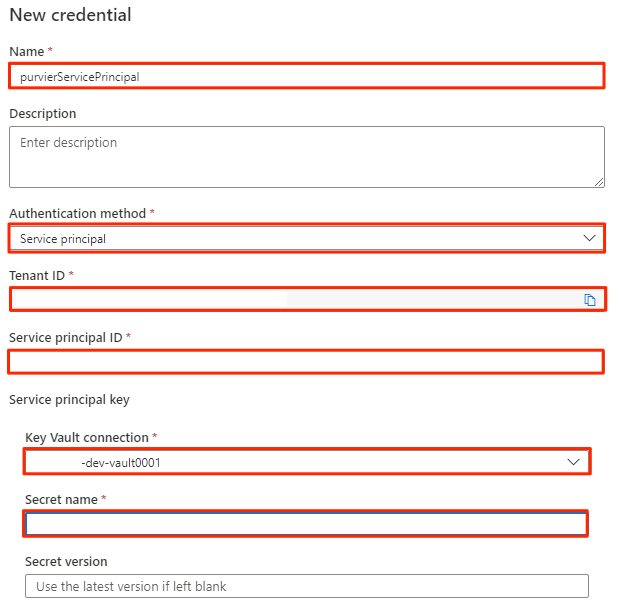
Select Create.
Register data sources
At this point, Purview can connect to the service principal. Now you can register and set up the data sources.
Register Azure Data Lake Storage Gen2 accounts
The following steps outline the process to register an Azure Data Lake Storage Gen2 storage account.
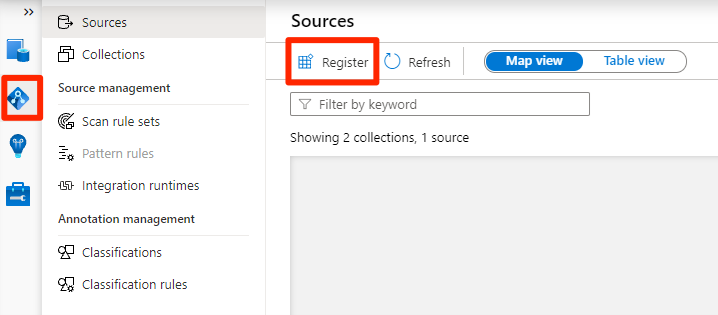
In Purview Studio, select the data map icon, select Sources, and then select Register.
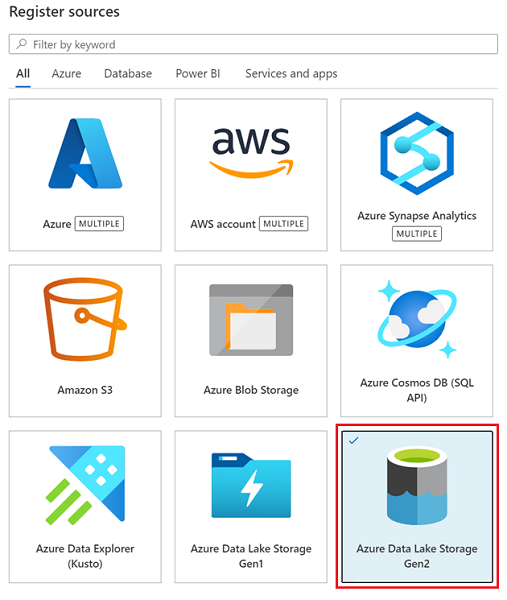
In Register sources, select Azure Data Lake Storage Gen2, and then select Continue.
In Register sources (Azure Data Lake Storage Gen2), select or enter the following information:
Setting Action Name Enter <DLZ-prefix>dldevraw. Azure subscription Select the subscription that hosts the storage account. Storage account name Select the relevant storage account. Endpoint The value is automatically populated based on the selected storage account. Select a collection Select the root collection. 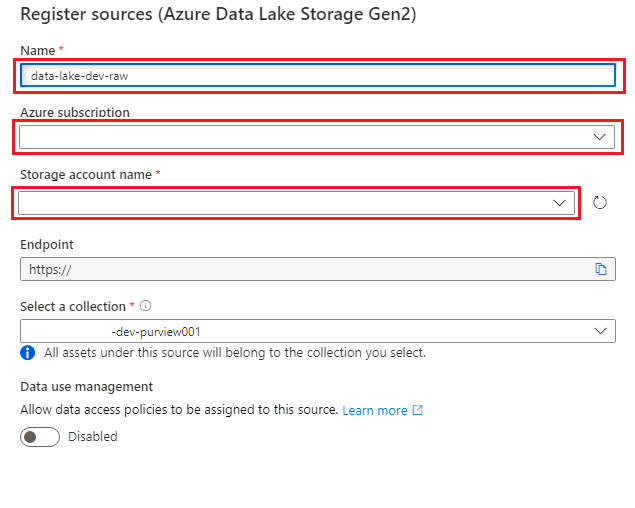
Select Register to create the data source.
Repeat these steps for the following storage accounts:
<DMLZ-prefix>devencur<DMLZ-prefix>devwork
Register the SQL Database instance as a data source
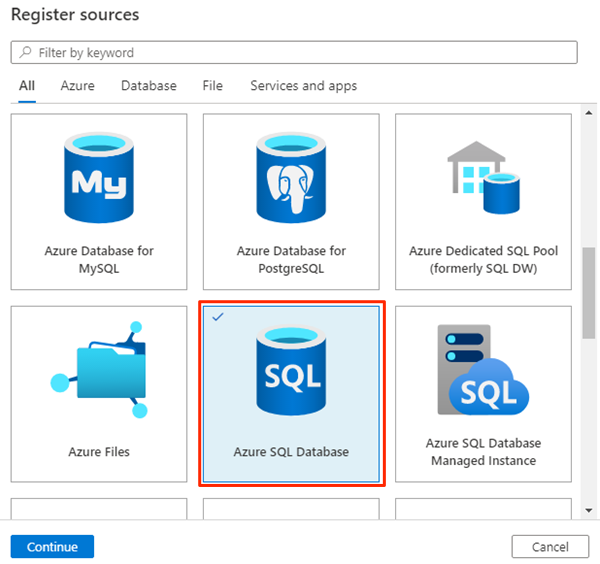
In Purview Studio, select the Data map icon, select Sources, and then select Register.
In Register sources, select Azure SQL Database, and then select Continue.
In Register sources (Azure SQL Database), select or enter the following information:
Setting Action Name Enter SQLDatabase (the name of the database created in Create Azure SQL Database instances). Subscription Select the subscription that hosts the database. Server name Enter <DP-prefix>-dev-sqlserver001. 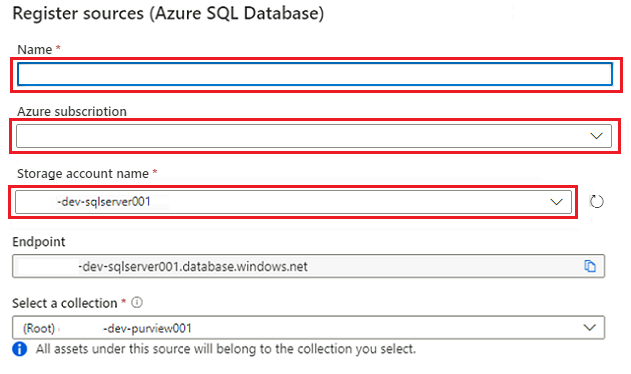
Select Register.
Set up scans
Next, set up scans for the data sources.
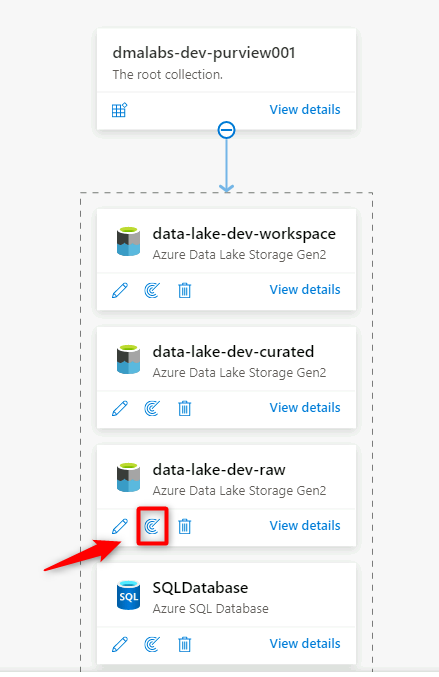
Scan the Data Lake Storage Gen2 data source
In Purview Studio, go to the data map. On the data source, select the New scan icon.
In the new scan pane, select or enter the following information:
Setting Action Name Enter Scan_<DLZ-prefix>devraw. Connect via integration runtime Select the self-hosted integration runtime that was deployed with the data landing zone. Credential Select the service principal you set up for Purview. 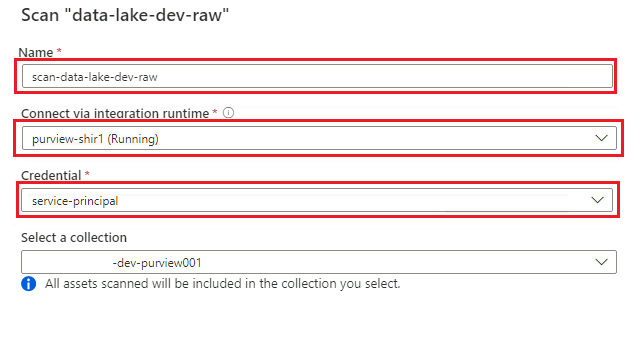
Select Test connection to verify the connectivity and that permissions are in place. Select Continue.
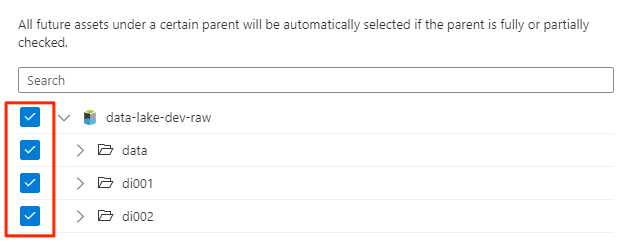
In Scope your scan, select the entire storage account as the scope for the scan, and then select Continue.
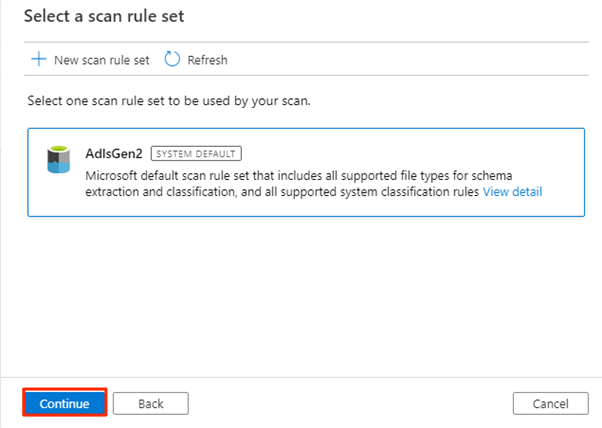
In Select a scan rule set, select AdlsGen2, and then select Continue.
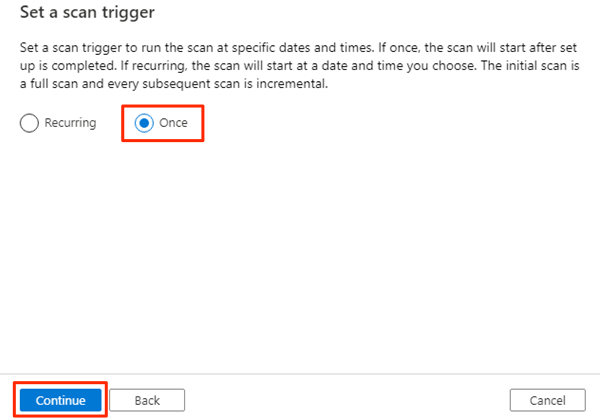
In Set a scan trigger, select Once, and then select Continue.
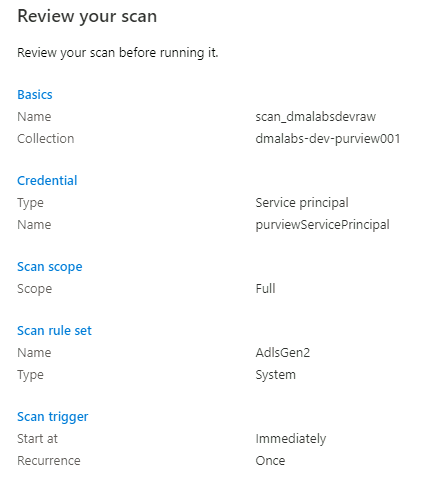
In Review your scan, review the scan settings. Select Save and Run to start the scan.
Repeat these steps for the following storage accounts:
<DMLZ-prefix>devencur<DMLZ-prefix>devwork
Scan the SQL Database data source
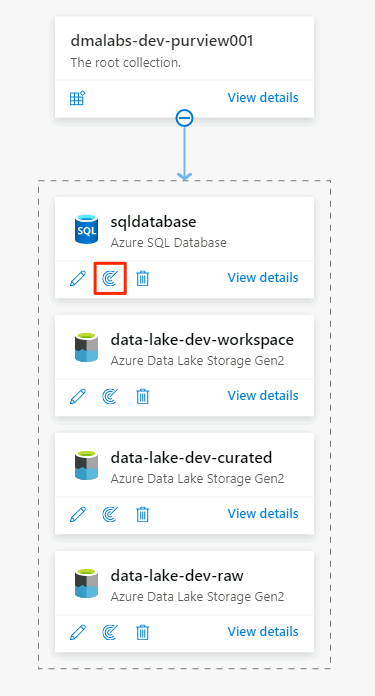
In the Azure SQL Database data source, select New Scan.
In the new scan pane, select or enter the following information:
Setting Action Name Enter Scan_Database001. Connect via integration runtime Select Purview-SHIR. Database name Select the database name. Credential Select the key vault credential you created in Purview. Lineage extraction (preview) Select Off. 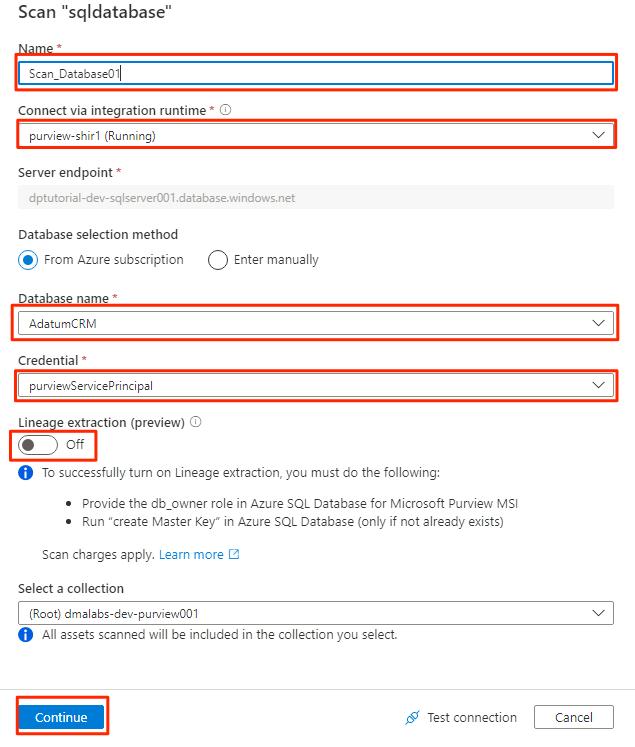
Select Test connection to verify the connectivity and that permissions are in place. Select Continue.
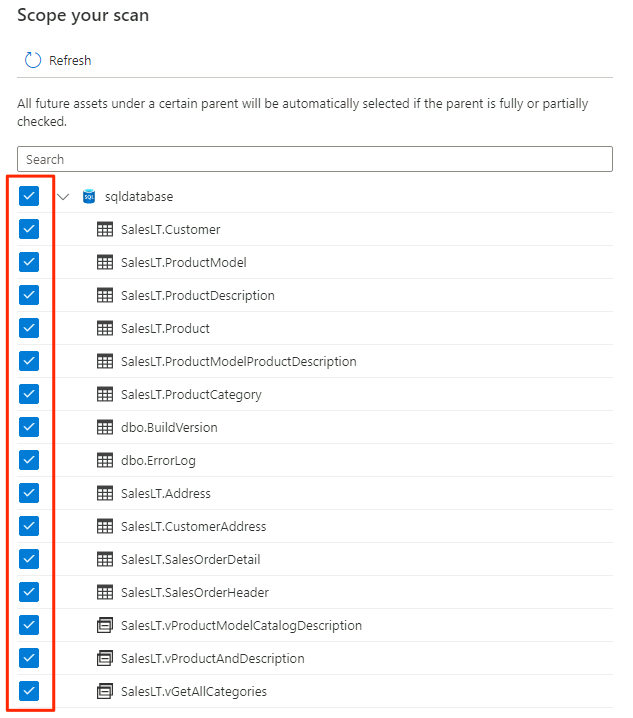
Select the scope for the scan. To scan the entire database, use the default value.
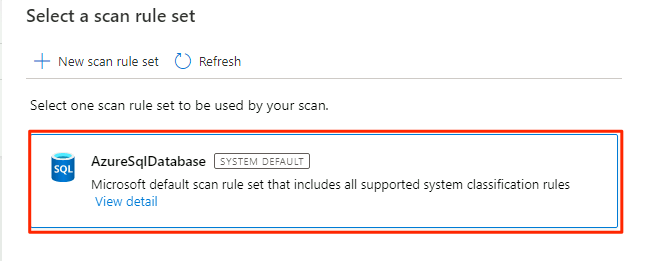
In Select a scan rule set, select AzureSqlDatabase, and then select Continue.
In Set a scan trigger, select Once, and then select Continue.

In Review your scan, review the scan settings. Select Save and Run to start the scan.
Repeat these steps for the AdatumERP database.
Purview is now set up for data governance for the registered data sources.
Copy SQL Database data to Data Lake Storage Gen2
In the following steps, you use the Copy Data tool in Data Factory to create a pipeline to copy the tables from the SQL Database instances AdatumCRM and AdatumERP to CSV files in the <DLZ-prefix>devraw Data Lake Storage Gen2 account.
The environment is locked to public access, so first you need to set up private endpoints. To use the private endpoints, you'll sign in to the Azure portal in your local browser, and then connect to the Bastion host virtual machine to access the required Azure services.
Create private endpoints
To set up private endpoints for the required resources:
In the
<DMLZ-prefix>-dev-bastionresource group, select<DMLZ-prefix>-dev-vm001.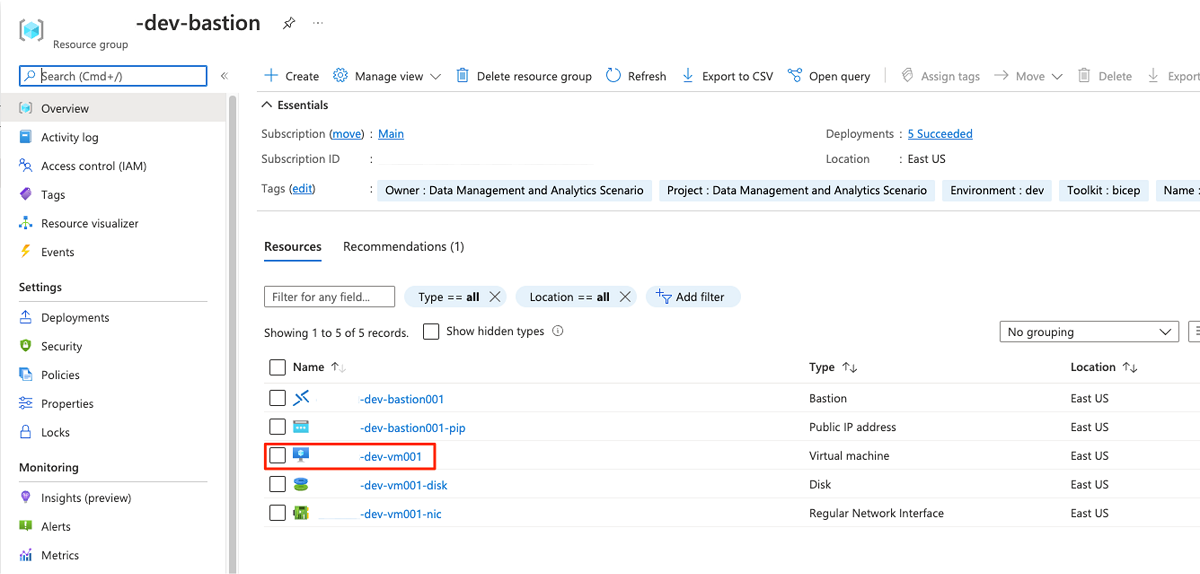
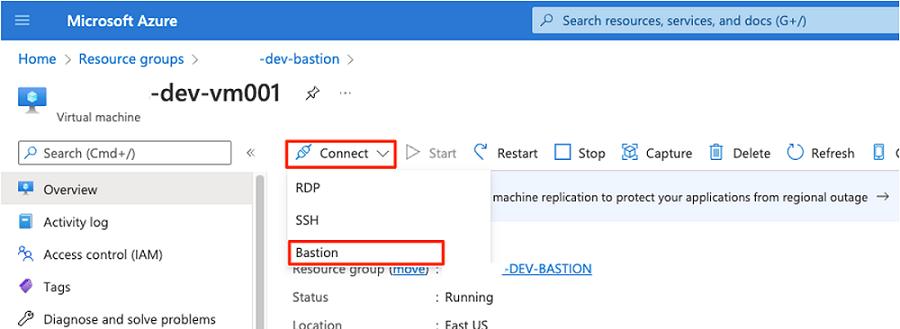
In the command bar, select Connect and select Bastion.
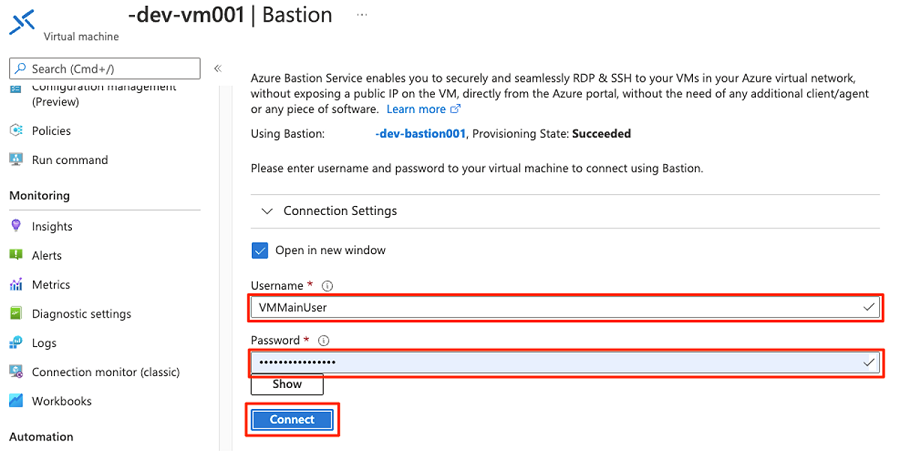
Enter the username and password for the virtual machine, and then select Connect.
In the virtual machine's web browser, go to the Azure portal. Go to the
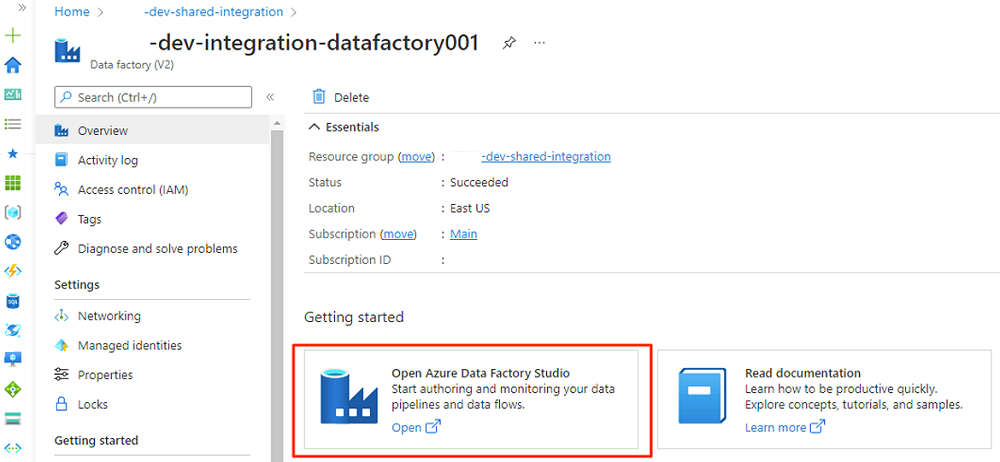
<DLZ-prefix>-dev-shared-integrationresource group and open the<DLZ-prefix>-dev-integration-datafactory001data factory.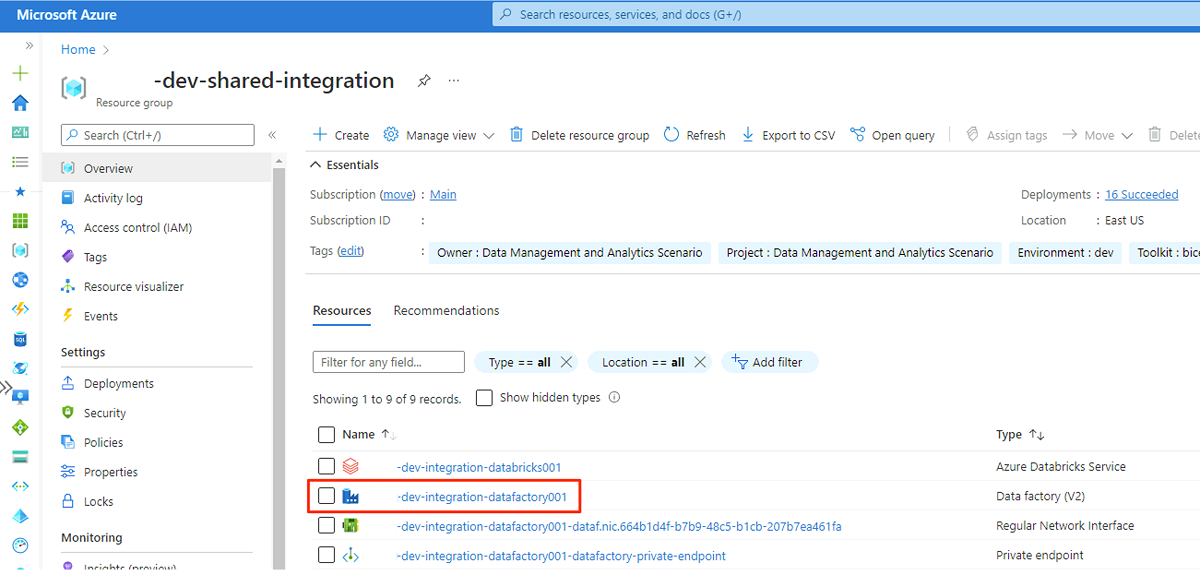
Under Getting started, in Open Azure Data Factory Studio, select Open.
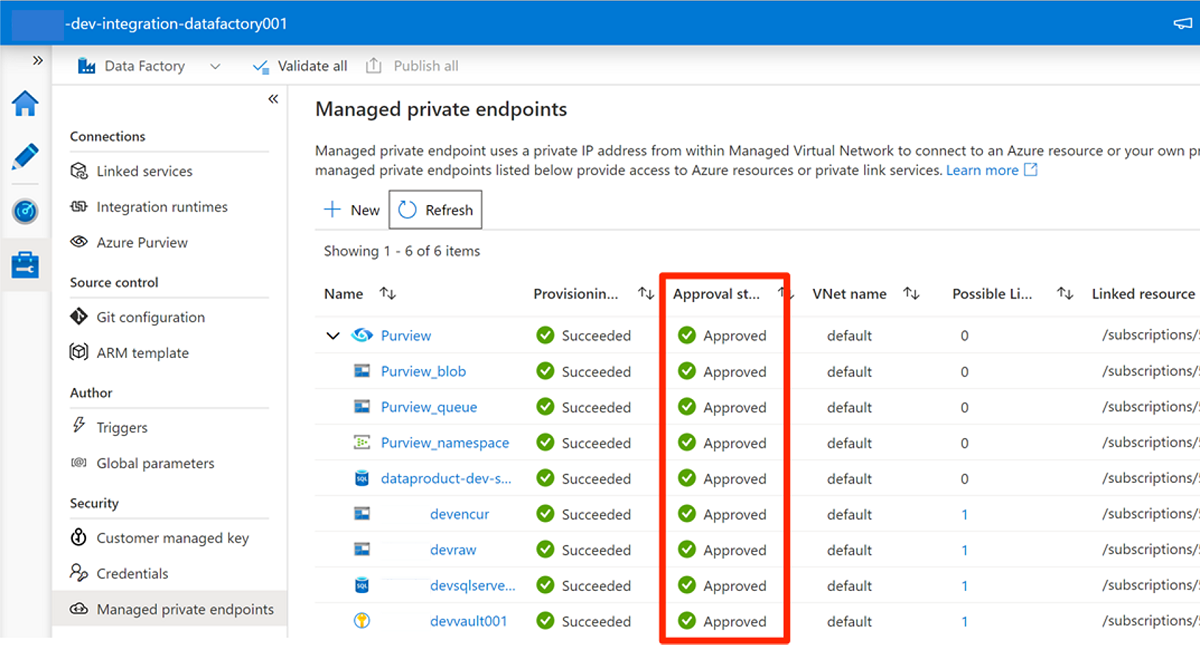
In the Data Factory Studio menu, select the Manage icon (the icon looks like a square toolbox with a wrench stamped on it). In the resource menu, select Managed private endpoints to create the private endpoints that are required to connect Data Factory to other secured Azure services.
Approving access requests for the private endpoints is discussed in a later section. After you approve private endpoint access requests, their approval status is Approved, as in the following example of the
<DLZ-prefix>devencurstorage account.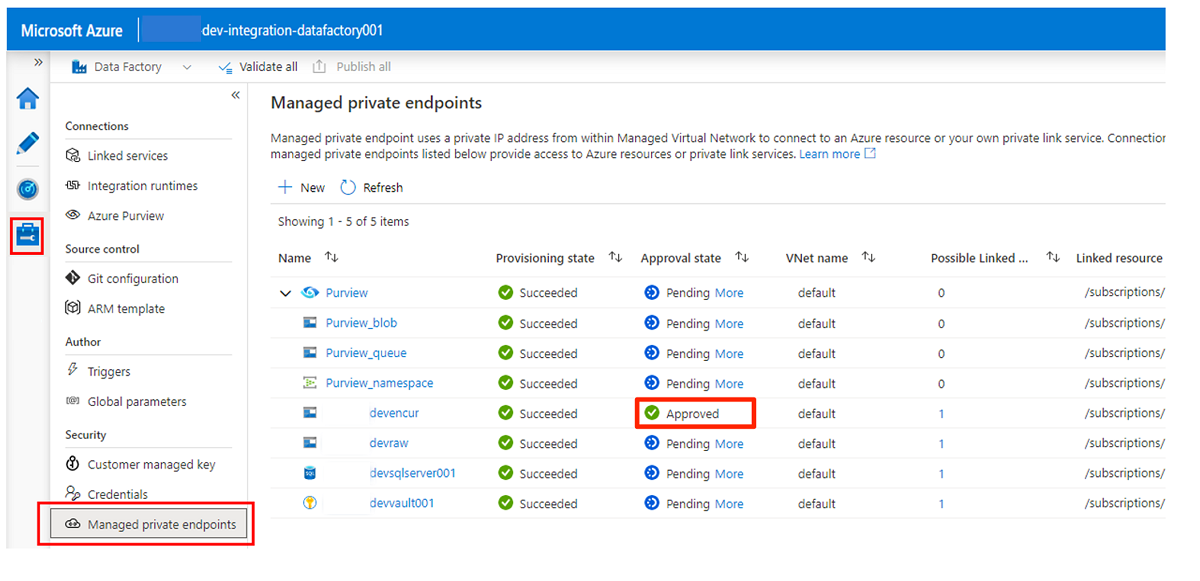
Before you approve the private endpoint connections, select New. Enter Azure SQL to find the Azure SQL Database connector you use to create a new managed private endpoint for the
<DP-prefix>-dev-sqlserver001Azure SQL virtual machine. The virtual machine contains theAdatumCRMandAdatumERPdatabases you created earlier.In New managed private endpoint (Azure SQL Database), for Name, enter data-product-dev-sqlserver001. Enter the Azure subscription you used to create the resources. For Server name, select
<DP-prefix>-dev-sqlserver001so that you can connect to it from this data factory in the next sections.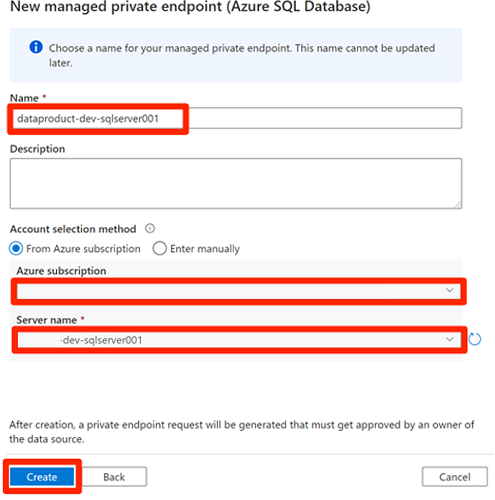


Approve private endpoint access requests
To give Data Factory access to the private endpoints for the required services, you have a couple options:
Option 1: In each service you request access to, in the Azure portal, go to the networking or private endpoint connections option of the service and approve the access requests to the private endpoint.
Option 2: Run the following scripts in Azure Cloud Shell in Bash mode to approve all access requests to the required private endpoints at once.
# Storage managed private endpoint approval

# devencur
resourceGroupName=$(az group list -o tsv  --query "[?contains(@.name, '-dev-storage')==\`true\`].name")
storageAcctName=$(az storage account list -g $resourceGroupName -o tsv  --query "[?contains(@.name, 'devencur')==\`true\`].name")
endPointConnectionName=$(az network private-endpoint-connection list -g $resourceGroupName -n $storageAcctName --type Microsoft.Storage/storageAccounts -o tsv --query "[?contains(@.properties.privateLinkServiceConnectionState.status, 'Pending')==\`true\`].name")

az network private-endpoint-connection approve -g $resourceGroupName -n $endPointConnectionName --resource-name $storageAcctName --type Microsoft.Storage/storageAccounts --description "Approved"

# devraw
resourceGroupName=$(az group list -o tsv  --query "[?contains(@.name, '-dev-storage')==\`true\`].name")
storageAcctName=$(az storage account list -g $resourceGroupName -o tsv  --query "[?contains(@.name, 'devraw')==\`true\`].name")
endPointConnectionName=$(az network private-endpoint-connection list -g $resourceGroupName -n $storageAcctName --type Microsoft.Storage/storageAccounts -o tsv --query "[?contains(@.properties.privateLinkServiceConnectionState.status, 'Pending')==\`true\`].name")
az network private-endpoint-connection approve -g $resourceGroupName -n $endPointConnectionName --resource-name $storageAcctName --type Microsoft.Storage/storageAccounts --description "Approved"

# SQL Database managed private endpoint approval
resourceGroupName=$(az group list -o tsv  --query "[?contains(@.name, '-dev-dp001')==\`true\`].name")
sqlServerName=$(az sql server list -g $resourceGroupName -o tsv  --query "[?contains(@.name, 'sqlserver001')==\`true\`].name")
endPointConnectionName=$(az network private-endpoint-connection list -g $resourceGroupName -n $sqlServerName --type Microsoft.Sql/servers -o tsv --query "[?contains(@.properties.privateLinkServiceConnectionState.status, 'Pending')==\`true\`].name")
az network private-endpoint-connection approve -g $resourceGroupName -n $endPointConnectionName --resource-name $sqlServerName --type Microsoft.Sql/servers --description "Approved"

# Key Vault private endpoint approval
resourceGroupName=$(az group list -o tsv  --query "[?contains(@.name, '-dev-metadata')==\`true\`].name")
keyVaultName=$(az keyvault list -g $resourceGroupName -o tsv  --query "[?contains(@.name, 'dev-vault001')==\`true\`].name")
endPointConnectionID=$(az network private-endpoint-connection list -g $resourceGroupName -n $keyVaultName --type Microsoft.Keyvault/vaults -o tsv --query "[?contains(@.properties.privateLinkServiceConnectionState.status, 'Pending')==\`true\`].id")
az network private-endpoint-connection approve -g $resourceGroupName --id $endPointConnectionID --resource-name $keyVaultName --type Microsoft.Keyvault/vaults --description "Approved"

# Purview private endpoint approval
resourceGroupName=$(az group list -o tsv  --query "[?contains(@.name, 'dev-governance')==\`true\`].name")
purviewAcctName=$(az purview account list -g $resourceGroupName -o tsv  --query "[?contains(@.name, '-dev-purview001')==\`true\`].name")
for epn in $(az network private-endpoint-connection list -g $resourceGroupName -n $purviewAcctName --type Microsoft.Purview/accounts -o tsv --query "[?contains(@.properties.privateLinkServiceConnectionState.status, 'Pending')==\`true\`].name")
do
    az network private-endpoint-connection approve -g $resourceGroupName -n $epn --resource-name $purviewAcctName --type Microsoft.Purview/accounts --description "Approved"
done
The following example shows how the <DLZ-prefix>devraw storage account manages private endpoint access requests. In the resource menu for the storage account, select Networking. In the command bar, select Private endpoint connections.

For some Azure resources, you select Private endpoint connections in the resource menu. An example for the Azure SQL server is shown in the following screenshot.
To approve a private endpoint access request, in Private endpoint connections, select the pending access request, and then select Approve:

After you approve the access request in each required service, it might take a few minutes for the request to show as Approved in Managed private endpoints in Data Factory Studio. Even if you select Refresh in the command bar, the approval state might be stale for a few minutes.
When you're finished approving all access requests for the required services, in Managed private endpoints, the Approval state value for all the services is Approved:
Role assignments
When you finish approving private endpoint access requests, add the appropriate role permissions for Data Factory to access these resources:
- SQL Database instances
AdatumCRMandAdatumERPin the<DP-prefix>-dev-sqlserver001Azure SQL server - Storage accounts
<DLZ-prefix>devraw,<DLZ-prefix>devencur, and<DLZ-prefix>devwork - Purview account
<DMLZ-prefix>-dev-purview001
Azure SQL virtual machine
To add role assignments, begin with the Azure SQL virtual machine. In the
<DMLZ-prefix>-dev-dp001resource group, go to<DP-prefix>-dev-sqlserver001.In the resource menu, select Access control (IAM). In the command bar, select Add > Add role assignment.
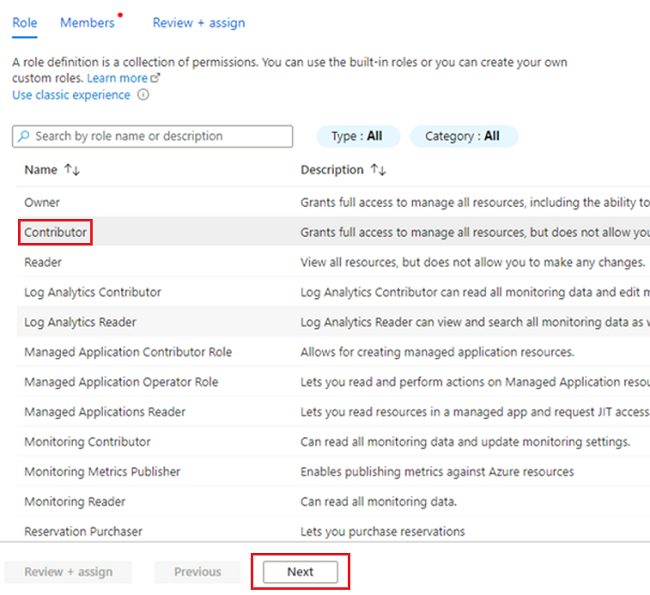
On the Role tab, select Contributor, and then select Next.
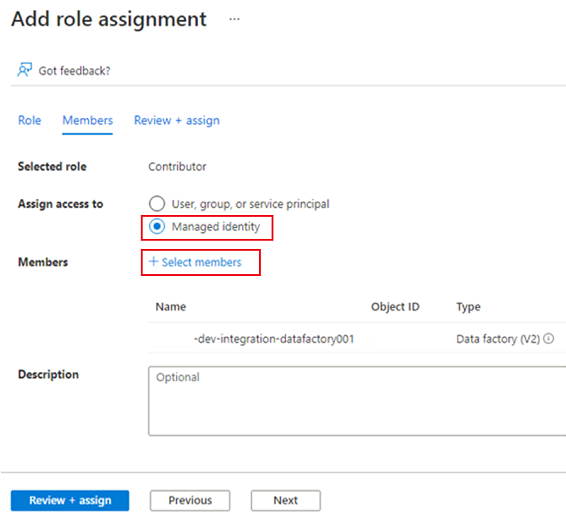
In Members, for Assign access to, select Managed identity. For Members, choose Select Members.
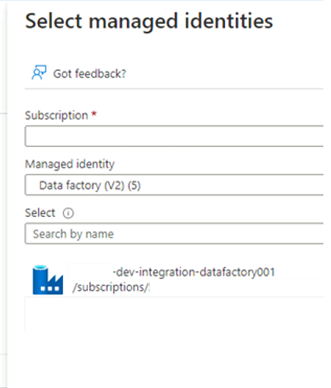
In Select managed identities, select your Azure subscription. For Managed identity, select Data Factory (V2) to see available data factories. In the list of data factories, select Azure Data Factory <DLZ-prefix>-dev-integration-datafactory001. Choose Select.
Select Review + Assign twice to complete the process.
Storage accounts
Next, assign the required roles to the <DLZ-prefix>devraw, <DLZ-prefix>devencur, and <DLZ-prefix>devwork storage accounts.
To assign the roles, complete the same steps that you used to create the Azure SQL server role assignment. But, for the role, select Storage Blob Data Contributor instead of Contributor.
After you assign roles for all three storage accounts, Data Factory can connect to and access the storage accounts.
Microsoft Purview
The final step to add role assignments is to add the Purview Data Curator role in Microsoft Purview to the managed identity account of the <DLZ-prefix>-dev-integration-datafactory001 data factory. Complete the following steps so that Data Factory can send data catalog asset information from multiple data sources to the Purview account.
In the resource group
<DMLZ-prefix>-dev-governance, go to the<DMLZ-prefix>-dev-purview001Purview account.In Purview Studio, select the Data map icon, and then select Collections.
Select the Role assignments tab for the collection. Under Data curators, add the managed identity for
<DLZ-prefix>-dev-integration-datafactory001: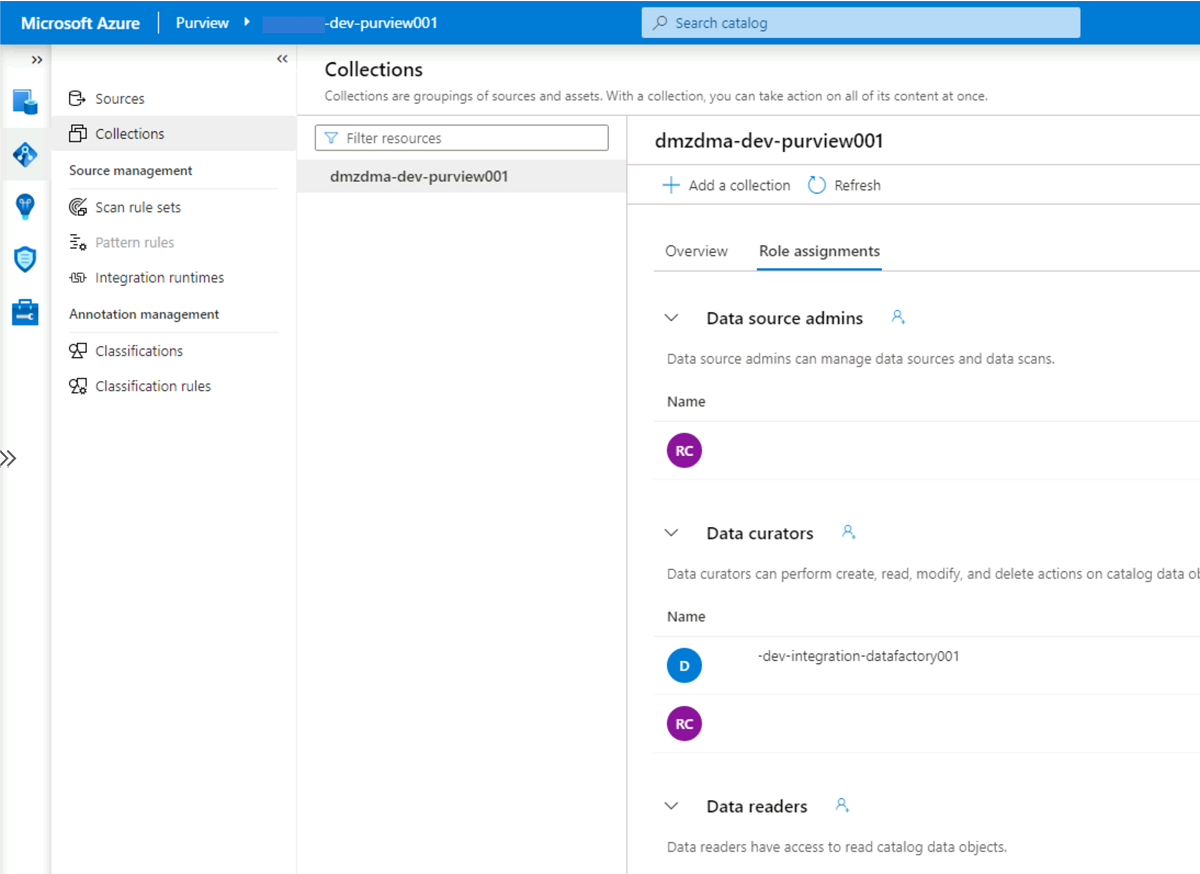
Connect Data Factory to Purview
The permissions are set, and Purview can now see the data factory. The next step is to have <DMLZ-prefix>-dev-purview001 connect to <DLZ-prefix>-dev-integration-datafactory001.
In Purview Studio, select the Management icon, and then select Data Factory. Select New to create a Data Factory connection.
In the New Data Factory connections pane, enter your Azure subscription and select the
<DLZ-prefix>-dev-integration-datafactory001data factory. Select OK.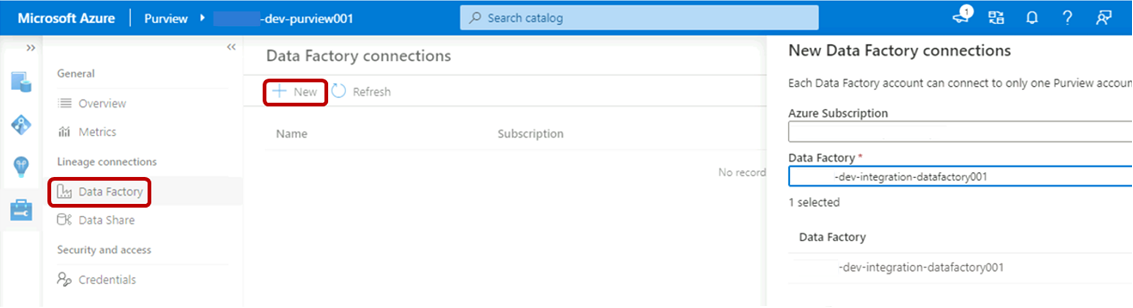
In the
<DLZ-prefix>-dev-integration-datafactory001Data Factory Studio instance, under Manage > Azure Purview, refresh Azure Purview account.The
Data Lineage - Pipelineintegration now shows the green Connected icon.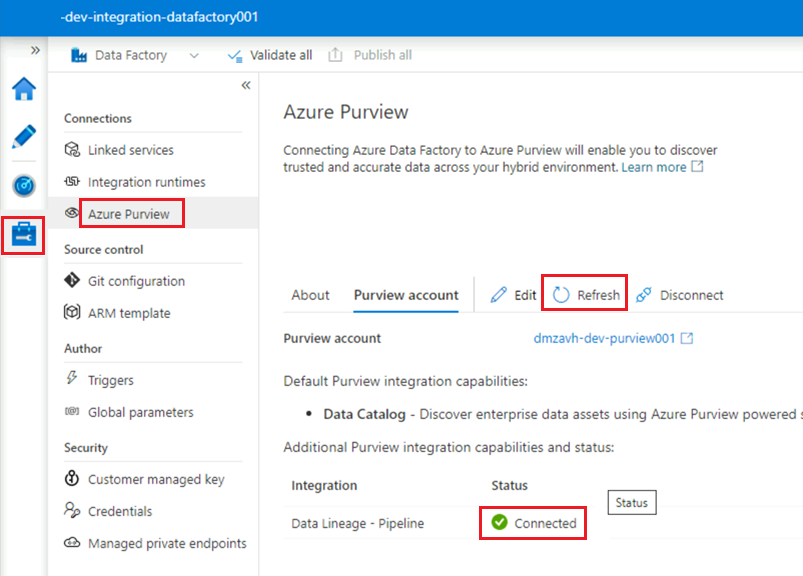

Create an ETL pipeline
Now that the <DLZ-prefix>-dev-integration-datafactory001 has the required access permissions, create a copy activity in Data Factory to move data from SQL Database instances to the <DLZ-prefix>devraw raw storage account.
Use the Copy Data tool with AdatumCRM
This process extracts customer data from the AdatumCRM SQL Database instance and copies it to Data Lake Storage Gen2 storage.
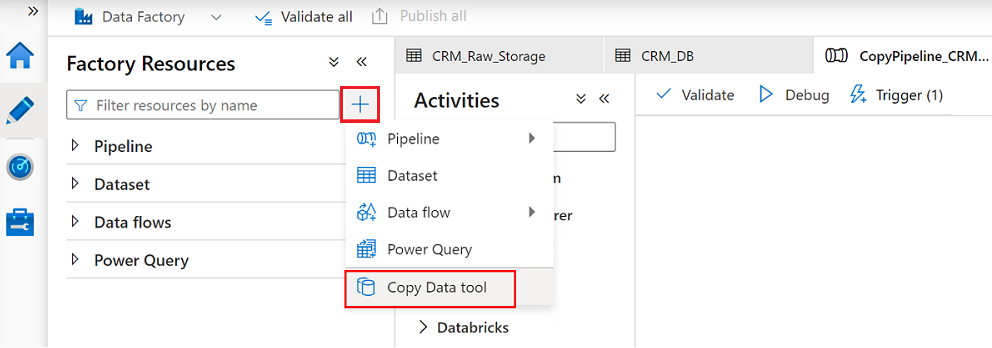
In Data Factory Studio, select the Author icon, and then select Factory Resources. Select the plus sign (+) and select Copy Data tool.
Complete each step in the Copy Data tool wizard:
To create a trigger to run the pipeline every 24 hours, select Schedule.
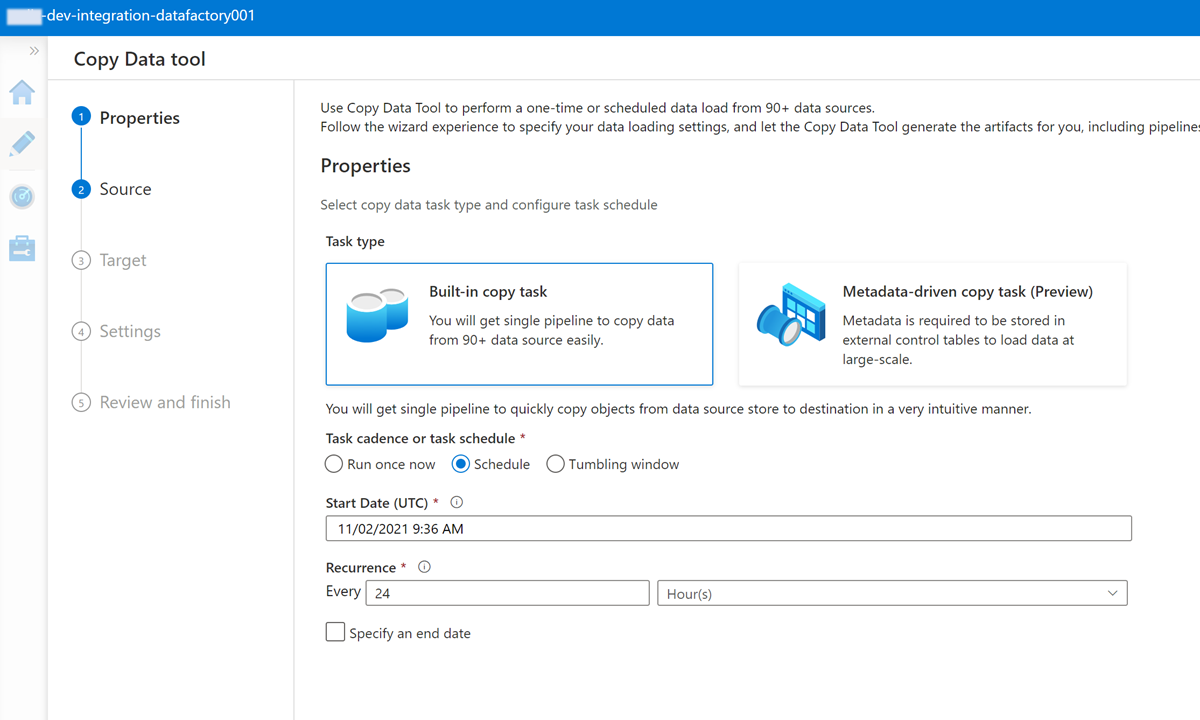
To create a linked service to connect this data factory to the
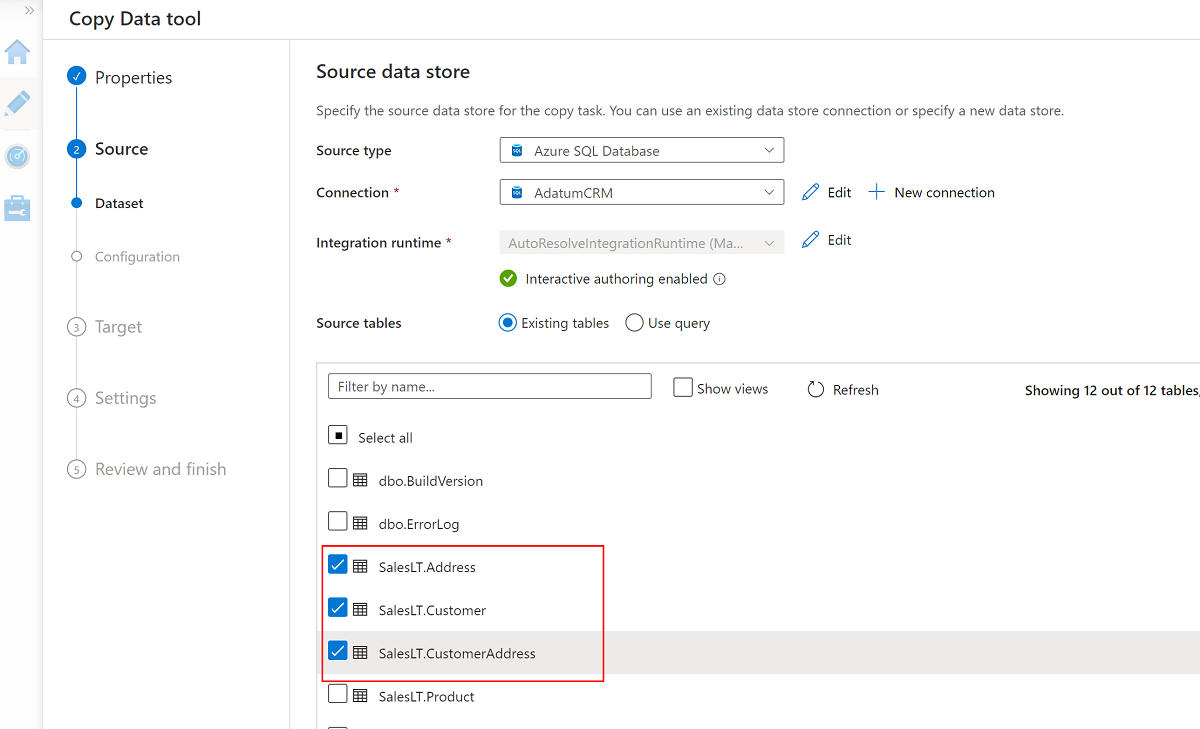
AdatumCRMSQL Database instance on the<DP-prefix>-dev-sqlserver001server (source), select New Connection.
Note
If you experience errors connecting to or accessing the data in the SQL Database instances or the storage accounts, review your permissions in the Azure subscription. Make sure that the data factory has the required credentials and access permissions to any problematic resource.
Select these three tables:
SalesLT.AddressSalesLT.CustomerSalesLT.CustomerAddress
Create a new linked service to access the
<DLZ-prefix>devrawAzure Data Lake Storage Gen2 storage (destination).
Browse the folders in the
<DLZ-prefix>devrawstorage and select Data as the destination.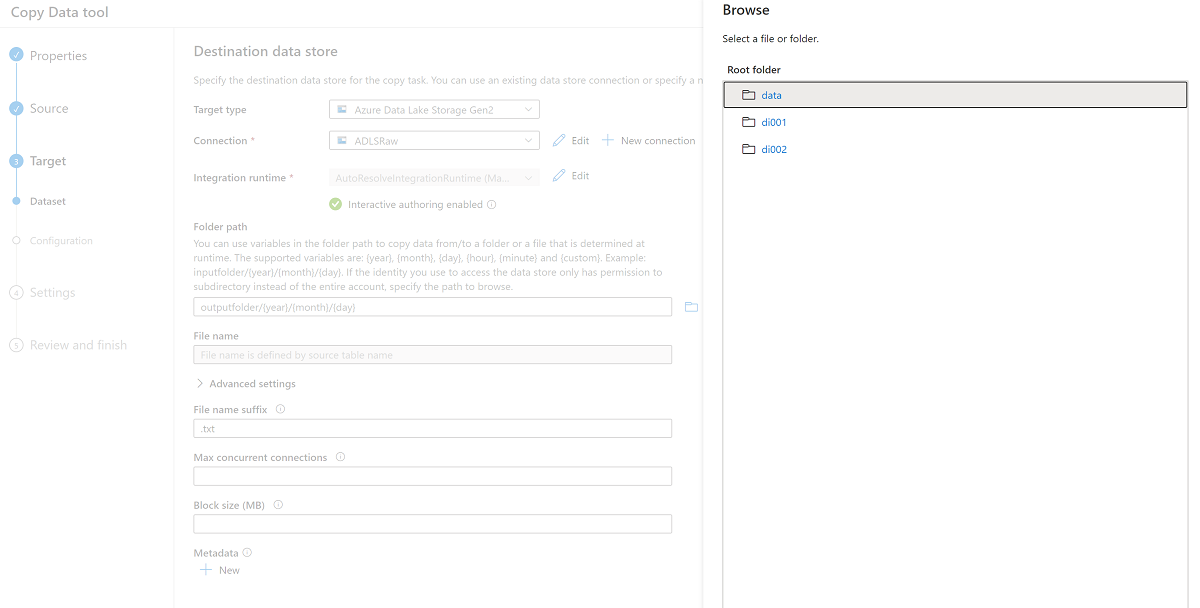
Change the file name suffix to .csv and use the other default options.

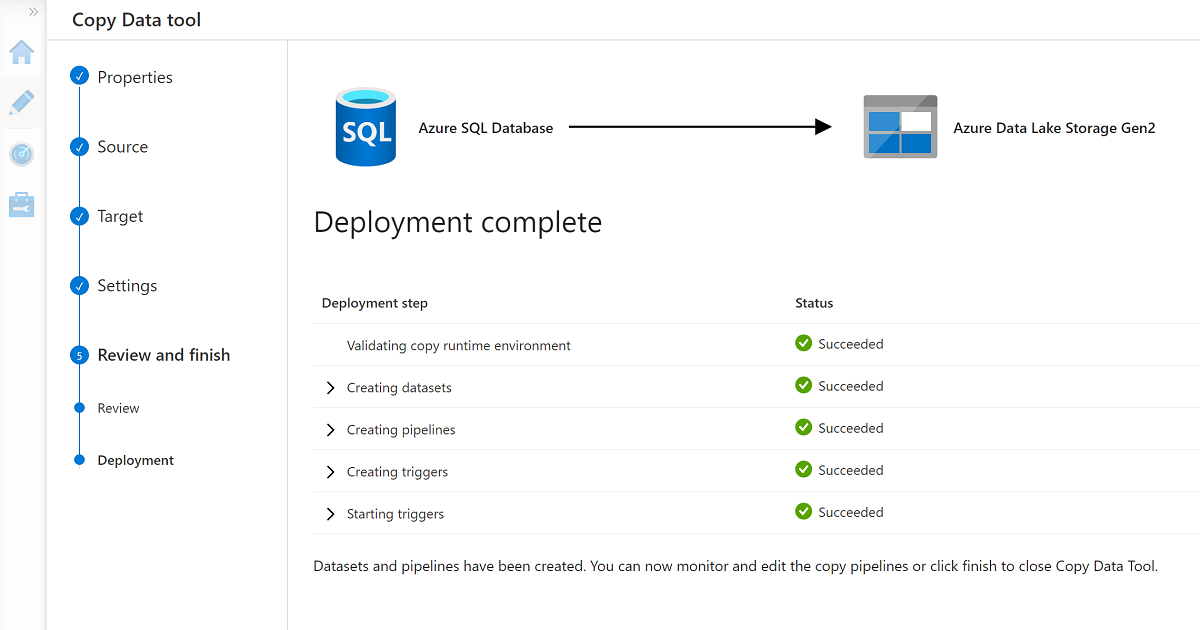
Go to the next pane and select Add header to file.

When you finish the wizard, the Deployment complete pane looks similar to this example:


The new pipeline is listed in Pipelines.
Run the pipeline
This process creates three .csv files in the Data\CRM folder, one for each of the selected tables in the AdatumCRM database.
Rename the pipeline
CopyPipeline_CRM_to_Raw.Rename the datasets
CRM_Raw_StorageandCRM_DB.In the Factory Resources command bar, select Publish all.
Select the
CopyPipeline_CRM_to_Rawpipeline, and in the pipeline command bar, select Trigger to copy the three tables from SQL Database to Data Lake Storage Gen2.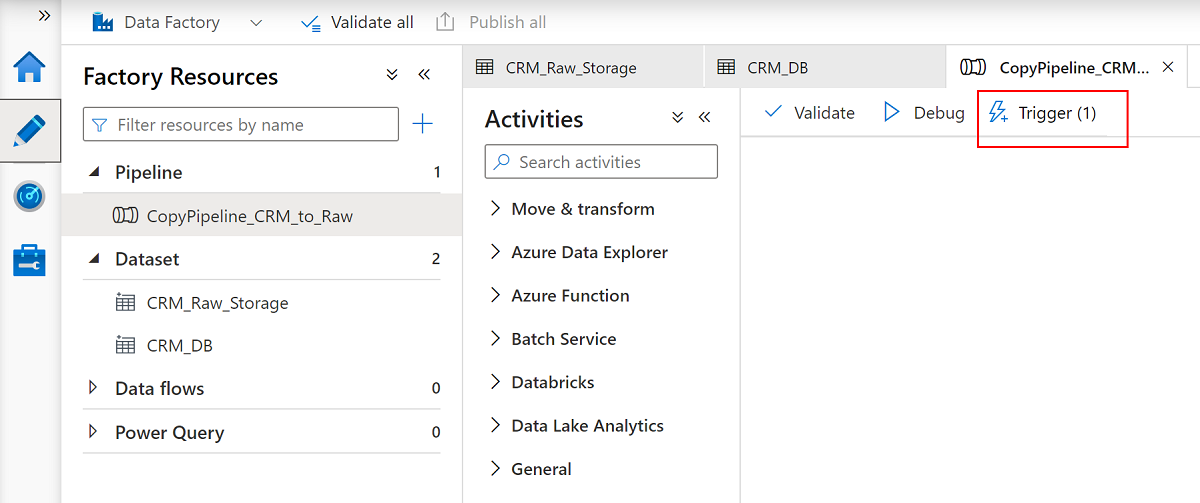
Use the Copy Data tool with AdatumERP
Next, extract the data from the AdatumERP database. The data represents sales data coming from the ERP system.
Still in Data Factory Studio, create a new pipeline by using the Copy Data tool. This time, you're sending the sales data from
AdatumERPto the<DLZ-prefix>devrawstorage account data folder, the same way you did with the CRM data. Complete the same steps, but use theAdatumERPdatabase as the source.Create the schedule to trigger every hour.
Create a linked service to the
AdatumERPSQL Database instance.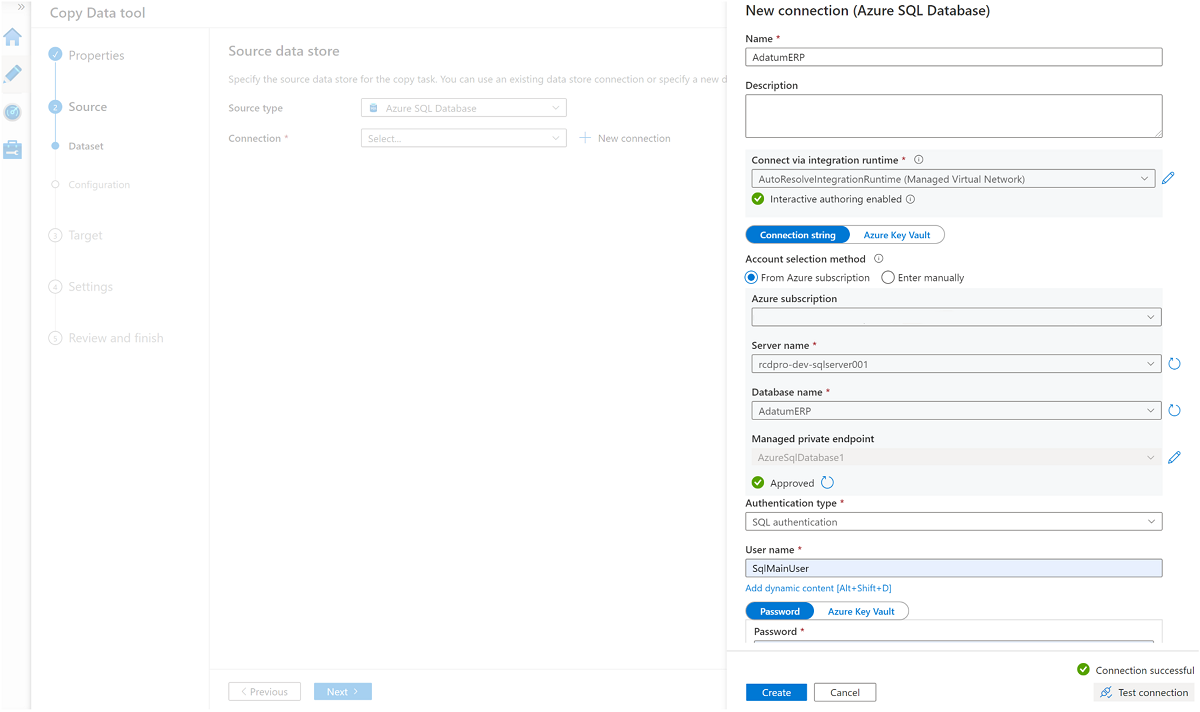
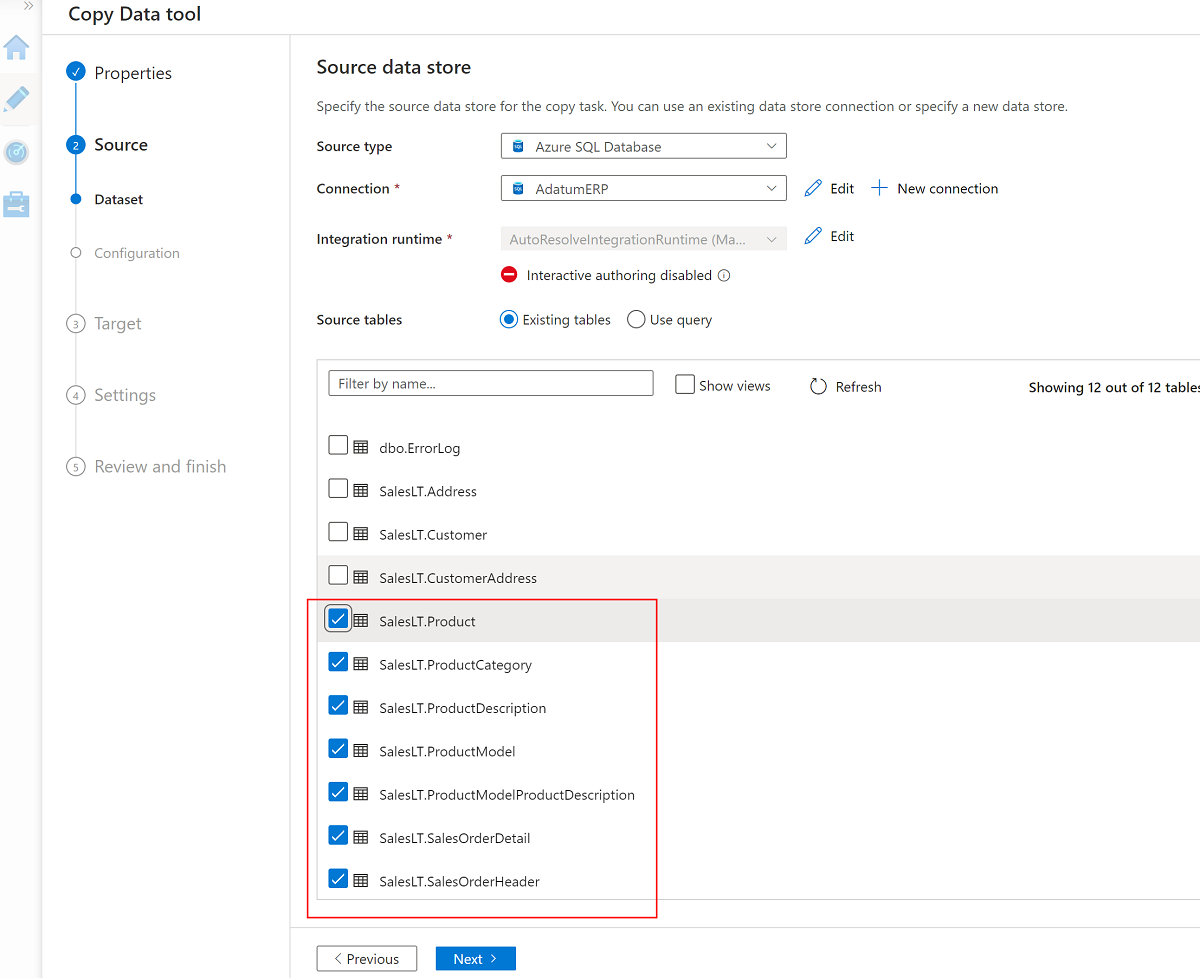
Select these seven tables:
SalesLT.ProductSalesLT.ProductCategorySalesLT.ProductDescriptionSalesLT.ProductModelSalesLT.ProductModelProductDescriptionSalesLT.SalesOrderDetailSalesLT.SalesOrderHeader
Use the existing linked service to the
<DLZ-prefix>devrawstorage account and set the file extension to .csv.
Select Add header to file.
Complete the wizard again and rename the pipeline
CopyPipeline_ERP_to_DevRaw. Then, in the command bar, select Publish all. Finally, run the trigger on this newly created pipeline to copy the seven selected tables from SQL Database to Data Lake Storage Gen2.

When you finish these steps, 10 CSV files are in the <DLZ-prefix>devraw Data Lake Storage Gen2 storage. In the next section, you curate the files in the <DLZ-prefix>devencur Data Lake Storage Gen2 storage.
Curate data in Data Lake Storage Gen2
When you finish creating the 10 CSV files in the raw <DLZ-prefix>devraw Data Lake Storage Gen2 storage, transform these files as needed as you copy them to the curated <DLZ-prefix>devencur Data Lake Storage Gen2 storage.
Continue using Azure Data Factory to create these new pipelines to orchestrate data movement.
Curate CRM to customer data
Create a data flow that gets the CSV files in the Data\CRM folder in <DLZ-prefix>devraw. Transform the files and copy the transformed files in .parquet file format to the Data\Customer folder in <DLZ-prefix>devencur.
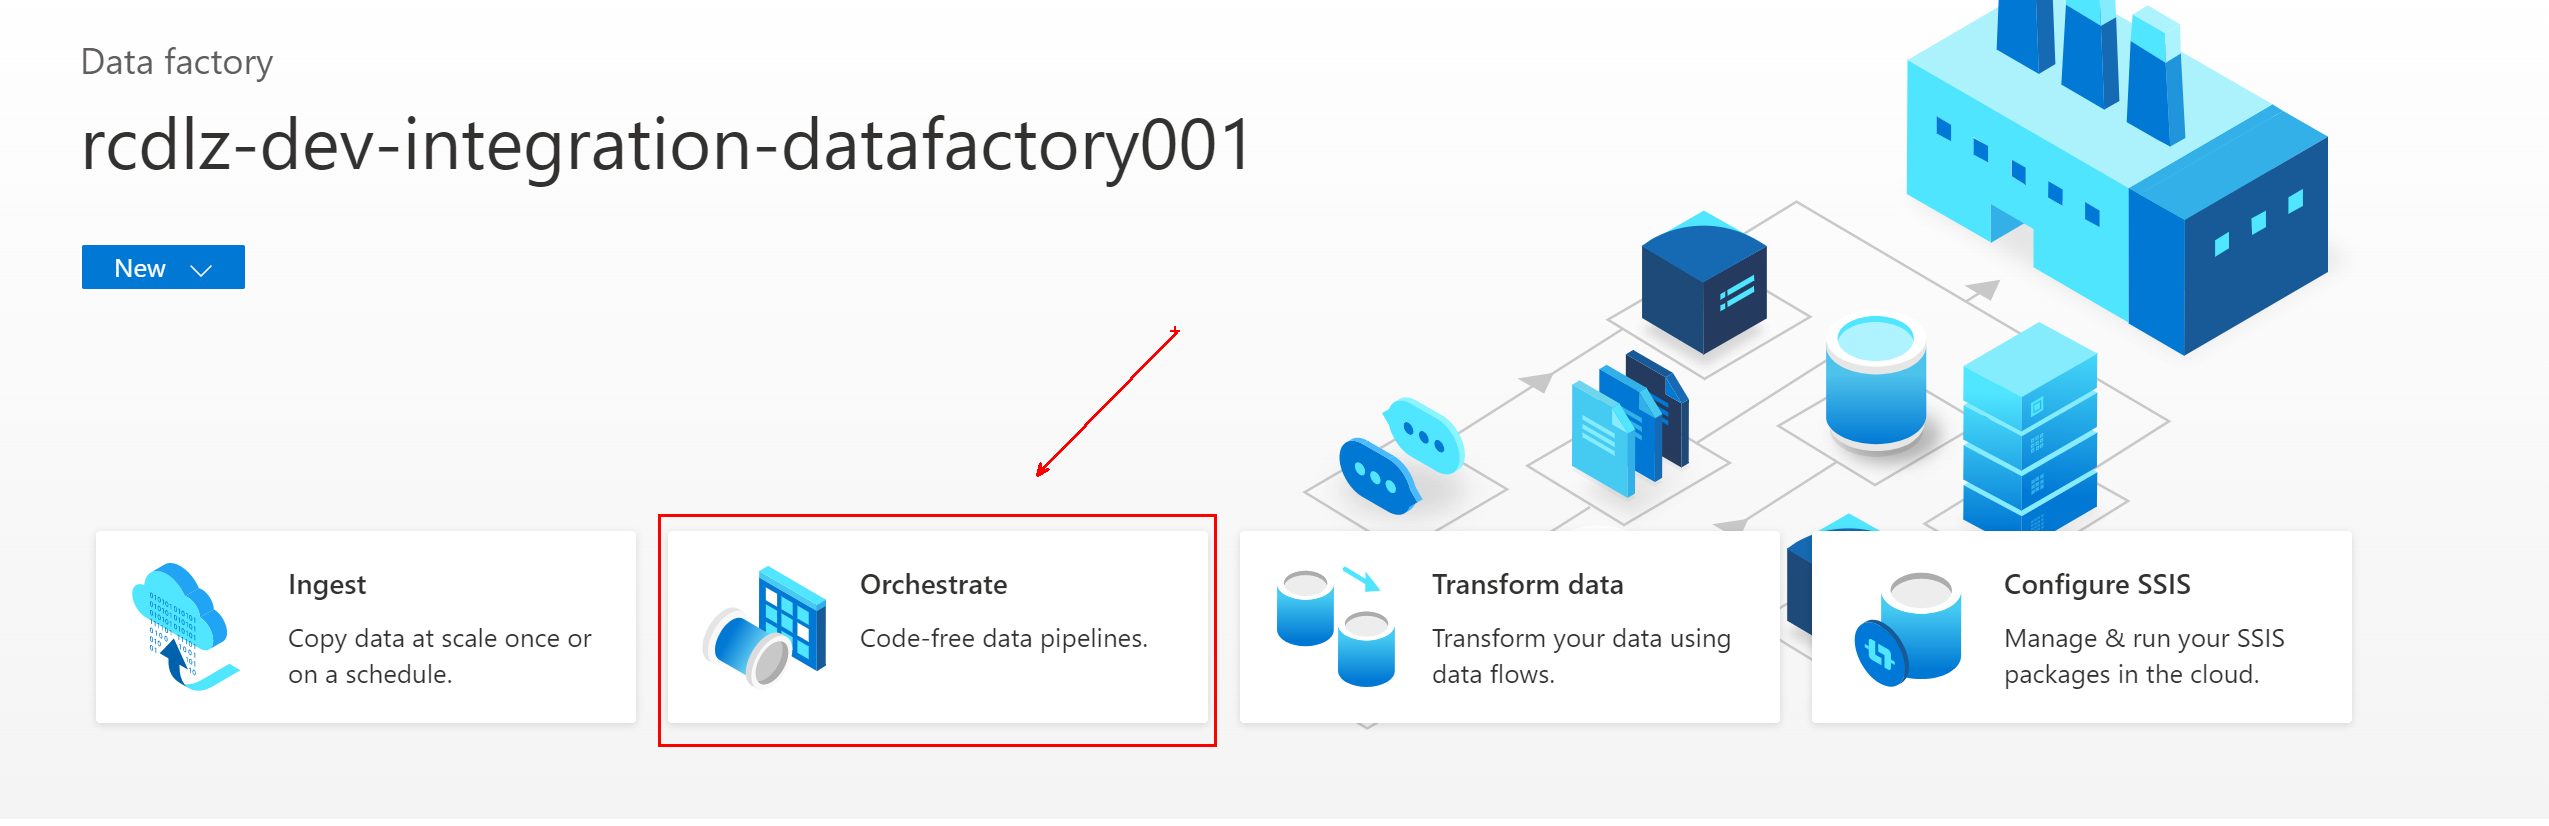
In Azure Data Factory, go to the data factory and select Orchestrate.
In General, name the pipeline
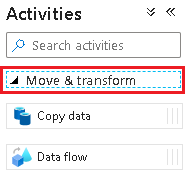
Pipeline_transform_CRM.In the Activities pane, expand Move and Transform. Drag the data flow activity and drop it in the pipeline canvas.
In Adding Data Flow, select Create new data flow and name the data flow
CRM_to_Customer. Select Finish.Note
In the command bar of the pipeline canvas, turn on Data flow debug. In debug mode, you can interactively test the transformation logic against a live Apache Spark cluster. Data flow clusters take 5 to 7 minutes to warm up. We recommend that you turn on debugging before you begin data flow development.

When you're finished selecting the options in the
CRM_to_Customerdata flow, thePipeline_transform_CRMpipeline looks similar to this example: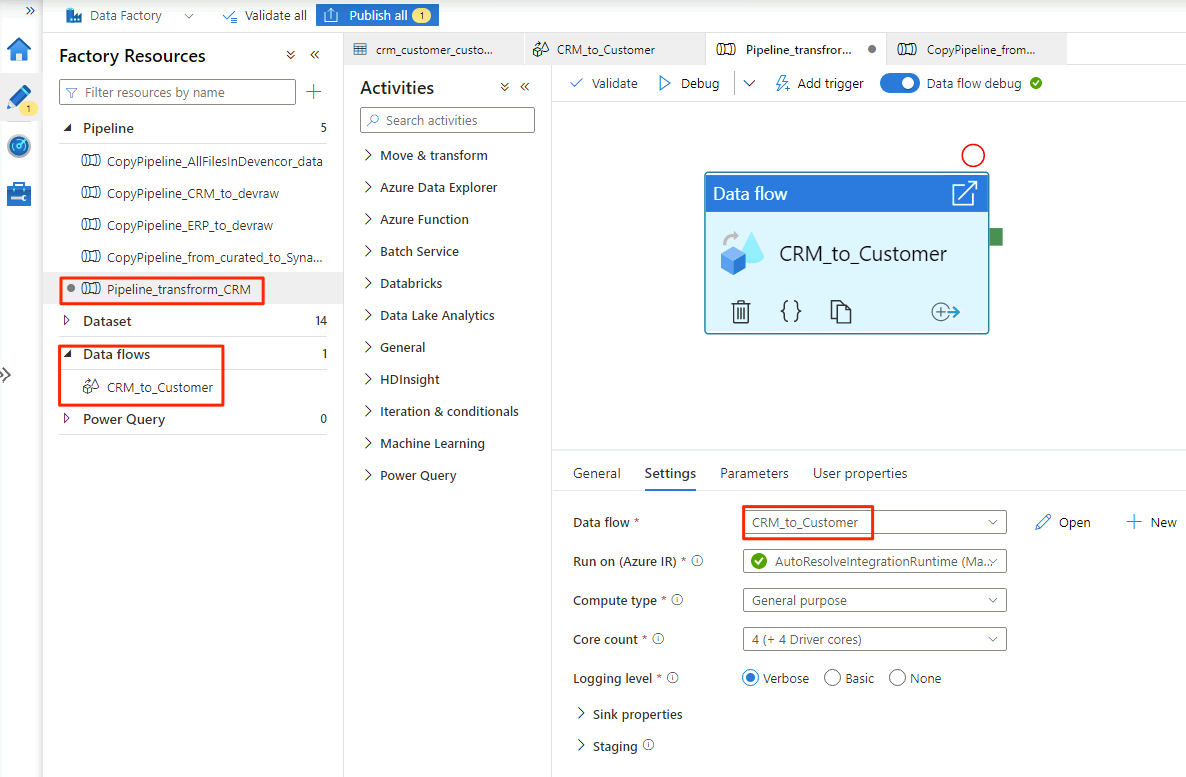
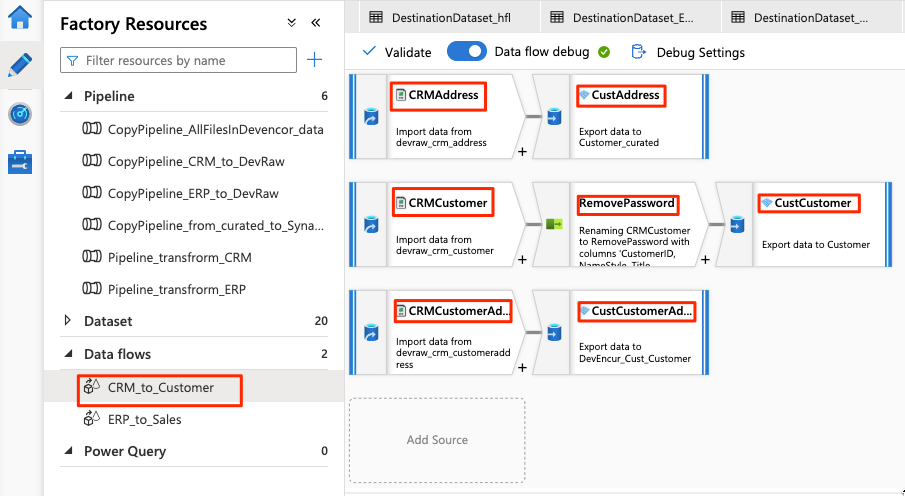
The data flow looks like this example:
Next, modify these settings in the data flow for the
CRMAddresssource:Create a new dataset from Data Lake Storage Gen2. Use the DelimitedText format. Name the dataset
DevRaw_CRM_Address.Connect the linked service to
<DLZ-prefix>devraw.Select the
Data\CRM\SalesLTAddress.csvfile as the source.
Modify these settings in the data flow for the paired
CustAddresssink:Create a new dataset named
DevEncur_Cust_Address.Select the Data\Customer folder in
<DLZ-prefix>devencuras the sink.Under Settings\Output to single file, convert the file to Address.parquet.
For the remainder of the data flow configuration, use the information in the following tables for each component. Note that CRMAddress and CustAddress are the first two rows. Use them as examples for the other objects.
An item that isn't in either of the following tables is the RemovePasswords schema modifier. The preceding screenshot shows that this item goes between CRMCustomer and CustCustomer. To add this schema modifier, go to Select settings and remove PasswordHash and PasswordSalt.
CRMCustomer returns a 15-column schema from the .crv file. CustCustomer writes only 13 columns after the schema modifier removes the two password columns.
The complete table
| Name | Object type | Dataset name | Data store | Format type | Linked service | File or folder |
|---|---|---|---|---|---|---|
CRMAddress |
source | DevRaw_CRM_Address |
Azure Data Lake Storage Gen2 | DelimitedText | devraw |
Data\CRM\SalesLTAddress.csv |
CustAddress |
sink | DevEncur_Cust_Address |
Azure Data Lake Storage Gen2 | Parquet | devencur |
Data\Customer\Address.parquet |
CRMCustomer |
source | DevRaw_CRM_Customer |
Azure Data Lake Storage Gen2 | DelimitedText | devraw |
Data\CRM\SalesLTCustomer.csv |
CustCustomer |
sink | DevEncur_Cust_Customer |
Azure Data Lake Storage Gen2 | Parquet | devencur |
Data\Customer\Customer.parquet |
CRMCustomerAddress |
source | DevRaw_CRM_CustomerAddress |
Azure Data Lake Storage Gen2 | DelimitedText | devraw |
Data\CRM\SalesLTCustomerAddress.csv |
CustCustomerAddress |
sink | DevEncur_Cust_CustomerAddress |
Azure Data Lake Storage Gen2 | Parquet | devencur |
Data\Customer\CustomerAddress.parquet |
The ERP to Sales table
Now, repeat similar steps to create a Pipeline_transform_ERP pipeline, create an ERP_to_Sales data flow to transform the .csv files in the Data\ERP folder in <DLZ-prefix>devraw, and copy the transformed files to the Data\Sales folder in <DLZ-prefix>devencur.
In the following table, you'll find the objects to create in the ERP_to_Sales data flow and the settings you need to modify for each object. Each .csv file is mapped to a .parquet sink.
| Name | Object type | Dataset name | Data store | Format type | Linked service | File or folder |
|---|---|---|---|---|---|---|
ERPProduct |
source | DevRaw_ERP_Product |
Azure Data Lake Storage Gen2 | DelimitedText | devraw |
Data\ERP\SalesLTProduct.csv |
SalesProduct |
sink | DevEncur_Sales_Product |
Azure Data Lake Storage Gen2 | Parquet | devencur |
Data\Sales\Product.parquet |
ERPProductCategory |
source | DevRaw_ERP_ProductCategory |
Azure Data Lake Storage Gen2 | DelimitedText | devraw |
Data\ERP\SalesLTProductCategory.csv |
SalesProductCategory |
sink | DevEncur_Sales_ProductCategory |
Azure Data Lake Storage Gen2 | Parquet | devencur |
Data\Sales\ProductCategory.parquet |
ERPProductDescription |
source | DevRaw_ERP_ProductDescription |
Azure Data Lake Storage Gen2 | DelimitedText | devraw |
Data\ERP\SalesLTProductDescription.csv |
SalesProductDescription |
sink | DevEncur_Sales_ProductDescription |
Azure Data Lake Storage Gen2 | Parquet | devencur |
Data\Sales\ProductDescription.parquet |
ERPProductModel |
source | DevRaw_ERP_ProductModel |
Azure Data Lake Storage Gen2 | DelimitedText | devraw |
Data\ERP\SalesLTProductModel.csv |
SalesProductModel |
sink | DevEncur_Sales_ProductModel |
Azure Data Lake Storage Gen2 | Parquet | devencur |
Data\Sales\ProductModel.parquet |
ERPProductModelProductDescription |
source | DevRaw_ERP_ProductModelProductDescription |
Azure Data Lake Storage Gen2 | DelimitedText | devraw |
Data\ERP\SalesLTProductModelProductDescription.csv |
SalesProductModelProductDescription |
sink | DevEncur_Sales_ProductModelProductDescription |
Azure Data Lake Storage Gen2 | Parquet | devencur |
Data\Sales\ProductModelProductDescription.parquet |
ERPProductSalesOrderDetail |
source | DevRaw_ERP_ProductSalesOrderDetail |
Azure Data Lake Storage Gen2 | DelimitedText | devraw |
Data\ERP\SalesLTProductSalesOrderDetail.csv |
SalesProductSalesOrderDetail |
sink | DevEncur_Sales_ProductSalesOrderDetail |
Azure Data Lake Storage Gen2 | Parquet | devencur |
Data\Sales\ProductSalesOrderDetail.parquet |
ERPProductSalesOrderHeader |
source | DevRaw_ERP_ProductSalesOrderHeader |
Azure Data Lake Storage Gen2 | DelimitedText | devraw |
Data\ERP\SalesLTProductSalesOrderHeader.csv |
SalesProductSalesOrderHeader |
sink | DevEncur_Sales_ProductSalesOrderHeader |
Azure Data Lake Storage Gen2 | Parquet | devencur |
Data\Sales\ProductSalesOrderHeader.parquet |
Next steps
Feedback
Coming soon: Throughout 2024 we will be phasing out GitHub Issues as the feedback mechanism for content and replacing it with a new feedback system. For more information see: https://aka.ms/ContentUserFeedback.
Submit and view feedback for