Custom neural voice lite (preview)
Speech Studio provides two custom neural voice (CNV) project types: CNV lite and CNV professional.
- Custom neural voice (CNV) professional allows you to upload your training data collected through professional recording studios and create a higher-quality voice that is nearly indistinguishable from its human samples. CNV professional access is limited based on eligibility and usage criteria. Request access on the intake form.
- Custom neural voice (CNV) lite is a project type in public preview. You can demo and evaluate custom neural voice before investing in professional recordings to create a higher-quality voice. No application is required. Microsoft restricts and selects the recording and testing samples for use with CNV lite. You must apply for full access to CNV professional in order to deploy and use the CNV lite model for business purpose.
With a CNV lite project, you record your voice online by reading 20-50 pre-defined scripts provided by Microsoft. After you've recorded at least 20 samples, you can start to train a model. Once the model is trained successfully, you can review the model and check out 20 output samples produced with another set of pre-defined scripts.
See the supported languages for custom neural voice.
Compare project types
The following table summarizes key differences between the CNV lite and CNV professional project types.
| Items | Lite (Preview) | Pro |
|---|---|---|
| Target scenarios | Demonstration or evaluation | Professional scenarios like brand and character voices for chat bots, or audio content reading. |
| Training data | Record online using Speech Studio | Bring your own data. Recording in a professional studio is recommended. |
| Scripts for recording | Provided in Speech Studio | Use your own scripts that match the use case scenario. Microsoft provides example scripts for reference. |
| Required data size | 20-50 utterances | 300-2000 utterances |
| Training time | Less than one compute hour | Approximately 20-40 compute hours |
| Voice quality | Moderate quality | High quality |
| Availability | Anyone can record samples online and train a model for demo and evaluation purpose. Full access to custom neural voice is required if you want to deploy the CNV lite model for business use. | Data upload isn't restricted, but you can only train and deploy a CNV professional model after access is approved. CNV professional access is limited based on eligibility and usage criteria. Request access on the intake form. |
| Pricing | Per unit prices apply equally for both the CNV lite and CNV professional projects. Check the pricing details here. | Per unit prices apply equally for both the CNV lite and CNV professional projects. Check the pricing details here. |
Create a custom neural voice lite project
To create a custom neural voice lite project, follow these steps:
Sign in to the Speech Studio.
Select the subscription and Speech resource to work with.
Important
Custom neural voice training is currently only available in some regions. See footnotes in the regions table for more information.
Select Custom voice > Create a project.
Select Custom neural voice lite > Next.
Note
To create a custom neural voice Pro project, see Create a project for custom neural voice.
Follow the instructions provided by the wizard to create your project.
Select the new project by name or select Go to project. You see these menu items in the left panel: Record and build, Review model, and Deploy model.
The CNV lite project expires after 90 days unless the verbal statement recorded by the voice talent is submitted.
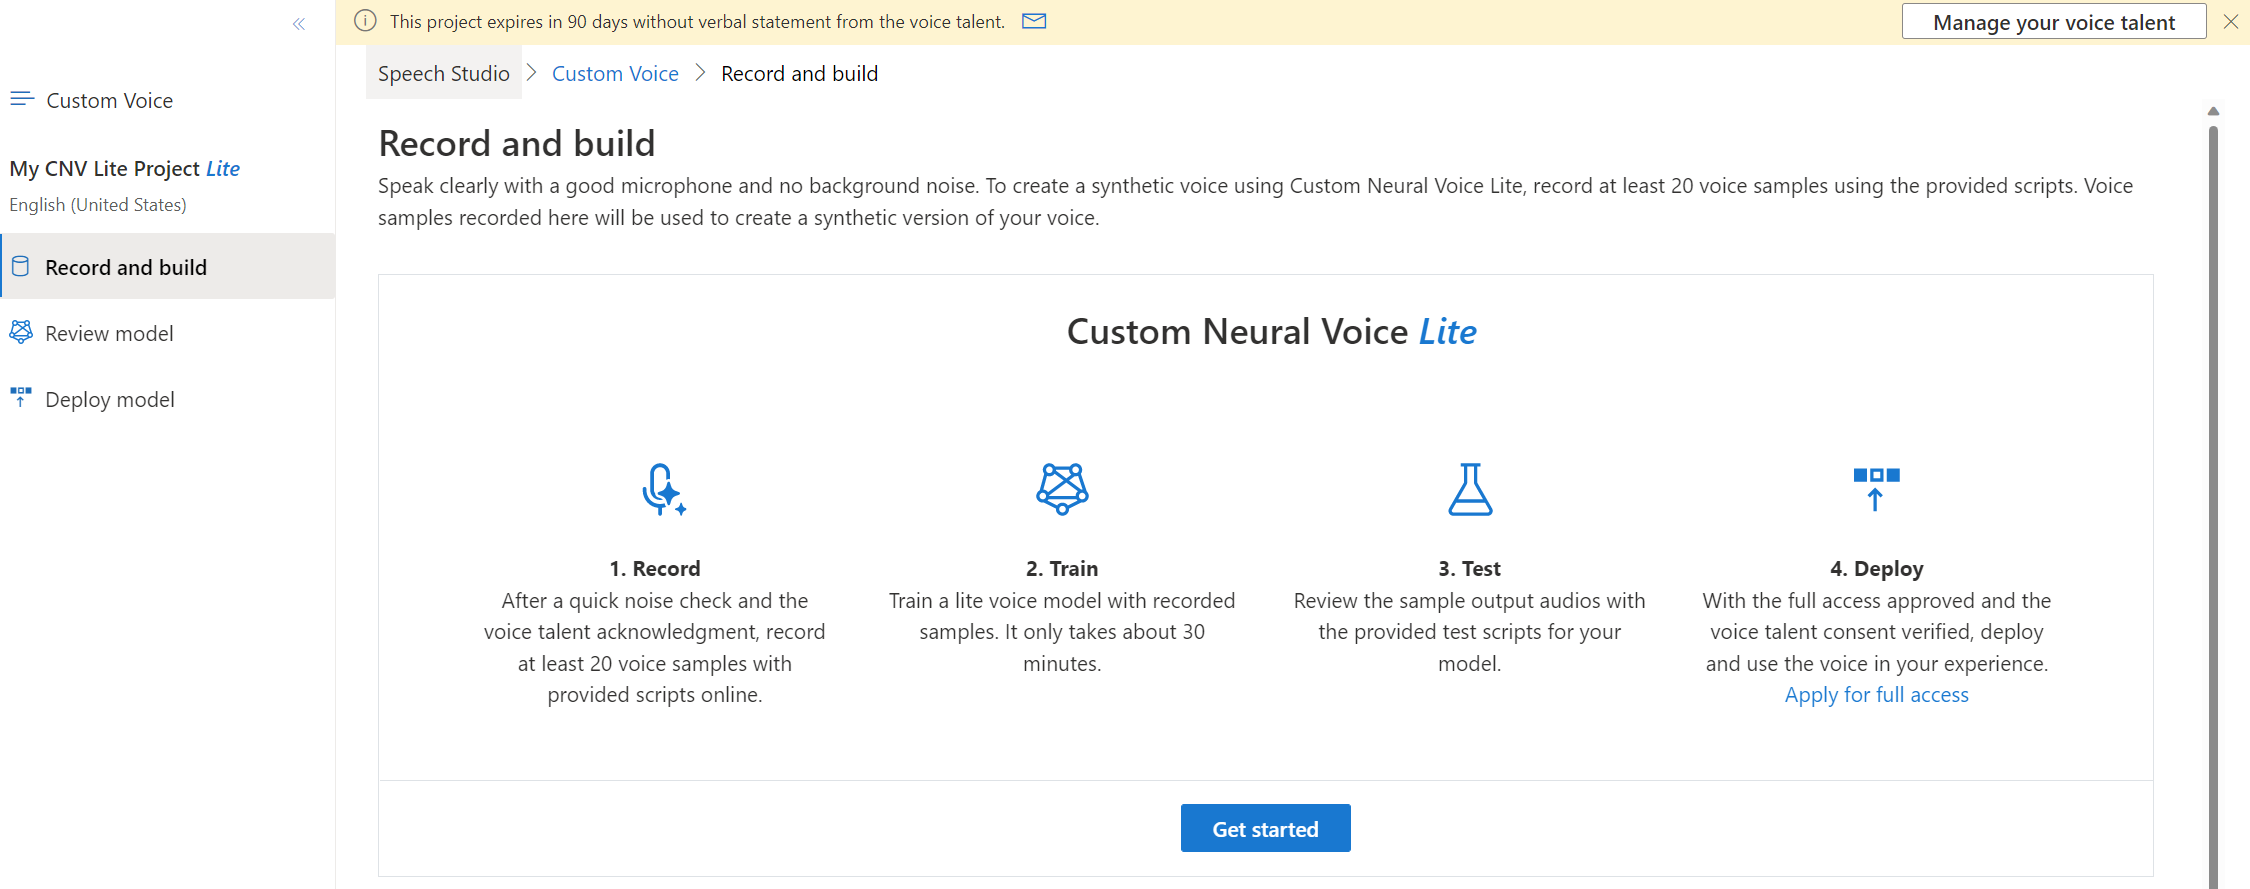
Record and build a CNV lite model
Record at least 20 voice samples (up to 50) with provided scripts online. Voice samples recorded here are used to create a synthetic version of your voice.
Here are some tips to help you record your voice samples:
- Use a good microphone. Increase the clarity of your samples by using a high-quality microphone. Speak about 8 inches away from the microphone to avoid mouth noises.
- Avoid background noise. Record in a quiet room without background noise or echoing.
- Relax and speak naturally. Allow yourself to express emotions as you read the sentences.
- Record in one take. To keep a consistent energy level, record all sentences in one session.
- Pronounce each word correctly, and speak clearly.
To record and build a CNV lite model, follow these steps:
- Select Custom voice > Your project name > Record and build.
- Select Get started.
- Read the Voice talent terms of use carefully. Select the checkbox to acknowledge the terms of use.
- Select Accept
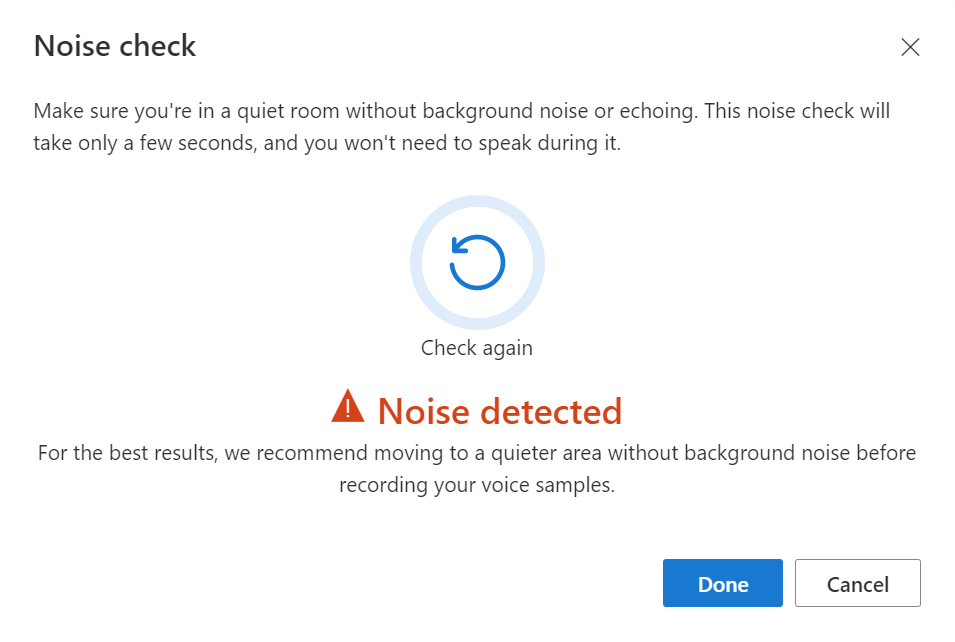
- Press the microphone icon to start the noise check. This noise check takes only a few seconds, and you don't need to speak during it.
- If noise was detected, you can select Check again to repeat the noise check. If no noise was detected, you can select Done to proceed to the next step.
- Review the recording tips and select Got it. For the best results, go to a quiet area without background noise before recording your voice samples.
- Press the microphone icon to start recording.
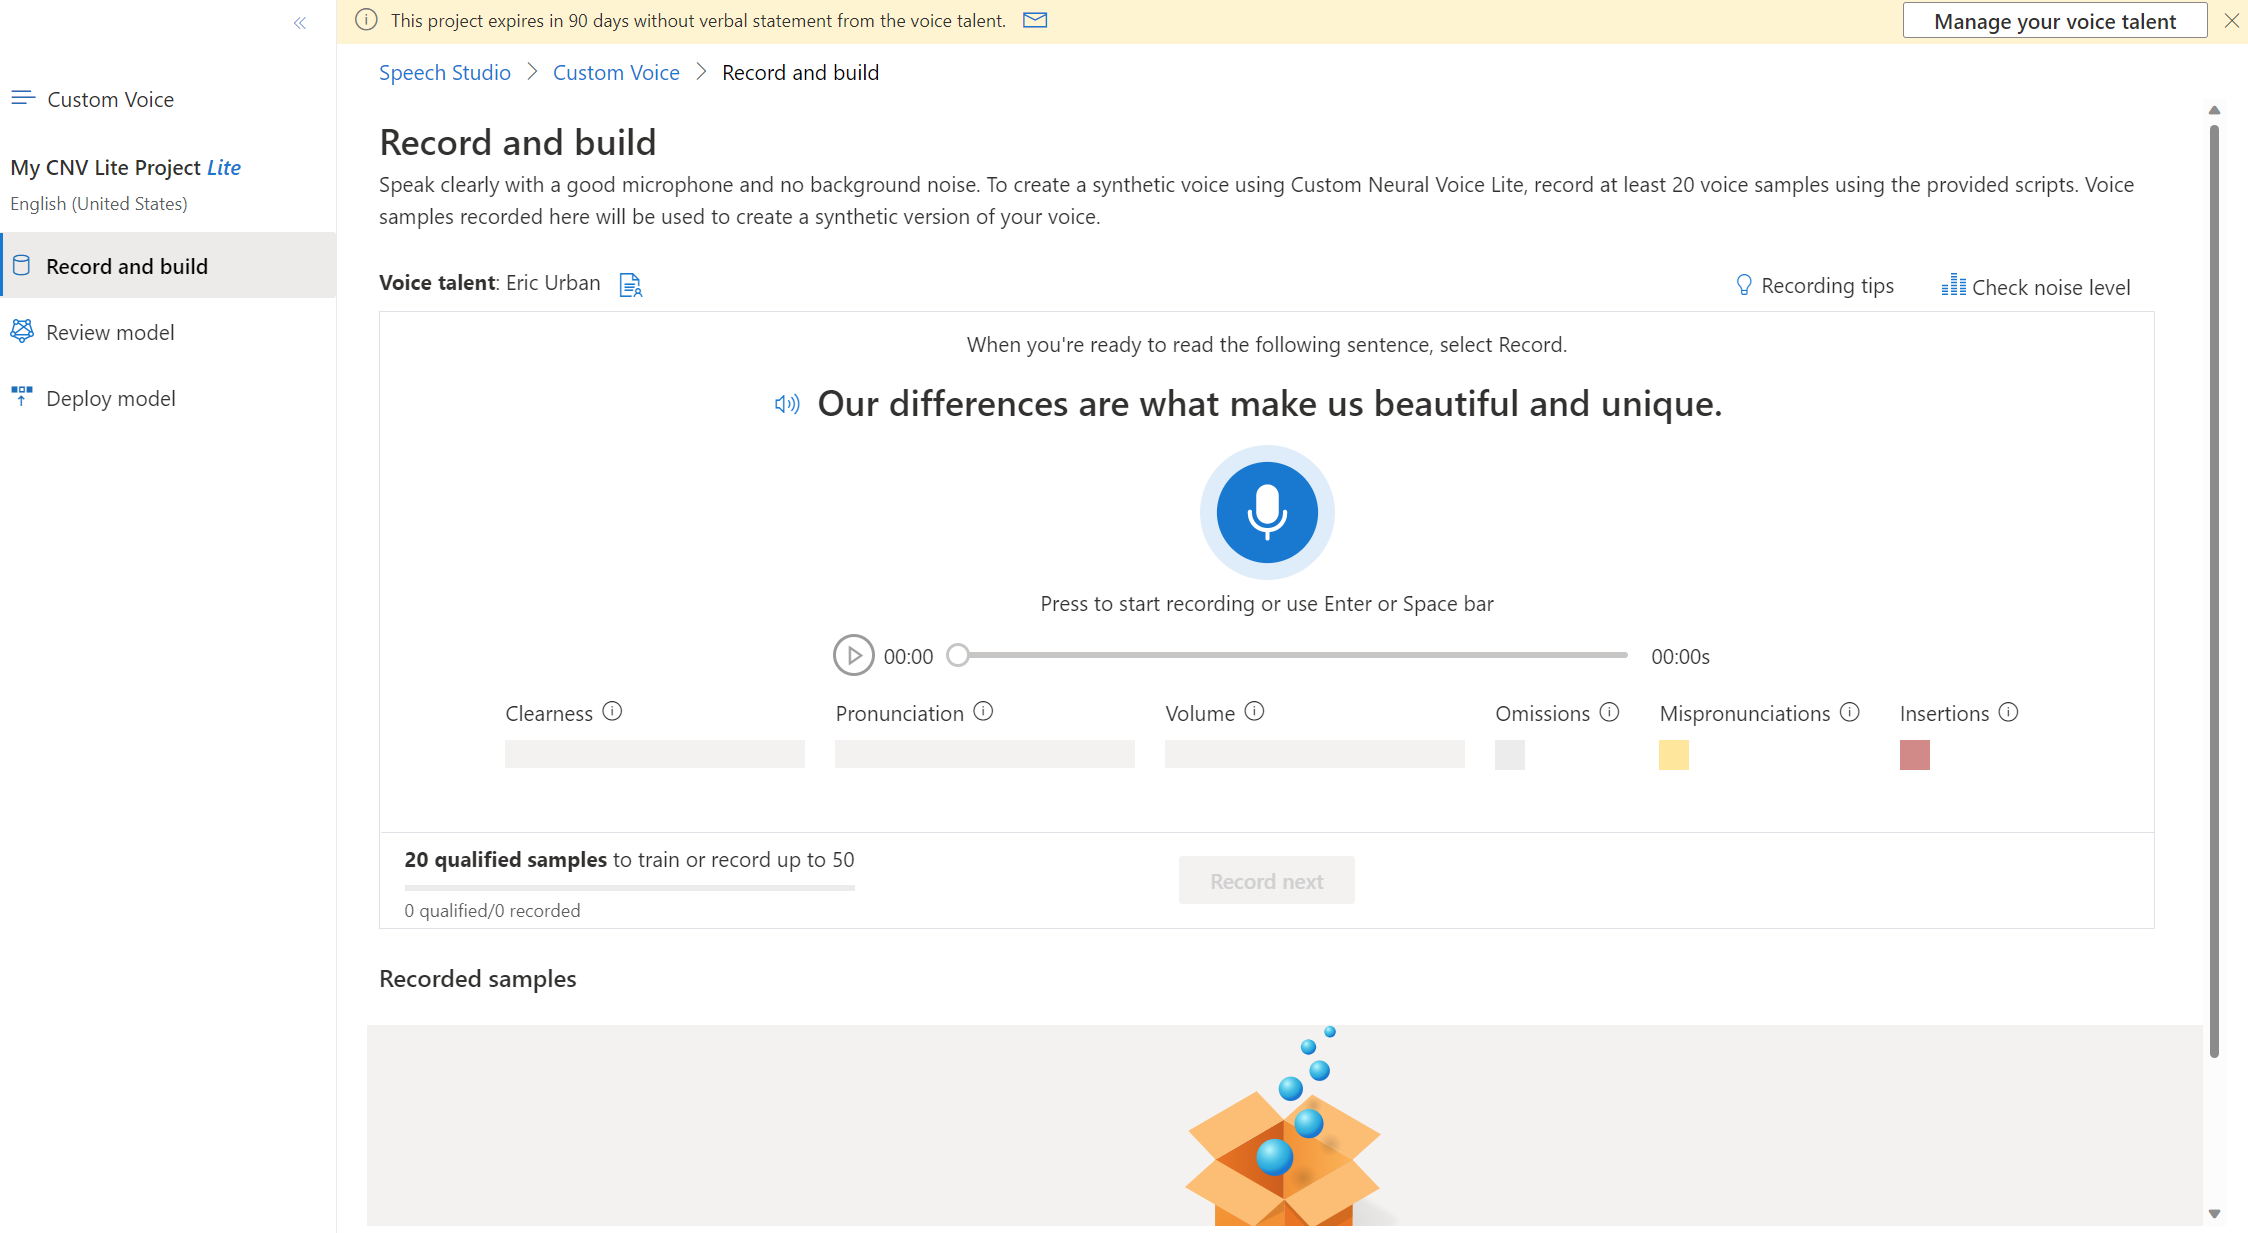
- Press the stop icon to stop recording.
- Review quality metrics. After recording each sample, check its quality metric before continuing to the next one.
- Record more samples. Although you can create a model with just 20 samples, it's recommended that you record up to 50 to get better quality.
- Select Train model to start the training process.
The training process takes approximately one compute hour. You can check the progress of the training process in the Review model page.
Review model
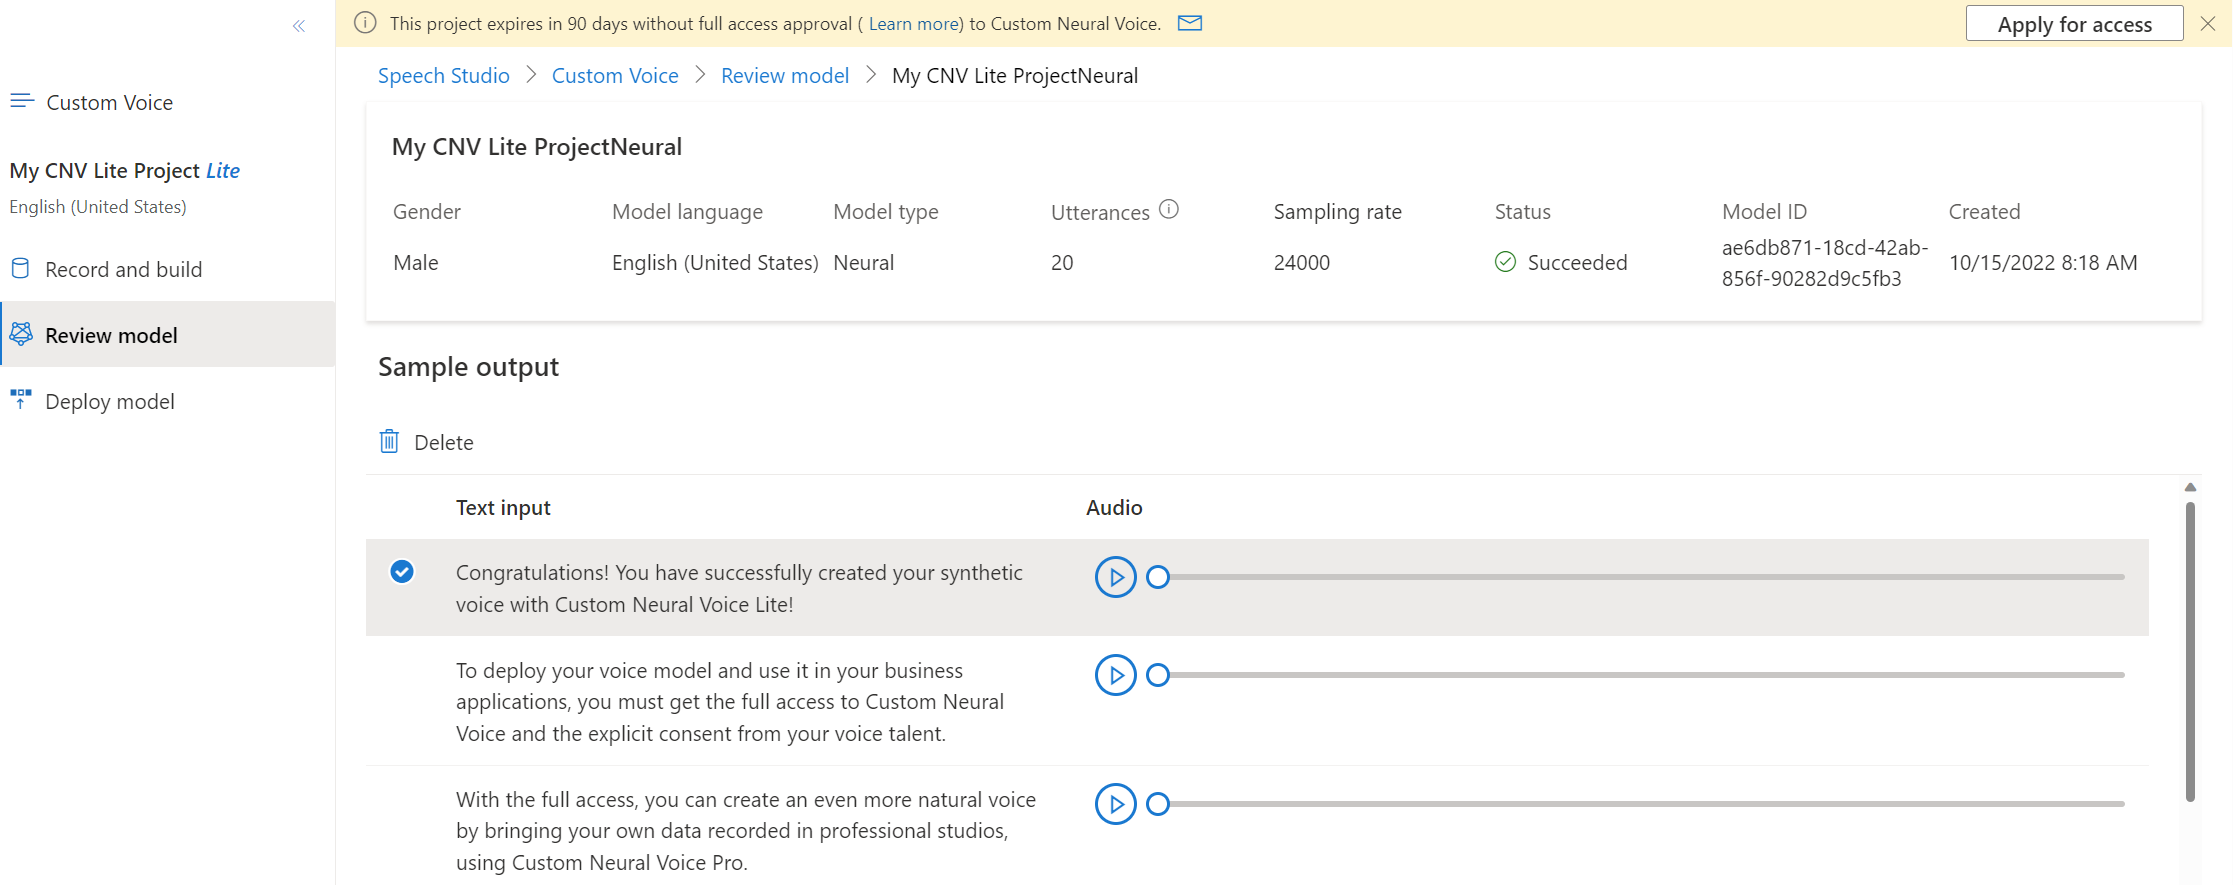
To review the CNV lite model and listen to your own synthetic voice, follow these steps:
- Select Custom voice > Your project name > Review model. Here you can review the voice model name, model language, sample data size, and training progress. The voice name is composed of the word "Neural" appended to your project name.
- Select the voice model name to review the model details and listen to the sample text to speech results.
- Select the play icon to hear your voice speak each script.
Submit verbal statement
A verbal statement recorded by the voice talent is required before you can deploy the model for your business use.
To submit the voice talent verbal statement, follow these steps:
- Select Custom voice > Your project name > Deploy model > Manage your voice talent.
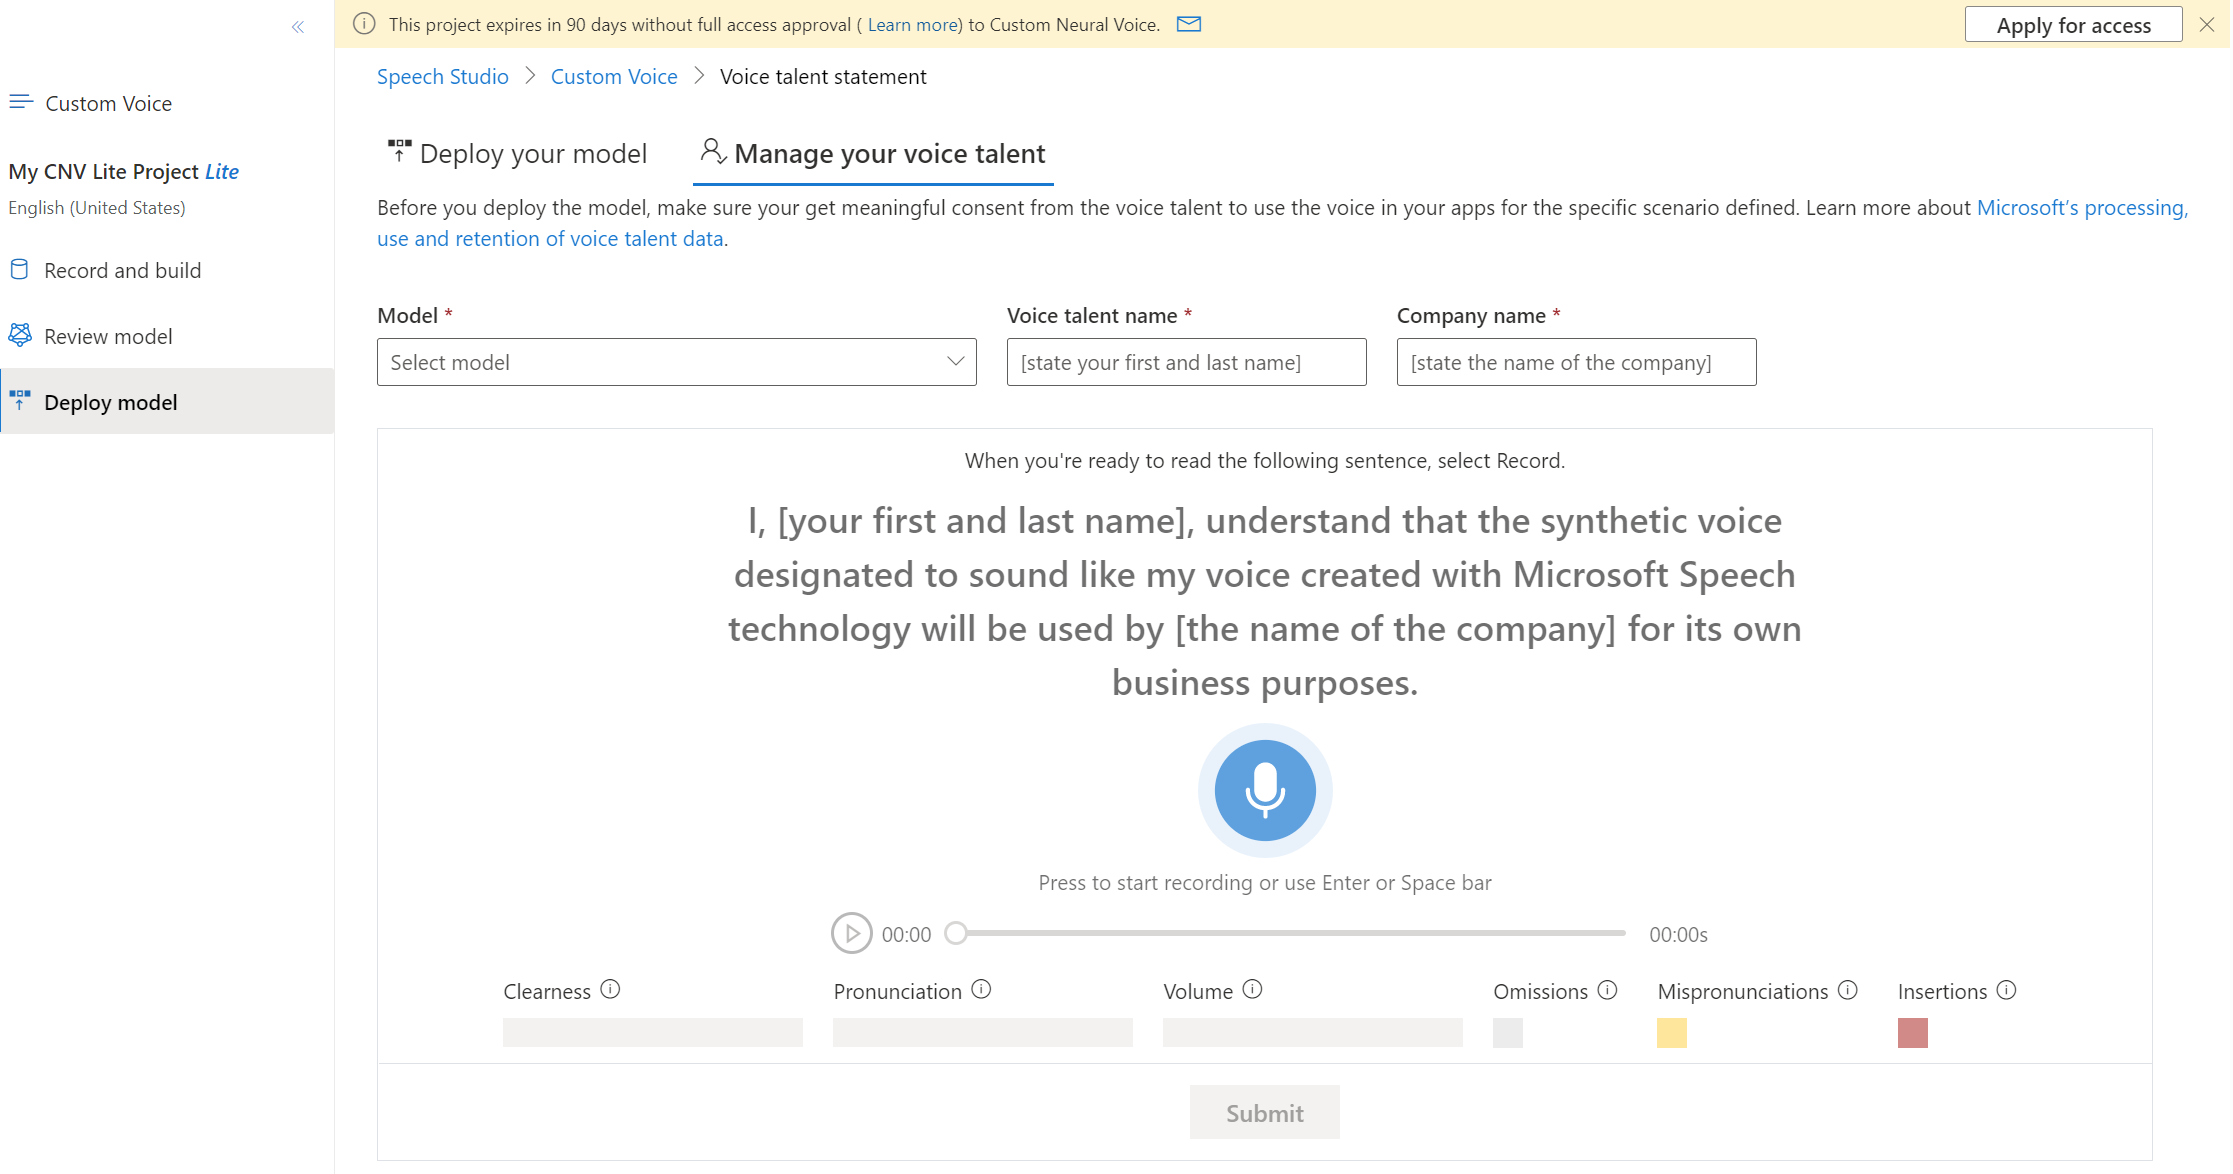
- Select the model.
- Enter the voice talent name and company name.
- Read and record the statement. Select the microphone icon to start recording. Select the stop icon to stop recording.
- Select Submit to submit the statement.
- Check the processing status in the script table at the bottom of the dashboard. Once the status is Succeeded, you can deploy the model.
Deploy model
To deploy your voice model and use it in your applications, you must get the full access to custom neural voice. Request access on the intake form. Within approximately 10 business days, you receive an email with the approval status. A verbal statement recorded by the voice talent is also required before you can deploy the model for your business use.
To deploy a CNV lite model, follow these steps:
- Select Custom voice > Your project name > Deploy model > Deploy model.
- Select a voice model name and then select Next.
- Enter a name and description for your endpoint and then select Next.
- Select the checkbox to agree to the terms of use and then select Next.
- Select Deploy to deploy the model.
From here, you can use the CNV lite voice model similarly as you would use a CNV professional voice model. For example, you can suspend or resume an endpoint after it's created, to limit spend and conserve resources that aren't in use. You can also access the voice in the Audio Content Creation tool in the Speech Studio.
Next steps
Feedback
Coming soon: Throughout 2024 we will be phasing out GitHub Issues as the feedback mechanism for content and replacing it with a new feedback system. For more information see: https://aka.ms/ContentUserFeedback.
Submit and view feedback for