Quickstart: Build, publish, and translate with custom models
Translator is a cloud-based neural machine translation service that is part of the Azure AI services family of REST API that can be used with any operating system. Translator powers many Microsoft products and services used by thousands of businesses worldwide to perform language translation and other language-related operations. In this quickstart, learn to build custom solutions for your applications across all supported languages.
Prerequisites
To use the Custom Translator portal, you need the following resources:
Azure subscription - Create one for free
Once you have an Azure subscription, create a Translator resource in the Azure portal to get your key and endpoint. After it deploys, select Go to resource.
You need the key and endpoint from the resource to connect your application to the Translator service. Paste your key and endpoint into the code later in the quickstart. You can find these values on the Azure portal Keys and Endpoint page:

For more information, see how to create a Translator resource.
Custom Translator portal
Once you have the above prerequisites, sign in to the Custom Translator portal to create workspaces, build projects, upload files, train models, and publish your custom solution.
You can read an overview of translation and custom translation, learn some tips, and watch a getting started video in the Azure AI technical blog.
Process summary
Create a workspace. A workspace is a work area for composing and building your custom translation system. A workspace can contain multiple projects, models, and documents. All the work you do in Custom Translator is done inside a specific workspace.
Create a project. A project is a wrapper for models, documents, and tests. Each project includes all documents that are uploaded into that workspace with the correct language pair. For example, if you have both an English-to-Spanish project and a Spanish-to-English project, the same documents are included in both projects.
Upload parallel documents. Parallel documents are pairs of documents where one (target) is the translation of the other (source). One document in the pair contains sentences in the source language and the other document contains sentences translated into the target language. It doesn't matter which language is marked as "source" and which language is marked as "target"—a parallel document can be used to train a translation system in either direction.
Train your model. A model is the system that provides translation for a specific language pair. The outcome of a successful training is a model. When you train a model, three mutually exclusive document types are required: training, tuning, and testing. If only training data is provided when queuing a training, Custom Translator automatically assembles tuning and testing data. It uses a random subset of sentences from your training documents, and excludes these sentences from the training data itself. A 10,000 parallel sentence is the minimum requirement to train a model.
Test (human evaluate) your model. The testing set is used to compute the BLEU score. This score indicates the quality of your translation system.
Publish (deploy) your trained model. Your custom model is made available for runtime translation requests.
Translate text. Use the cloud-based, secure, high performance, highly scalable Microsoft Translator Text API V3 to make translation requests.
Create a workspace
After your sign-in to Custom Translator, you'll be asked for permission to read your profile from the Microsoft identity platform to request your user access token and refresh token. Both tokens are needed for authentication and to ensure that you aren't signed out during your live session or while training your models. Select Yes.

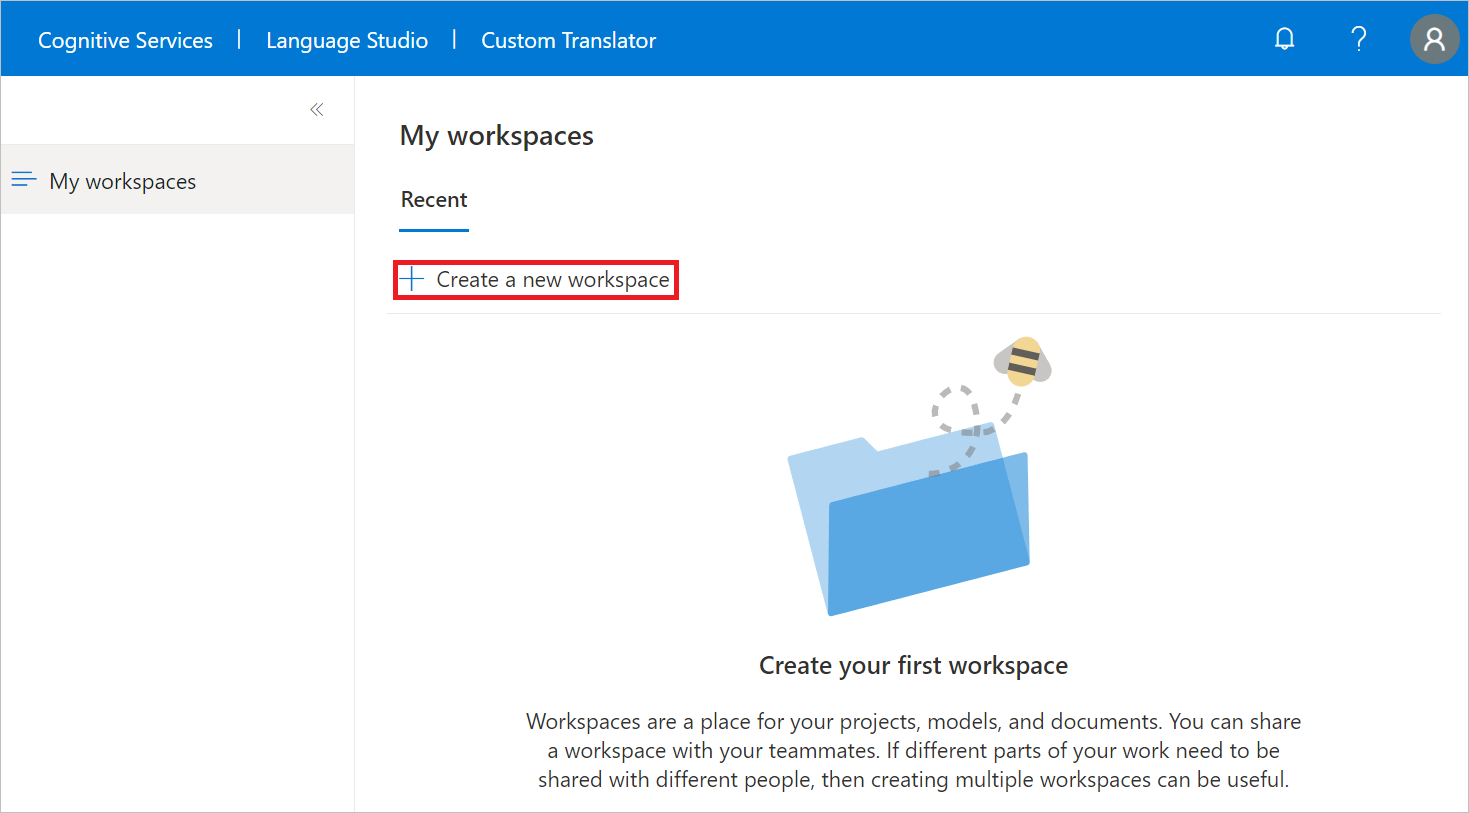
Select My workspaces.
Select Create a new workspace.
Type Contoso MT models for Workspace name and select Next.
Select "Global" for Select resource region from the dropdown list.
Copy/paste your Translator Services key.
Select Next.
Select Done.
Note
Region must match the region that was selected during the resource creation. You can use KEY 1 or KEY 2.

Create a project
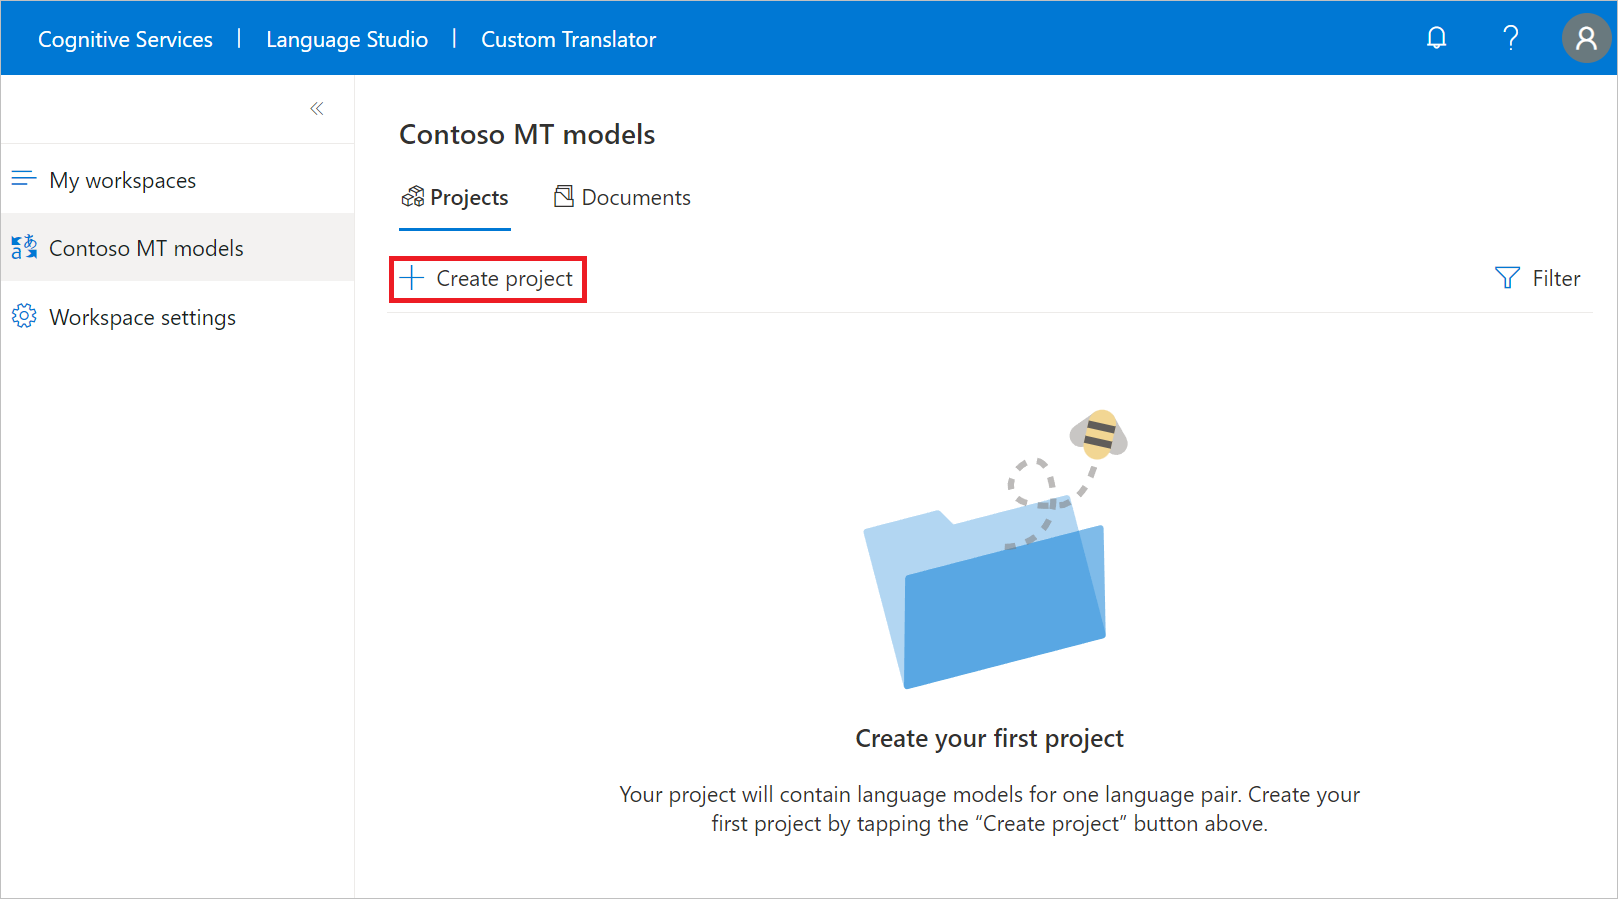
Once the workspace is created successfully, you're taken to the Projects page.
You create English-to-German project to train a custom model with only a training document type.
Select Create project.
Type English-to-German for Project name.
Select English (en) as Source language from the dropdown list.
Select German (de) as Target language from the dropdown list.
Select General for Domain from the dropdown list.
Select Create project.
Upload documents
In order to create a custom model, you need to upload all or a combination of training, tuning, testing, and dictionary document types.
In this quickstart, you'll upload training documents for customization.
Note
You can use our sample training, phrase and sentence dictionaries dataset, Customer sample English-to-German datasets, for this quickstart. However, for production, it's better to upload your own training dataset.
Select English-to-German project name.
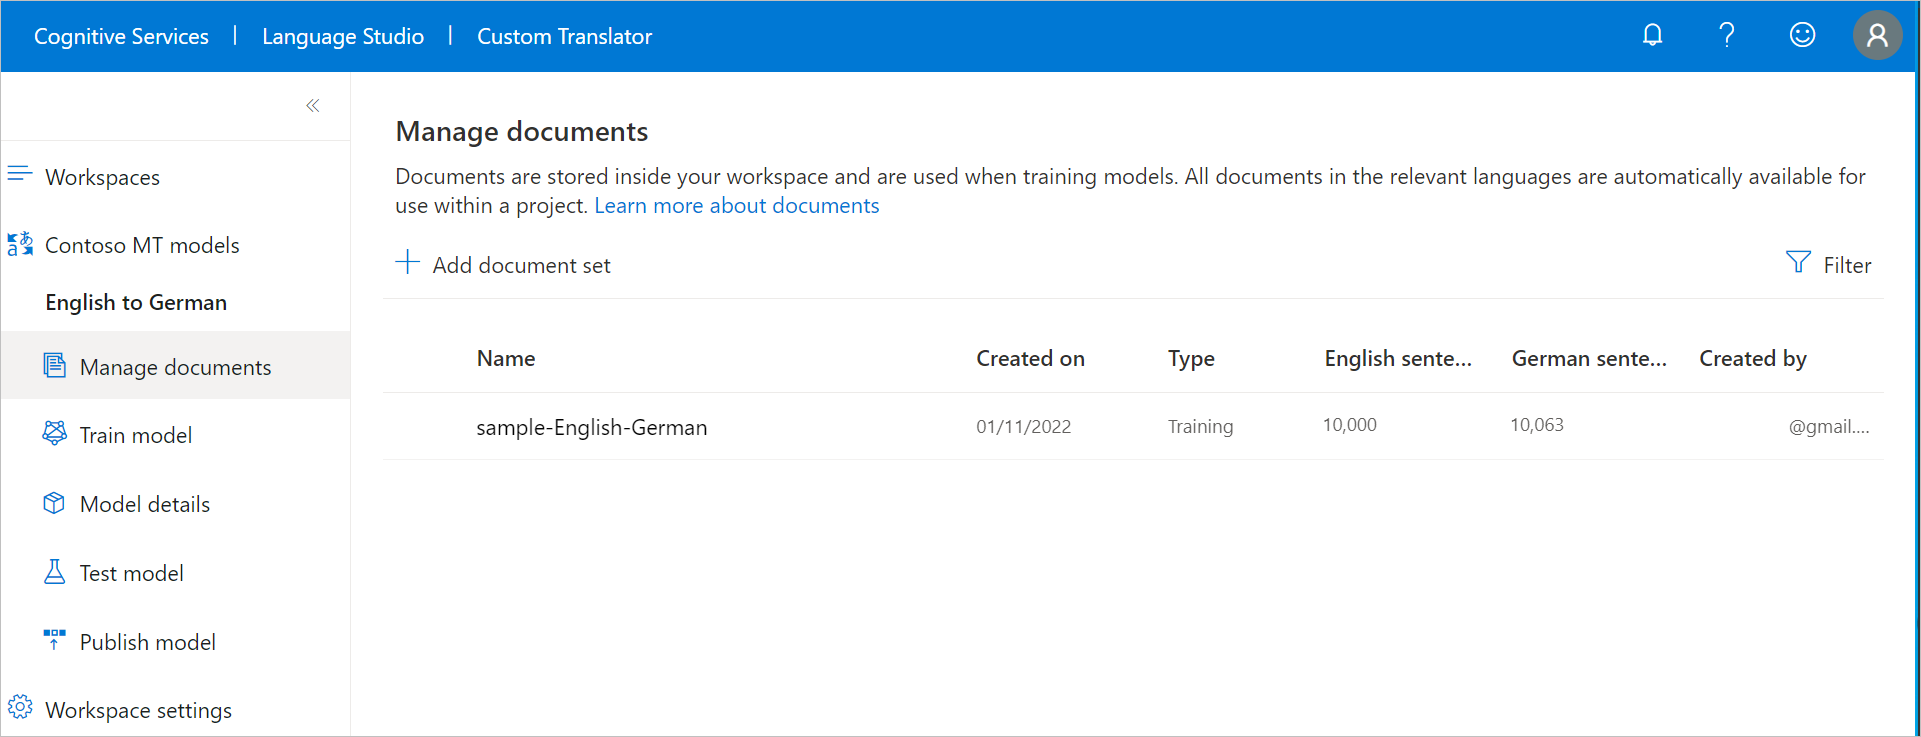
Select Manage documents from the left navigation menu.
Select Add document set.
Check the Training set box and select Next.
Keep Parallel documents checked and type sample-English-German.
Under the Source (English - EN) file, select Browse files and select sample-English-German-Training-en.txt.
Under Target (German - EN) file, select Browse files and select sample-English-German-Training-de.txt.
Select Upload
Note
You can upload the sample phrase and sentence dictionaries dataset. This step is left for you to complete.
Train your model
Now you're ready to train your English-to-German model.
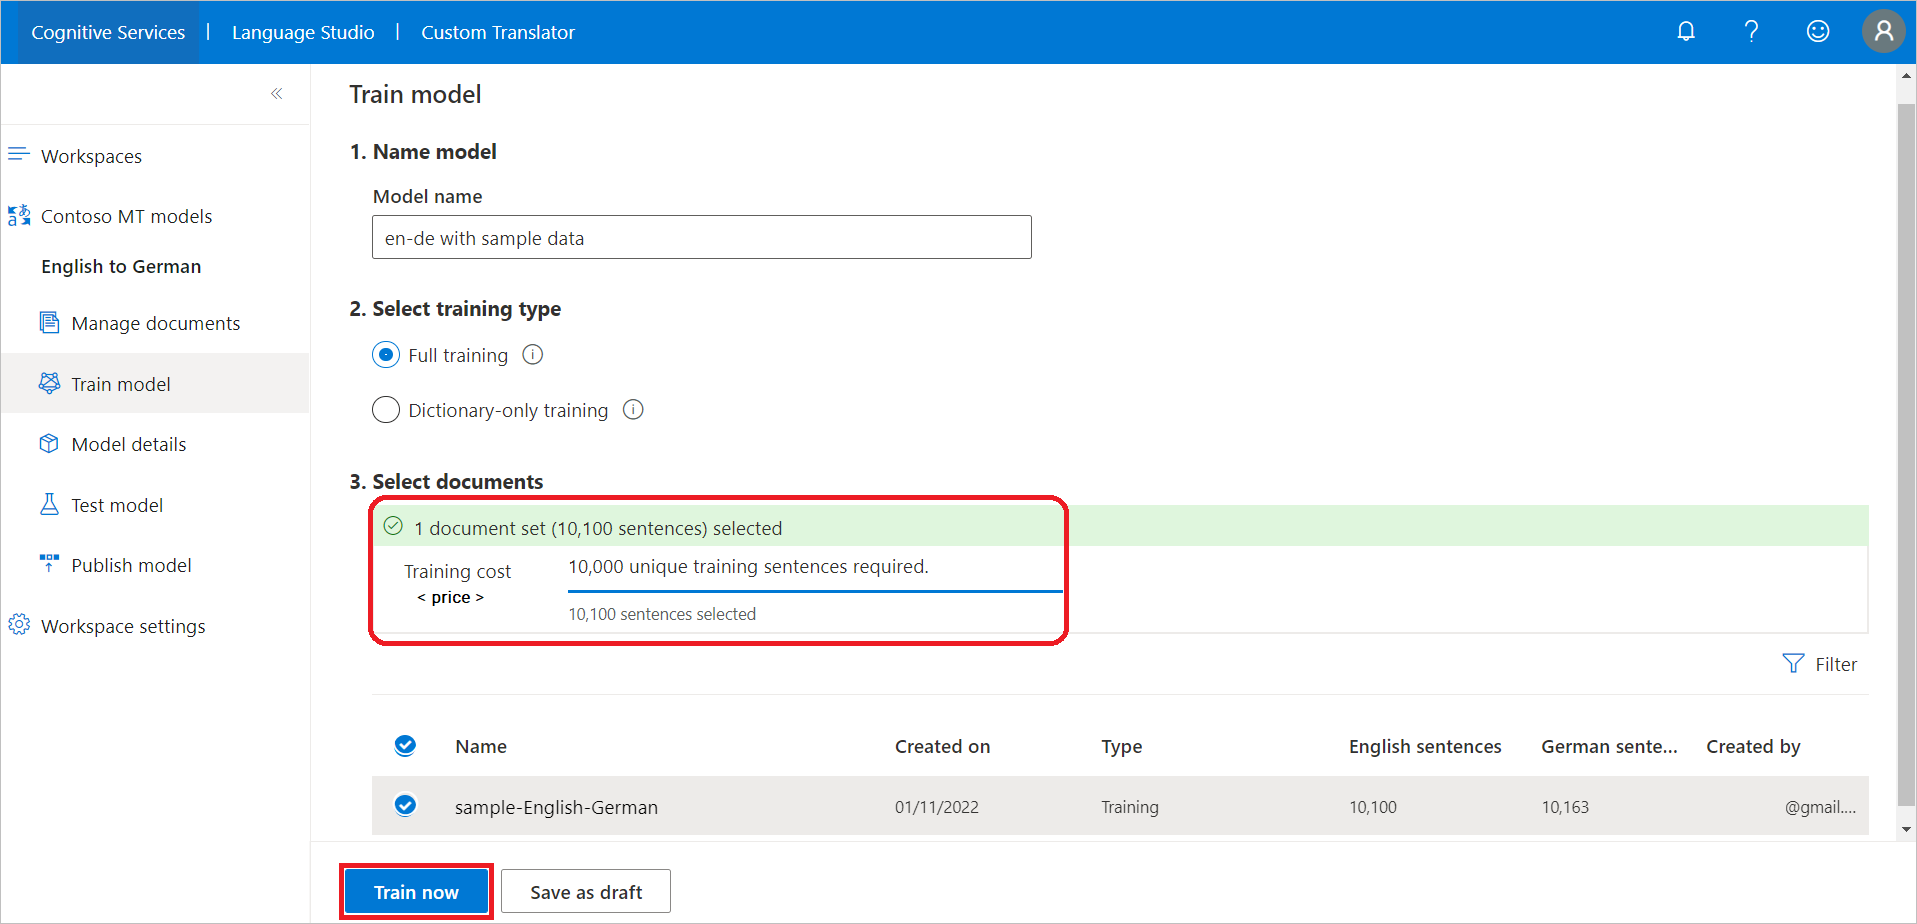
Select Train model from the left navigation menu.
Type en-de with sample data for Model name.
Keep Full training checked.
Under Select documents, check sample-English-German and review the training cost associated with the selected number of sentences.
Select Train now.
Select Train to confirm.
Note
Notifications displays model training in progress, e.g., Submitting data state. Training model takes few hours, subject to the number of selected sentences.
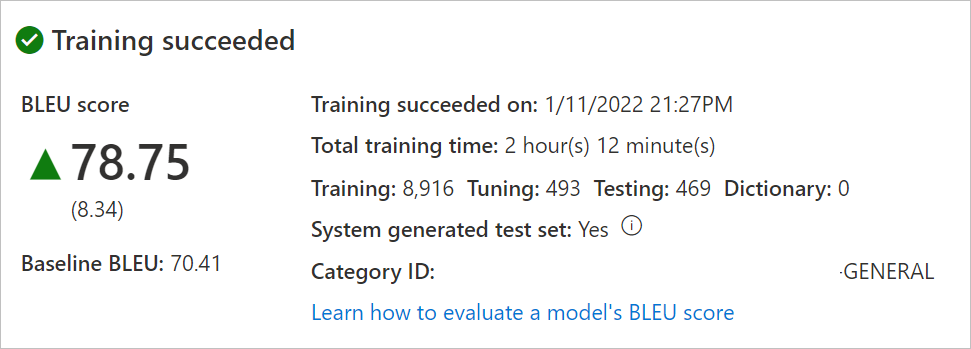
After successful model training, select Model details from the left navigation menu.
Select the model name en-de with sample data. Review training date/time, total training time, number of sentences used for training, tuning, testing, and dictionary. Check whether the system generated the test and tuning sets. You use the
Category IDto make translation requests.Evaluate the model BLEU score. The test set BLEU score is the custom model score and Baseline BLEU is the pretrained baseline model used for customization. A higher BLEU score means higher translation quality using the custom model.
Note
If you train with our shared customer sample datasets, BLEU score will be different than the image.
Test your model
Once your training has completed successfully, inspect the test set translated sentences.
- Select Test model from the left navigation menu.
- Select "en-de with sample data"
- Human evaluate translation from New model (custom model), and Baseline model (our pretrained baseline used for customization) against Reference (target translation from the test set)
Publish your model
Publishing your model makes it available for use with the Translator API. A project might have one or many successfully trained models. You can only publish one model per project; however, you can publish a model to one or multiple regions depending on your needs. For more information, see Translator pricing.
Select Publish model from the left navigation menu.
Select en-de with sample data and select Publish.
Check the desired region(s).
Select Publish. The status should transition from Deploying to Deployed.

Translate text
Developers should use the
Category IDwhen making translation requests with Microsoft Translator Text API V3. More information about the Translator Text API can be found on the API Reference webpage.Business users may want to download and install our free DocumentTranslator app for Windows.
Next steps
Feedback
Coming soon: Throughout 2024 we will be phasing out GitHub Issues as the feedback mechanism for content and replacing it with a new feedback system. For more information see: https://aka.ms/ContentUserFeedback.
Submit and view feedback for