Get started with the chat hero sample
Important
The Azure Communication Services Group Chat Hero Sample demonstrates how the Communication Services Chat Web SDK can be used to build a group chat experience.
In this Sample quickstart, we learn how the sample works before we run the sample on your local machine. We then deploy the sample to Azure using your own Azure Communication Services resources.
Overview
The sample has both a client-side application and a server-side application. The client-side application is a React/Redux web application that uses Microsoft's Fluent UI framework. This application sends requests to a Node.js server-side application that helps the client-side application connect to Azure.
Here's what the sample looks like:
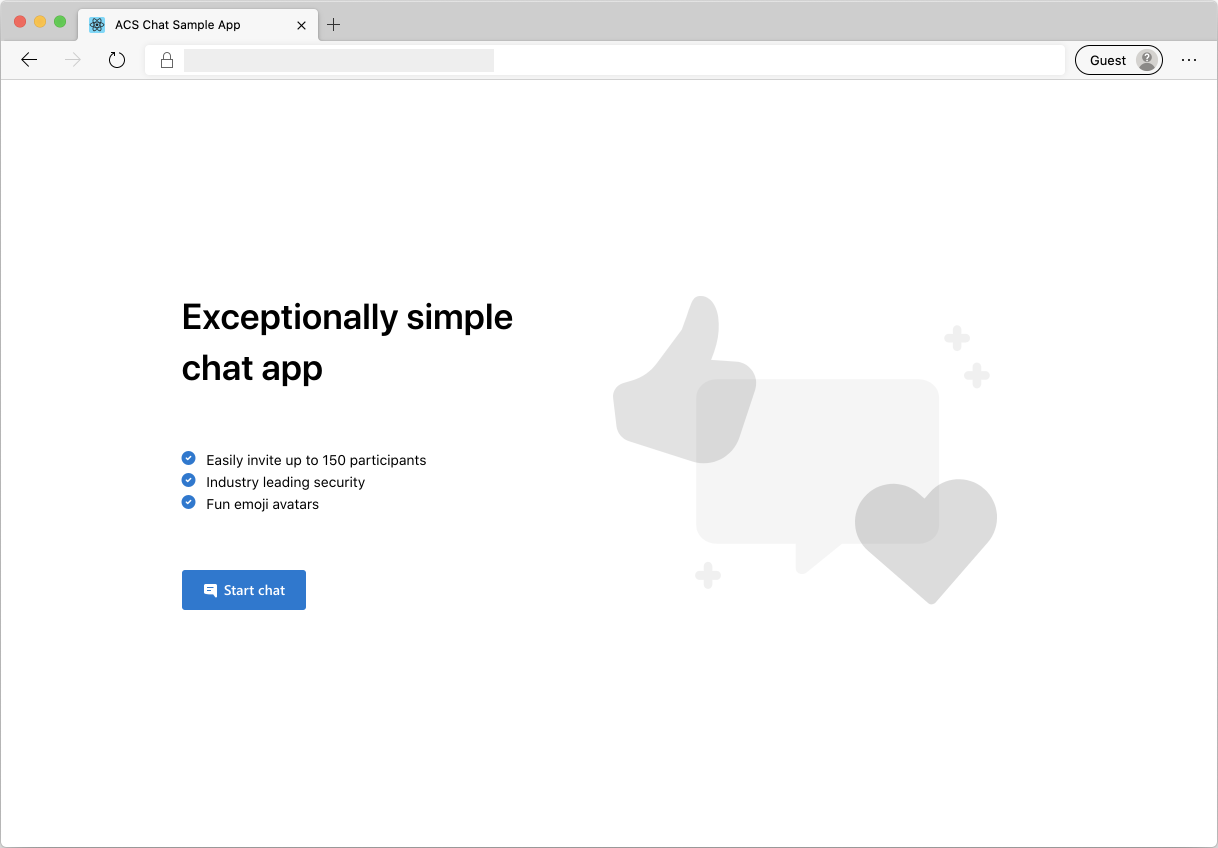
When you press Start a Chat, the web application fetches a user access token from the server-side application. You then use this token to connect the client app to Azure Communication Services. Once the token is retrieved, the system prompts you to enter your name and choose an emoji to represent you in chat.
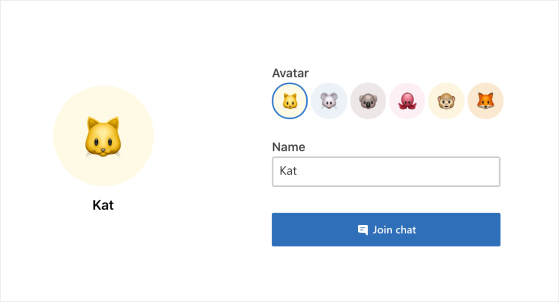
Once you configure your display name and emoji, you can join the chat session. Now you see the main chat canvas where the core chat experience lives.
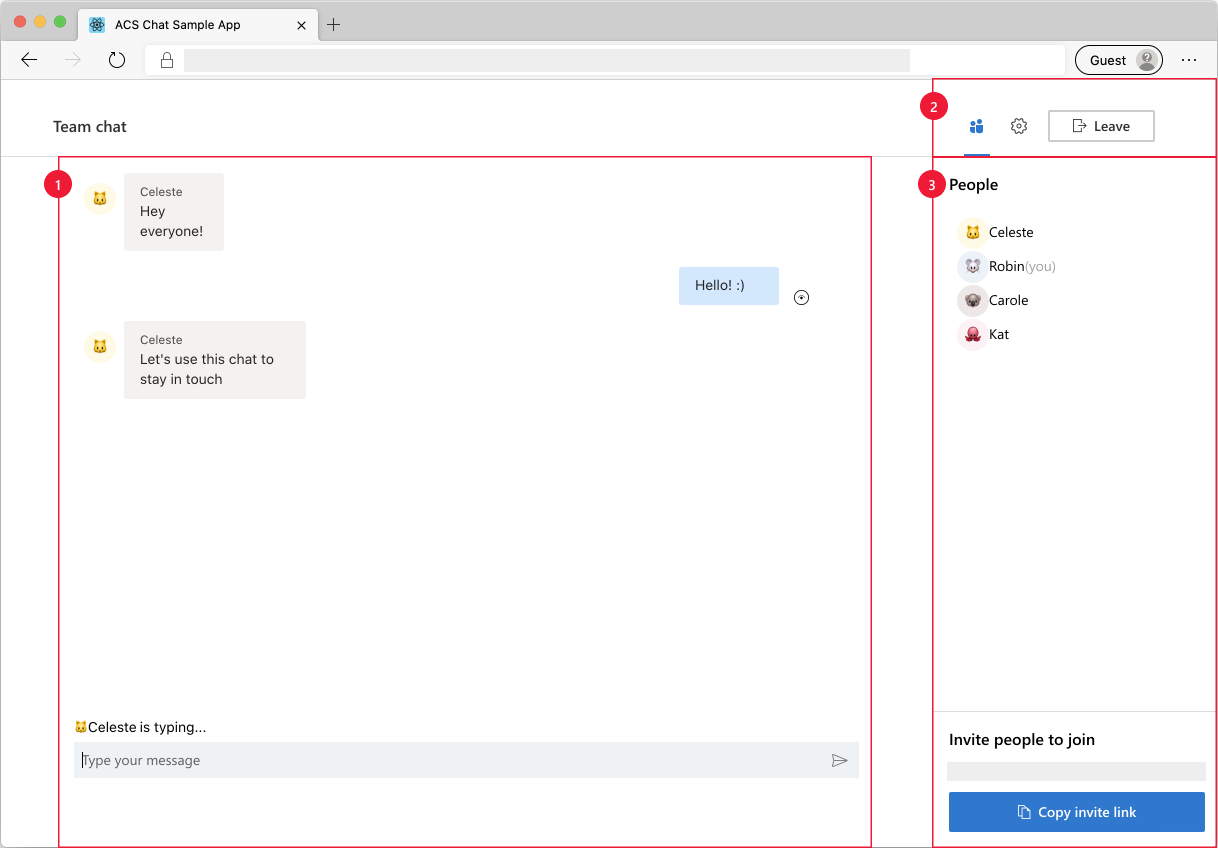
Components of the main chat screen:
- Main Chat Area: The core chat experience where users can send and receive messages. To send messages, you can use the input area and press enter (or use the send button). Received chat messages are organized by sender with the correct name and emoji. You see two types of notifications in the chat area: 1) typing notifications when a user is typing and 2) sent and read notifications for messages.
- Header: Where the user sees the title of the chat thread and the controls for toggling participant and settings side bars, and a leave button to exit the chat session.
- Side Bar: Where participants and setting information display when toggled using the controls in the header. The participants side bar contains a list of participants in the chat and a link to invite participants to the chat session. The settings side bar enables you to configure the chat thread title.
Complete the following prerequisites and steps to set up the sample.
Prerequisites
- Visual Studio Code (Stable Build).
- Node.js (16.14.2 and above).
- Create an Azure account with an active subscription. For details, see Create an account for free.
- Create an Azure Communication Services resource. For details, see Create an Azure Communication Resource. Record your resource connection string for this quickstart.
Before running the sample for the first time
Open an instance of PowerShell, Windows Terminal, Command Prompt, or equivalent and navigate to the directory where you'd like to clone the sample to.
Clone the repo using the following CLI string:
git clone https://github.com/Azure-Samples/communication-services-web-chat-hero.gitOr clone the repo using any method described in Clone an existing Git repo.
Get the
Connection StringandEndpoint URLfrom the Azure portal or by using the Azure CLI.az communication list-key --name "<acsResourceName>" --resource-group "<resourceGroup>"For more information on connection strings, see Create an Azure Communication Services resources
Once you get the
Connection String, Add the connection string to the Server/appsettings.json file found under the Chat folder. Input your connection string in the variable:ResourceConnectionString.Once you get the
Endpoint, add the endpoint string to the Server/appsetting.json file. Input your endpoint in the variable:EndpointUrl.Get the
identityfrom the Azure portal. Select Identities & User Access Tokens in the Azure portal. Generate a user withChatscope.Once you get the
identitystring, add the identity string to the Server/appsetting.json file. Input your identity string in the variable:AdminUserId. This is the server user to add new users to the chat thread.
Local run
- Set your connection string in
Server/appsettings.json - Set your endpoint URL string in
Server/appsettings.json - Set your adminUserId string in
Server/appsettings.json npm run setupfrom the root directorynpm run startfrom the root directory
You can test the sample locally by opening multiple browser sessions with the URL of your chat to simulate a multi-user chat.
Publish the sample to Azure
- Under the root directory, run these commands:
npm run setup
npm run build
npm run package
- Use the Azure extension and deploy the Chat/dist directory to your app service
Clean up resources
If you want to clean up and remove a Communication Services subscription, you can delete the resource or resource group. Deleting the resource group also deletes any other resources associated with it. Learn more about cleaning up resources.
Next steps
For more information, see the following articles:
- Learn about chat concepts
- Familiarize yourself with our Chat SDK
- Check out the chat components in the UI Library
Related topics
Feedback
Coming soon: Throughout 2024 we will be phasing out GitHub Issues as the feedback mechanism for content and replacing it with a new feedback system. For more information see: https://aka.ms/ContentUserFeedback.
Submit and view feedback for