Tutorial: Deploy to Azure Container Apps using Visual Studio
Azure Container Apps enables you to run microservices and containerized applications on a serverless platform. With Container Apps, you enjoy the benefits of running containers while leaving behind the concerns of manually configuring cloud infrastructure and complex container orchestrators.
In this tutorial, you'll deploy a containerized ASP.NET Core 6.0 application to Azure Container Apps using Visual Studio. The steps below also apply to earlier versions of ASP.NET Core.
Prerequisites
- An Azure account with an active subscription is required. If you don't already have one, you can create an account for free.
- Visual Studio 2022 version 17.2 or higher, available as a free download.
Create the project
Begin by creating the containerized ASP.NET Core application to deploy to Azure.
Inside Visual Studio, select File and then choose New => Project.
In the dialog window, search for ASP.NET, and then choose ASP.NET Core Web App and select Next.
In the Project Name field, name the application MyContainerApp and then select Next.
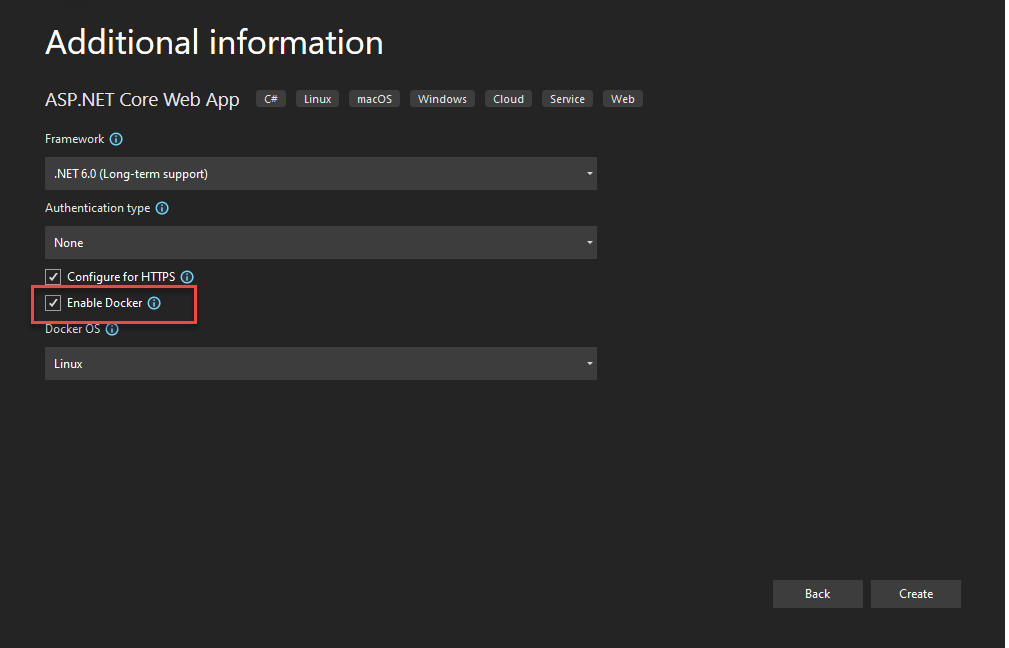
On the Additional Information screen, make sure to select Enable Docker, and then make sure Linux is selected for the Docker OS setting. Azure Container Apps currently does not support Windows containers. This selection ensures the project template supports containerization by default. While enabled, the project uses a container as it is running or building.
Click Create and Visual Studio creates and loads the project.
Deploy to Azure Container Apps
The application includes a Dockerfile because the Enable Docker setting was selected in the project template. Visual Studio uses the Dockerfile to build the container image that is run by Azure Container Apps.
Refer to How Visual Studio builds containerized apps if you'd like to learn more about the specifics of this process.
You are now ready to deploy to the application to Azure Containers Apps.
Create the resources
The Visual Studio publish dialogs will help you choose existing Azure resources, or create new ones to be used to deploy your applications to. It will also build the container image using the Dockerfile in the project, push this image to ACR, and finally deploy the new image to the container app selected.
Right-click the MyContainerApp project node and select Publish.
In the dialog, choose Azure from the list of publishing options, and then select Next.

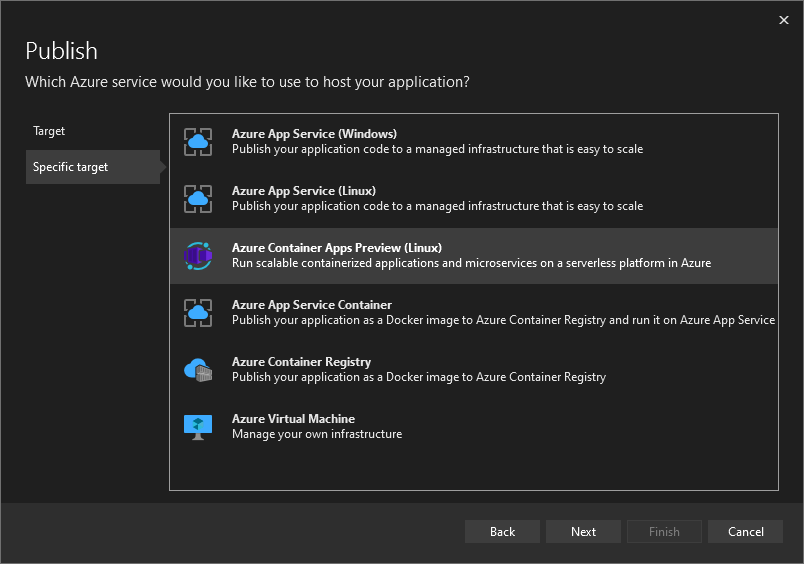
On the Specific target screen, choose Azure Container Apps (Linux), and then select Next again.
Next, create an Azure Container App to host the project. Select the green plus icon on the right to open the create dialog. In the Create new dialog, enter the following values:
- Container App name: Enter a name of
msdocscontainerapp. - Subscription name: Choose the subscription where you would like to host your app.
- Resource group: A resource group acts as a logical container to organize related resources in Azure. You can either select an existing resource group, or select New to create one with a name of your choosing, such as
msdocscontainerapps. - Container Apps Environment: Container Apps Environment: Every container app must be part of a container app environment. An environment provides an isolated network for one or more container apps, making it possible for them to easily invoke each other. Click New to open the Create new dialog for your container app environment. Leave the default values and select OK to close the environment dialog.
- Container Name: This is the friendly name of the container that will run for this container app. Use the name
msdocscontainer1for this quickstart. A container app typically runs a single container, but there are times when having more than one container is needed. One such example is when a sidecar container is required to perform an activity such as specialized logging or communications.

- Container App name: Enter a name of
Select Create to finalize the creation or your container app. Visual Studio and Azure create the needed resources on your behalf. This process may take a couple minutes, so allow it to run to completion before moving on.
Once the resources are created, choose Next.

On the Registry screen, you can either select an existing Registry if you have one, or create a new one. To create a new one, click the green + icon on the right. On the Create new registry screen, fill in the following values:
- DNS prefix: Enter a value of
msdocscontainerregistryor a name of your choosing. - Subscription Name: Select the subscription you want to use - you may only have one to choose from.
- Resource Group: Choose the msdocs resource group you created previously.
- Sku: Select Standard.
- Registry Location: Select a region that is geographically close to you.
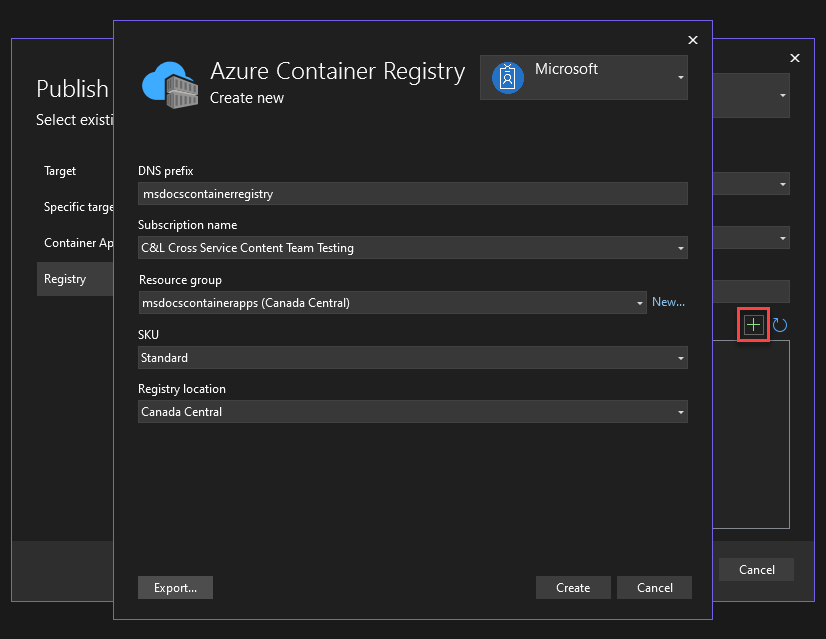
- DNS prefix: Enter a value of
After you have populated these values, select Create. Visual Studio and Azure will take a moment to create the registry.
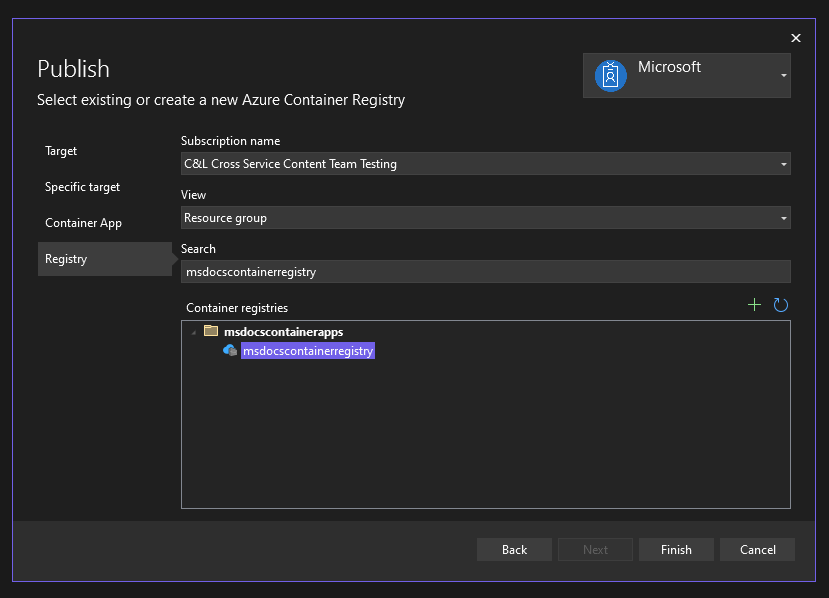
Once the container registry is created, make sure it is selected, and then choose Finish. Visual Studio will take a moment to create the publish profile. This publish profile is where VS stores the publish options and resources you chose so you can quickly publish again whenever you want. You can close the dialog once it finishes.
Publish the app using Visual Studio
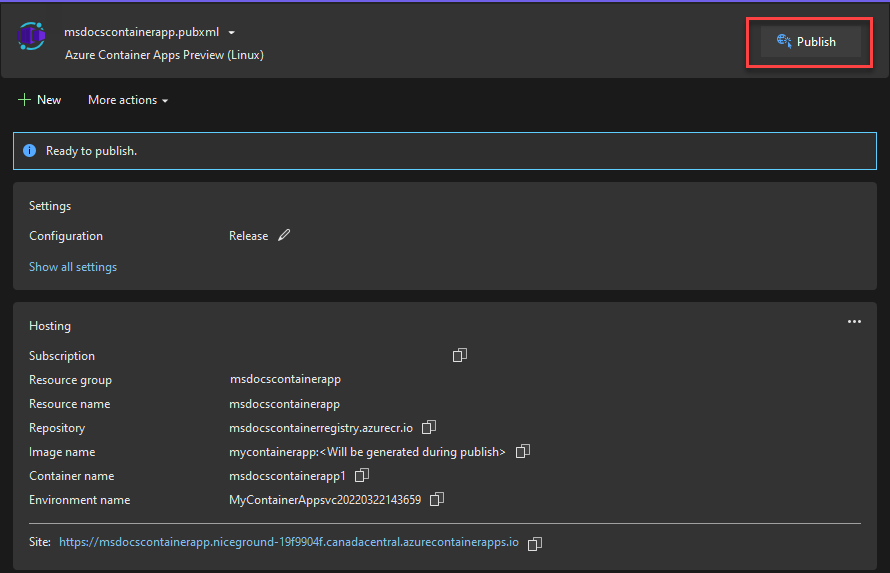
While the resources and publishing profile are created, you still need to publish and deploy the app to Azure.
Choose Publish in the upper right of the publishing profile screen to deploy to the container app you created in Azure. This process may take a moment, so wait for it to complete.
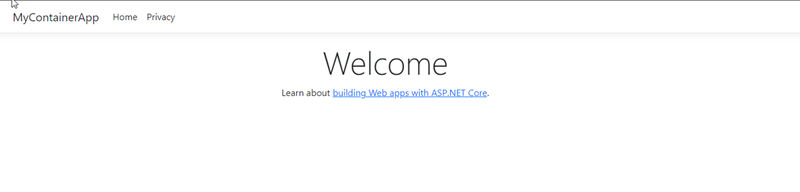
When the app finishes deploying, Visual Studio opens a browser to the URL of your deployed site. This page may initially display an error if all of the proper resources have not finished provisioning. You can continue to refresh the browser periodically to check if the deployment has fully completed.
Publish the app using GitHub Actions
Container Apps can also be deployed using CI/CD through GitHub actions, which are a powerful tool for automating, customizing, and executing development workflows directly through the GitHub repository of your project.
If Visual Studio detects the project you are publishing is hosted in GitHub, the publish flow presents an additional Deployment type step. This stage allows developers to choose whether to publish directly through Visual Studio using the steps shown earlier in the quickstart, or through a GitHub Actions workflow.
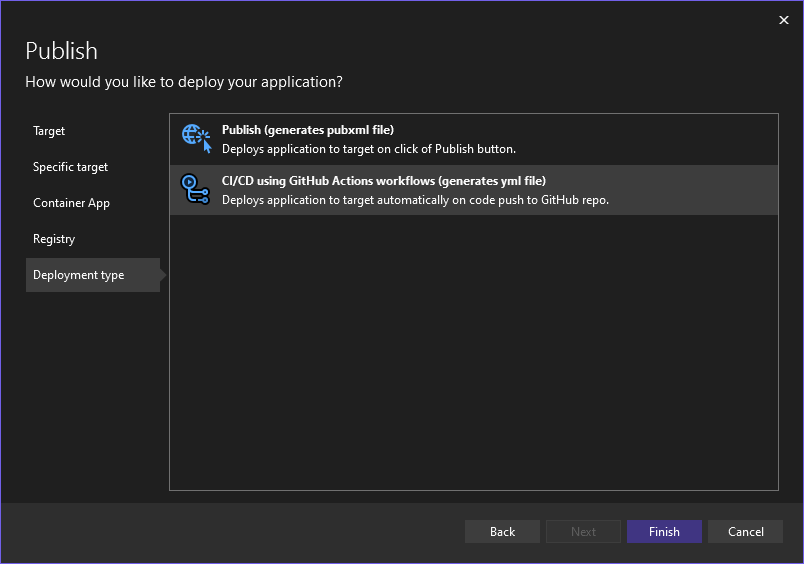
If you select the GitHub Actions workflow, Visual Studio will add a .github folder to the root directory of the project, along with a generated YAML file inside of it. The YAML file contains GitHub Actions configurations to build and deploy your app to Azure every time you push your code.
After you make a change and push your code, you can see the progress of the build and deploy process in GitHub under the Actions tab. This page provides detailed logs and indicators regarding the progress and health of the workflow.
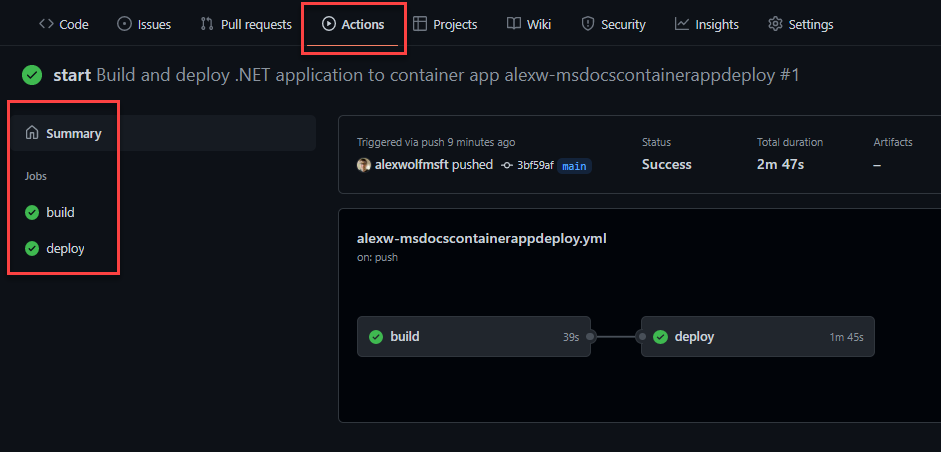
Once you see a green checkmark next to the build and deploy jobs the workflow is complete. When you browse to your Container Apps site you should see the latest changes applied. You can always find the URL for your container app using the Azure portal page.
Clean up resources
If you're not going to continue to use this application, you can delete the Azure Container Apps instance and all the associated services by removing the resource group.
Follow these steps in the Azure portal to remove the resources you created:
- Select the msdocscontainerapps resource group from the Overview section.
- Select the Delete resource group button at the top of the resource group Overview.
- Enter the resource group name msdocscontainerapps in the Are you sure you want to delete "my-container-apps" confirmation dialog.
- Select Delete.
The process to delete the resource group may take a few minutes to complete.
Tip
Having issues? Let us know on GitHub by opening an issue in the Azure Container Apps repo.
Next steps
Feedback
Coming soon: Throughout 2024 we will be phasing out GitHub Issues as the feedback mechanism for content and replacing it with a new feedback system. For more information see: https://aka.ms/ContentUserFeedback.
Submit and view feedback for