Transformation with Azure Databricks
APPLIES TO:  Azure Data Factory
Azure Synapse Analytics
Azure Data Factory
Azure Synapse Analytics
Tip
Try out Data Factory in Microsoft Fabric, an all-in-one analytics solution for enterprises. Microsoft Fabric covers everything from data movement to data science, real-time analytics, business intelligence, and reporting. Learn how to start a new trial for free!
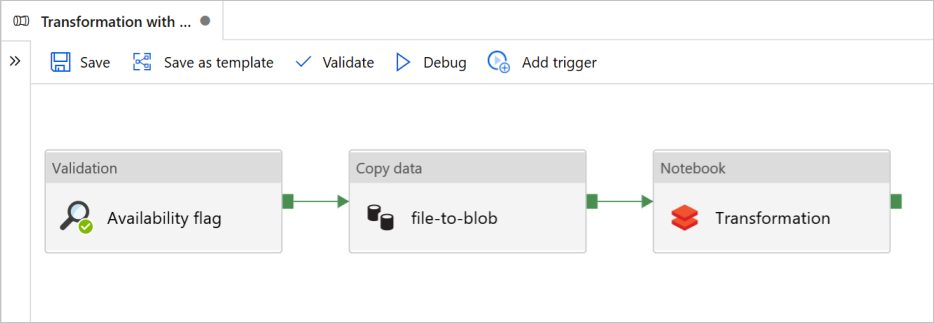
In this tutorial, you create an end-to-end pipeline that contains the Validation, Copy data, and Notebook activities in Azure Data Factory.
Validation ensures that your source dataset is ready for downstream consumption before you trigger the copy and analytics job.
Copy data duplicates the source dataset to the sink storage, which is mounted as DBFS in the Azure Databricks notebook. In this way, the dataset can be directly consumed by Spark.
Notebook triggers the Databricks notebook that transforms the dataset. It also adds the dataset to a processed folder or Azure Synapse Analytics.
For simplicity, the template in this tutorial doesn't create a scheduled trigger. You can add one if necessary.
Prerequisites
An Azure Blob storage account with a container called
sinkdatafor use as a sink.Make note of the storage account name, container name, and access key. You'll need these values later in the template.
An Azure Databricks workspace.
Import a notebook for Transformation
To import a Transformation notebook to your Databricks workspace:
Sign in to your Azure Databricks workspace, and then select Import.
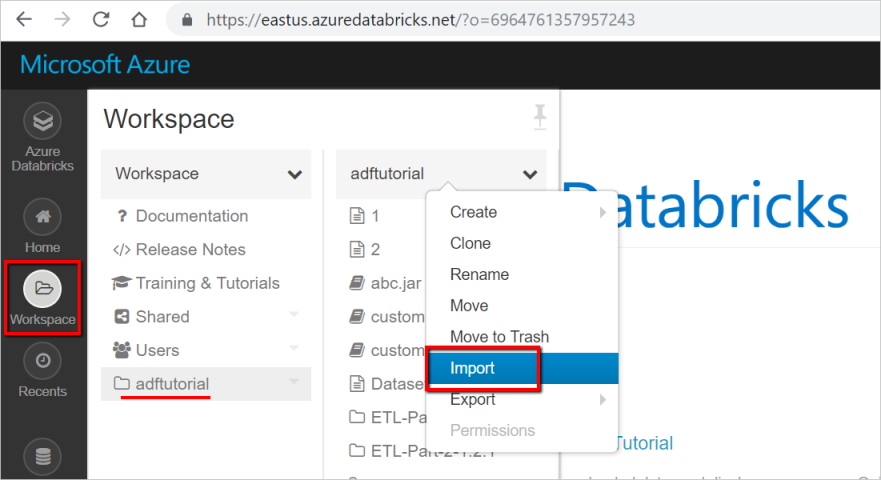 Your workspace path can be different from the one shown, but remember it for later.
Select Import from: URL. In the text box, enter
https://adflabstaging1.blob.core.windows.net/share/Transformations.html.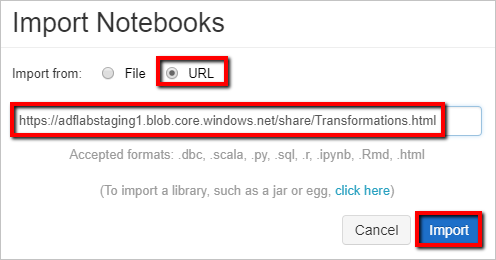
Now let's update the Transformation notebook with your storage connection information.
In the imported notebook, go to command 5 as shown in the following code snippet.
- Replace
<storage name>and<access key>with your own storage connection information. - Use the storage account with the
sinkdatacontainer.
# Supply storageName and accessKey values storageName = "<storage name>" accessKey = "<access key>" try: dbutils.fs.mount( source = "wasbs://sinkdata\@"+storageName+".blob.core.windows.net/", mount_point = "/mnt/Data Factorydata", extra_configs = {"fs.azure.account.key."+storageName+".blob.core.windows.net": accessKey}) except Exception as e: # The error message has a long stack track. This code tries to print just the relevant line indicating what failed. import re result = re.findall(r"\^\s\*Caused by:\s*\S+:\s\*(.*)\$", e.message, flags=re.MULTILINE) if result: print result[-1] \# Print only the relevant error message else: print e \# Otherwise print the whole stack trace.- Replace
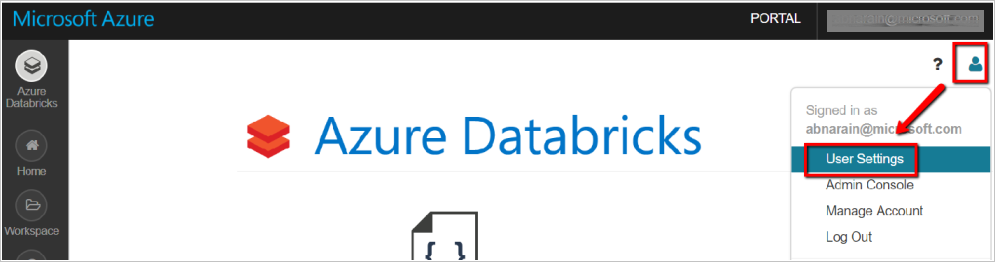
Generate a Databricks access token for Data Factory to access Databricks.
- In your Databricks workspace, select your user profile icon in the upper right.
- Select User Settings.
- Select Generate New Token under the Access Tokens tab.
- Select Generate.
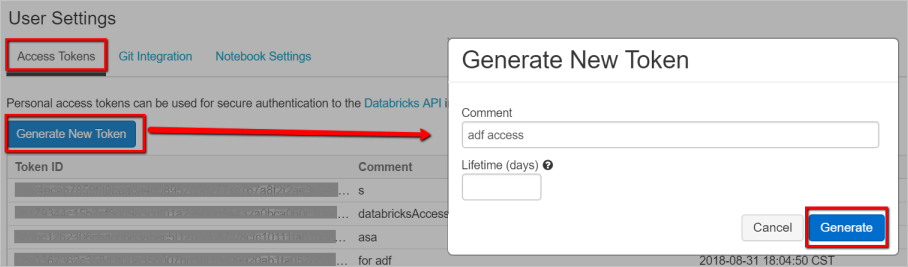
Save the access token for later use in creating a Databricks linked service. The access token looks something like
dapi32db32cbb4w6eee18b7d87e45exxxxxx.
How to use this template
Go to the Transformation with Azure Databricks template and create new linked services for following connections.

Source Blob Connection - to access the source data.
For this exercise, you can use the public blob storage that contains the source files. Reference the following screenshot for the configuration. Use the following SAS URL to connect to source storage (read-only access):
https://storagewithdata.blob.core.windows.net/data?sv=2018-03-28&si=read%20and%20list&sr=c&sig=PuyyS6%2FKdB2JxcZN0kPlmHSBlD8uIKyzhBWmWzznkBw%3D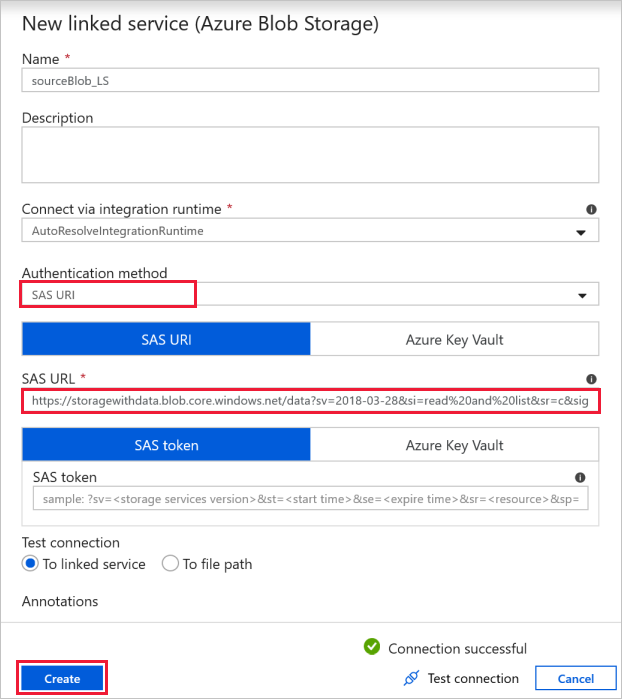
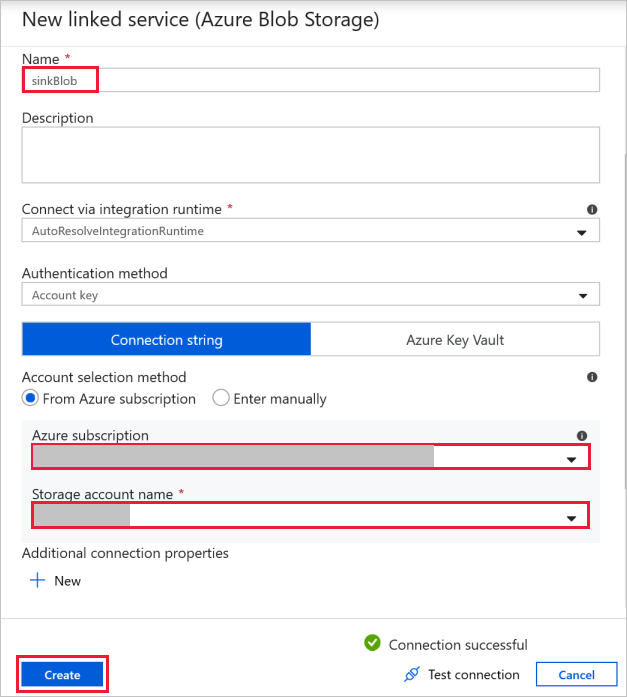
Destination Blob Connection - to store the copied data.
In the New linked service window, select your sink storage blob.
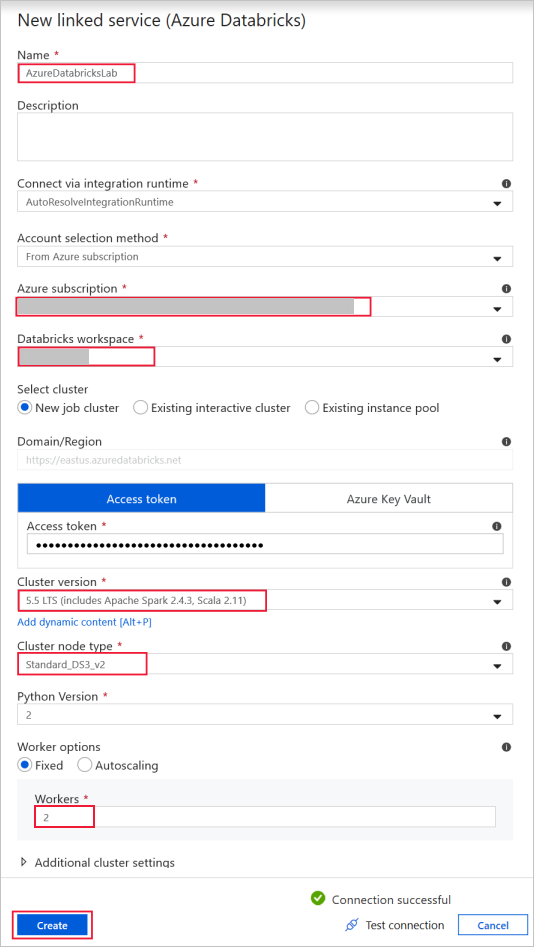
Azure Databricks - to connect to the Databricks cluster.
Create a Databricks-linked service by using the access key that you generated previously. You can opt to select an interactive cluster if you have one. This example uses the New job cluster option.
Select Use this template. You'll see a pipeline created.

Pipeline introduction and configuration
In the new pipeline, most settings are configured automatically with default values. Review the configurations of your pipeline and make any necessary changes.
In the Validation activity Availability flag, verify that the source Dataset value is set to
SourceAvailabilityDatasetthat you created earlier.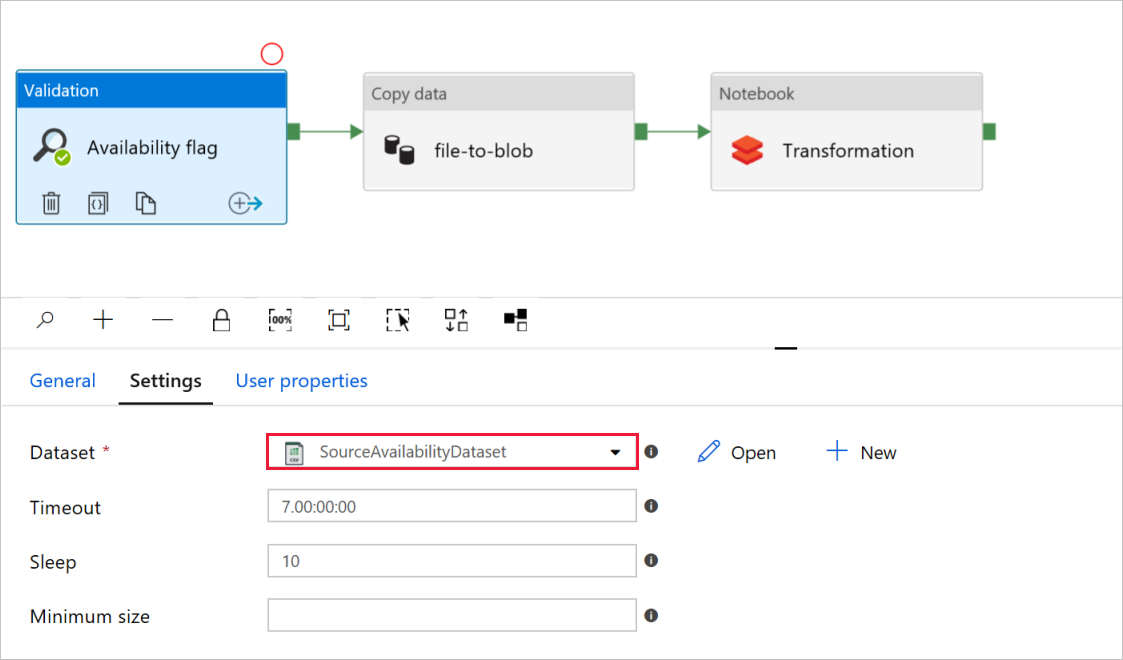
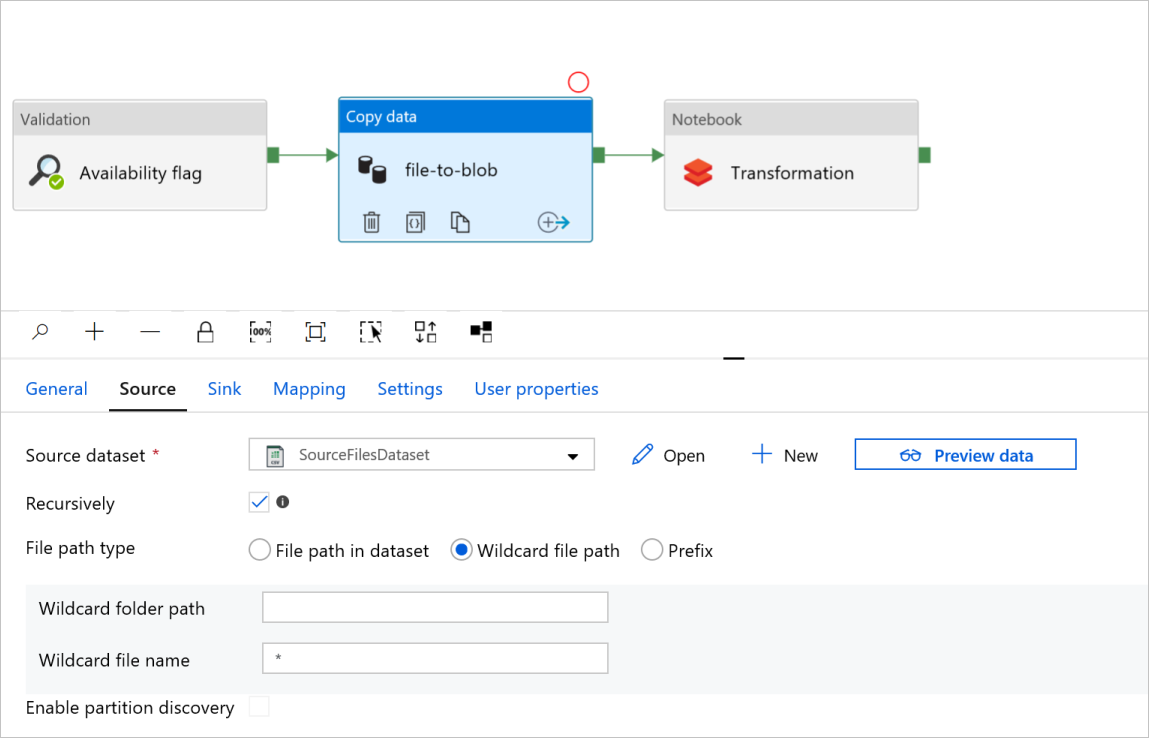
In the Copy data activity file-to-blob, check the Source and Sink tabs. Change settings if necessary.
Source tab
Sink tab

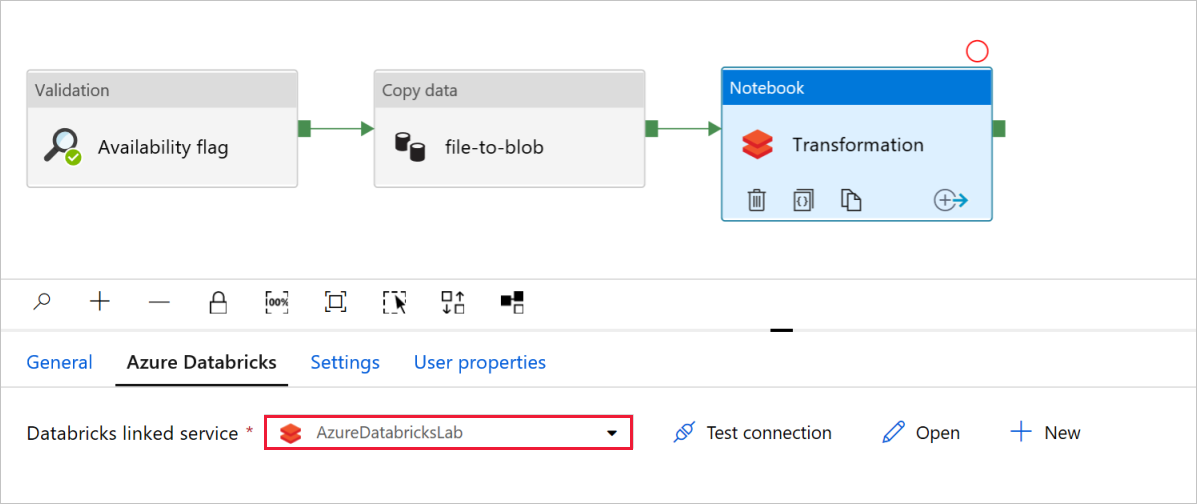
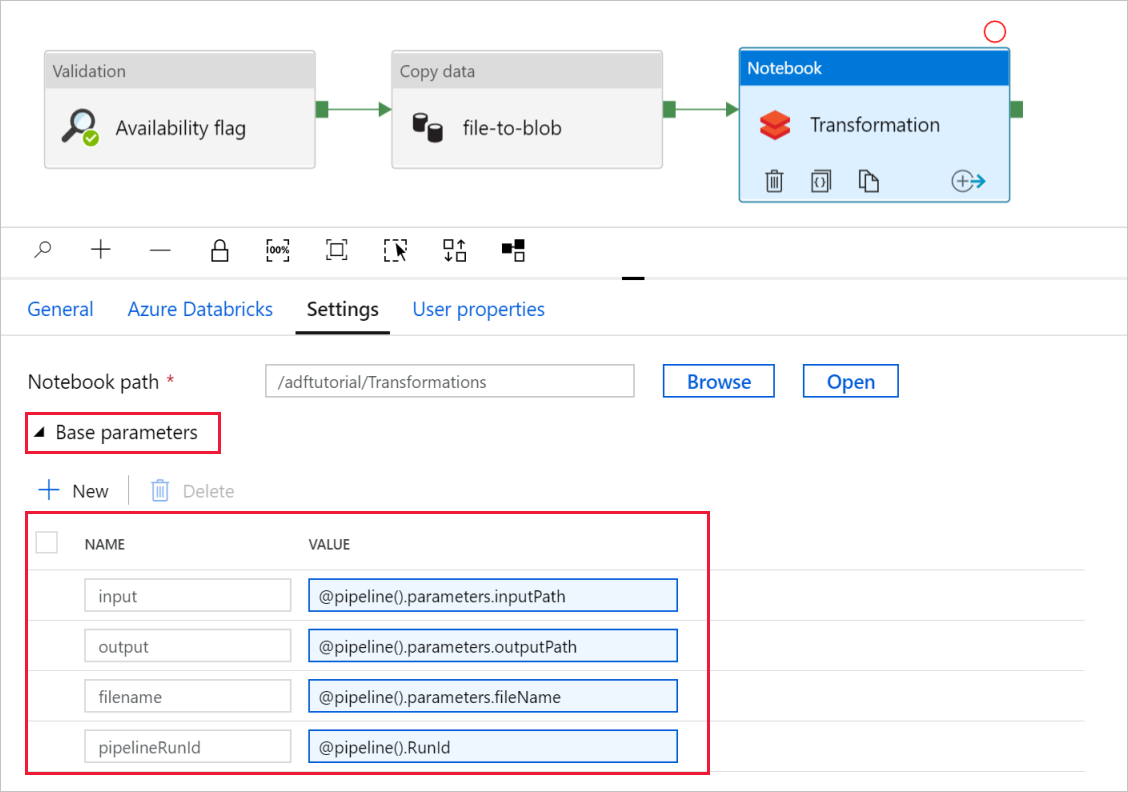
In the Notebook activity Transformation, review and update the paths and settings as needed.
Databricks linked service should be pre-populated with the value from a previous step, as shown:
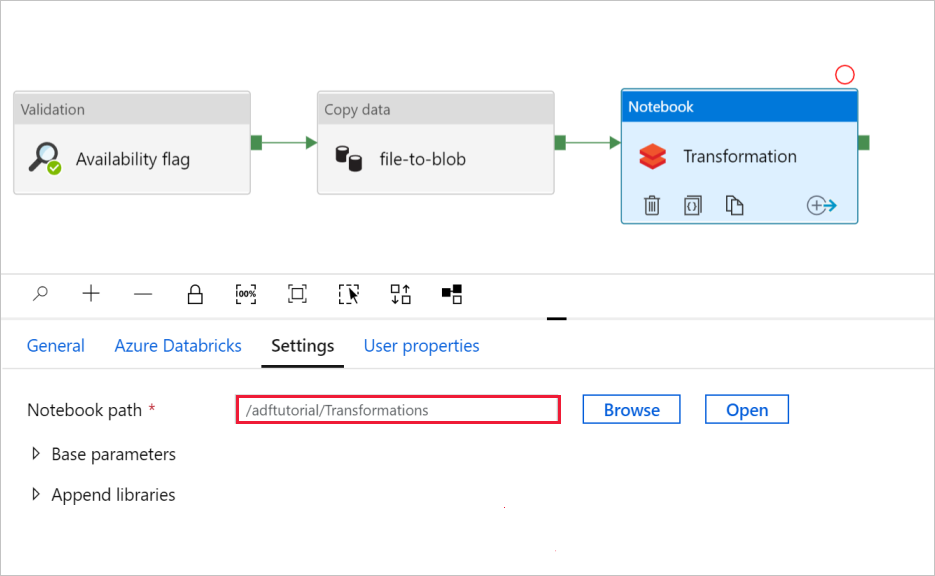
To check the Notebook settings:
Select the Settings tab. For Notebook path, verify that the default path is correct. You might need to browse and choose the correct notebook path.
Expand the Base Parameters selector and verify that the parameters match what is shown in the following screenshot. These parameters are passed to the Databricks notebook from Data Factory.
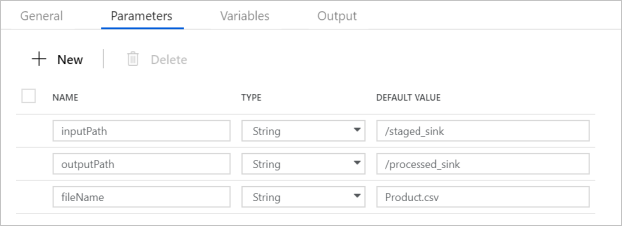
Verify that the Pipeline Parameters match what is shown in the following screenshot:
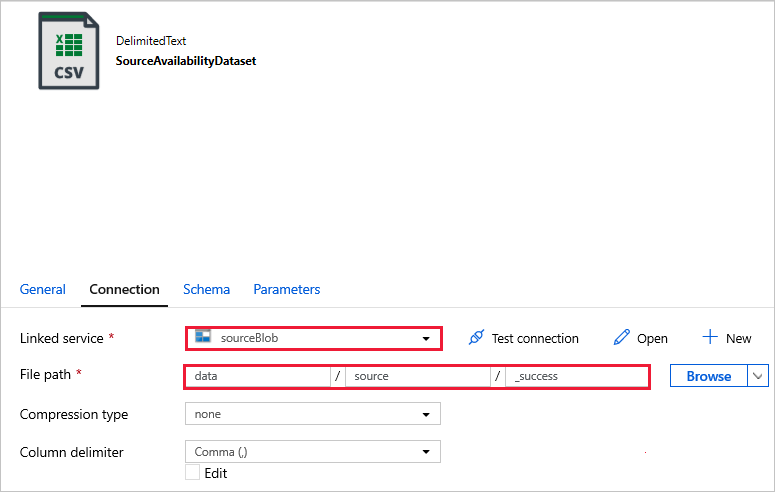
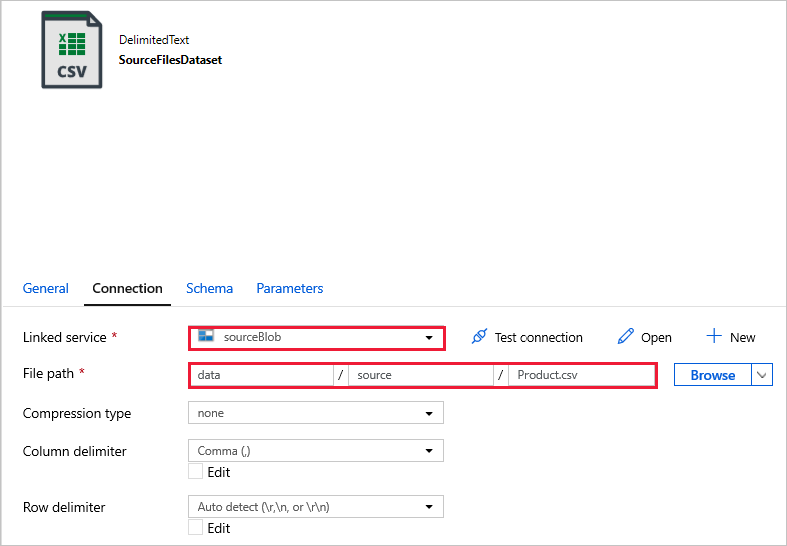
Connect to your datasets.
Note
In below datasets, the file path has been automatically specified in the template. If any changes required, make sure that you specify the path for both container and directory in case any connection error.
SourceAvailabilityDataset - to check that the source data is available.
SourceFilesDataset - to access the source data.
DestinationFilesDataset - to copy the data into the sink destination location. Use the following values:
Linked service -
sinkBlob_LS, created in a previous step.File path -
sinkdata/staged_sink.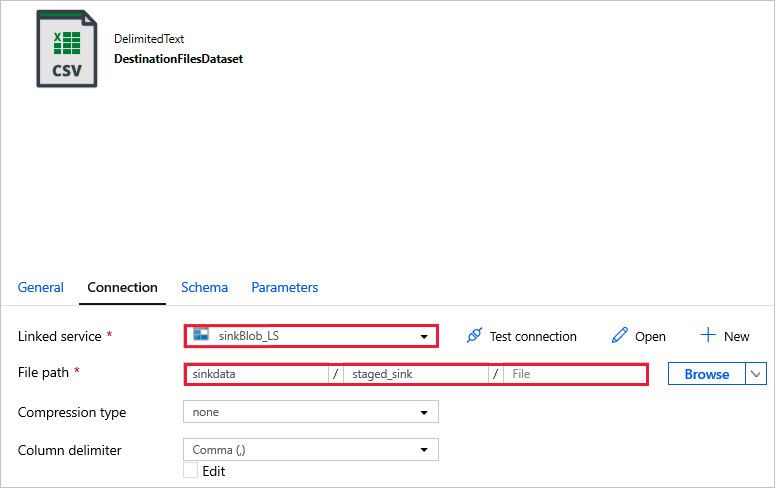
Select Debug to run the pipeline. You can find the link to Databricks logs for more detailed Spark logs.

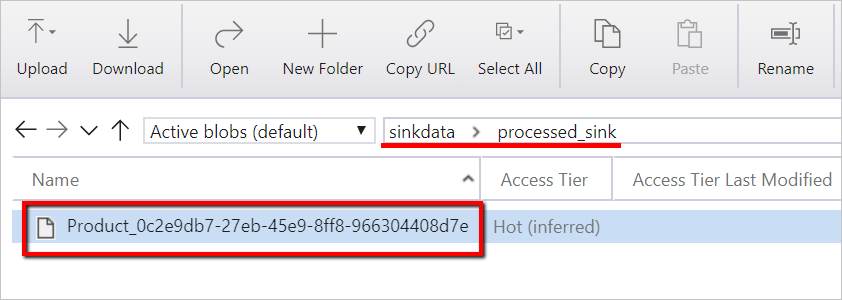
You can also verify the data file by using Azure Storage Explorer.
Note
For correlating with Data Factory pipeline runs, this example appends the pipeline run ID from the data factory to the output folder. This helps keep track of files generated by each run.
Related content
Feedback
Coming soon: Throughout 2024 we will be phasing out GitHub Issues as the feedback mechanism for content and replacing it with a new feedback system. For more information see: https://aka.ms/ContentUserFeedback.
Submit and view feedback for