Register data from Azure Data Lake Storage Gen1 in Azure Data Catalog
In this article, you will learn how to integrate Azure Data Lake Storage Gen1 with Azure Data Catalog to make your data discoverable within an organization by integrating it with Data Catalog. For more information on cataloging data, see Azure Data Catalog. To understand scenarios in which you can use Data Catalog, see Azure Data Catalog common scenarios.
Prerequisites
Before you begin this tutorial, you must have the following:
An Azure subscription. See Get Azure free trial.
Enable your Azure subscription for Data Lake Storage Gen1. See instructions.
A Data Lake Storage Gen1 account. Follow the instructions at Get started with Azure Data Lake Storage Gen1 using the Azure portal. For this tutorial, create a Data Lake Storage Gen1 account called datacatalogstore.
Once you have created the account, upload a sample data set to it. For this tutorial, let us upload all the .csv files under the AmbulanceData folder in the Azure Data Lake Git Repository. You can use various clients, such as Azure Storage Explorer, to upload data to a blob container.
Azure Data Catalog. Your organization must already have an Azure Data Catalog created for your organization. Only one catalog is allowed for each organization.
Register Data Lake Storage Gen1 as a source for Data Catalog
Go to
https://azure.microsoft.com/services/data-catalog, and click Get started.Log into the Azure Data Catalog portal, and click Publish data.

On the next page, click Launch Application. This will download the application manifest file on your computer. Double-click the manifest file to start the application.
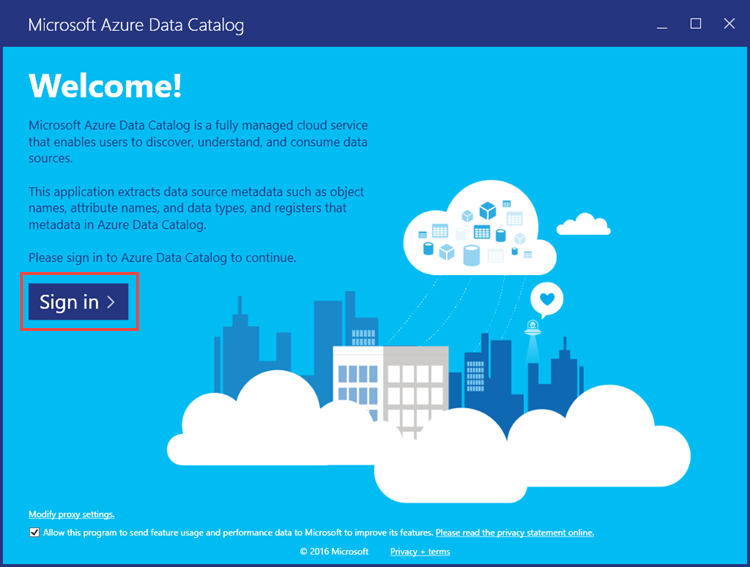
On the Welcome page, click Sign in, and enter your credentials.
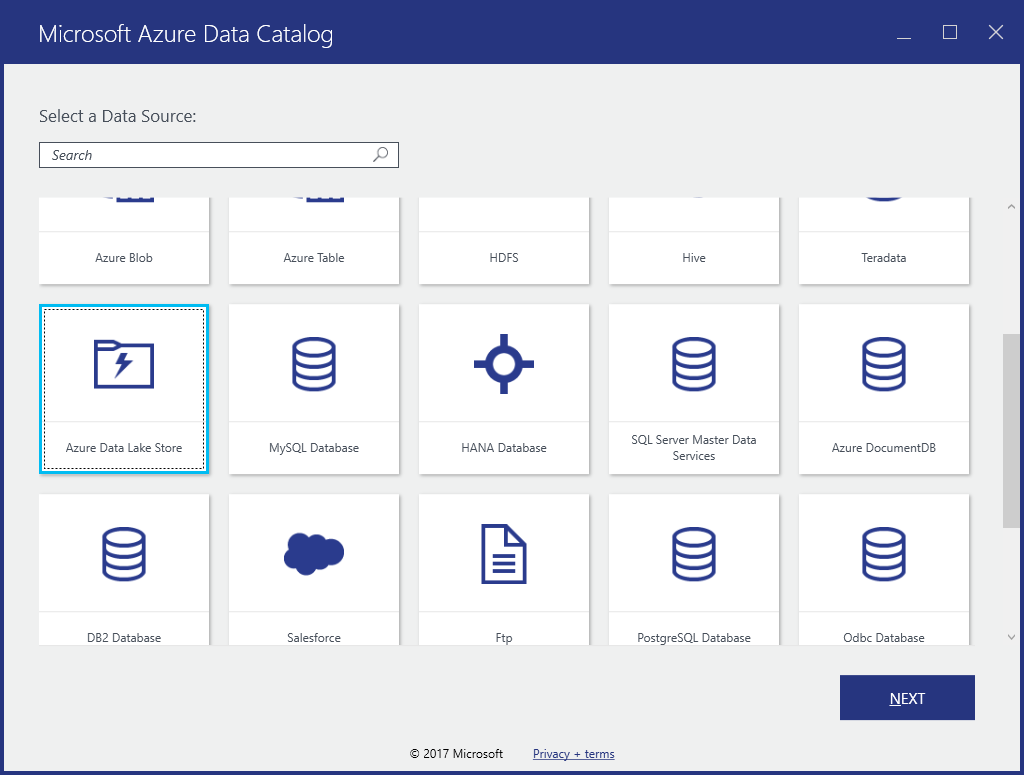
On the Select a Data Source page, select Azure Data Lake Store, and then click Next.
On the next page, provide the Data Lake Storage Gen1 account name that you want to register in Data Catalog. Leave the other options as default and then click Connect.

The next page can be divided into the following segments.
a. The Server Hierarchy box represents the Data Lake Storage Gen1 account folder structure. $Root represents the Data Lake Storage Gen1 account root, and AmbulanceData represents the folder created in the root of the Data Lake Storage Gen1 account.
b. The Available objects box lists the files and folders under the AmbulanceData folder.
c. The Objects to be registered box lists the files and folders that you want to register in Azure Data Catalog.
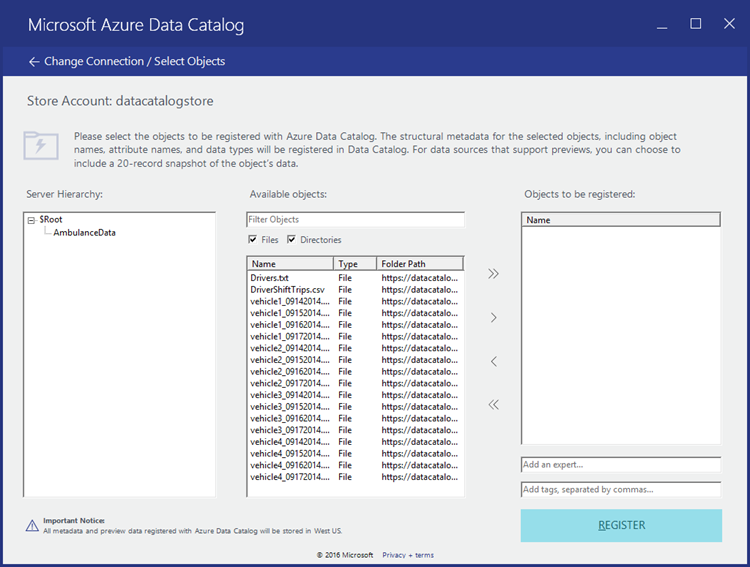
For this tutorial, you should register all the files in the directory. For that, click the (
 ) button to move all the files to Objects to be registered box.
Because the data will be registered in an organization-wide data catalog, it is a recommended approach to add some metadata that you can later use to quickly locate the data. For example, you can add an e-mail address for the data owner (for example, one who is uploading the data) or add a tag to identify the data. The screen capture below shows a tag that you add to the data.

Click Register.
The following screen capture denotes that the data is successfully registered in the Data Catalog.
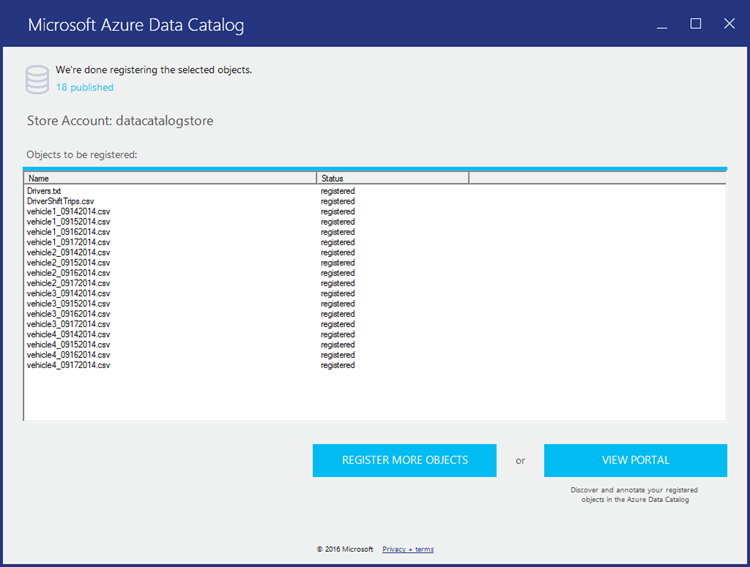
Click View Portal to go back to the Data Catalog portal and verify that you can now access the registered data from the portal. To search the data, you can use the tag you used while registering the data.
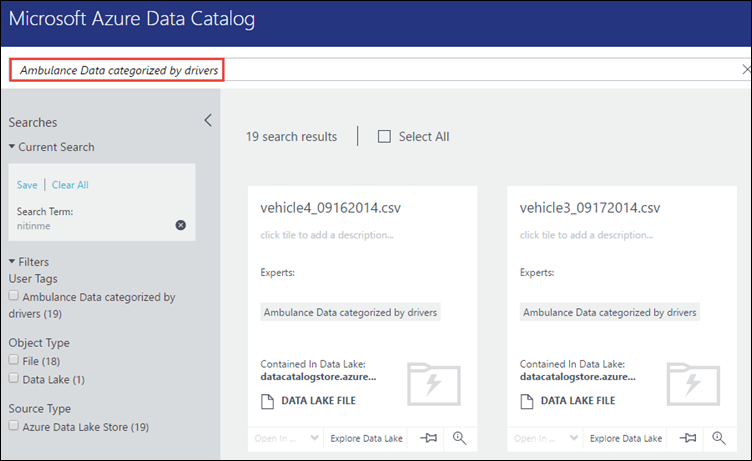
You can now perform operations like adding annotations and documentation to the data. For more information, see the following links.