Sensor integration as a customer
Follow the steps to integrate with a sensor partner to enable the partner to start pushing the data into your Data Manager for Agriculture instance.
Step 1: Identify the sensor partner app and provide consent
Each sensor partner has their own multi-tenant Microsoft Entra app created and published on the Data Manager for Agriculture platform. The sensor partner supported by default on the platform is Davis Instruments (sensorPartnerId: DavisInstruments).
To start using the on-boarded sensor partners, you need to give consent to the sensor partner so that they start showing up in App Registrations. The steps for you to follow:
Log in to Azure portal using "Global Administrator" or "Privileged Role Administrator" credentials.
For Davis Instruments, click on this link to provide consent.
On the permission review page, Microsoft Entra app requests for minimum "read user profile" permission. This permission level is sufficient for sensor integration with Data Manager for Agriculture.
Click on "Accept" button to grant admin consent.
Now, look for
Davis Instruments WeatherLink Data Manager for Agriculture Connectorunder All Applications tab inApp Registrationspage (illustrated with a generic Partner in the image).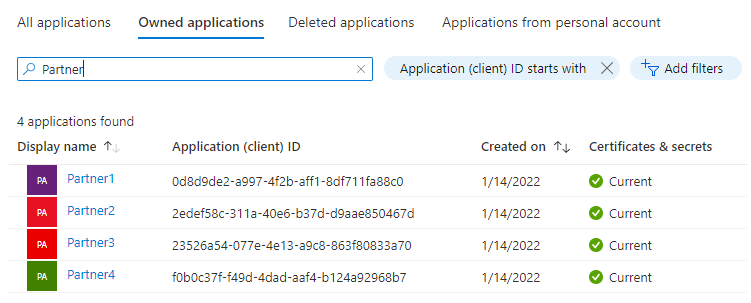
Copy the Application (client) ID for the specific partner app that you want to provide access to.
Step 2: Add role assignment to the partner app
The next step is to assign roles in the Azure portal to provide authorization to the sensor partner application. Data Manager for Agriculture use Azure RBAC to manage authorization requests.
Log in to Azure portal and navigate to your Resource Group where you created the Data Manager for Agriculture resource.
Note
Inside the resource group tab, if you do not find the created Data Manager for Agriculture resource, you need to enable the show hidden types checkbox.
You find the IAM (Identity Access Management) menu option on the left hand side of the option pane as shown in the image:
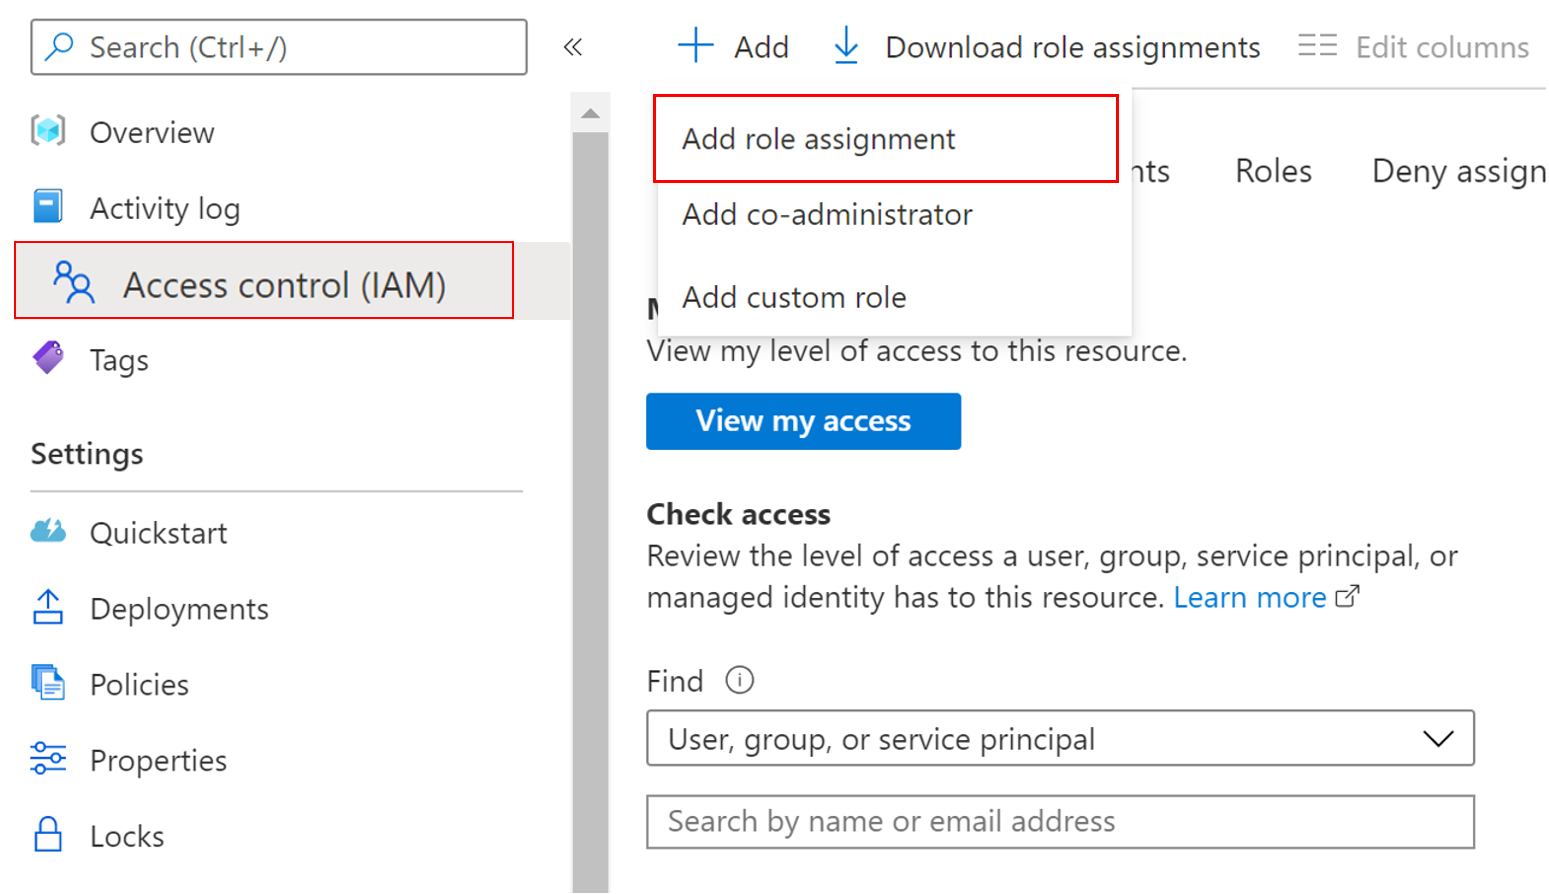
Click Add > Add role assignment, this action opens up a pane on the right side of the portal, choose the role from the dropdown:
- AgFood Platform Sensor Partner Contributor - has all privileges in the CRU (Create, Read, Update) operations that are specific to sensors.
To complete the role assignment, do the following steps:
Choose the mentioned role.
Choose User, group, or service principal in the Assign access to section.
Paste the sensor partner App Name or ID in the Select section (as shown in the image).
Click Save to assign the role.

This step ensures that the sensor partner app has been granted access (based on the role assigned) to Azure Data Manager for Agriculture Resource.
Step 3: Enable sensor integration
You need to enable sensor integration before initiating calls. This step provisions required internal Azure resources for sensor integration in your Data Manager for Agriculture instance. You can do this by running the following armclient command.
armclient patch /subscriptions/<subscription-id>/resourceGroups/<resource-group-name>/providers/Microsoft.AgFoodPlatform/farmBeats/<farmbeats-instance-name>?api-version=2021-09-01-preview "{properties:{sensorIntegration:{enabled:'true'}}}"Sample output:
{
  "id": "/subscriptions/<subscription-id>/resourceGroups/<resource-group-name>/providers/Microsoft.AgFoodPlatform/farmBeats/<farmbeats-instance-name>",
  "type": "Microsoft.AgFoodPlatform/farmBeats",
  "sku": {
    "name": "A0"
  },
  "systemData": {
    "createdBy": "<customer-id>",
    "createdByType": "User",
    "createdAt": "2022-03-11T03:36:32Z",
    "lastModifiedBy": "<customer-id>",
    "lastModifiedByType": "User",
    "lastModifiedAt": "2022-03-11T03:40:06Z"
  },
  "properties": {
    "instanceUri": "https://<farmbeats-instance-name>.farmbeats.azure.net/",
    "provisioningState": "Succeeded",
    "sensorIntegration": {
      "enabled": "True",
      "provisioningState": "**Creating**"
    },
    "publicNetworkAccess": "Enabled"
  },
  "location": "eastus",
  "name": "myfarmbeats"
}
The job can take a few minutes to complete. To know the status of the job, you can use the following armclient command:
armclient get /subscriptions/<subscription-id>/resourceGroups/<resource-group-name> /providers/Microsoft.AgFoodPlatform/farmBeats/<farmbeats-instance-name>?api-version=2021-09-01-previewTo verify completed status, look at the provisioningState attribute. The status needs to change to "Succeeded” from “Creating” in the earlier step.
Sample output:
{
  "id": "/subscriptions/<subscription-id>/resourceGroups/<resource-group-name>/providers/Microsoft.AgFoodPlatform/farmBeats/<farmbeats-instance-name>",
  "type": "Microsoft.AgFoodPlatform/farmBeats",
  "sku": {
    "name": "A0"
  },
  "systemData": {
    "createdBy": "<customer-id>",
    "createdByType": "User",
    "createdAt": "2022-03-11T03:36:32Z",
    "lastModifiedBy": "<customer-id>",
    "lastModifiedByType": "User",
    "lastModifiedAt": "2022-03-11T03:40:06Z"
  },
  "properties": {
    "instanceUri": "https://<customer-host-name>.farmbeats.azure.net/",
    "provisioningState": "Succeeded",
    "sensorIntegration": {
      "enabled": "True",
      "provisioningState": "**Succeeded**"
    },
    "publicNetworkAccess": "Enabled"
  },
  "tags": {
    "usage": "<sensor-partner-id>"
  },
  "location": "eastus",
  "name": "<customer-id>"
}
With the sensor integration step complete, you can now create sensor integration objects.
Step 4: Create integration object
Use the SensorPartnerIntegrations collection and call into the SensorPartnerIntegrations_CreateOrUpdate API to create an integration object for a given sensor partner. Every single customer of a sensor partner (for example: Davis) needs a unique integration ID created in their Data Manager for Agriculture resource.
There are two different paths you need to evaluate:
If you're the owners of the sensors provided by the sensor partners, then create just one integration object (ID) for your account with sensor partner.
If your end users (that is Farmers/Retailers/Agronomists) own the sensors, then create a unique integration object (ID) for each end user because each end user has their own accounts with the sensor partner.
API Endpoint: PATCH /sensor-partners/{sensorPartnerId}/integrations/{integrationID}
Step 5: Generate consent link
A section requesting for the consent link is part of the sensor partner integration flow. This consent link is way for sensor partners to validate if the customer is a valid user of the service. Sensor integration is tied to consent key.
Our sensor partner Davis Instruments uses this UI, for enabling set-up and requesting for the consent link.
Sensor partners call into the check-consent API endpoint to verify validity. To generate a consent link, you need to use the SensorPartnerIntegrations_GenerateConsentLink API and provide the integration ID created from the step (3). As a response, you get a string called consentLink. Copy this string and provided it to the sensor partner for further validation. If you're using sensors from Davis Instruments, then follow instruction on this page.
API Endpoint: PATCH /sensor-partners/{sensorPartnerId}/integrations/{integrationId}/: generate-consent-link
This step marks the completion of the sensor partner on-boarding from a customer perspective. , get all the required information to call your API endpoints to create Sensor model, Device model, Sensors & Devices. The partners are now able to push sensor events using the connection string generated for each sensor ID.
The final step is to start consuming sensor events. Before consuming the events, you need to create a mapping of every sensor ID to a specific Party ID and resource (Field, Seasonal Field).
Step 6: Create sensor mapping
Use the SensorMappings collection, call into the SensorMappings_CreateOrUpdate API to create mapping for each of sensor. Mapping is nothing but associating a sensor ID with a specific PartyID and a resource(field, seasonal field etc.). PartyID and resources are already present in the Data Manager for Agriculture system. This association ensures that as a platform you get to build data science models around a common geometry of the resource and party dimension. Every data source (satellite, weather, farm operations) is tied to a party & resource. As you establish this mapping object on a per sensor level you power all the agronomic use cases to benefit from sensor data.
API Endpoint: PATCH /sensor-mappings/{sensorMappingId}
Step 7: Consume sensor events
Use the SensorEvents collection to call into the SensorEvents_List API and consume data pushed by your sensors. You need to provide the following information
- sensorId (specifies for which sensor you want the data to be shown)
- sensorPartnerId (specifies which sensor partner is pushing this data)
- startDateTime & endDateTime (time range filters ensure data is sliced to requested timeline)
API Endpoint: GET /sensor-events
Next steps
- Test our APIs here.
Feedback
Coming soon: Throughout 2024 we will be phasing out GitHub Issues as the feedback mechanism for content and replacing it with a new feedback system. For more information see: https://aka.ms/ContentUserFeedback.
Submit and view feedback for