Use the Azure portal to manage Edge storage accounts on your Azure Stack Edge Pro GPU
APPLIES TO:  Azure Stack Edge Pro - GPUAzure Stack Edge Pro 2Azure Stack Edge Pro RAzure Stack Edge Mini R
This article describes how to manage Edge storage accounts and local storage accounts on your Azure Stack Edge. You can manage the Azure Stack Edge Pro device via the Azure portal or via the local web UI. Use the Azure portal to add or delete Edge storage accounts on your device. Use Azure PowerShell to add local storage accounts on your device.
About Edge storage accounts
You can transfer data from your Azure Stack Edge Pro GPU device via the SMB, NFS, or REST protocols. To transfer data to Blob storage using the REST APIs, you need to create Edge storage accounts on your device.
The Edge storage accounts that you add on the Azure Stack Edge Pro GPU device are mapped to Azure Storage accounts. Any data written to the Edge storage accounts is automatically pushed to the cloud.
A diagram detailing the two types of accounts and how the data flows from each of these accounts to Azure is shown below:

In this article, you learn how to:
- Add an Edge storage account
- Delete an Edge storage account
Add an Edge storage account
To create an Edge storage account, do the following procedure:
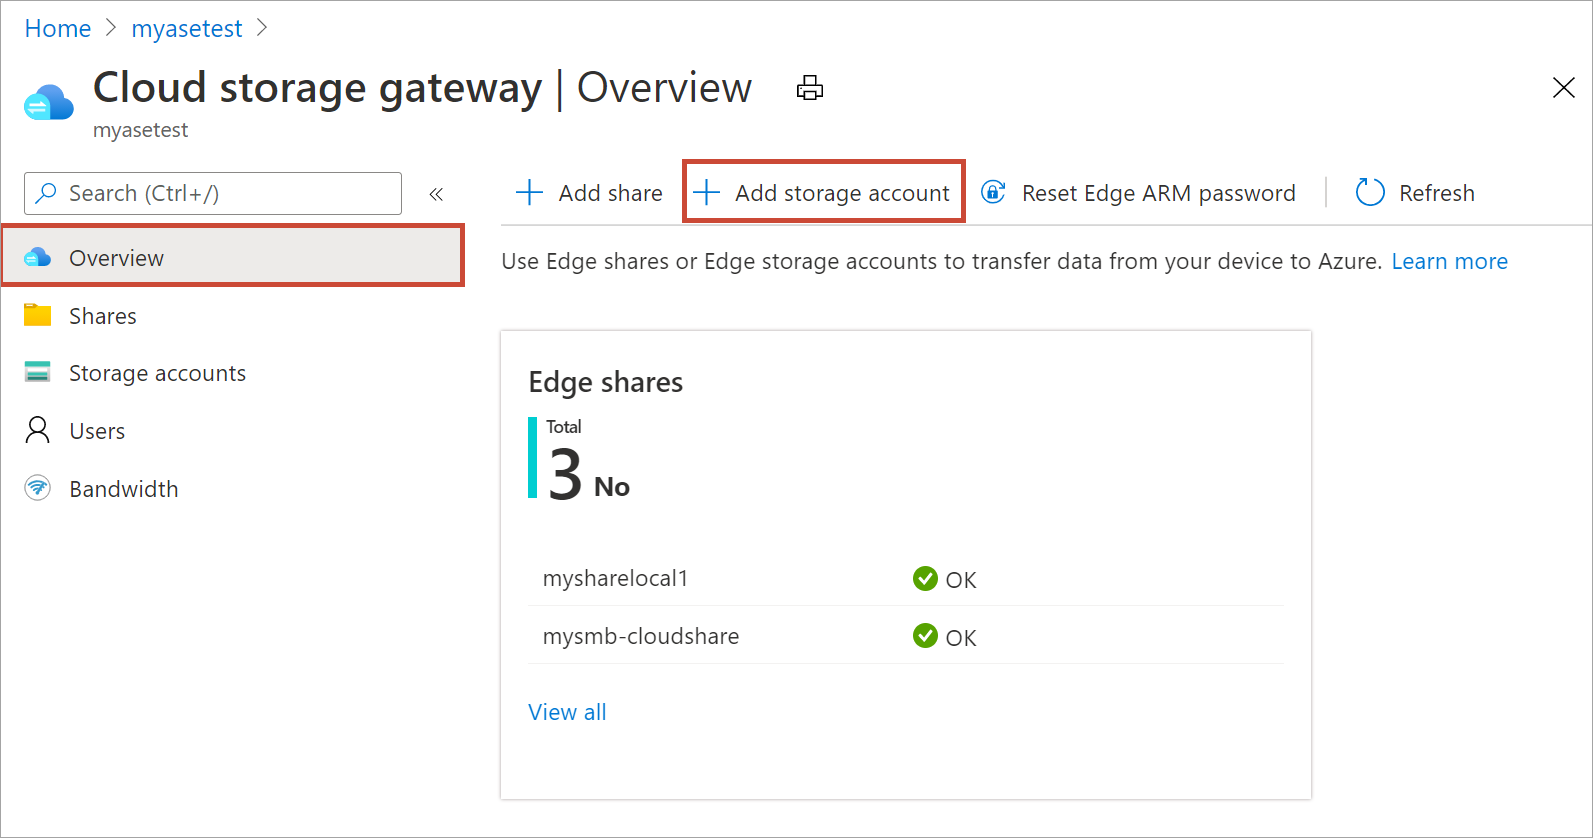
In the Azure portal, select your Azure Stack Edge resource and then go to the Overview. Your device should be online. Go to Cloud storage gateway > Storage accounts.
Select + Add storage account on the device command bar.
In the Add Edge storage account pane, specify the following settings:
Provide a unique name for the Edge storage account on your device. Storage account names can only contain lowercase numbers and letters. Special characters are not allowed. Storage account name has to be unique within the device (not across the devices).
Provide an optional description for the information on the data the storage account is holding.
By default, the Edge storage account is mapped to an Azure Storage account in the cloud, and the data from the storage account is automatically pushed to the cloud. Specify the Azure storage account that your Edge storage account is mapped to.
Create a new container, or select from an existing container in the Azure storage account. Any data from the device that is written to the Edge storage account is automatically uploaded to the selected storage container in the mapped Azure Storage account.
After all the storage account options are specified, select Add to create the Edge storage account. You are notified when the Edge storage account is successfully created. The new Edge storage account is then displayed in the list of storage accounts in the Azure portal.
If you select this new storage account and go to Access keys, you can find the blob service endpoint and the corresponding storage account name. Copy this information as these values together with the access keys will help you connect to the Edge storage account.
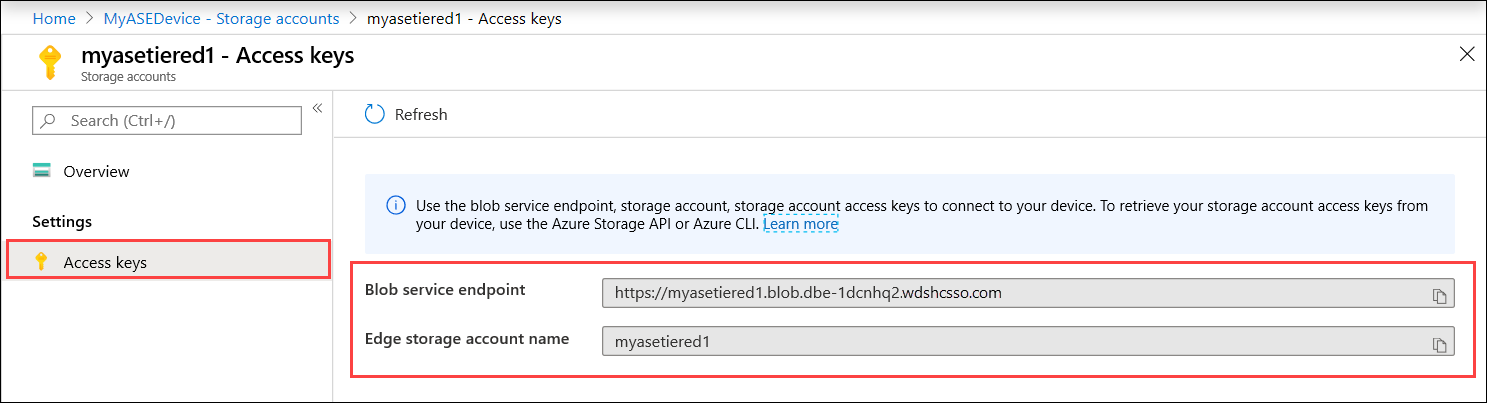
You get the access keys by Connecting to the device local APIs using Azure Resource Manager.
Create a local storage account
Create a new local storage account by using an existing resource group. Use this local storage account to upload the virtual disk image when creating a VM.
Before you create a local storage account, you must configure your client to connect to the device via Azure Resource Manager over Azure PowerShell. For detailed instructions, see Connect to Azure Resource Manager on your Azure Stack Edge device.
Set some parameters.
$StorageAccountName = "<Storage account name>"Create a new local storage account on your device.
New-AzStorageAccount -Name $StorageAccountName -ResourceGroupName $ResourceGroupName -Location DBELocal -SkuName Standard_LRSNote
By using Azure Resource Manager, you can create only local storage accounts, such as locally redundant storage (standard or premium). To create tiered storage accounts, see Tutorial: Transfer data via storage accounts with Azure Stack Edge Pro with GPU.
Here's an example output:
PS C:\WINDOWS\system32> New-AzStorageAccount -Name myaseazsa -ResourceGroupName myaseazrg -Location DBELocal -SkuName Standard_LRS

StorageAccountName ResourceGroupName PrimaryLocation SkuName      Kind    AccessTier CreationTime
------------------ ----------------- --------------- -------      ----    ---------- ------------
myaseazsa          myaseazrg         DBELocal        Standard_LRS Storage            6/10/2021 11:45...

PS C:\WINDOWS\system32>
Get access keys for a local storage account
Before you get the access keys, you must configure your client to connect to the device via Azure Resource Manager over Azure PowerShell. For detailed instructions, see Connect to Azure Resource Manager on your Azure Stack Edge device.
To get the access keys for an existing local storage account that you have created, provide the associated resource group name and the local storage account name.
Get-AzStorageAccountKey
Here's an example output:
PS C:\WINDOWS\system32> Get-AzStorageAccountKey

cmdlet Get-AzStorageAccountKey at command pipeline position 1
Supply values for the following parameters:
(Type !? for Help.)
ResourceGroupName: myaseazrg
Name: myaseazsa

KeyName    Value                                                                                       Permissions
-------    -----                                                                                       ------
key1       gv3OF57tuPDyzBNc1M7fhil2UAiiwnhTT6zgiwE3TlF/CD217Cvw2YCPcrKF47joNKRvzp44leUe5HtVkGx8RQ==    Full
key2       kmEynIs3xnpmSxWbU41h5a7DZD7v4gGV3yXa2NbPbmhrPt10+QmE5PkOxxypeSqbqzd9si+ArNvbsqIRuLH2Lw==    Full

PS C:\WINDOWS\system32>
Delete an Edge storage account
Take the following steps to delete an Edge storage account.
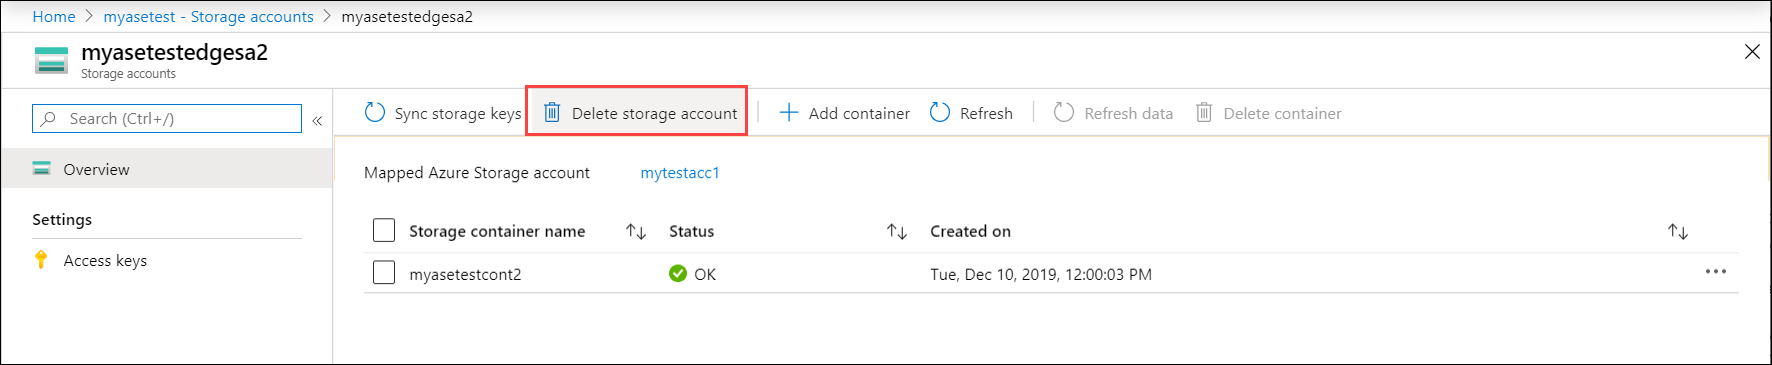
Go to Configuration > Storage accounts in your resource. From the list of storage accounts, select the storage account you want to delete. From the top command bar, select Delete storage account.
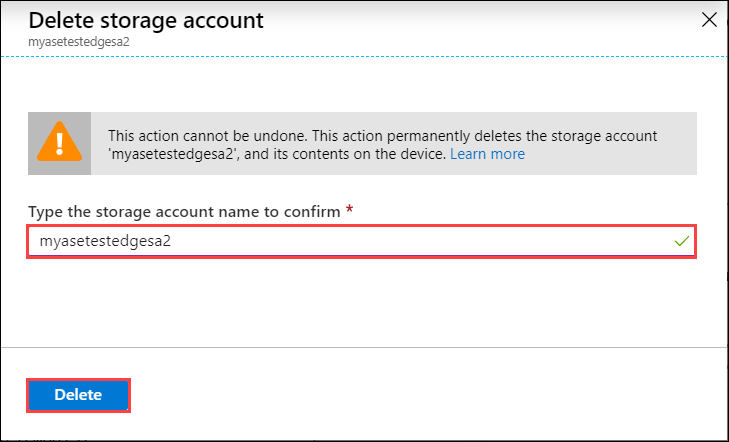
In the Delete storage account blade, confirm the storage account to delete and select Delete.
The list of storage accounts is updated to reflect the deletion.
Add, delete a container
You can also add or delete the containers for these storage accounts.
To add a container, take the following steps:
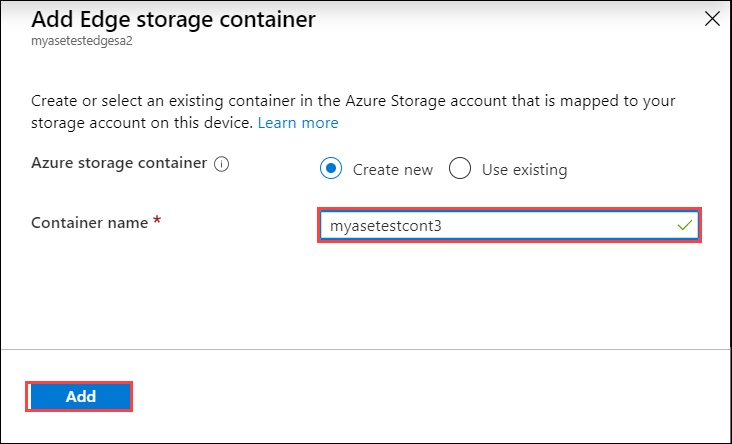
Select the storage account that you want to manage. From the top command bar, select + Add container.
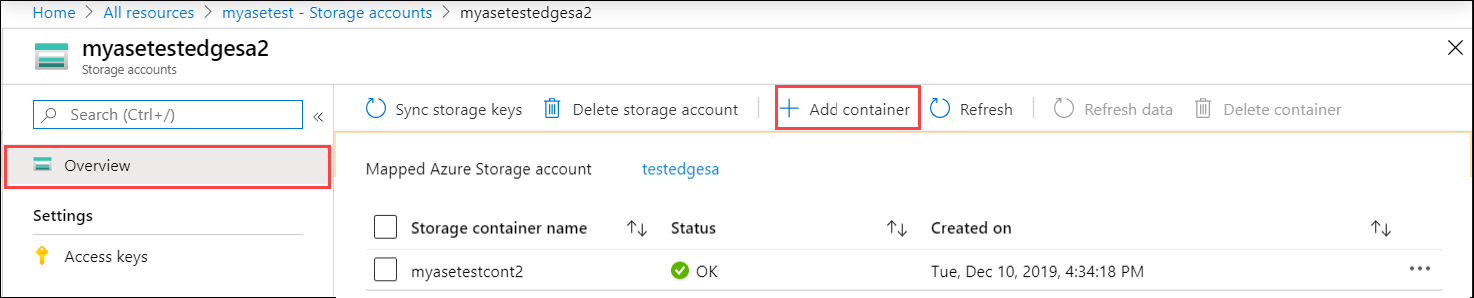
Provide a name for your container. This container is created in your Edge storage account as well as the Azure storage account mapped to this account.
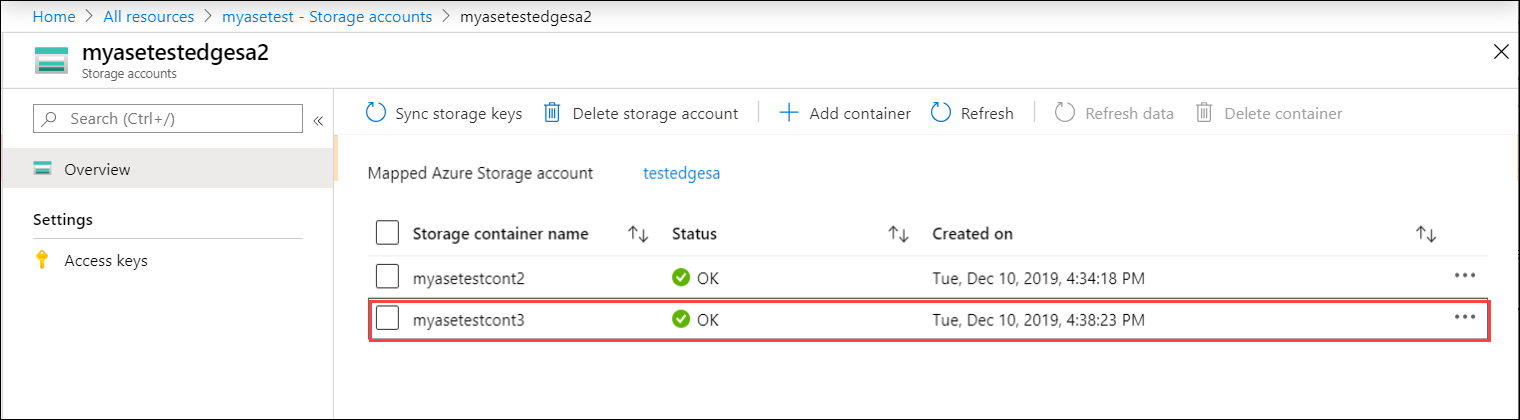
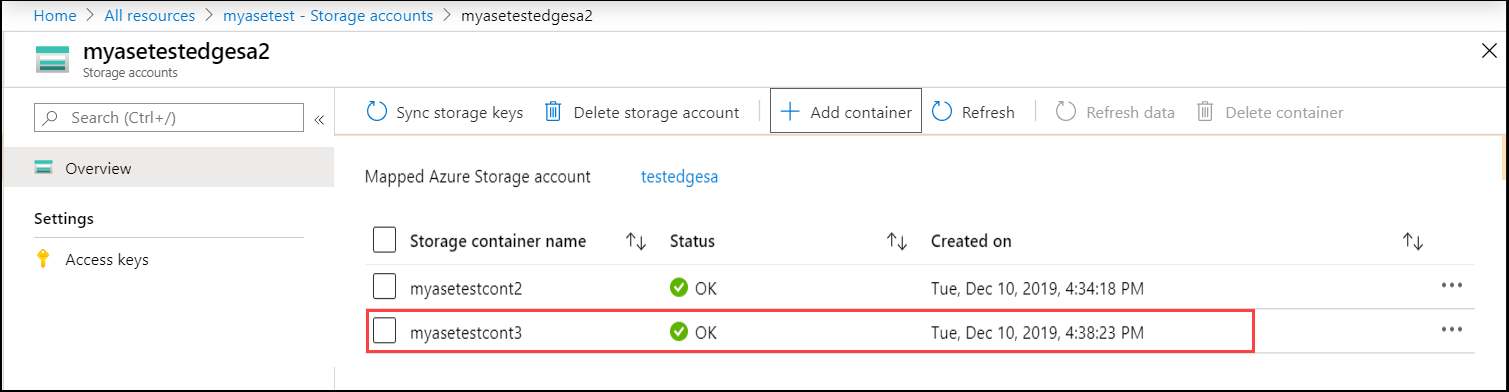
The list of containers is updated to reflect the newly added container.
You can now select a container from this list and select + Delete container from the top command bar.
Sync storage keys
Each Azure Storage account has two 512-bit storage access keys that are used for authentication when the storage account is accessed. One of these two keys must be supplied when your Azure Stack Edge device accesses your cloud storage service provider (in this case, Azure).
An Azure administrator can regenerate or change the access key by directly accessing the storage account (via the Azure Storage service). The Azure Stack Edge service and the device do not see this change automatically.
To inform Azure Stack Edge of the change, you will need to access the Azure Stack Edge service, access the storage account, and then synchronize the access key. The service then gets the latest key, encrypts the keys, and sends the encrypted key to the device. When the device gets the new key, it can continue to transfer data to the Azure Storage account.
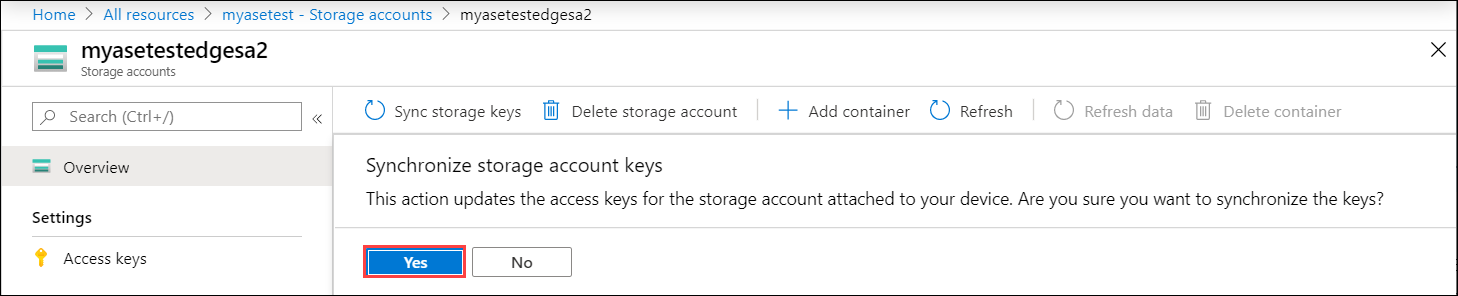
To provide the new keys to the device, access the Azure portal and synchronize storage access keys. Take the following steps:
In your resource, select the storage account that you want to manage. From the top command bar, select Sync storage key.
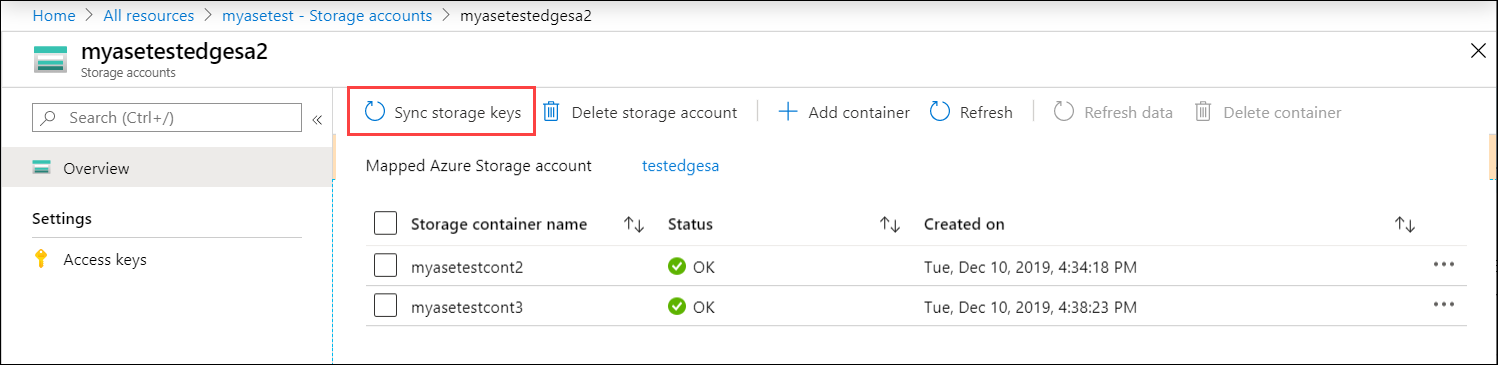
When prompted for confirmation, select Yes.
Next steps
- Learn how to Manage users via Azure portal.
Feedback
Coming soon: Throughout 2024 we will be phasing out GitHub Issues as the feedback mechanism for content and replacing it with a new feedback system. For more information see: https://aka.ms/ContentUserFeedback.
Submit and view feedback for