Configure a hierarchy of teams
Azure DevOps Services | Azure DevOps Server 2022 - Azure DevOps Server 2019
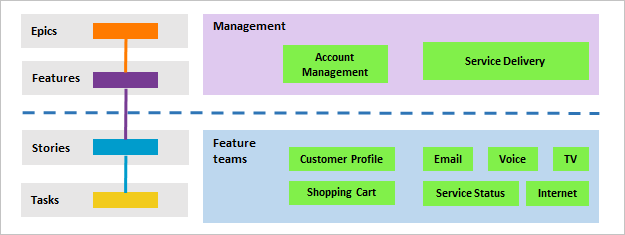
In Portfolio management, we showed how management teams and feature teams can use their backlogs to focus on the work that's most important to them. In this article, we show how to configure teams that best support the different backlog views of management and feature teams.
Specifically, we'll show you how to configure a team structure like the one shown in the image below.
In this article you'll learn how to:
- Set up a hierarchical set of teams and backlogs
- Define a single sprint cadence for all teams
- Review which area paths are assigned to teams
Prerequisites
- If you don't have a project yet, create one.
- To add teams, you must be a member of the Project Administrators group. To get added to this group, see Change project-level permissions.
Add a team for each management area
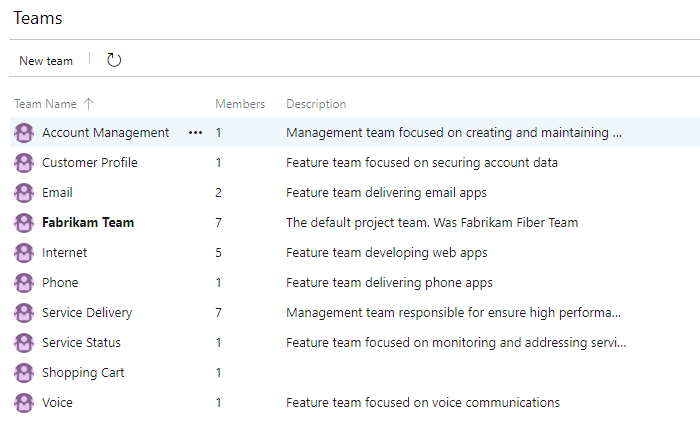
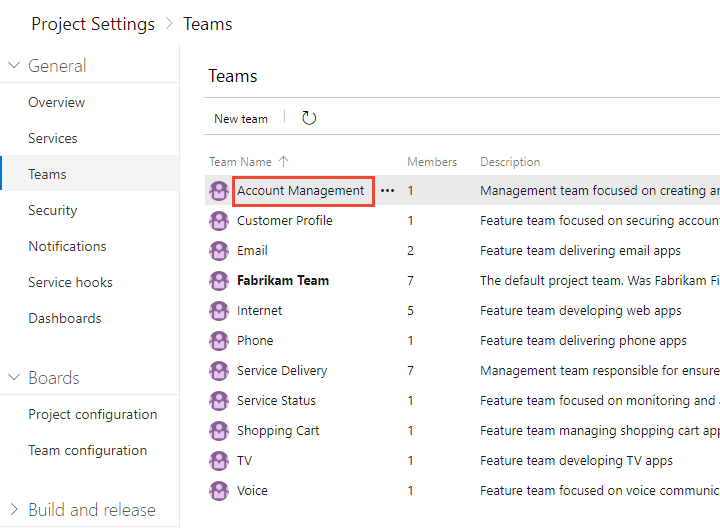
The first step is to add a team for each feature team and management area. You can also rename teams that you've already added. When you finish, you'll have a set of teams similar to the ones shown.
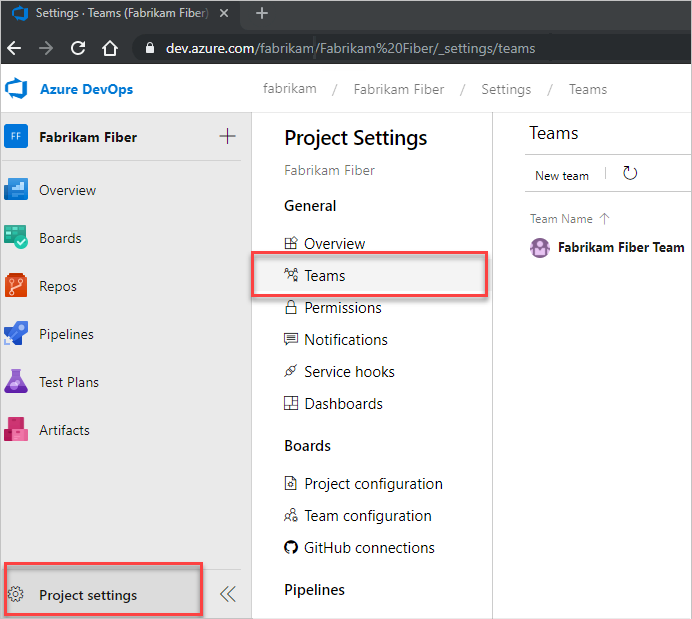
- From the web portal, choose Project settings and open Teams.
Choose New team. Give the team a name, and optionally a description.
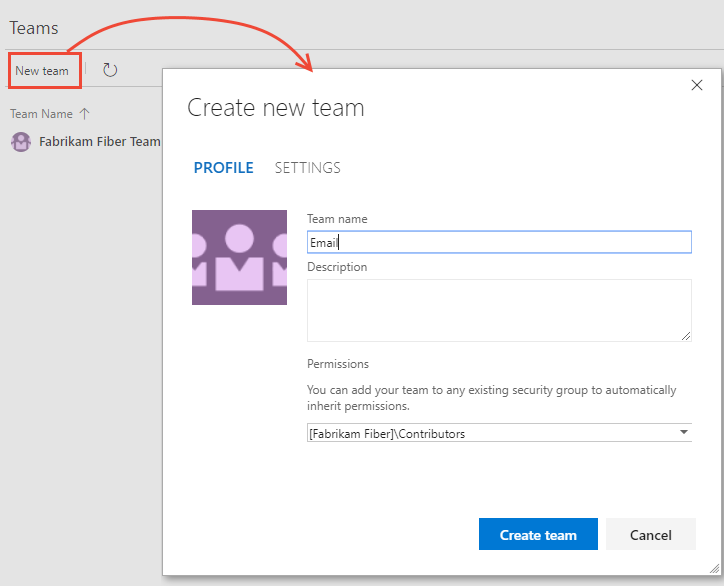
Repeat this step for all feature and management teams you want to create.
Move area paths into a hierarchical structure
In this step, you want to move the areas paths associated with feature teams from a flat structure to a hierarchical structure.
| Flat area structure | Hierarchical area structure |
|---|---|
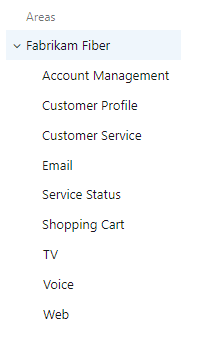 |
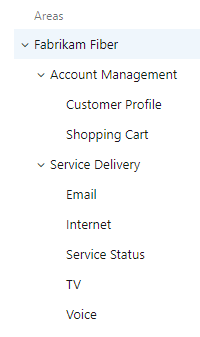 |
You do this by opening each area path associated with a feature team and changing its location to be under the management area path.
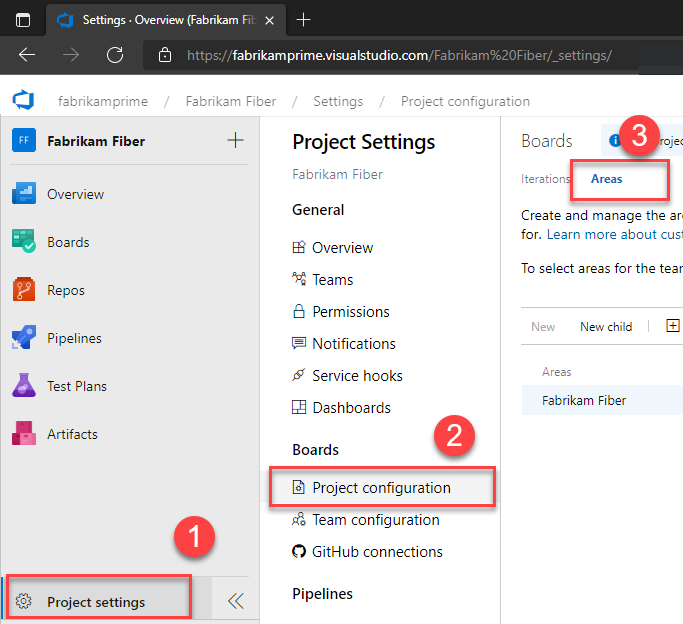
Choose (1) Project Settings, expand Work if needed, and choose (2) Project configuration and then (3) Areas.
Next, choose the
 actions icon for one of the area paths associated with a feature team and select Edit. Then change the Location to move it under its corresponding management team area path.
For example, here we move the Customer Profile to under Account Management.

Repeat this step for all feature team area paths.
Include subarea paths for management teams
By including subarea paths for the management teams, you automatically include the backlog items of their feature teams onto the management team's backlog. The default setting for all teams is to exclude subarea paths.
Note
Sub-area paths may break a team's ability to reorder or reparent items on the backlog. Also, it can introduce uncertainties with regards to assignments made to the Kanban Board Column, Done, and Lane fields. For more information, see Exercising select features with shared area paths later in this article.
You define both areas and iterations from Project Settings>Boards>Team configuration. You can quickly go to it from Teams.
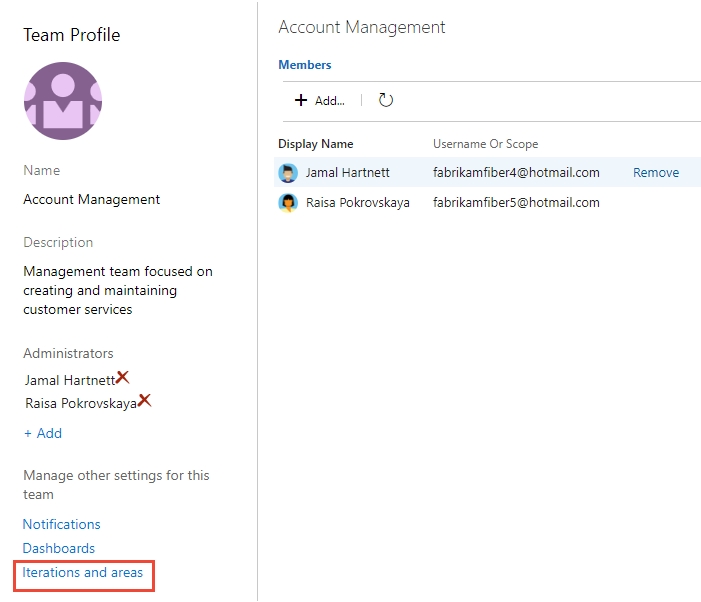
From Project Settings, choose Teams, and then choose the team whose settings you want to modify.
Here we open the Account Management team.
Choose Iterations and areas and then Areas.
If you need to switch the team context, use the team selector within the breadcrumbs.
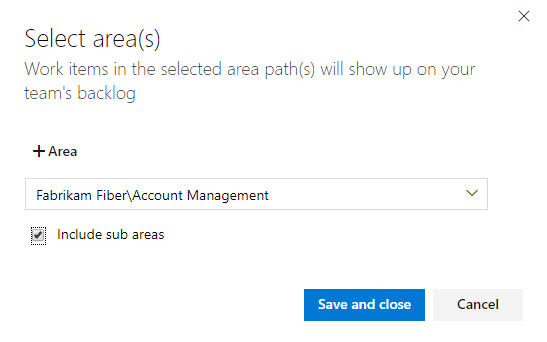
Choose Select area(s), and select the area path for Account Management and check the Include sub areas checkbox.
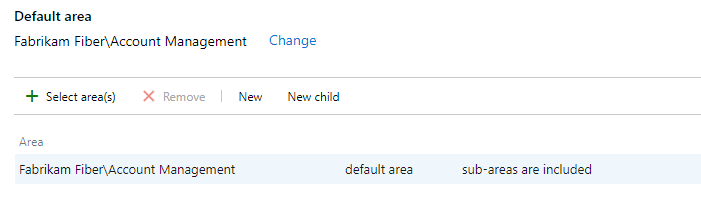
Verify that only this area path is selected for the team and is the default area path. Remove any other area paths that may have been previously selected.
Repeat this step for all your management areas. If you want to enable rollup across all feature teams and management areas to the top-level area, repeat this step for the default team. In our example, that corresponds to Fabrikam Fiber.
Define a single sprint cadence for all teams
If your feature teams use Scrum or use sprints to assign their work, you'll want to set up a series of sprints that all teams can use. By default, you'll see a set of predefined sprints. Add more sprints and set their sprint dates from Project Settings as described in Add iterations and set iteration dates. You can rename and edit the default sprints as needed.
Note
While maintaining a single sprint cadence simplifies project administration, you can create different cadences as needed. For example, some teams may follow a monthly cadence while others follow a 3-week cadence. Simply define a node under the top project node for each cadence, and then define the sprints under those nodes. For example:
- Fabrikam Fiber/CY2019
- Fabrikam Fiber/3Week Sprints
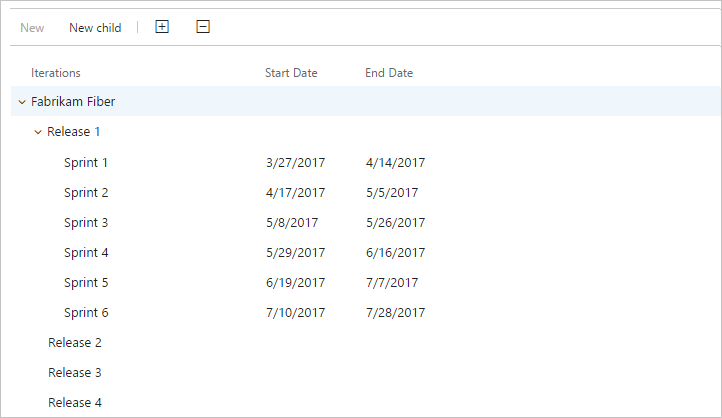
Here we define the start and end dates of the first 6 sprints corresponding to a 3-week cadence.
Configure other team settings
For teams to be well defined, you'll want to add team administrator(s) and have them verify or configure other team settings. For more information, see Manage and configure team tools.
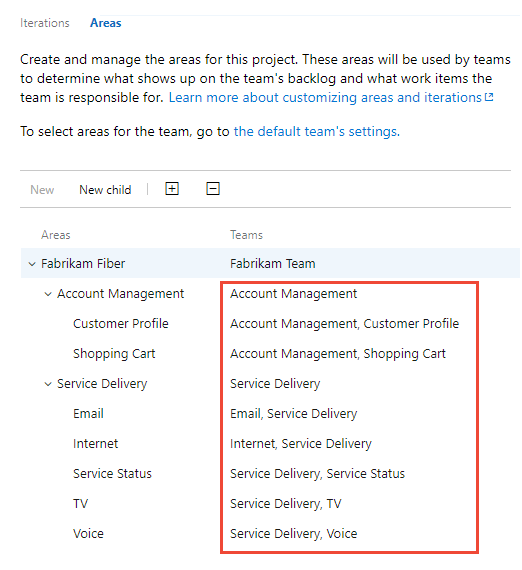
Review area paths assigned to teams
From Project Settings>Project configuration>Areas, you can review which Area Paths have been assigned to which teams. To modify the assignments, choose the team and change the team's area path assignments.
Exercising select features with shared area paths
When you share area paths across two or more teams, you'll want to understand how Azure Boards manages conflicts that can arise when exercising these features:
- Reordering or reparenting work items on a backlog or board
- Updates made to Kanban Board Column, Board Column Done, and Board Lane fields when dragging items to a different column
Reordering and reparenting work items
All backlogs and boards support drag-and-drop to reorder and reparent work items. Updates made to one team backlogs and boards are reflected in other team backlogs and boards that share the same area path. You may need to refresh the page to view the changes.
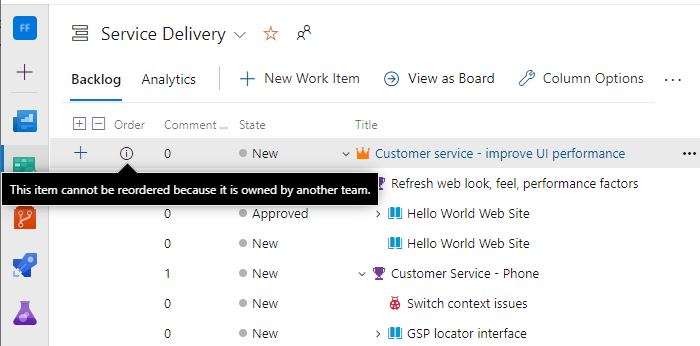
You can only use drag-and-drop to reorder or reparent work items assigned to area paths selected for your team. When the Parents view option is enabled, work items may appear on your backlog that your team doesn't own. Anything that appears with the ![]() information icon can't be reordered nor reparented as it's owned by another team.
information icon can't be reordered nor reparented as it's owned by another team.
Kanban board column updates
Because each team can customize the Kanban board columns and swimlanes, the values assigned to Kanban board fields may differ from what you expect when another team updates the work item from a different board. Even if the management team and the feature teams configure their Feature Kanban board columns with identical workflow mapping, updating work items on one team's Kanban board won't be reflected on another team's Kanban board. Only when the work item moves to a column that maps to a workflow state does the card column reflect the same on all boards.
By design, the team with the longest area path wins the conflict and determines the values for the Kanban Board Column, Board Column Done, and Board Lane fields. If the shared area paths are of equal depth, the results are non-deterministic.
The primary work-around for this issue is to maintain single ownership of work items by Defining area paths and assign to a team. Another option is to add custom workflow states that all teams can use. For more information, see Customize the workflow (Inheritance process).
Next steps
Related articles
Feedback
Coming soon: Throughout 2024 we will be phasing out GitHub Issues as the feedback mechanism for content and replacing it with a new feedback system. For more information see: https://aka.ms/ContentUserFeedback.
Submit and view feedback for