Deploy a web app to an NGINX web server running on a Linux Virtual Machine (Classic)
Azure DevOps Services | Azure DevOps Server 2022 - Azure DevOps Server 2019 | TFS 2018
Note
If you want to deploy your application to a Linux virtual machine using YAML pipelines, see Deploy to a Linux virtual machine.
Learn how to use Classic Azure Pipelines to build and deploy your web app to an NGINX web server running on a Linux virtual machine.
Prerequisites
- An Azure DevOps Organization. Create one for free.
- An Azure account with an active subscription. Create an Azure account for free if you don't have one already.
- A GitHub account. Create one for free.
Linux VM Prerequisites
- If you don't have a Linux VM with an Nginx web server, follow the steps in this Quickstart to create one in Azure.
Get the code
If you don't have a repository, use the following sample project follow along with this tutorial:
https://github.com/MicrosoftDocs/pipelines-javascript
Build your app
Set up a deployment group
Deployment groups make it easier to organize the servers you want to use to host your app. A deployment group is a collection of machines with an Azure Pipelines agent on each of them. Each machine interacts with Azure Pipelines to coordinate deployment of your app.
Open an SSH session to your Linux VM. You can do this using the Cloud Shell button in the upper-right of the Azure portal.

Run the following command to initiate the session. Replace the placeholder with the IP address of your VM:
ssh <publicIpAddress>Run the following command to install the required dependencies to set up the build and release agent on a Linux virtual machine. See Self-hosted Linux agents for more details.
sudo apt-get install -y libunwind8 libcurl3in Azure DevOps web portal, select Pipelines, and then select Deployment groups.
Select Add a deployment group (or New if you have existing deployment groups).
Enter a name for the group such as myNginx and then select Create.
Select Linux for the Type of target to register and make sure that Use a personal access token in the script for authentication is checked. Select Copy script to the clipboard. This script will install and configure an agent on your VM.
Back in the SSH session in Azure portal, paste and run the script.
When you're prompted to configure tags for the agent, press Enter to skip.
Wait for the script to finish and display the message Started Azure Pipelines Agent. Type "q" to exit the file editor and return to the shell prompt.
Back in Azure DevOps portal, on the Deployment groups page, open the myNginx deployment group. Select the Targets tab, and verify that your VM is listed.
Create a release pipeline
Select Pipelines > Releases, and then select New pipeline.
Select Empty job.
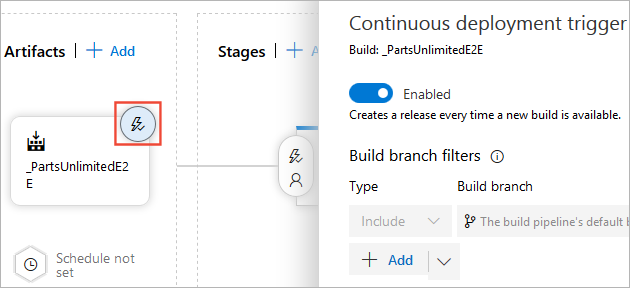
Select Add an artifact to link your build artifact. Select Build, and then select your Project and Source from the dropdown menu. Select Add when you are done.
Select the Continuous deployment icon, and the click the toggle button to enable the continuous deployment trigger. Add the main branch as a Build branch filter.
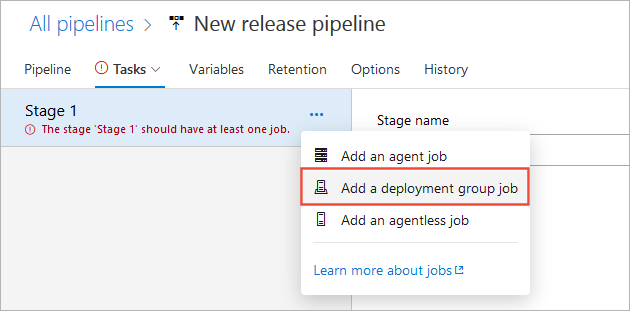
Select Tasks, and then select the Agent job and remove it.

Select the ellipsis icon, and then select Add a deployment group job. The tasks you will add to this job will run on each server in your deployment group.
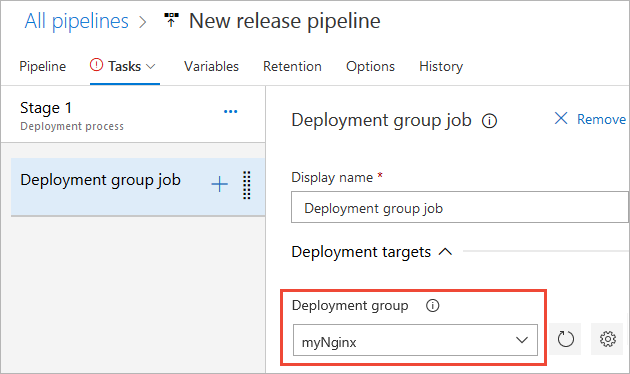
Select the deployment group you created earlier from the Deployment group dropdown menu.
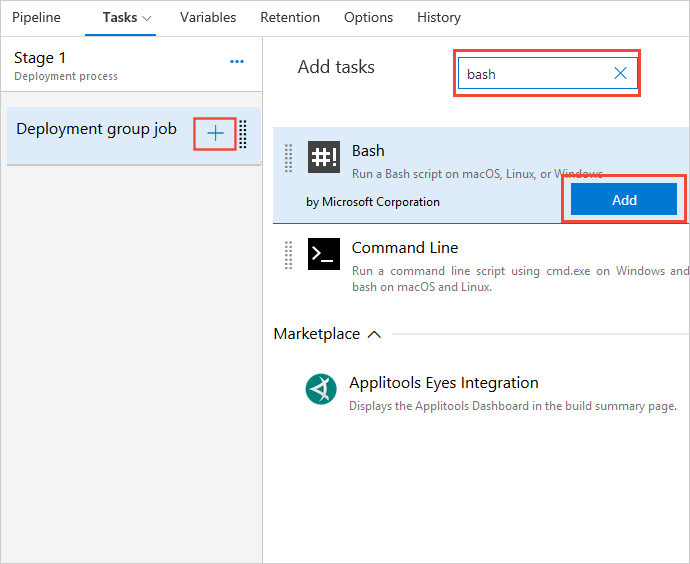
Select + to add a new task. Search for Bash and then select Add to add it to your pipeline.
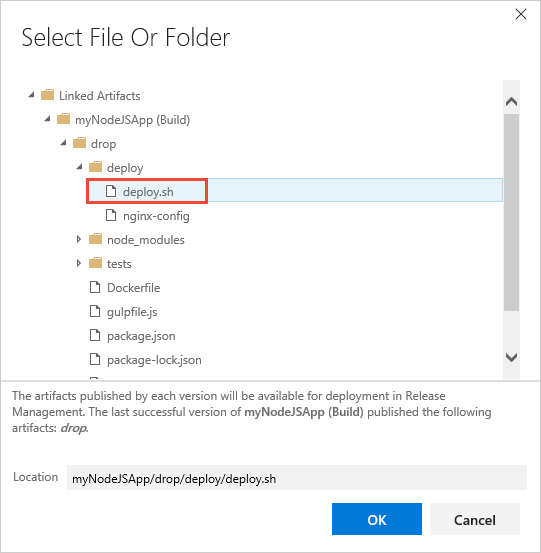
Select the browse button to add the path of your deploy.sh script file. See a sample nodeJS deployment script here.
Select Save when you are done.

Deploy your app
Select Releases, and then select Create a release.
Make sure that the artifact version you want to use is selected and then select Create.
Select the release link in the information bar message. For example: "Release Release-1 has been queued".
Select the status link in Stages to see the deployment logs.
After the release is complete, navigate to your app and verify its contents.