Set up retention policy in Azure DevTest Labs
This article covers setting a retention policy, cleaning up the factory, and retiring old images from all the other DevTest Labs in the organization.
Prerequisites
Make sure that you follow these articles before proceeding further:
- Create an image factory
- Run an image factory from Azure DevOps
- Save custom images and distribute to multiple labs
The following items should already be in place:
- A lab for the image factory in Azure DevTest Labs
- One or more target Azure DevTest Labs where the factory will distribute golden images
- An Azure DevOps Project used to automate the image factory.
- Source code location containing the scripts and configuration (in our example, in the same DevOps Project used above)
- A build definition to orchestrate the Azure PowerShell tasks
Setting the retention policy
Before you configure the cleanup steps, define how many historic images you want to keep in DevTest Labs. When you followed the Run an image factory from Azure DevOps article, you configured various build Variables. One of them was ImageRetention. You set this variable to 1, which means that the DevTest Labs won't maintain a history of custom images. Only the latest distributed images will be available. If you change this variable to 2, the latest distributed image plus the previous ones will be maintained. You can set this value to define the number of historic images you want to maintain in your DevTest Labs.
Cleaning Up the factory
The first step in cleaning Up the factory is to remove the golden Image VMs from the image factory. There's a script to do this task just like our previous scripts. The first step is to add another Azure PowerShell task to the build definition as shown in the following image:

Once you have the new task in the list, select the item, and fill in all the details as shown in the following image:
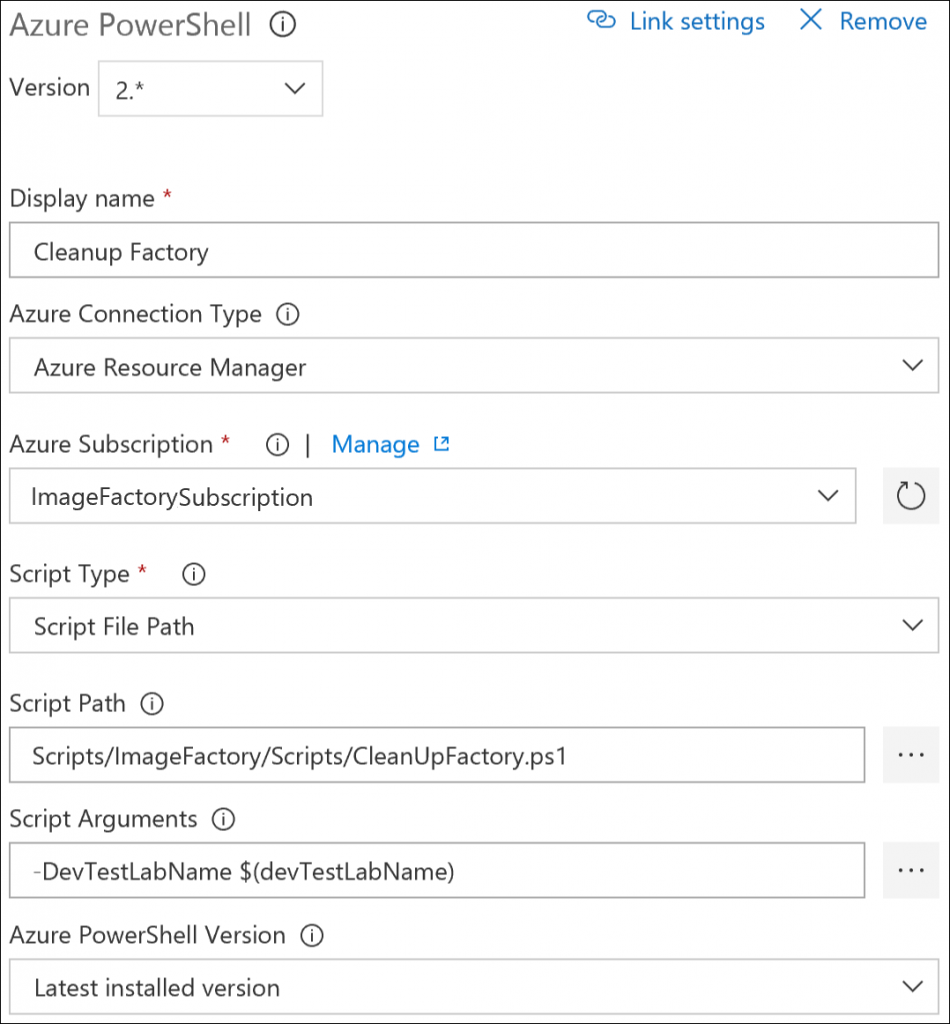
The script parameters are: -DevTestLabName $(devTestLabName).
Retire old images
This task removes any old images, keeping only a history matching the ImageRetention build variable. Add an additional Azure PowerShell build task to our build definition. Once it's added, select the task, and fill in the details as shown in the following image:
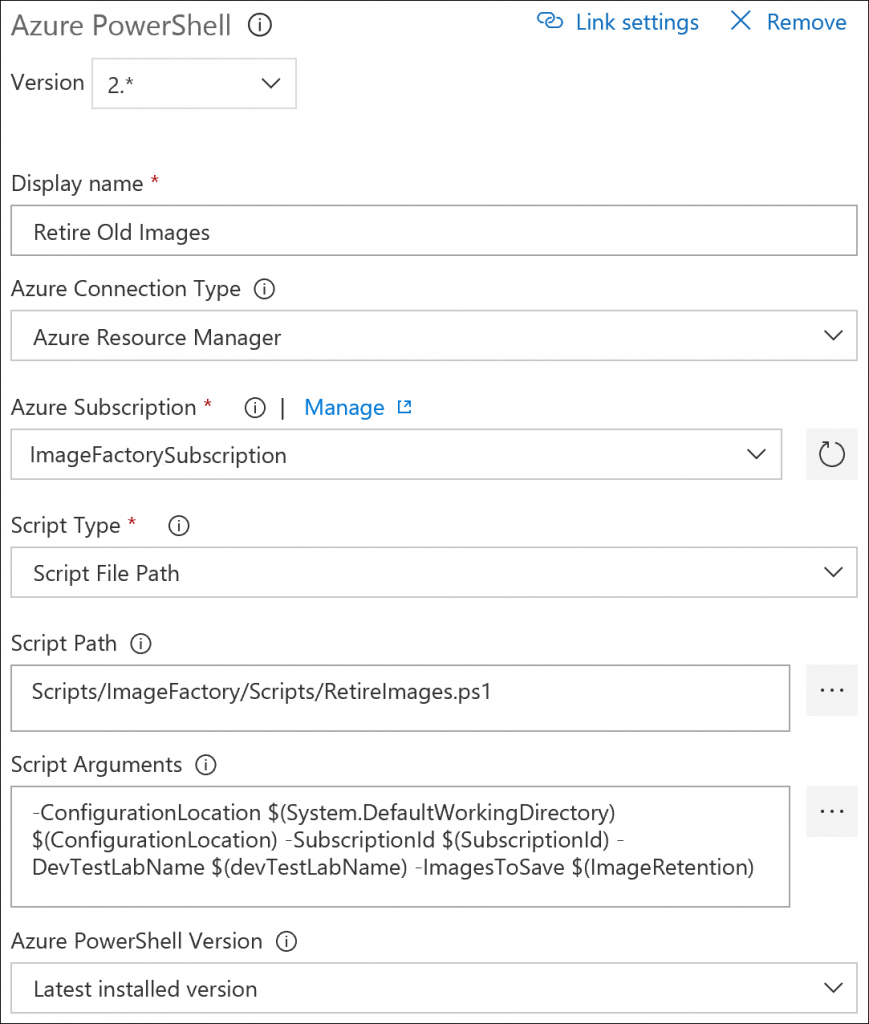
The script parameters are: -ConfigurationLocation $(System.DefaultWorkingDirectory)$(ConfigurationLocation) -SubscriptionId $(SubscriptionId) -DevTestLabName $(devTestLabName) -ImagesToSave $(ImageRetention)
Queue the build
Now that you completed the build definition, queue up a new build to make sure everything is working. After the build completes successfully, the new custom images show up in the destination lab. If you check the image factory lab, you see no provisioned VMs. If you queue up further builds, you see the cleanup tasks retiring old custom images from the DevTest Labs. The retirement accords with the retention value set in the build variables.
Note
If you executed the build pipeline at the end of the last article in the series, manually delete the virtual machines that you created in the image factory lab before queuing a new build. You only need the manual cleanup step while you set everything up and verify it works.
Summary
Now you have a running image factory that can generate and distribute custom images to your labs on demand. At this point, it's just a matter of getting your images set up properly and identifying the target labs. As mentioned in the previous article, the Labs.json file located in your Configuration folder specifies which images should be made available in each of the target labs. As you add other DevTest Labs to your organization, you simply need to add an entry in the Labs.json for the new lab.
Adding a new image to your factory is also simple. When you want to include a new image in your factory, open the Azure portal and navigate to your factory lab. Select the button to add a VM, and choose the marketplace image and artifacts you want. Instead of selecting the Create button to make the new VM, select View Azure Resource Manager template. Save the template as a .json file somewhere within the GoldenImages folder in your repository. The next time you run your image factory, it will create your custom image.
Next steps
- Schedule your build/release to run the image factory periodically. It refreshes your factory-generated images regularly.
- Make more golden images for your factory. You may also consider creating artifacts to script more pieces of your VM setup tasks and include the artifacts in your factory images.
- Create a separate build/release to run the DistributeImages script separately. You can run this script when you make changes to Labs.json and get images copied to target labs without having to recreate all the images again.
Feedback
Coming soon: Throughout 2024 we will be phasing out GitHub Issues as the feedback mechanism for content and replacing it with a new feedback system. For more information see: https://aka.ms/ContentUserFeedback.
Submit and view feedback for