Quickstart: Create an Azure Event Hubs schema registry using Azure portal
Azure Schema Registry is a feature of Event Hubs, which provides a central repository for schemas for event-driven and messaging-centric applications. It provides the flexibility for your producer and consumer applications to exchange data without having to manage and share the schema. It also provides a simple governance framework for reusable schemas and defines relationship between schemas through a grouping construct (schema groups). For more information, see Azure Schema Registry in Event Hubs.
This article shows you how to create a schema group with schemas in a schema registry hosted by Azure Event Hubs.
Note
- The feature isn't available in the basic tier.
- Make sure that you are a member of one of these roles: Owner, Contributor, or Schema Registry Contributor. For details about role-based access control, see Schema Registry overview.
- If the event hub is in a virtual network, you won't be able to create schemas in the Azure portal unless you access the portal from a VM in the same virtual network.
- The Schema Registry functionality isn't supported for namespaces with private endpoint enabled.
Prerequisites
Create an Event Hubs namespace. You can also use an existing namespace.
Create a schema group
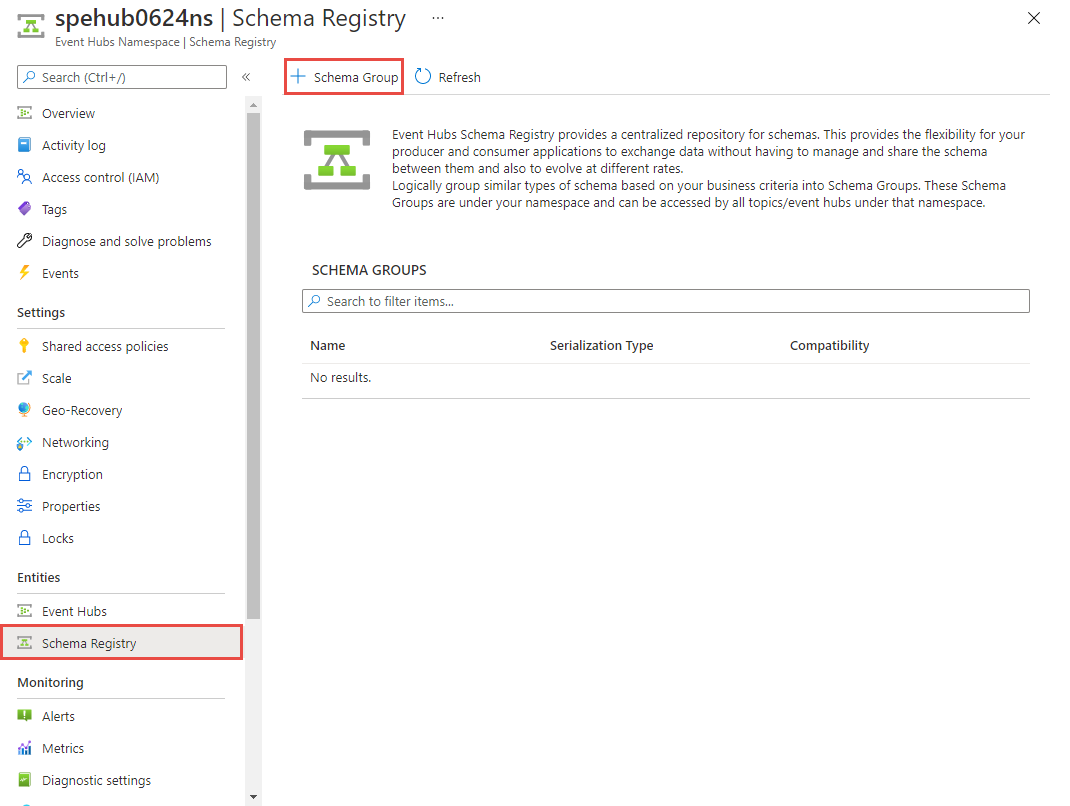
Navigate to the Event Hubs Namespace page.
Select Schema Registry on the left menu. To create a schema group, select + Schema Group on the toolbar.
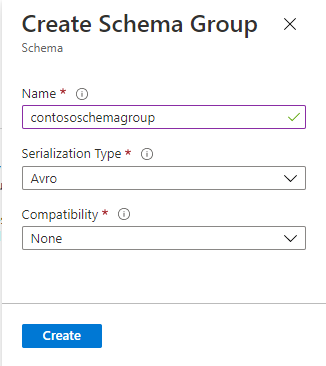
On the Create Schema Group page, do these steps:
Enter a name for the schema group.
For Serialization type, select Avro serialization format that applies to all schemas in the schema group. JSON serialization format is also supported (preview).
Select a compatibility mode for all schemas in the group. For Avro, forward and backward compatibility modes are supported.
Then, select Create to create the schema group.
Select the name of the schema group in the list of schema groups.
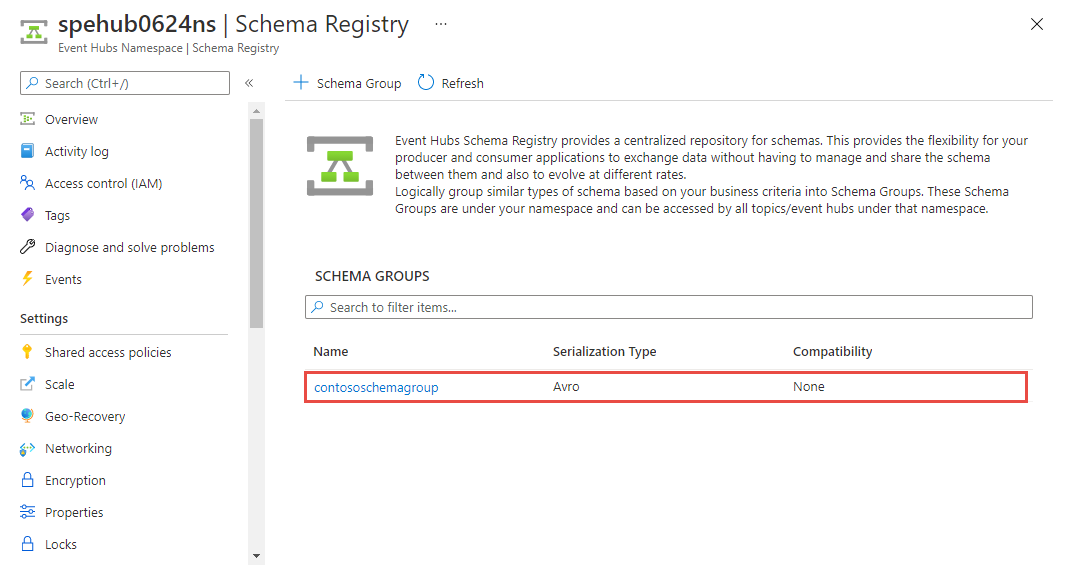
You see the Schema Group page for the group.

Add a schema to the schema group
In this section, you add a schema to the schema group using the Azure portal.
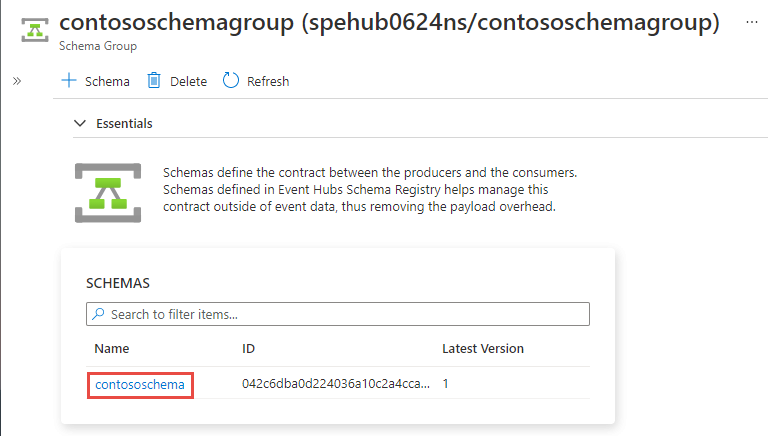
On the Schema Group page, select + Schema on the toolbar.
On the Create Schema page, do these steps:
For Name, enter
orderschema.Enter the following schema into the text box. You can also select file with the schema.
{
  "namespace": "com.azure.schemaregistry.samples",
  "type": "record",
  "name": "Order",
  "fields": [
    {
      "name": "id",
      "type": "string"
    },
    {
      "name": "amount",
      "type": "double"
    }
  ]
}
Select Create.
Select the schema from the list of schemas.
You see the Schema Overview page for the schema.
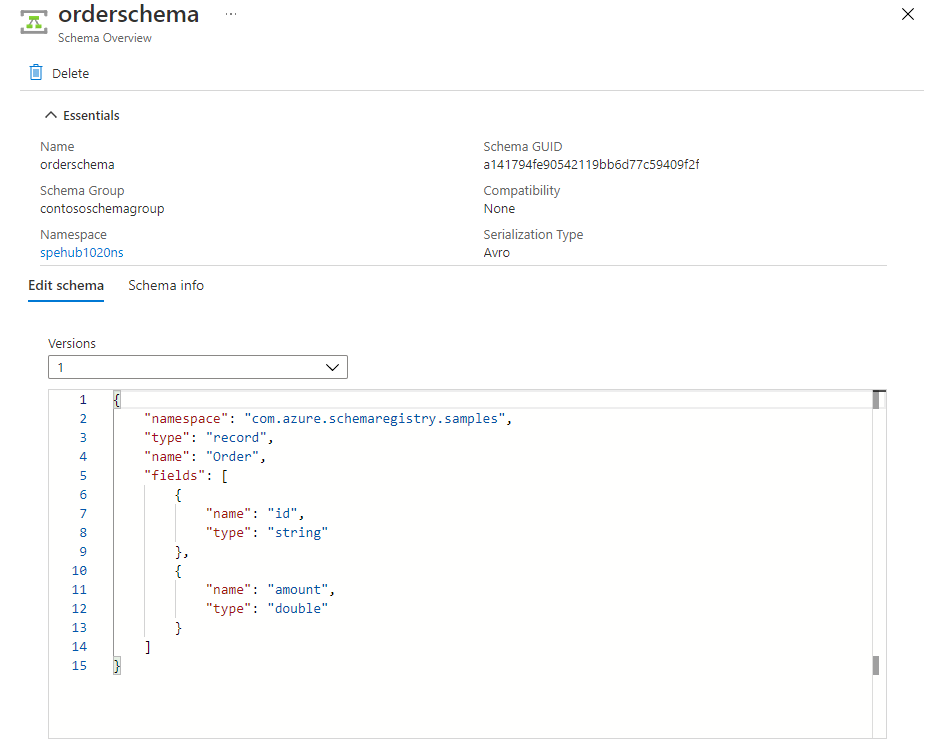
If there are multiple versions of a schema, you see them in the Versions drop-down list. Select a version to switch to that version schema.
Create a new version of schema
Update the schema in the text box, and select Validate. In the following example, a new field
descriptionhas been added to the schema.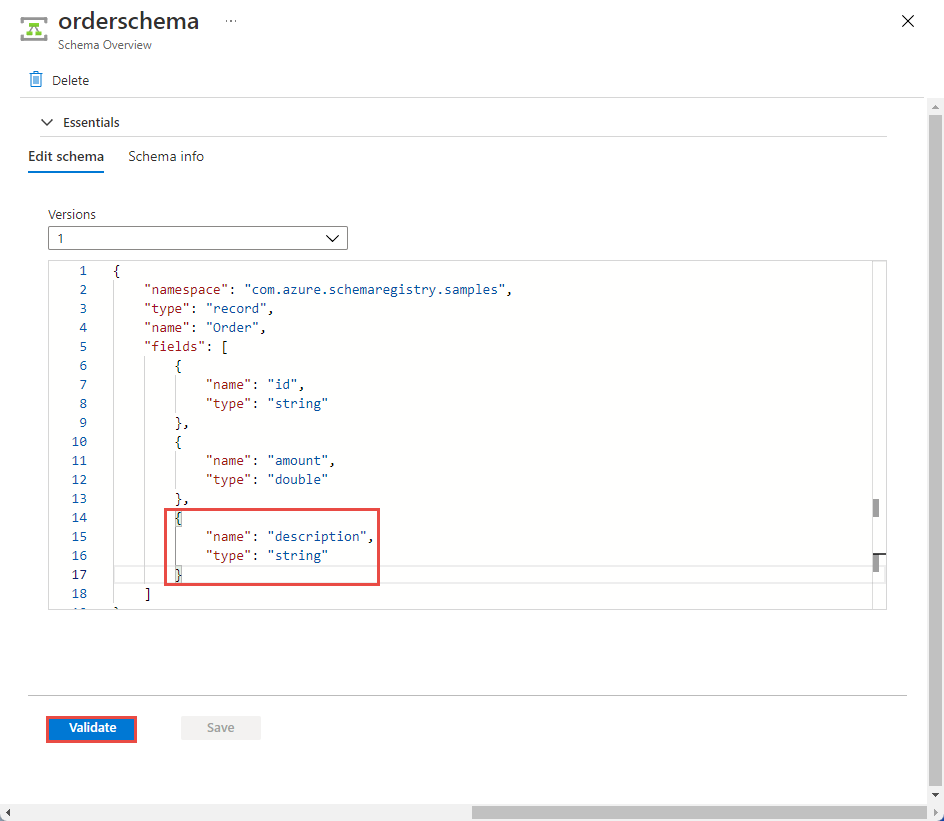
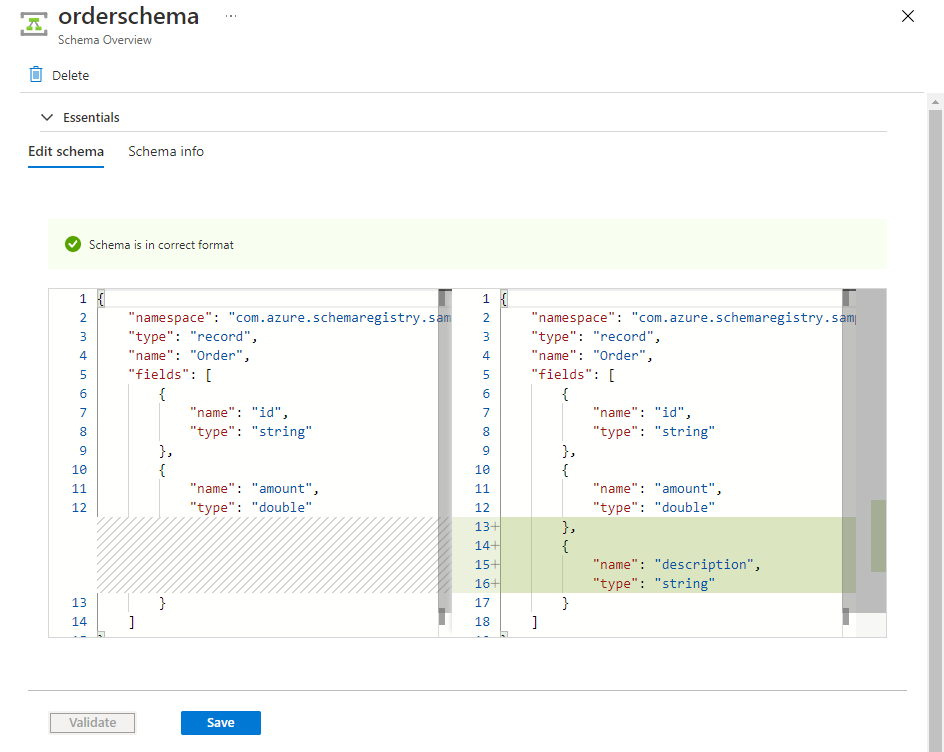
Review validation status and changes, and select Save.
You see that
2is selected for the version on the Schema Overview page.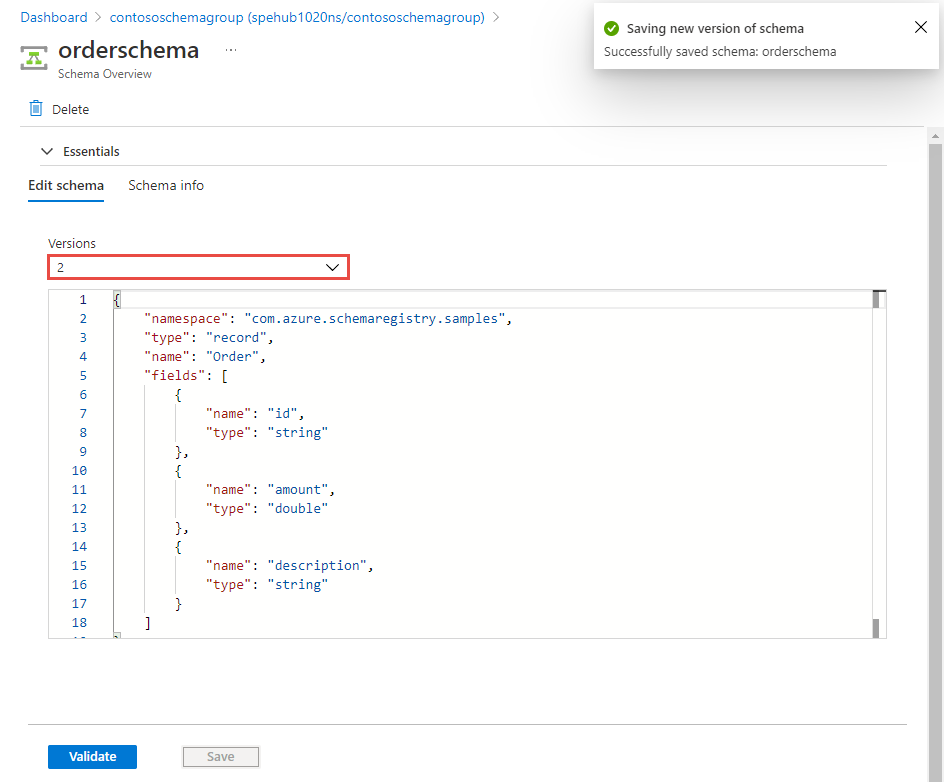
Select
1to see the version 1 of the schema.
Clean up resources
Note
Don't clean up resources if you want to continue to the next quick start linked from Next steps.
- Navigate to the Event Hubs Namespace page.
- Select Schema Registry on the left menu.
- Select the schema group you created in this quickstart.
- On the Schema Group page, select Delete on the toolbar.
- On the Delete Schema Group page, type the name of the schema group, and select Delete.
Next steps
Feedback
Coming soon: Throughout 2024 we will be phasing out GitHub Issues as the feedback mechanism for content and replacing it with a new feedback system. For more information see: https://aka.ms/ContentUserFeedback.
Submit and view feedback for