Onboard a root or apex domain to Azure Front Door
Important
Azure Front Door (classic) will be retired on March 31, 2027. To avoid any service disruption, it is important that you migrate your Azure Front Door (classic) profiles to Azure Front Door Standard or Premium tier by March 2027. For more information, see Azure Front Door (classic) retirement.
Azure Front Door uses CNAME records to validate domain ownership for the onboarding of custom domains. Azure Front Door doesn't expose the front-end IP address associated with your Azure Front Door profile. So, you can't map your apex domain to an IP address if your intent is to onboard it to Azure Front Door.
The Domain Name System (DNS) protocol prevents the assignment of CNAME records at the zone apex. For example, if your domain is contoso.com, you can create CNAME records for somelabel.contoso.com, but you can't create a CNAME record for contoso.com itself. This restriction presents a problem for application owners who load balance applications behind Azure Front Door. Because using an Azure Front Door profile requires creation of a CNAME record, it isn't possible to point at the Azure Front Door profile from the zone apex.
You can resolve this problem by using alias records in Azure DNS. Unlike CNAME records, alias records are created at the zone apex. Application owners can use it to point their zone apex record to an Azure Front Door profile that has public endpoints. Application owners can point to the same Azure Front Door profile used for any other domain within their DNS zone. For example, contoso.com and www.contoso.com can point to the same Azure Front Door profile.
Mapping your apex or root domain to your Azure Front Door profile requires CNAME flattening or DNS chasing, which is when the DNS provider recursively resolves CNAME entries until it resolves an IP address. Azure DNS supports this functionality for Azure Front Door endpoints.
Note
Other DNS providers support CNAME flattening or DNS chasing. However, Azure Front Door recommends using Azure DNS for its customers for hosting their domains.
You can use the Azure portal to onboard an apex domain on your Azure Front Door and enable HTTPS on it by associating it with a Transport Layer Security (TLS) certificate. Apex domains are also referred to as root or naked domains.
Apex domains are at the root of a DNS zone and don't contain subdomains. For example, contoso.com is an apex domain. Azure Front Door supports adding apex domains when you use Azure DNS. For more information about apex domains, see Domains in Azure Front Door.
You can use the Azure portal to onboard an apex domain on your Azure Front Door profile, and you can enable HTTPS on it by associating it with a TLS certificate.
Onboard the custom domain to your Azure Front Door profile
Under Settings, select Domains for your Azure Front Door profile. Then select + Add to add a new custom domain.
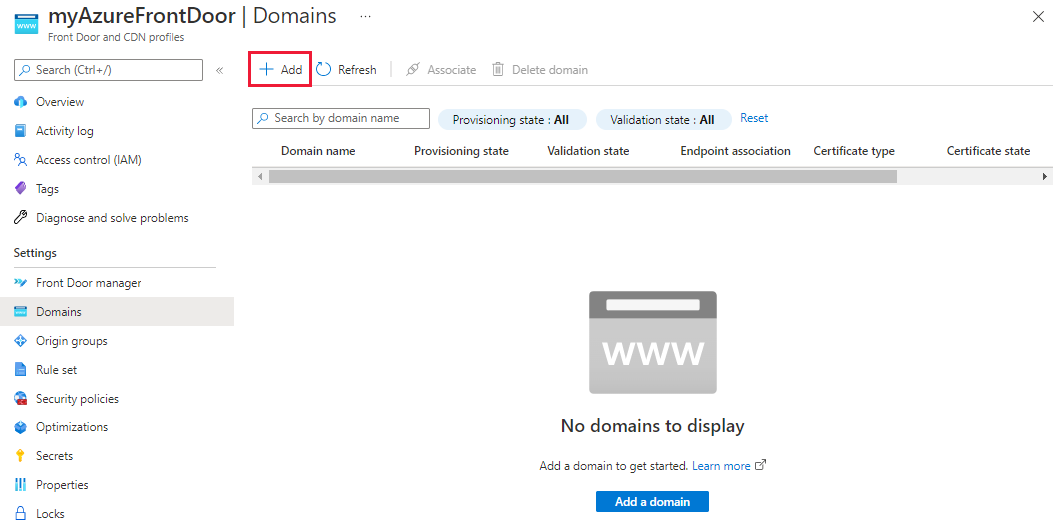
On the Add a domain pane, you enter information about the custom domain. You can choose Azure-managed DNS (recommended), or you can choose to use your DNS provider.
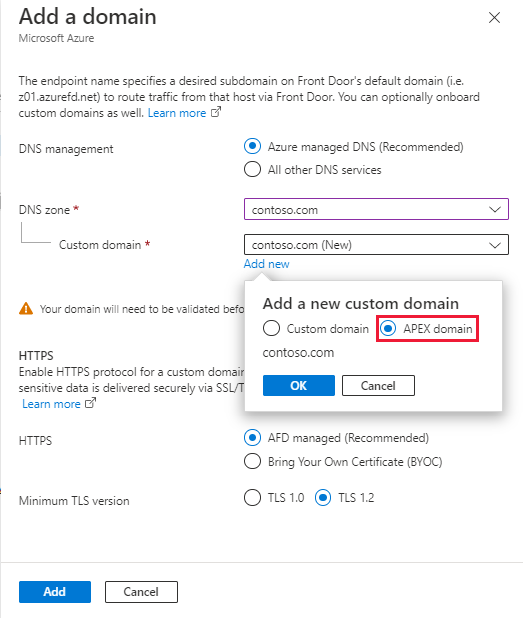
Azure-managed DNS: Select an existing DNS zone. For Custom domain, select Add new. Select APEX domain from the pop-up. Then select OK to save.
Another DNS provider: Make sure the DNS provider supports CNAME flattening and follow the steps for adding a custom domain.
Select the Pending validation state. A new pane appears with the DNS TXT record information needed to validate the custom domain. The TXT record is in the form of
_dnsauth.<your_subdomain>.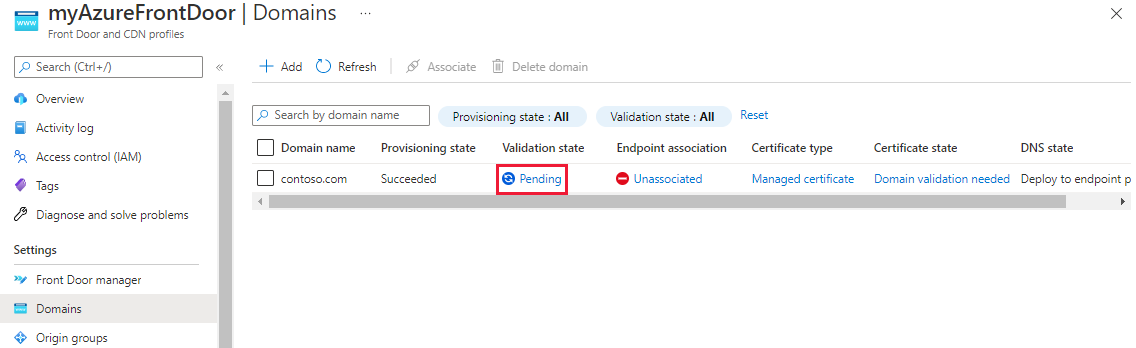
Azure DNS-based zone: Select Add to create a new TXT record with the value that appears in the Azure DNS zone.

If you're using another DNS provider, manually create a new TXT record with the name
_dnsauth.<your_subdomain>with the record value as shown on the pane.
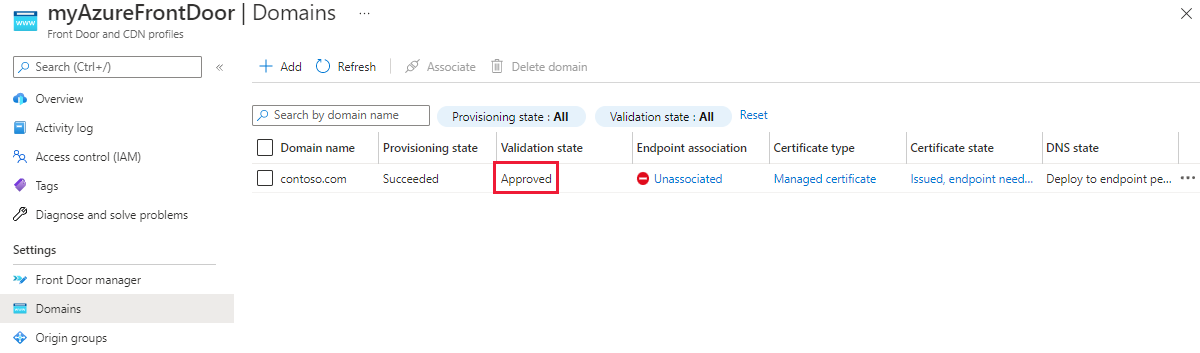
Close the Validate the custom domain pane and return to the Domains pane for the Azure Front Door profile. You should see Validation state change from Pending to Approved. If not, wait up to 10 minutes for changes to appear. If your validation doesn't get approved, make sure your TXT record is correct and that name servers are configured correctly if you're using Azure DNS.
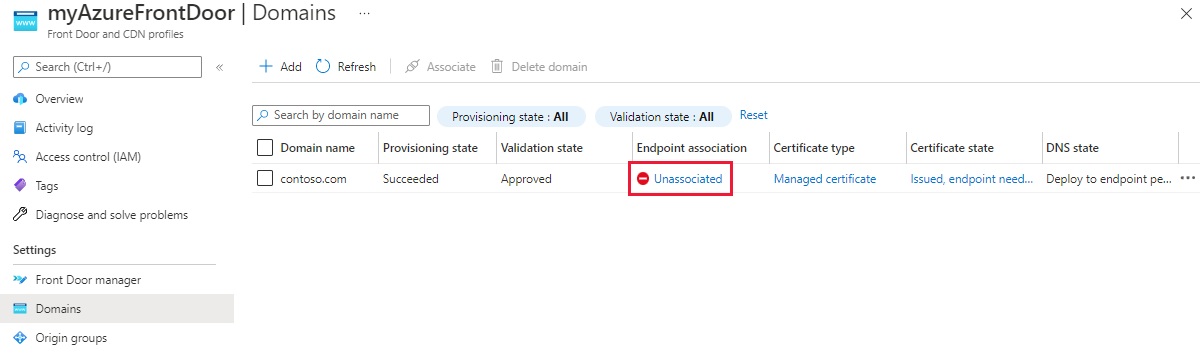
Select Unassociated from the Endpoint association column to add the new custom domain to an endpoint.
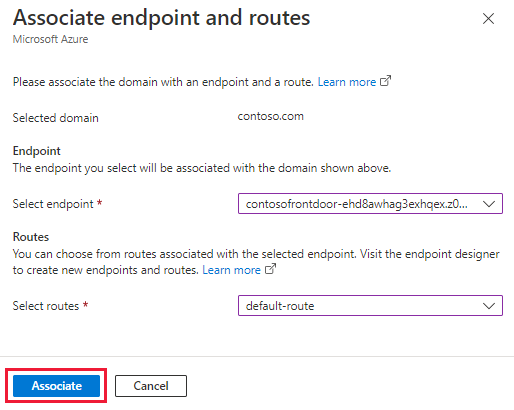
On the Associate endpoint and route pane, select the endpoint and route to which you want to associate the domain. Then select Associate.
Under the DNS state column, select CNAME record is currently not detected to add the alias record to the DNS provider.
Azure DNS: Select Add.
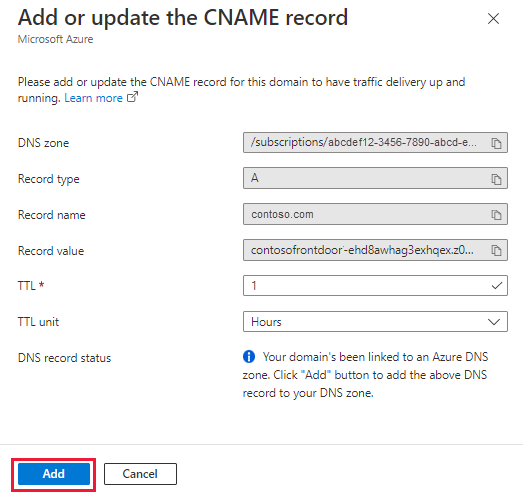
A DNS provider that supports CNAME flattening: You must manually enter the alias record name.
After the alias record gets created and the custom domain is associated with the Azure Front Door endpoint, traffic starts flowing.

Note
- The DNS state column is used for CNAME mapping check. An apex domain doesn't support a CNAME record, so the DNS state shows CNAME record is currently not detected even after you add the alias record to the DNS provider.
- When you place a service like an Azure Web App behind Azure Front Door, you need to configure the web app with the same domain name as the root domain in Azure Front Door. You also need to configure the back-end host header with that domain name to prevent a redirect loop.
- Apex domains don't have CNAME records pointing to the Azure Front Door profile. Managed certificate autorotation always fails unless domain validation is finished between rotations.
Enable HTTPS on your custom domain
Follow the guidance for configuring HTTPS for your custom domain to enable HTTPS for your apex domain.
Create an alias record for zone apex
Open Azure DNS configuration for the domain to be onboarded.
Create or edit the record for zone apex.
Select the record type as A. For Alias record set, select Yes. Set Alias type to Azure resource.
Select the Azure subscription that contains your Azure Front Door profile. Then select the Azure Front Door resource from the Azure resource dropdown list.
Select OK to submit your changes.
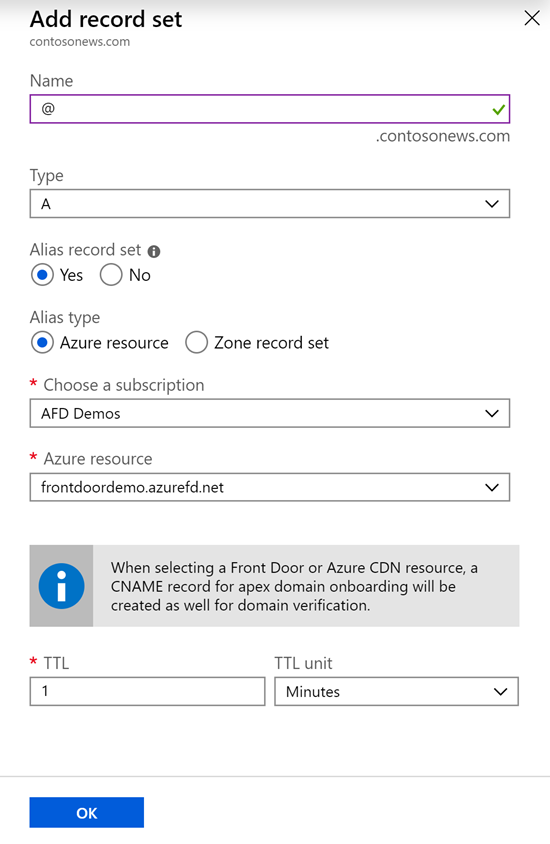
The preceding step creates a zone apex record that points to your Azure Front Door resource. It also creates a CNAME record mapping afdverify (for example,
afdverify.contosonews.com) that's used for onboarding the domain on your Azure Front Door profile.
Onboard the custom domain on your Azure Front Door
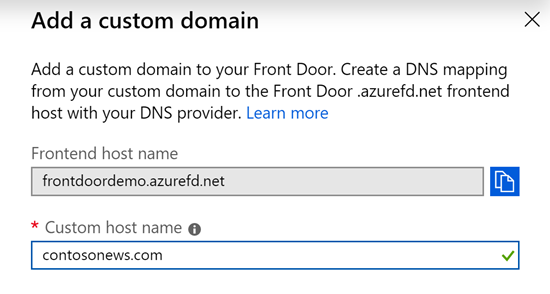
On the Azure Front Door designer tab, select the + icon on the Frontend hosts section to add a new custom domain.
Enter the root or apex domain name in the Custom host name field. An example is
contosonews.com.After the CNAME mapping from the domain to your Azure Front Door is validated, select Add to add the custom domain.
Select Save to submit the changes.
Enable HTTPS on your custom domain
Select the custom domain that was added. Under the section Custom domain HTTPS, change the status to Enabled.
For Certificate management type, select Use my own certificate.

Warning
An Azure Front Door-managed certificate management type isn't currently supported for apex or root domains. The only option available for enabling HTTPS on an apex or root domain for Azure Front Door is to use your own custom TLS/SSL certificate hosted on Azure Key Vault.
Ensure that you set up the right permissions for Azure Front Door to access your key vault, as noted in the UI, before you proceed to the next step.
Choose a Key Vault account from your current subscription. Then select the appropriate Secret and Secret version to map to the right certificate.
Select Update to save the selection. Then select Save.
Select Refresh after a couple of minutes. Then select the custom domain again to see the progress of certificate provisioning.
Warning
Ensure that you created appropriate routing rules for your apex domain or added the domain to existing routing rules.
Next steps
- Learn how to create an Azure Front Door profile.
- Learn how Azure Front Door works.
Feedback
Coming soon: Throughout 2024 we will be phasing out GitHub Issues as the feedback mechanism for content and replacing it with a new feedback system. For more information see: https://aka.ms/ContentUserFeedback.
Submit and view feedback for