Configure Azure RBAC for the DICOM service
In this article, you'll learn how to use Azure role-based access control (Azure RBAC) to assign access to the DICOM® service.
Assign roles
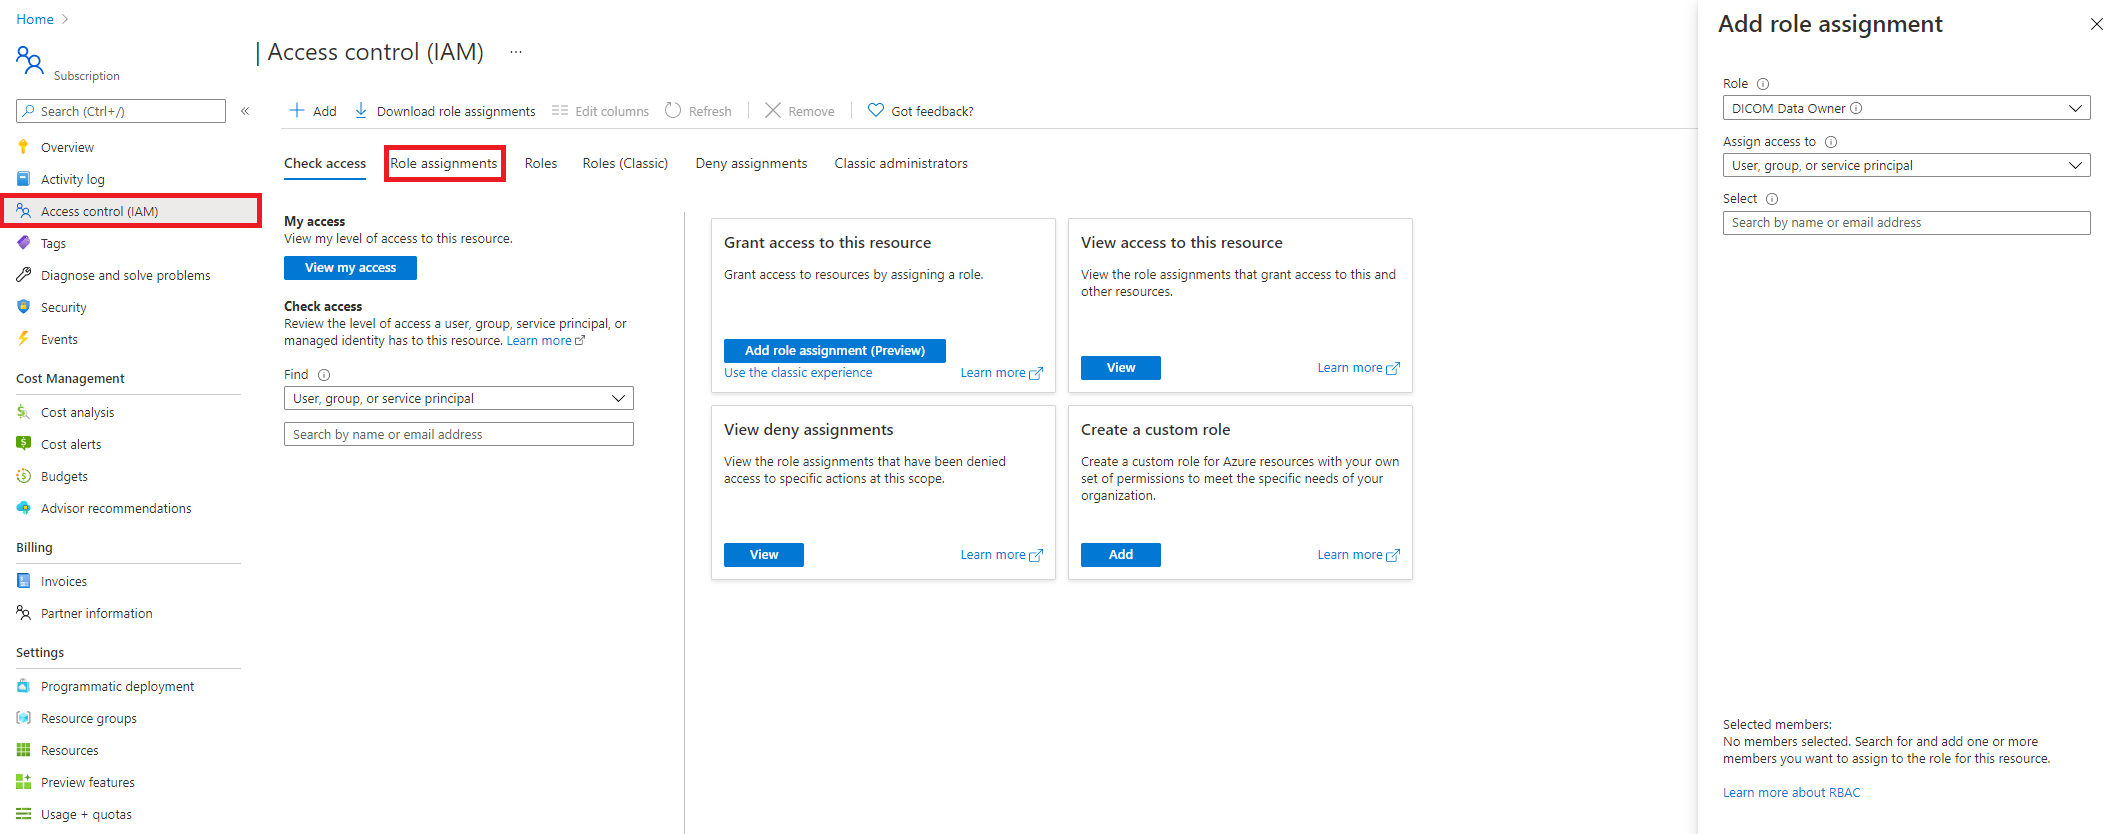
To grant users, service principals, or groups access to the DICOM data plane, select the Access control (IAM) blade. Select the Role assignments tab, and select + Add.
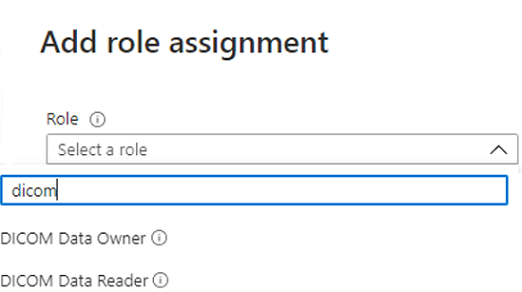
In the Role selection, search for one of the built-in roles for the DICOM data plane:
You can choose between:
- DICOM Data Owner: Full access to DICOM data.
- DICOM Data Reader: Read and search DICOM data.
If these roles aren't sufficient for your need, you can use PowerShell to create custom roles. For information about creating custom roles, see Create a custom role using Azure PowerShell.
In the Select box, search for a user, service principal, or group that you want to assign the role to.
Caching behavior
The DICOM service will cache decisions for up to five minutes. If you grant a user access to the DICOM service by adding them to the list of allowed object IDs, or you remove them from the list, you should expect it to take up to five minutes for changes in permissions to propagate.
Note
DICOM® is the registered trademark of the National Electrical Manufacturers Association for its Standards publications relating to digital communications of medical information.
Feedback
Coming soon: Throughout 2024 we will be phasing out GitHub Issues as the feedback mechanism for content and replacing it with a new feedback system. For more information see: https://aka.ms/ContentUserFeedback.
Submit and view feedback for

