Register a client application for the DICOM service
In this article, you learn how to register a client application for the DICOM® service. You can find more information on Register an application with the Microsoft identity platform.
Register a new application
In the Azure portal, select Microsoft Entra ID.
Select App registrations.
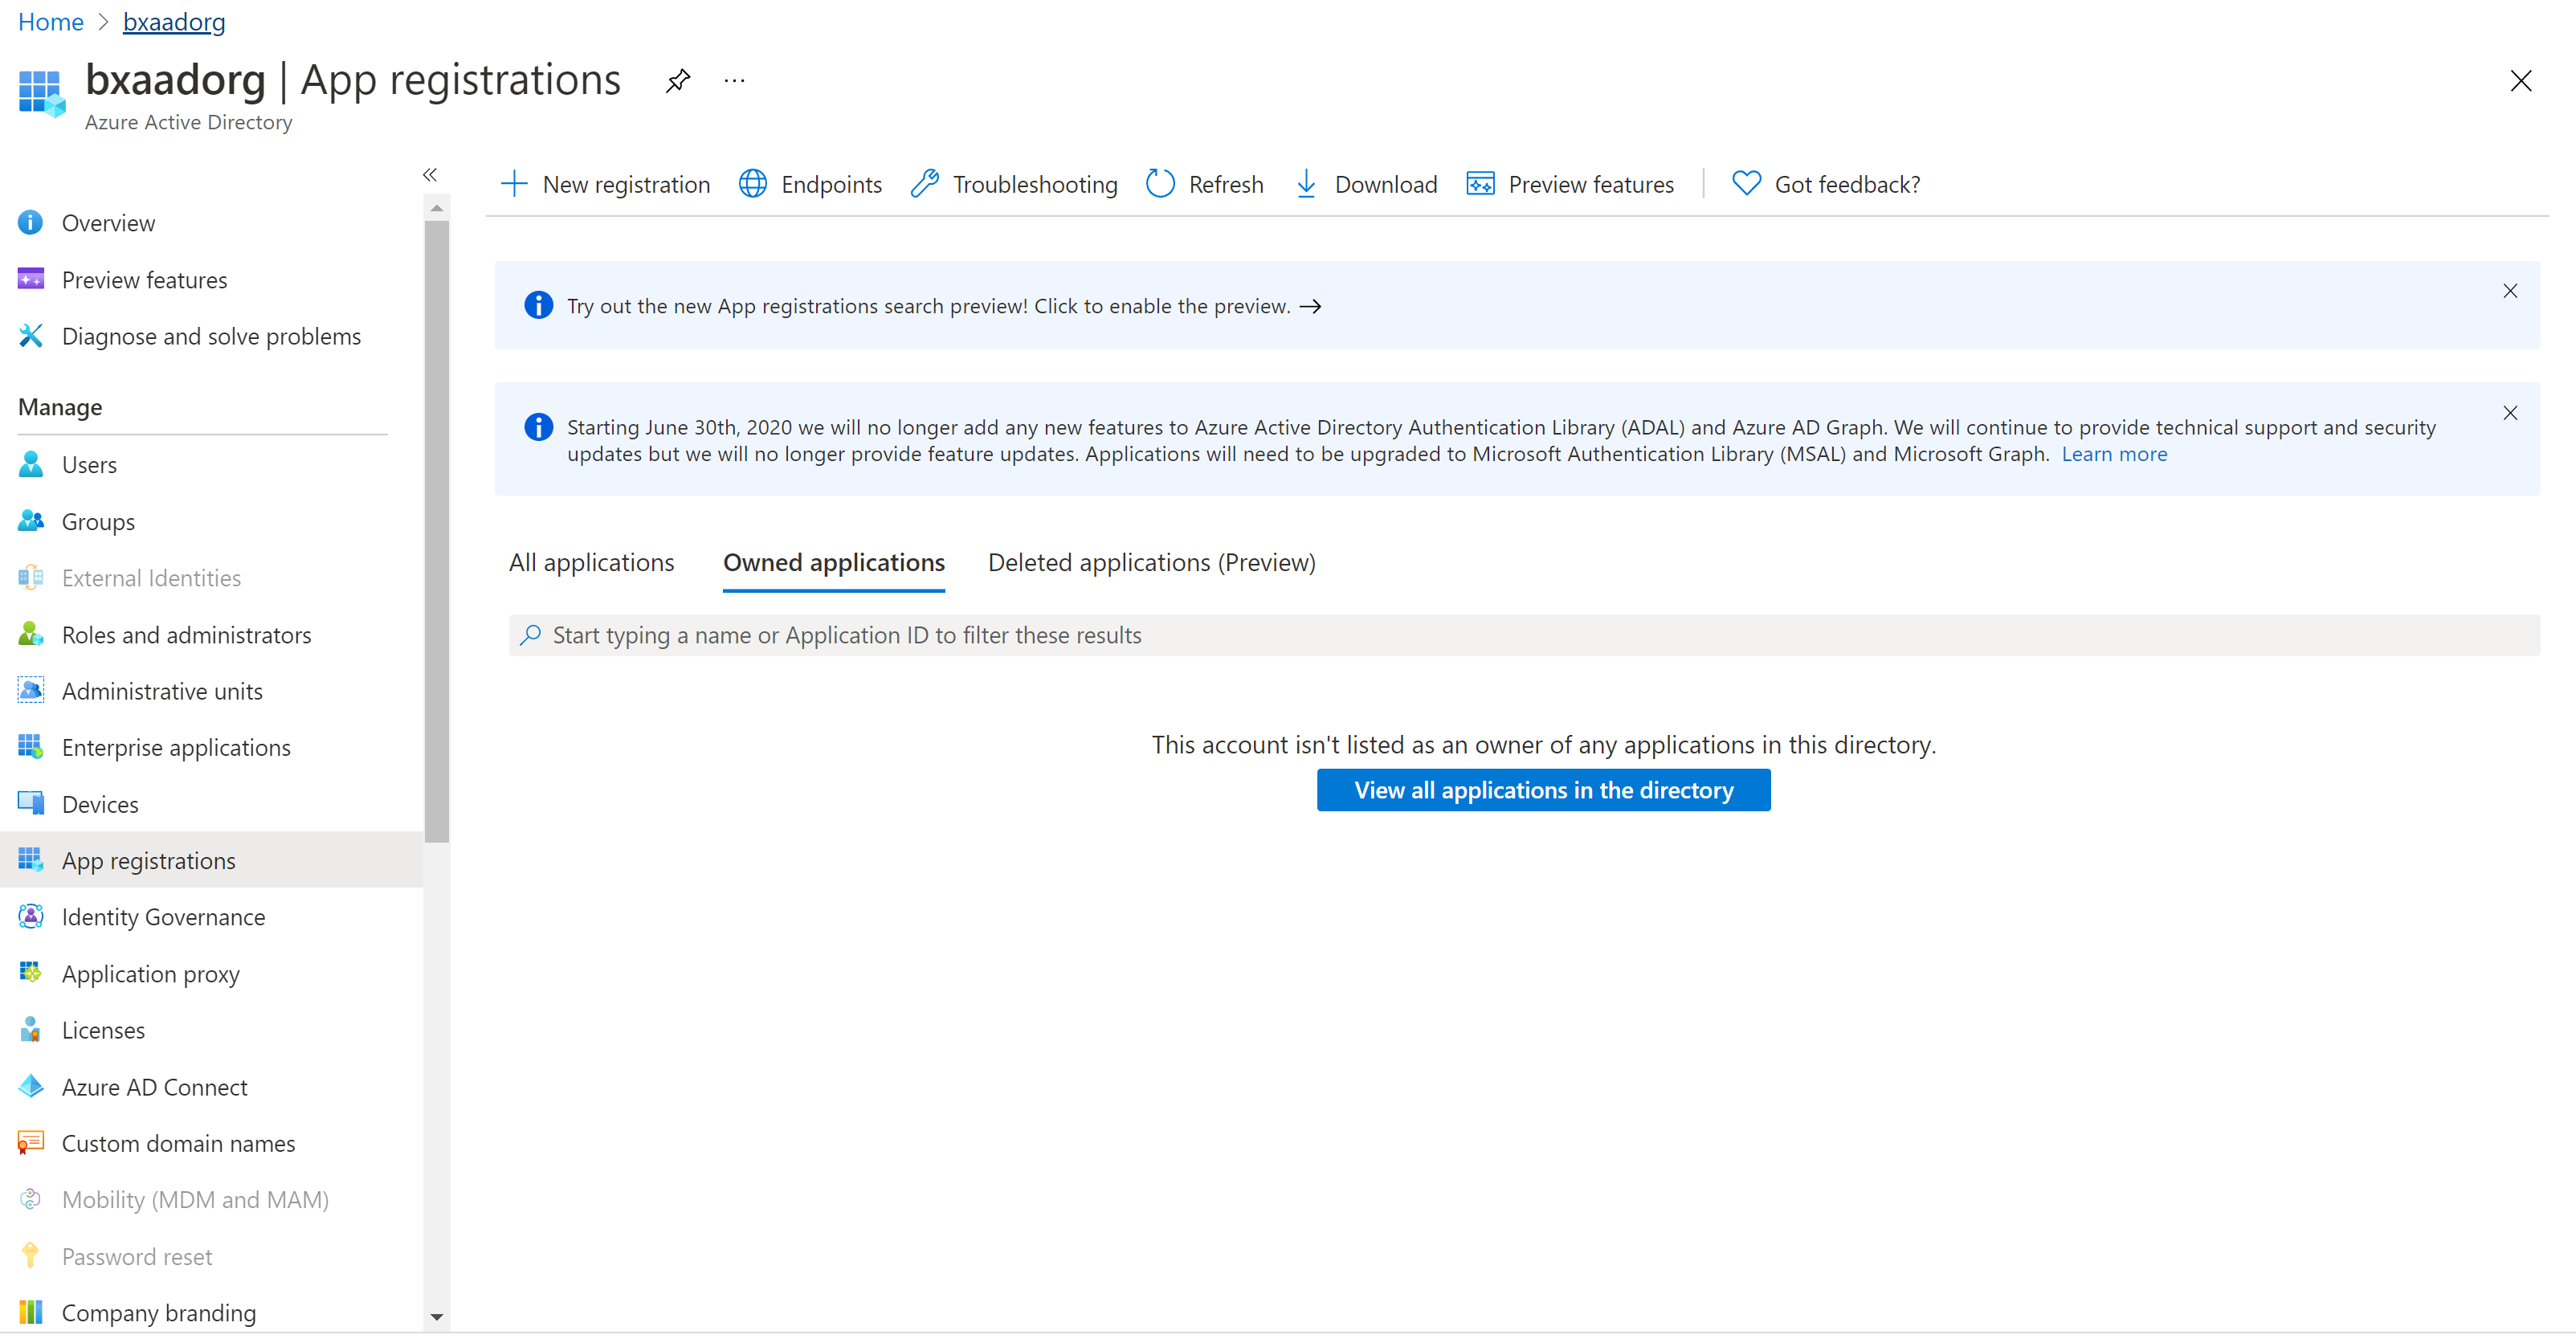
Select New registration.
For Supported account types, select Accounts in this organizational directory only. Leave the other options as is.
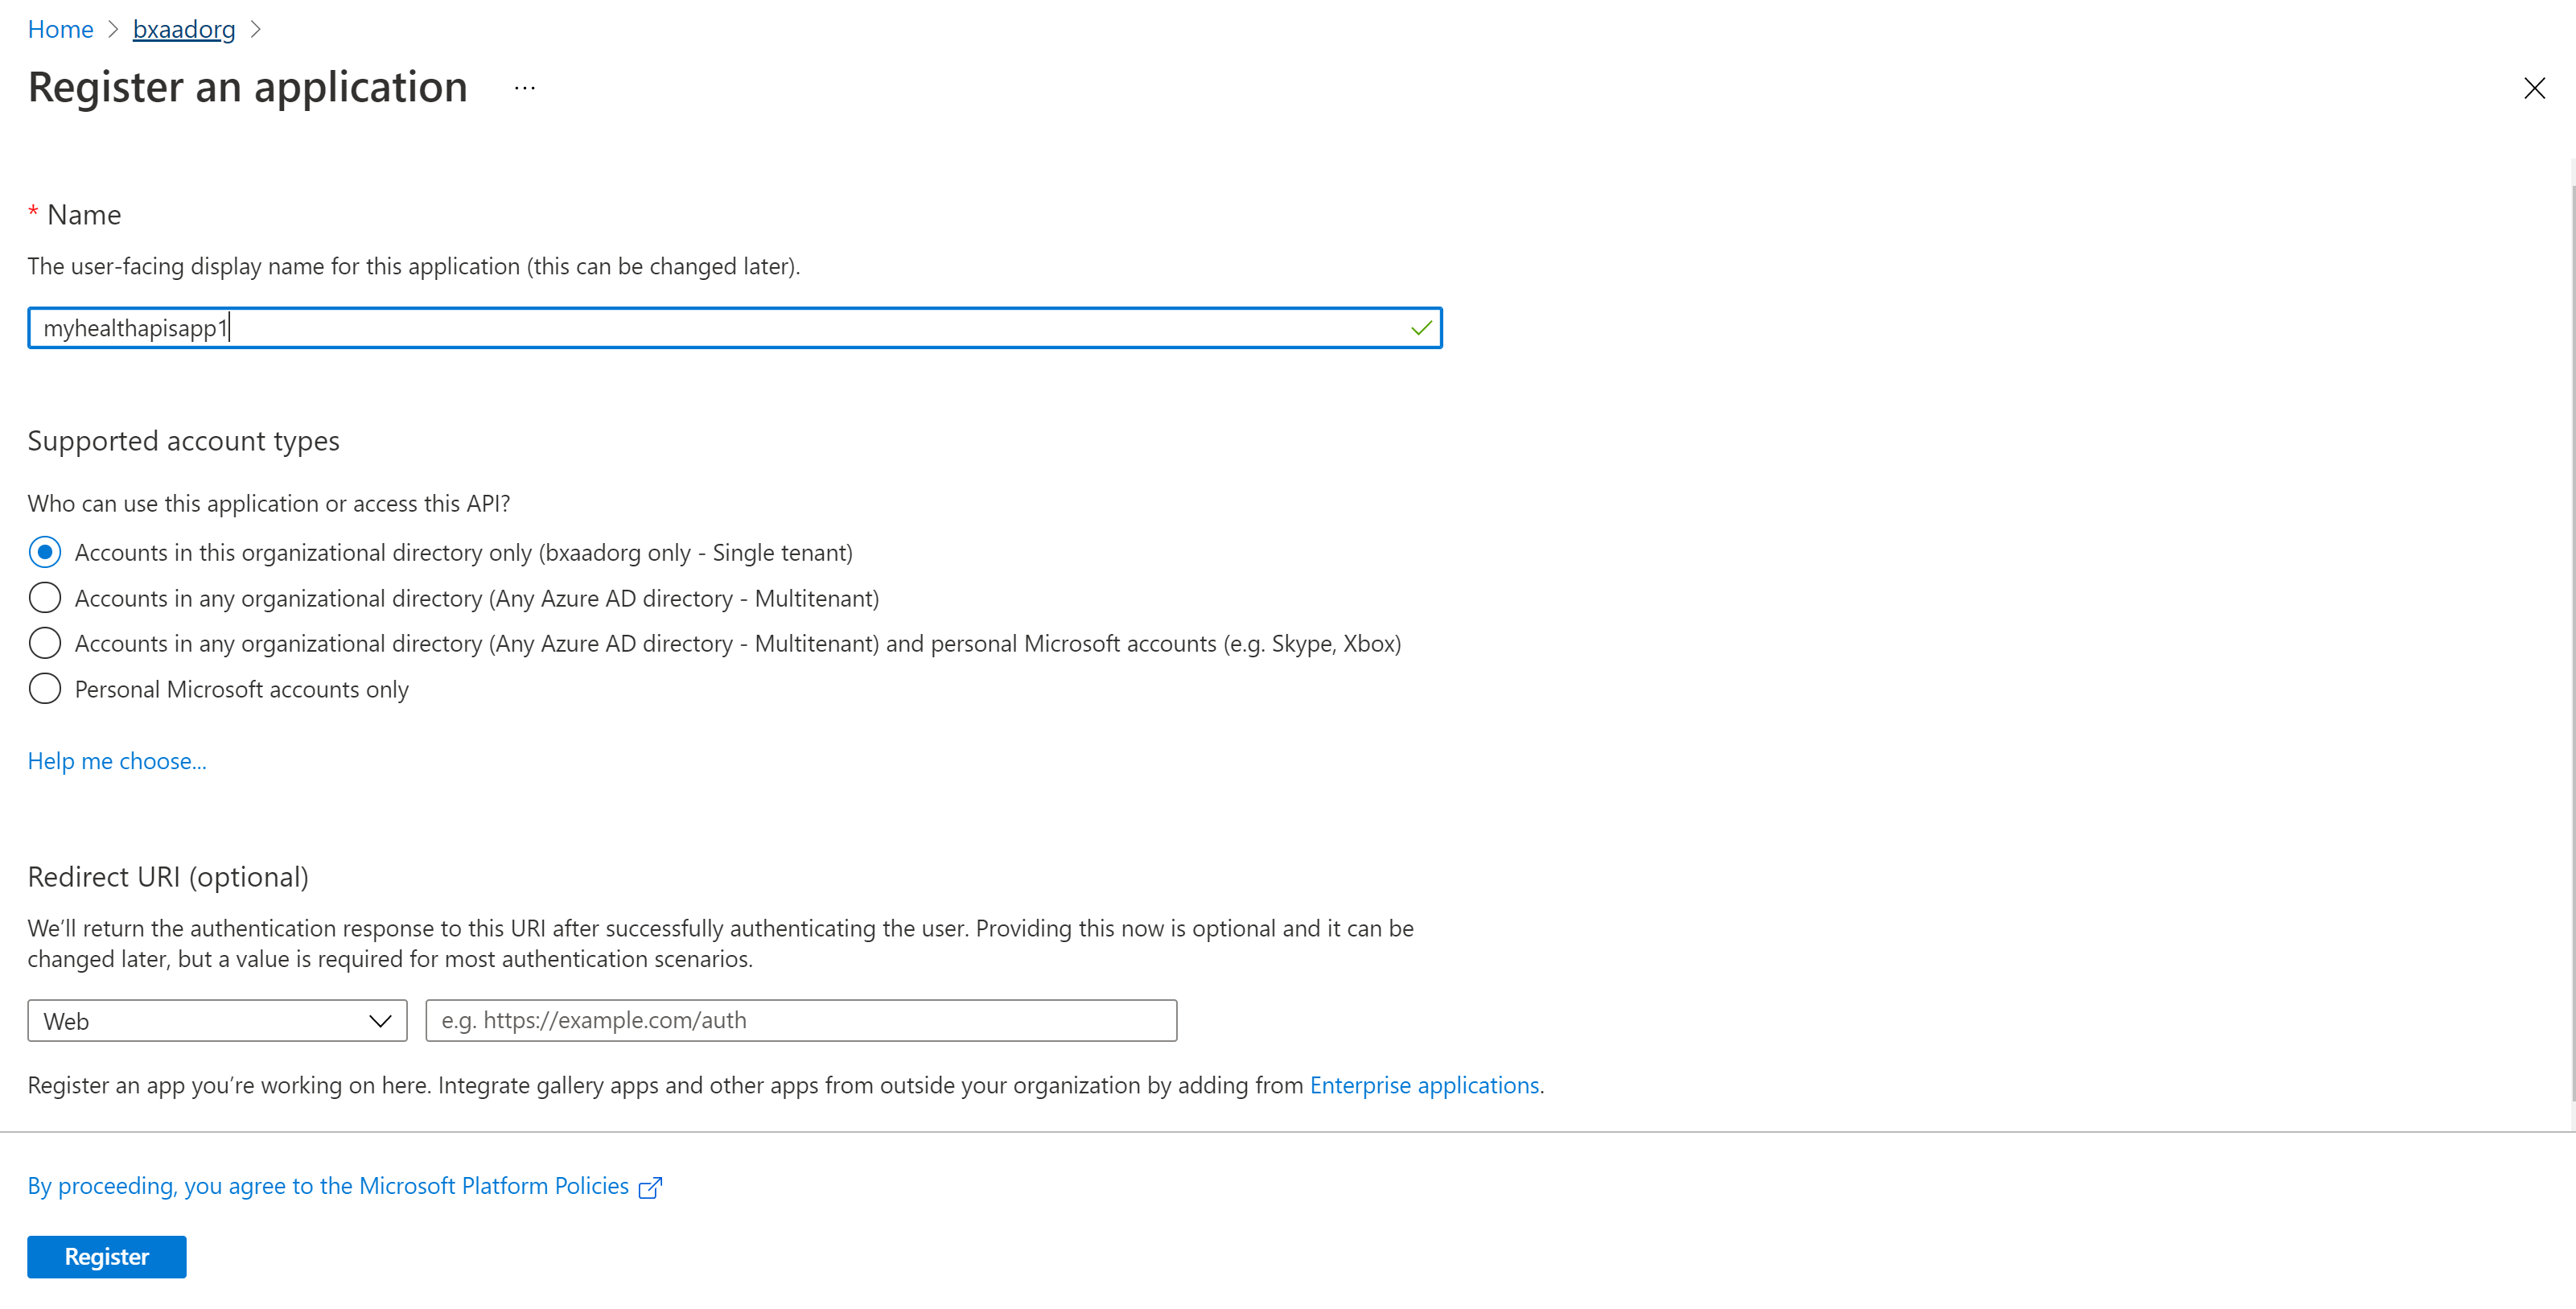
Select Register.


Application ID (client ID)
After you register a new application, you can find the Application (client) ID and Directory (tenant) ID from the Overview menu option. Make a note of the values for use later.

Authentication setting: Confidential vs. public
Select Authentication to review the settings. The default value for Allow public client flows is No.
If you keep this default value, the application registration is a confidential client application and a certificate or secret is required.

If you change the default value to Yes for the Allow public client flows option in the Advanced setting, the application registration is a public client application and a certificate or secret isn't required. The Yes value is useful when you want to use the client application in your mobile app or a JavaScript app where you don't want to store any secrets.
For tools that require a redirect URL, select Add a platform to configure the platform.
Note
For Postman, select Mobile and desktop applications. Enter https://www.getpostman.com/oauth2/callback in the Custom redirect URIs section. Select Configure to save the setting.

Certificates & secrets
Select Certificates & secrets and select New client secret.
Add and then copy the secret value.

Optionally, you can upload a certificate (public key) and use the Certificate ID, a GUID value associated with the certificate. For testing purposes, you can create a self-signed certificate using tools such as the PowerShell command line, New-SelfSignedCertificate, and then export the certificate from the certificate store.
API permissions
The following steps are required for the DICOM service. In addition, user access permissions or role assignments for Azure Health Data Services are managed through role-based access control (RBAC). For more information, see Configure Azure RBAC for Azure Health Data Services.
Select the API permissions pane.

Select Add a permission.
Add a permission to the DICOM service by searching for Azure API for DICOM under APIs my organization uses.

The search result for Azure API for DICOM only returns if you've already deployed the DICOM service in the workspace.
If you're referencing a different resource application, select your DICOM API resource application registration that you created previously under APIs my organization uses.
Select scopes (permissions) that the confidential client application asks for on behalf of a user. Select Dicom.ReadWrite, and then select Add permissions.


Your application registration is now finished.
Note
DICOM® is the registered trademark of the National Electrical Manufacturers Association for its Standards publications relating to digital communications of medical information.
Feedback
Coming soon: Throughout 2024 we will be phasing out GitHub Issues as the feedback mechanism for content and replacing it with a new feedback system. For more information see: https://aka.ms/ContentUserFeedback.
Submit and view feedback for