Manage farms
You can manage your farms in Azure FarmBeats. This article provides the information about how to create farms, install devices, sensors, and drones that help you manage your farms.
Important
Azure FarmBeats is retired. You can see the public announcement here.
We have built a new agriculture focused service, it's name is Azure Data Manager for Agriculture and it's now available as a preview service. For more information, see public documentation here or write to us at madma@microsoft.com.
Create farms
Use the following steps:
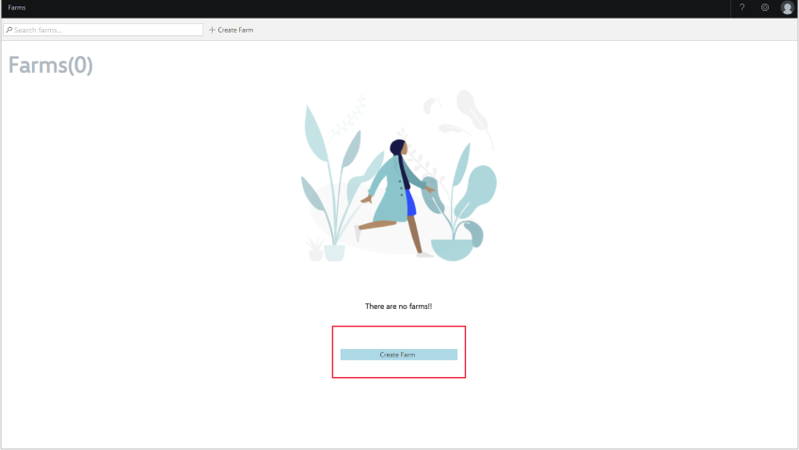
Sign-in to the Farm Accelerator, the Farms page displays. The Farms page displays the list of farms in case they're created in subscription.
Here's the sample image:
Select Create Farm and provide Name, Crops and Address.
In the Define Farm Boundary (mandatory field) select either Mark on Map or Paste GeoJSON code.
Here are the two ways to define a farm boundary:
Mark on Map: Use the map control tool to draw and mark the boundary of the farm. To mark the boundaries,
 and mark the exact boundaries.
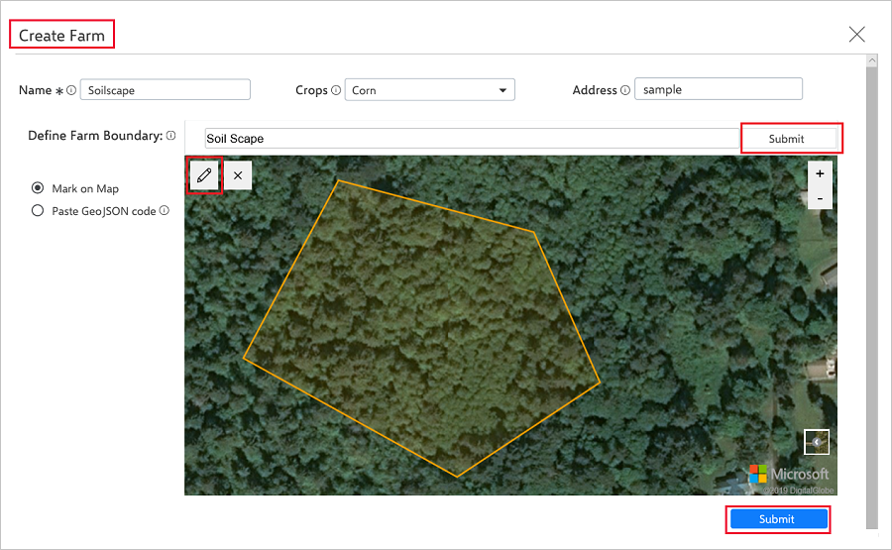
Paste GeoJson Code: The GeoJSON is a format for encoding geographical data structures, using JavaScript Object Notation (JSON). This option displays a text box where a GeoJSON string can be entered to mark the farm boundaries. You can also create GeoJSON code from GeoJSON.io. Use the tooltips to help fill in the information.
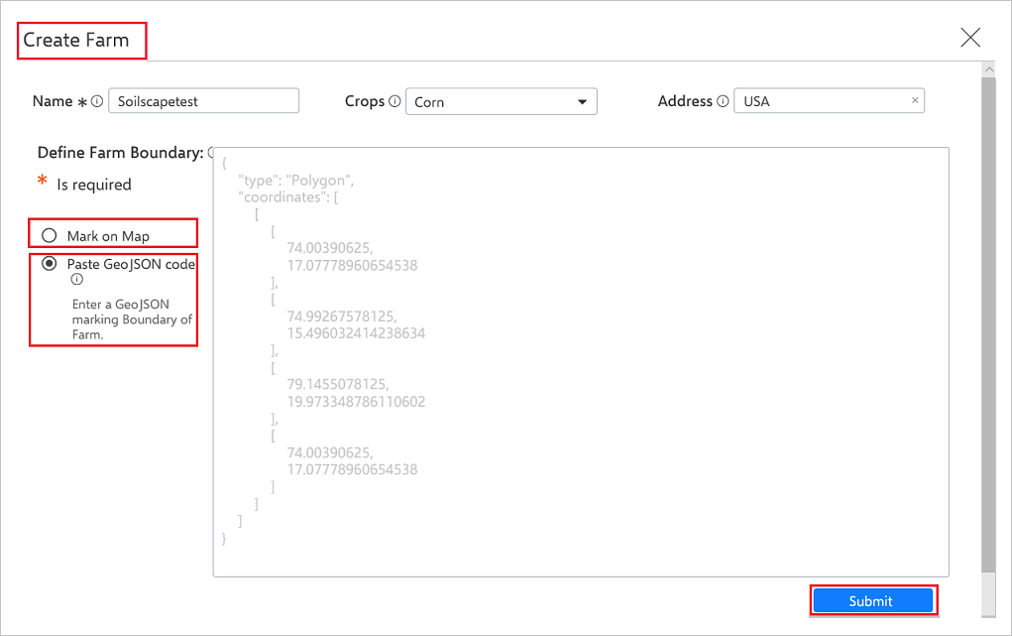
Select Submit to create a farm. A new farm is created and displayed in the Farms page.
View farm
The Farm list page displays a list of created farms. Select a farm to view the list of:
- **Device count—displays the number and status of devices deployed within the farm.
- **Map—map of the farm with the devices deployed in the farm.
- **Telemetry—displays the telemetry from the sensors deployed in the farm.
- **Latest Precision Maps—displays the latest Satellite Indices map (EVI, NDWI), Soil Moisture Heatmap and Sensor Placement map.
Edit farm
The Farms page displays a list of created farms.
Select a farm to view and edit the farm.
Select Edit Farm to edit the farm information. In the Farm Details window, you can edit Name, Crops, Address, and define Farm Boundary fields.
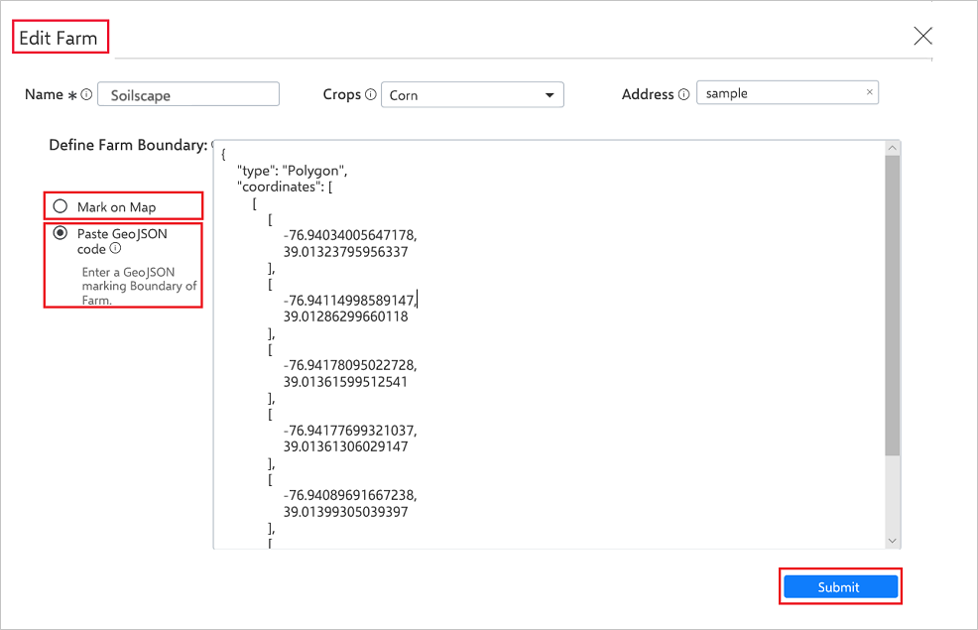
Select Submit to save the details edited.
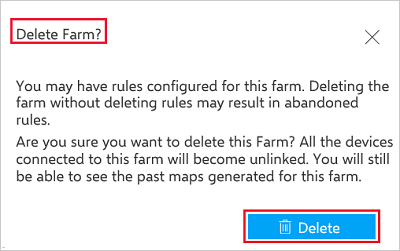
Delete farm
The Farms page displays a list of farms created. Use the following steps to delete a farm:
Select a farm from the list to delete farm details.
Select Delete Farm to delete the farm.
Note
When you delete a farm, the devices and maps associated with the farm aren’t deleted. Any farm information associated with the device and maps won’t be relevant. You can continue to view devices, telemetry and maps from the FarmBeats service.
Next steps
Now that your farm is created, learn how to get sensor data flowing into your farm.