Use IP filters
Security is an important aspect of any IoT solution based on Azure IoT Hub. Sometimes you need to explicitly specify the IP addresses from which devices can connect as part of your security configuration. The IP filter feature enables you to configure rules for rejecting or accepting traffic from specific IPv4 addresses.
When to use
Use IP filter to receive traffic only from a specified range of IP addresses and reject everything else. For example, you're using your IoT hub with Azure Express Route to create private connections between an IoT hub and your on-premises infrastructure.
Default setting
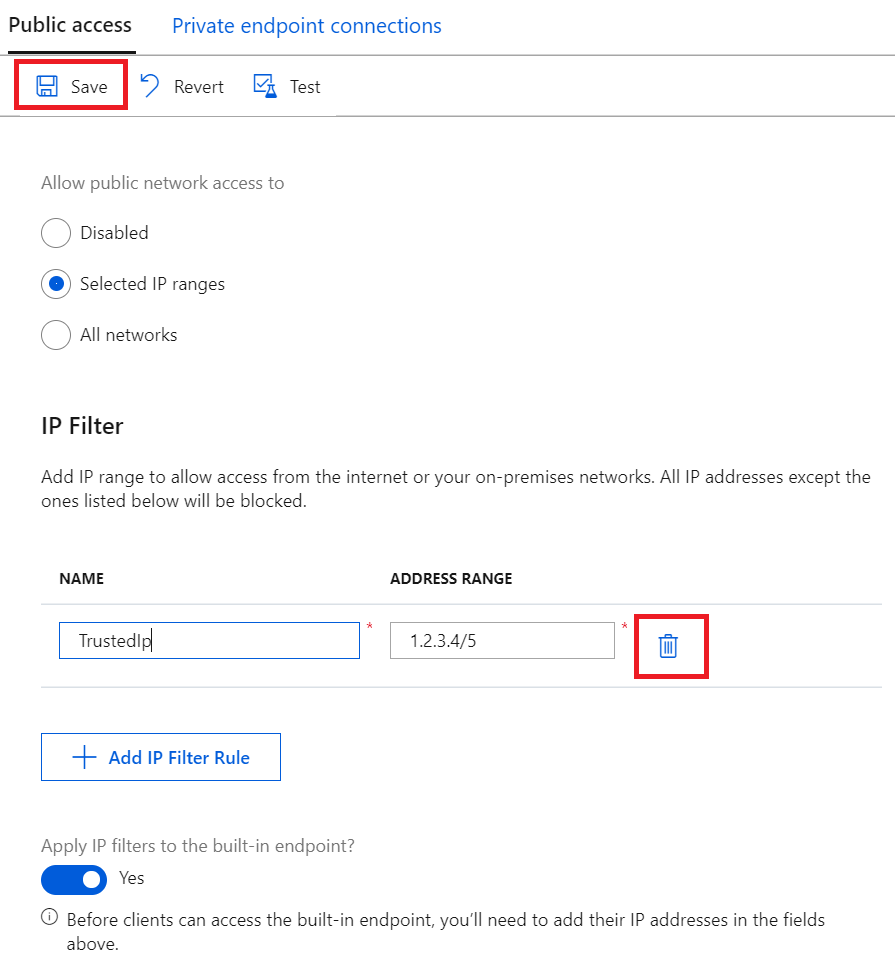
To get to the IP Filter settings page of your IoT hub, select Networking > Public access, then choose Selected IP Ranges:
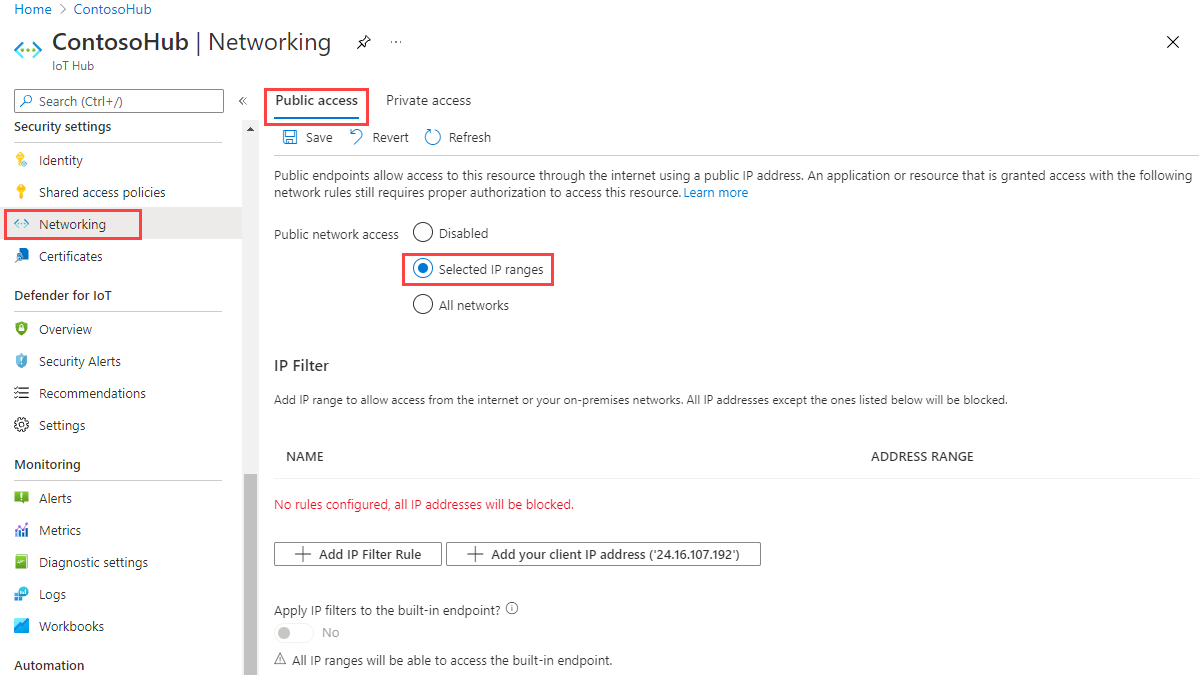
By default, the IP Filter grid in the portal for an IoT hub is empty. This default setting means that your hub blocks connections from all IP addresses. This default setting is equivalent to a rule that blocks the 0.0.0.0/0 IP address range.
Add or edit an IP filter rule
To add an IP filter rule, select Add IP Filter Rule. To quickly add your computer's IP address, select Add your client IP address.
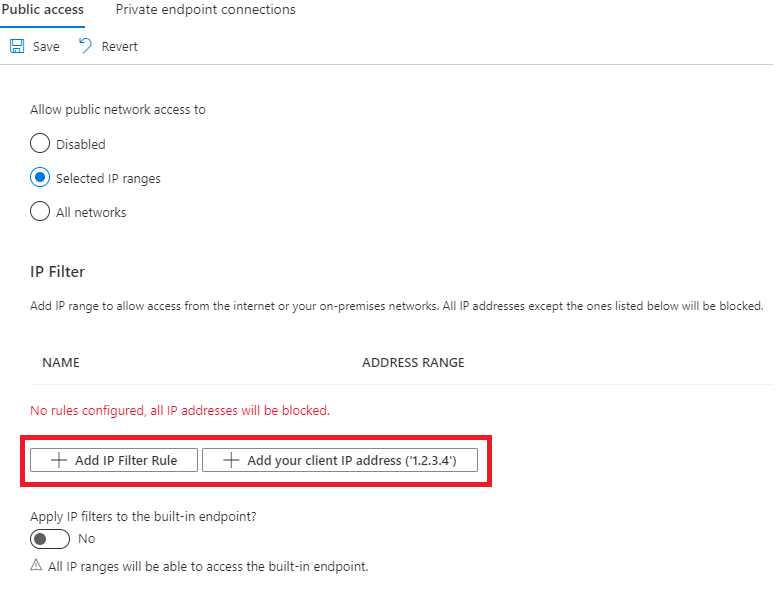
After selecting Add IP Filter Rule, fill in the fields. These fields are pre-filled for you if you selected to add your client IP address.
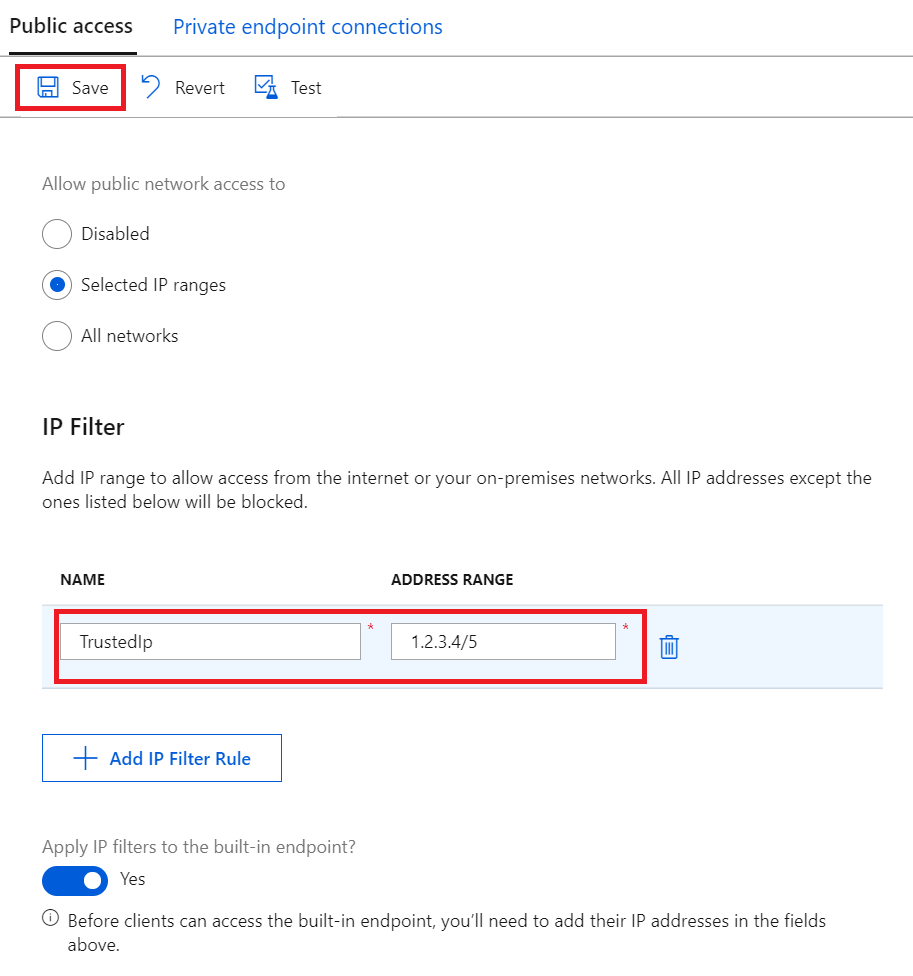
Provide a name for the IP Filter rule. This name must be a unique, case-insensitive, alphanumeric string up to 128 characters long. Only the ASCII 7-bit alphanumeric characters plus the following special characters are accepted:
- : . + % _ # * ? ! ( ) , = @ ; '.Provide a single IPv4 address or a block of IP addresses in CIDR notation. For example, in CIDR notation 192.168.100.0/22 represents the 1024 IPv4 addresses from 192.168.100.0 to 192.168.103.255.
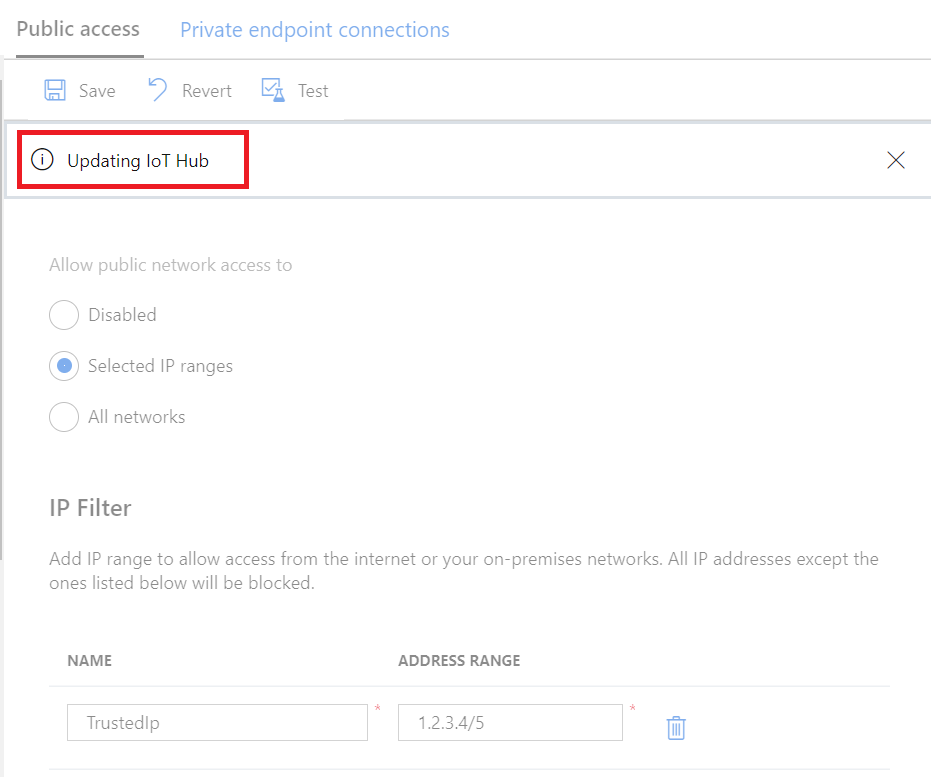
After filling in the fields, select Save to save the rule. You see an alert notifying you that the update is in progress.
The Add option is disabled when you reach the maximum of 100 IP filter rules.
To edit an existing rule, select the data you want to change, make the change, then select Save to save your edit.
Delete an IP filter rule
To delete an IP filter rule, select the trash can icon on that row and then select Save. The rule is removed and the change is saved.
Apply IP filter rules to the built-in Event Hubs compatible endpoint
To apply the IP filter rules to the built-in Event Hubs compatible endpoint, check the box next to Apply IP filters to the built-in endpoint?, then select Save.

Note
This option isn't available to free (F1) IoT hubs. To apply IP filter rules to the built-in endpoint, use a paid IoT hub.
By enabling this option, your IP filter rules are replicated to the built-in endpoint, so only trusted IP ranges can access it.
If you disable this option, the built-in endpoint is accessible to all IP addresses. This behavior may be useful if you want to read from the endpoint with services with source IP addresses which may change over time like Azure Stream Analytics.
How filter rules are applied
The IP filter rules are applied at the IoT Hub service level. Therefore, the IP filter rules apply to all connections from devices and back-end apps using any supported protocol. Also, you can choose if the built-in Event Hubs compatible endpoint (not via the IoT Hub connection string) are bound to these rules.
Any connection attempt from an IP address that isn't explicitly allowed receives an unauthorized 401 status code and description. The response message does not mention the IP rule. Rejecting IP addresses can prevent other Azure services such as Azure Stream Analytics, Azure Virtual Machines, or the Device Explorer in Azure portal from interacting with the IoT hub.
Note
If you want to use Azure Stream Analytics (ASA) to read messages from an IoT hub with IP filter enabled, disable the Apply IP filters to the built-in endpoint option, and then use the event hub-compatible name and endpoint of your IoT hub to manually add an Event Hubs stream input in the ASA.
Ordering
IP filter rules are allow rules and applied without ordering. Only IP addresses that you add are allowed to connect to IoT Hub.
For example, if you want to accept addresses in the range 192.168.100.0/22 and reject everything else, you only need to add one rule in the grid with address range 192.168.100.0/22.
Azure portal
IP filter rules are also applied when using IoT Hub through Azure portal. This is because API calls to the IoT Hub service are made directly using your browser with your credentials, which is consistent with other Azure services. To access IoT Hub using Azure portal when IP filter is enabled, add your computer's IP address to the allowlist.
Retrieve and update IP filters using Azure CLI
Your IoT Hub's IP filters can be retrieved and updated through Azure CLI.
To retrieve current IP filters of your IoT Hub, run:
az resource show -n <iothubName> -g <resourceGroupName> --resource-type Microsoft.Devices/IotHubs
This will return a JSON object where your existing IP filters are listed under the properties.networkRuleSets key:
{
...
    "properties": {
        "networkRuleSets": {
            "defaultAction": "Deny",
            "applyToBuiltInEventHubEndpoint": true,
            "ipRules": [{
                    "filterName": "TrustedFactories",
                    "action": "Allow",
                    "ipMask": "1.2.3.4/5"
                },
                {
                    "filterName": "TrustedDevices",
                    "action": "Allow",
                    "ipMask": "1.1.1.1/1"
                }
            ]
        }
    }
}
To add a new IP filter for your IoT Hub, run:
az resource update -n <iothubName> -g <resourceGroupName> --resource-type Microsoft.Devices/IotHubs --add properties.networkRuleSets.ipRules "{\"action\":\"Allow\",\"filterName\":\"TrustedIP\",\"ipMask\":\"192.168.0.1\"}"
To remove an existing IP filter in your IoT Hub, run:
az resource update -n <iothubName> -g <resourceGroupName> --resource-type Microsoft.Devices/IotHubs --add properties.networkRuleSets.ipRules <ipFilterIndexToRemove>
Here, <ipFilterIndexToRemove> must correspond to the ordering of IP filters in your IoT Hub's properties.networkRuleSets.ipRules.
Retrieve and update IP filters using Azure PowerShell
Note
We recommend that you use the Azure Az PowerShell module to interact with Azure. See Install Azure PowerShell to get started. To learn how to migrate to the Az PowerShell module, see Migrate Azure PowerShell from AzureRM to Az.
Your IoT Hub's IP filters can be retrieved and set through Azure PowerShell.
# Get your IoT Hub resource using its name and its resource group name
$iothubResource = Get-AzResource -ResourceGroupName <resourceGroupNmae> -ResourceName <iotHubName> -ExpandProperties

# Access existing IP filter rules
$iothubResource.Properties.networkRuleSets.ipRules |% { Write-host $_ }

# Construct a new IP filter
$filter = @{'filterName'='TrustedIP'; 'action'='Allow'; 'ipMask'='192.168.0.1'}

# Add your new IP filter rule
$iothubResource.Properties.networkRuleSets.ipRules += $filter

# Remove an existing IP filter rule using its name, e.g., 'GoodIP'
$iothubResource.Properties.networkRuleSets.ipRules = @($iothubResource.Properties.networkRuleSets.ipRules | Where 'filterName' -ne 'GoodIP')

# Update your IoT Hub resource with your updated IP filters
$iothubResource | Set-AzResource -Force
Update IP filter rules using REST
You may also retrieve and modify your IoT Hub's IP filter using Azure resource Provider's REST endpoint. See properties.networkRuleSets in createorupdate method.
Next steps
To further explore the capabilities of IoT Hub, see:
Feedback
Coming soon: Throughout 2024 we will be phasing out GitHub Issues as the feedback mechanism for content and replacing it with a new feedback system. For more information see: https://aka.ms/ContentUserFeedback.
Submit and view feedback for