How to manage devices using device twin tags in Azure IoT Hub
This article demonstrates how to use tags to manage IoT devices using device twin tags
Device twin tags can be used as a powerful tool to help you organize your devices. This is especially important when you have multiple kinds of devices within your IoT solutions, you can use tags to set types, locations etc. For example:
{
    "deviceId": "mydevice1",
    "status": "enabled",
    "connectionState": "Connected",
    "cloudToDeviceMessageCount": 0,
    "authenticationType": "sas",
    "tags": {
        "deploymentLocation": {
            "building": "43",
            "floor": "1"
        },
		"deviceType":"HDCamera"
    },
    "properties": {
     ...
    }
}
Prerequisites
An IoT hub. Create one with the CLI or the Azure portal.
At least two registered devices. Register devices in the Azure portal.
Add and view device twin tags using the Azure portal
This section describes how to create an IoT hub using the Azure portal.
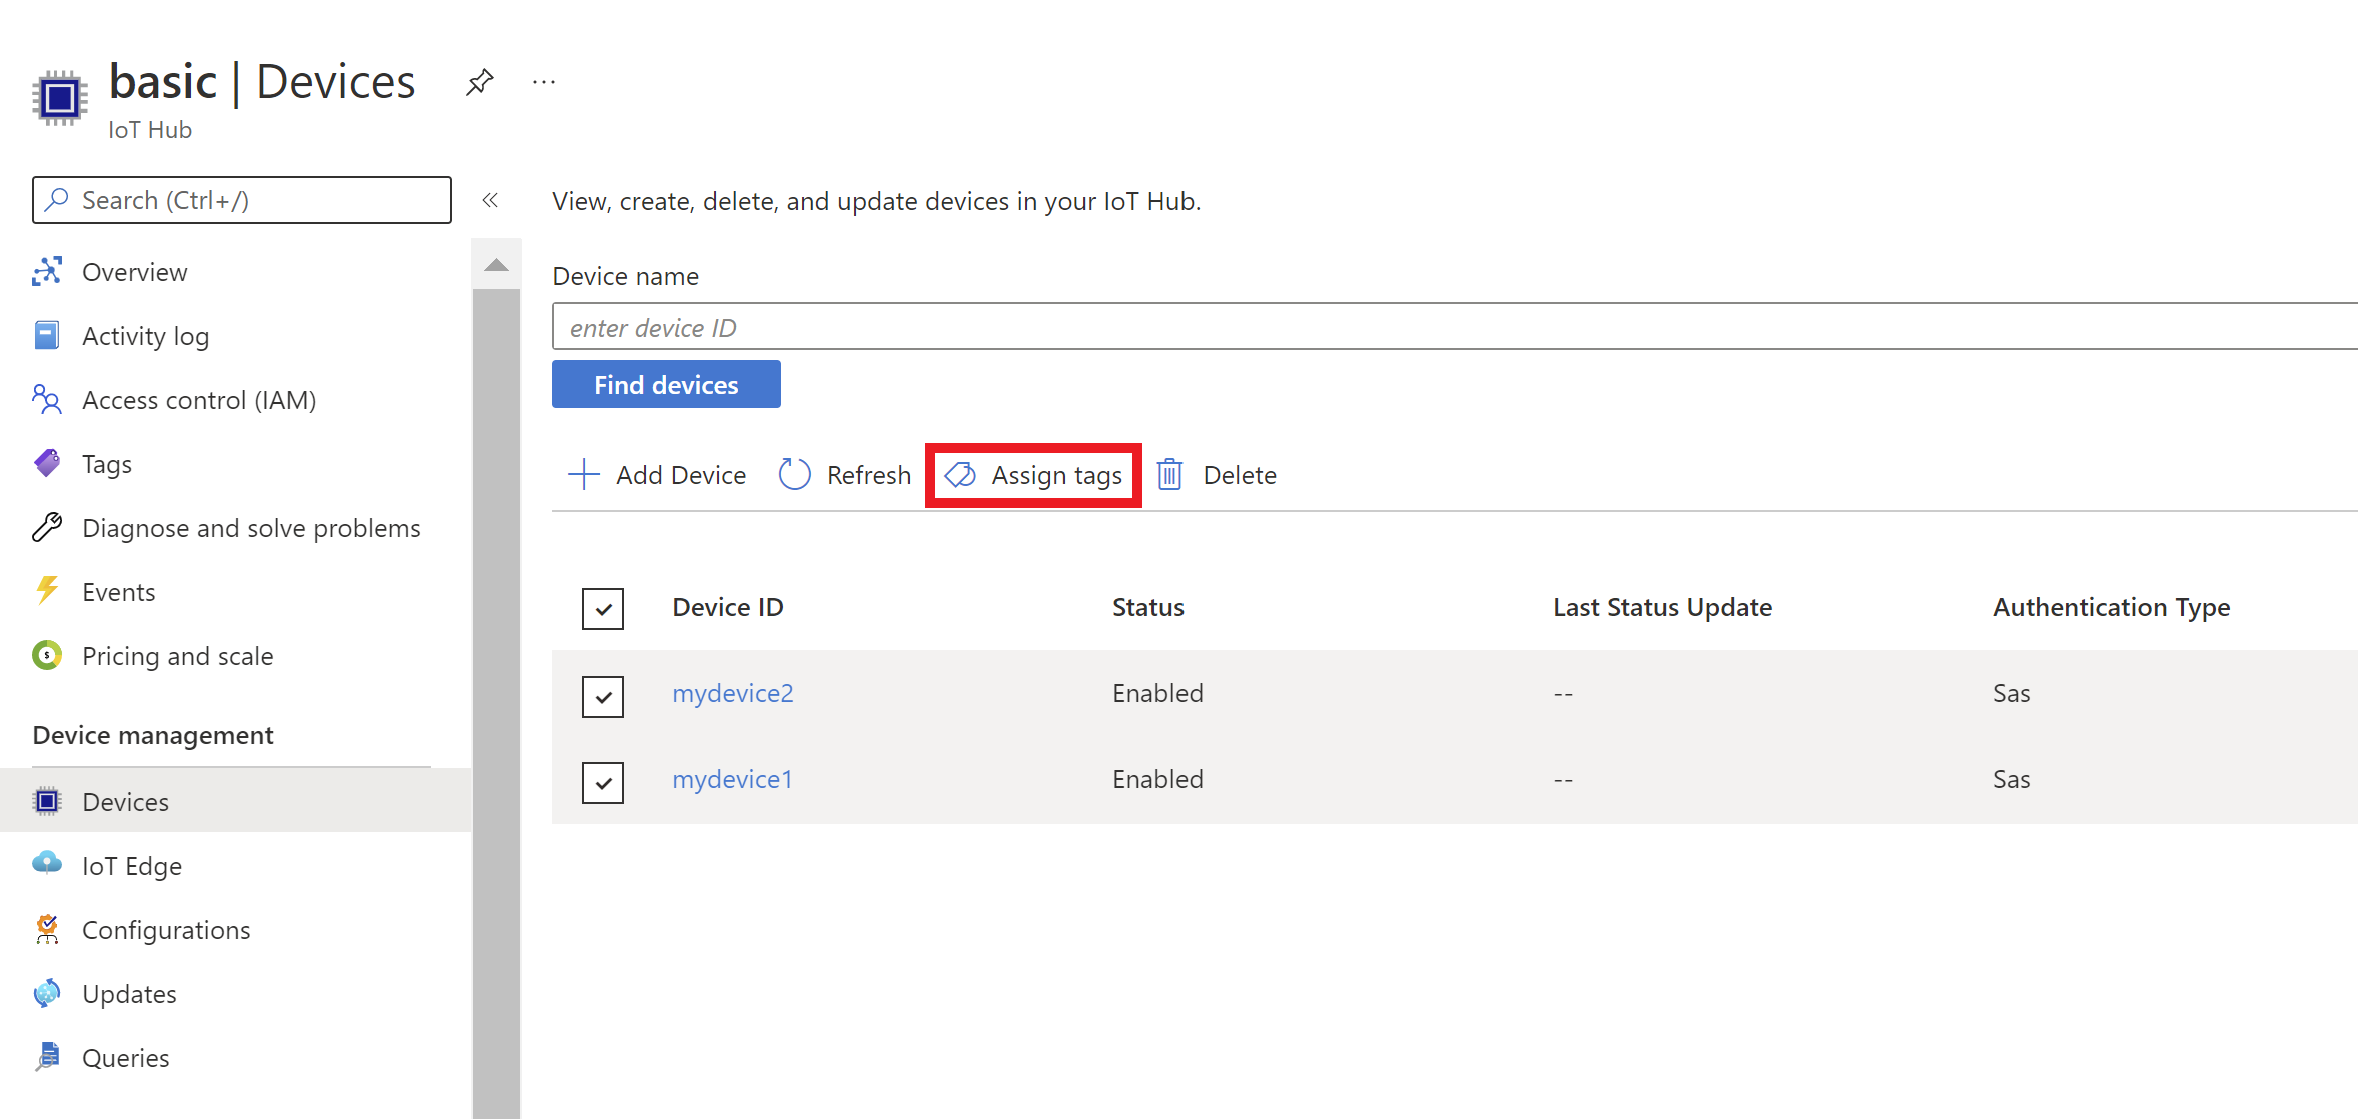
Sign in to the Azure portal and go to your IoT Hub.
Select the Device tab in the left navigation.
Select the desired devices, select Assign Tags.
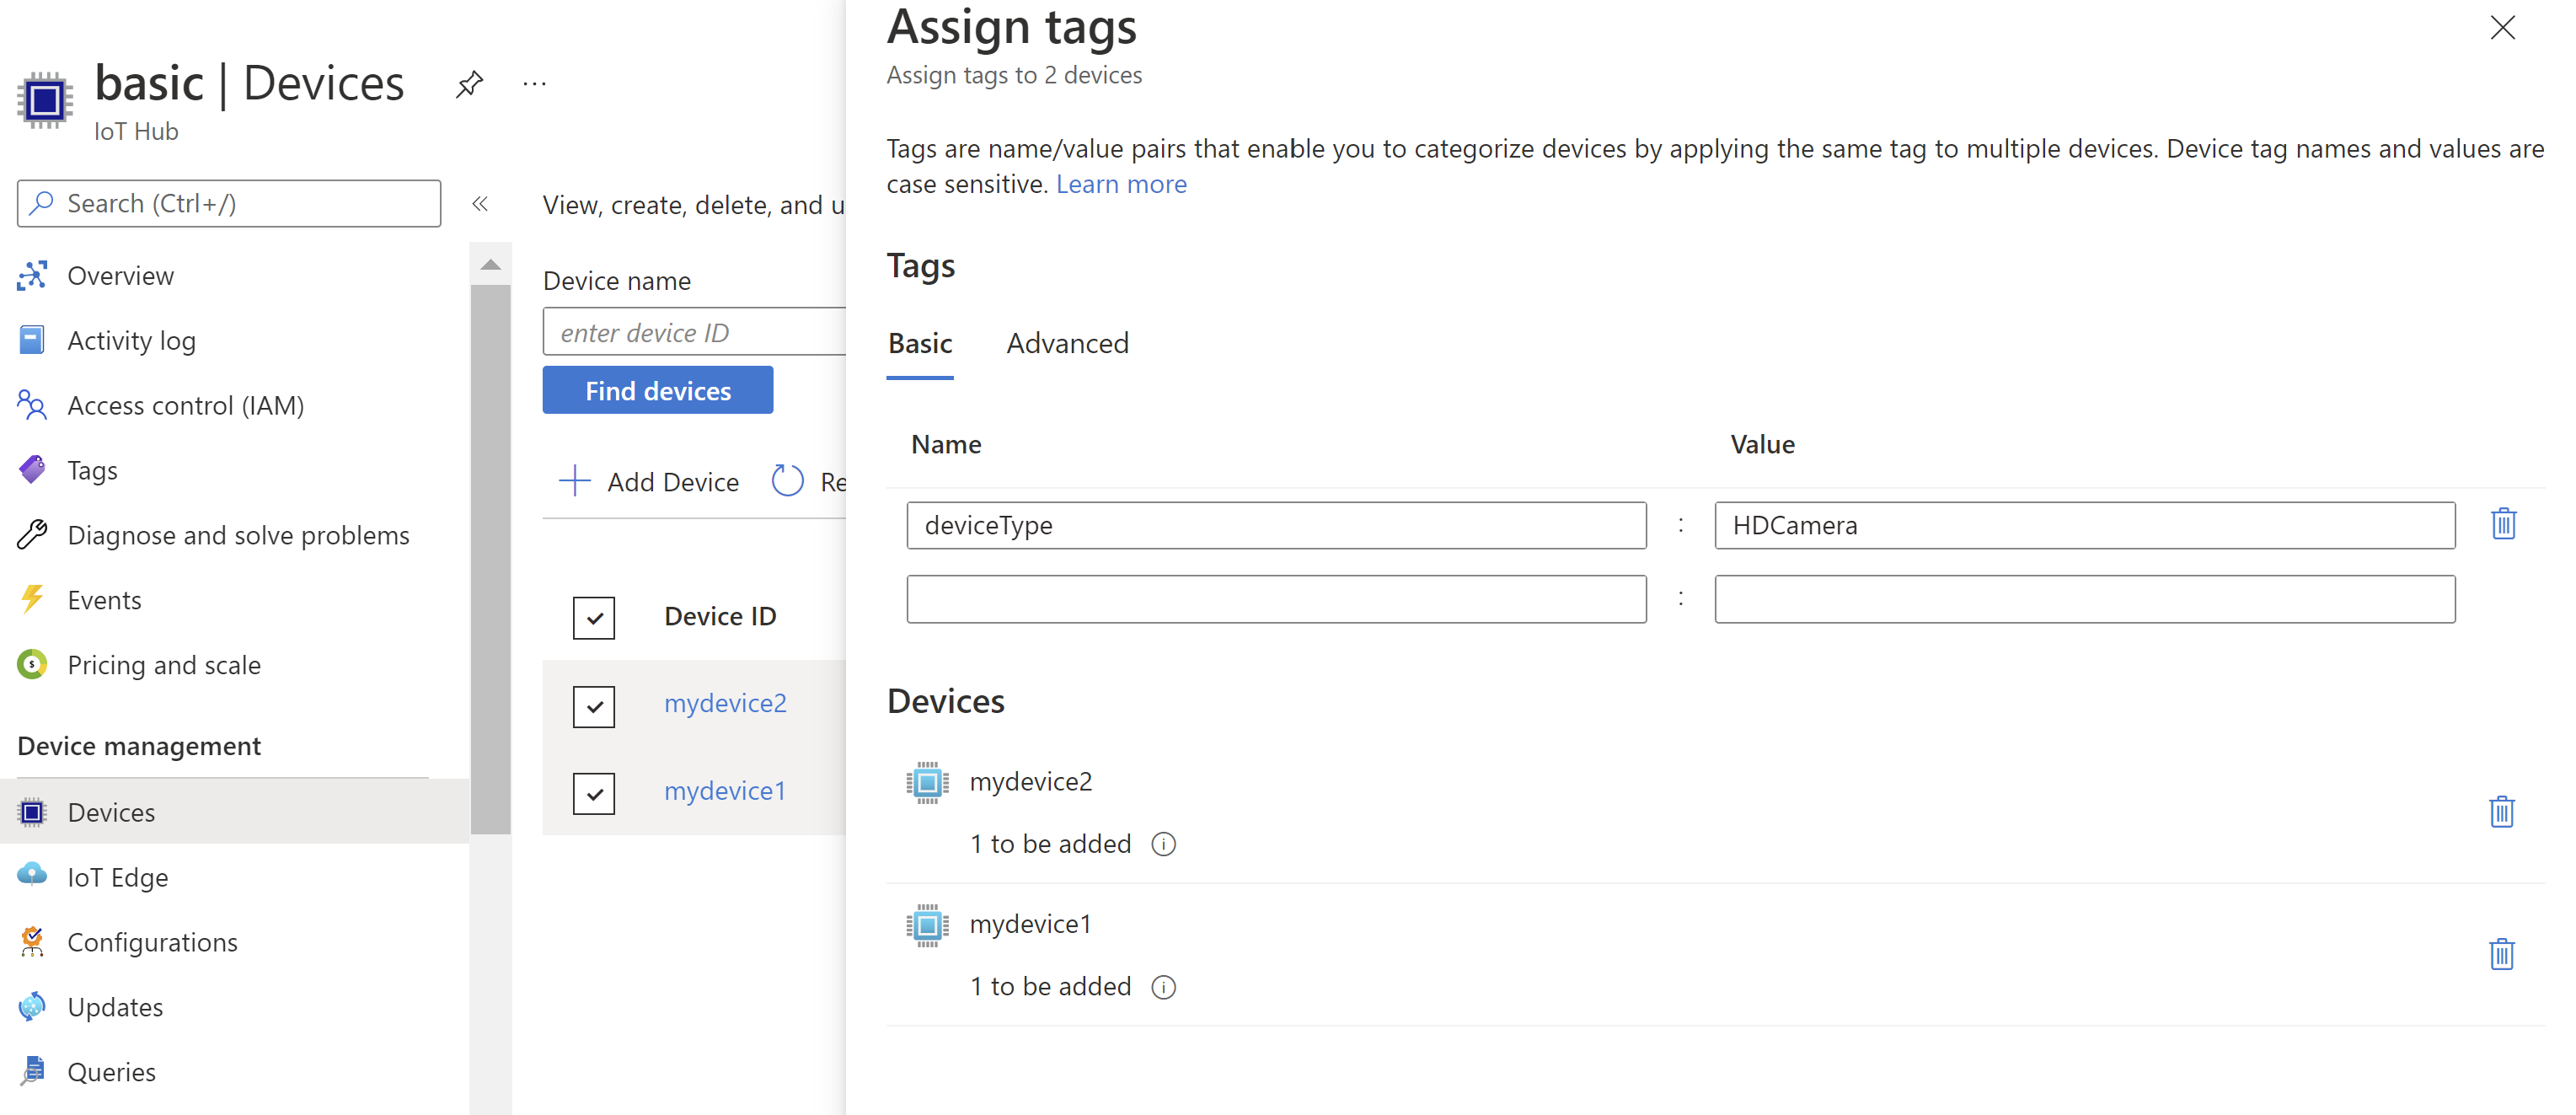
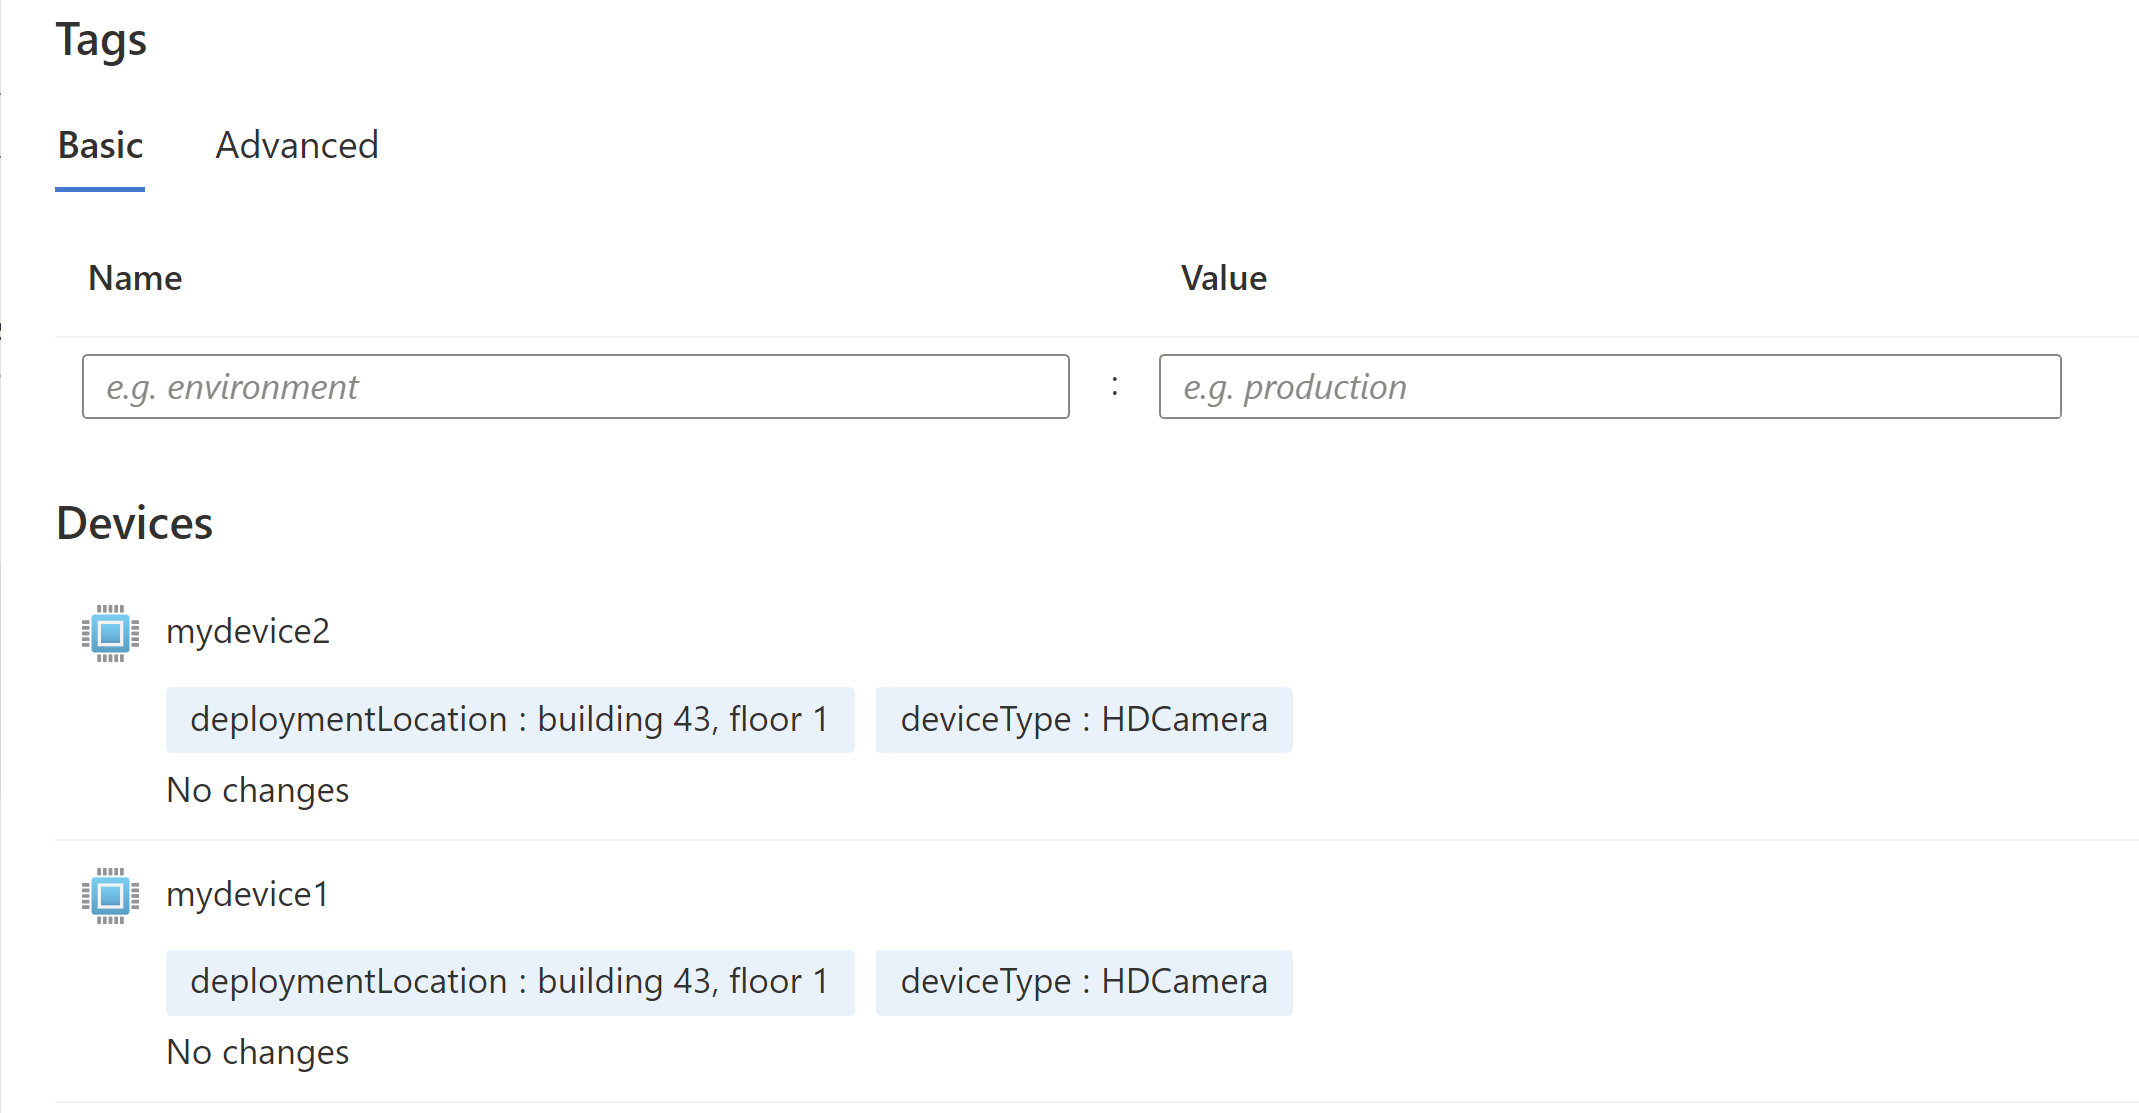
In the opened view, you can see the tags the devices already have. To add a new basic tag, provide a name and value for the tag. The format for the name and value pair is found in Tags and properties format. Select Save to save the tag.
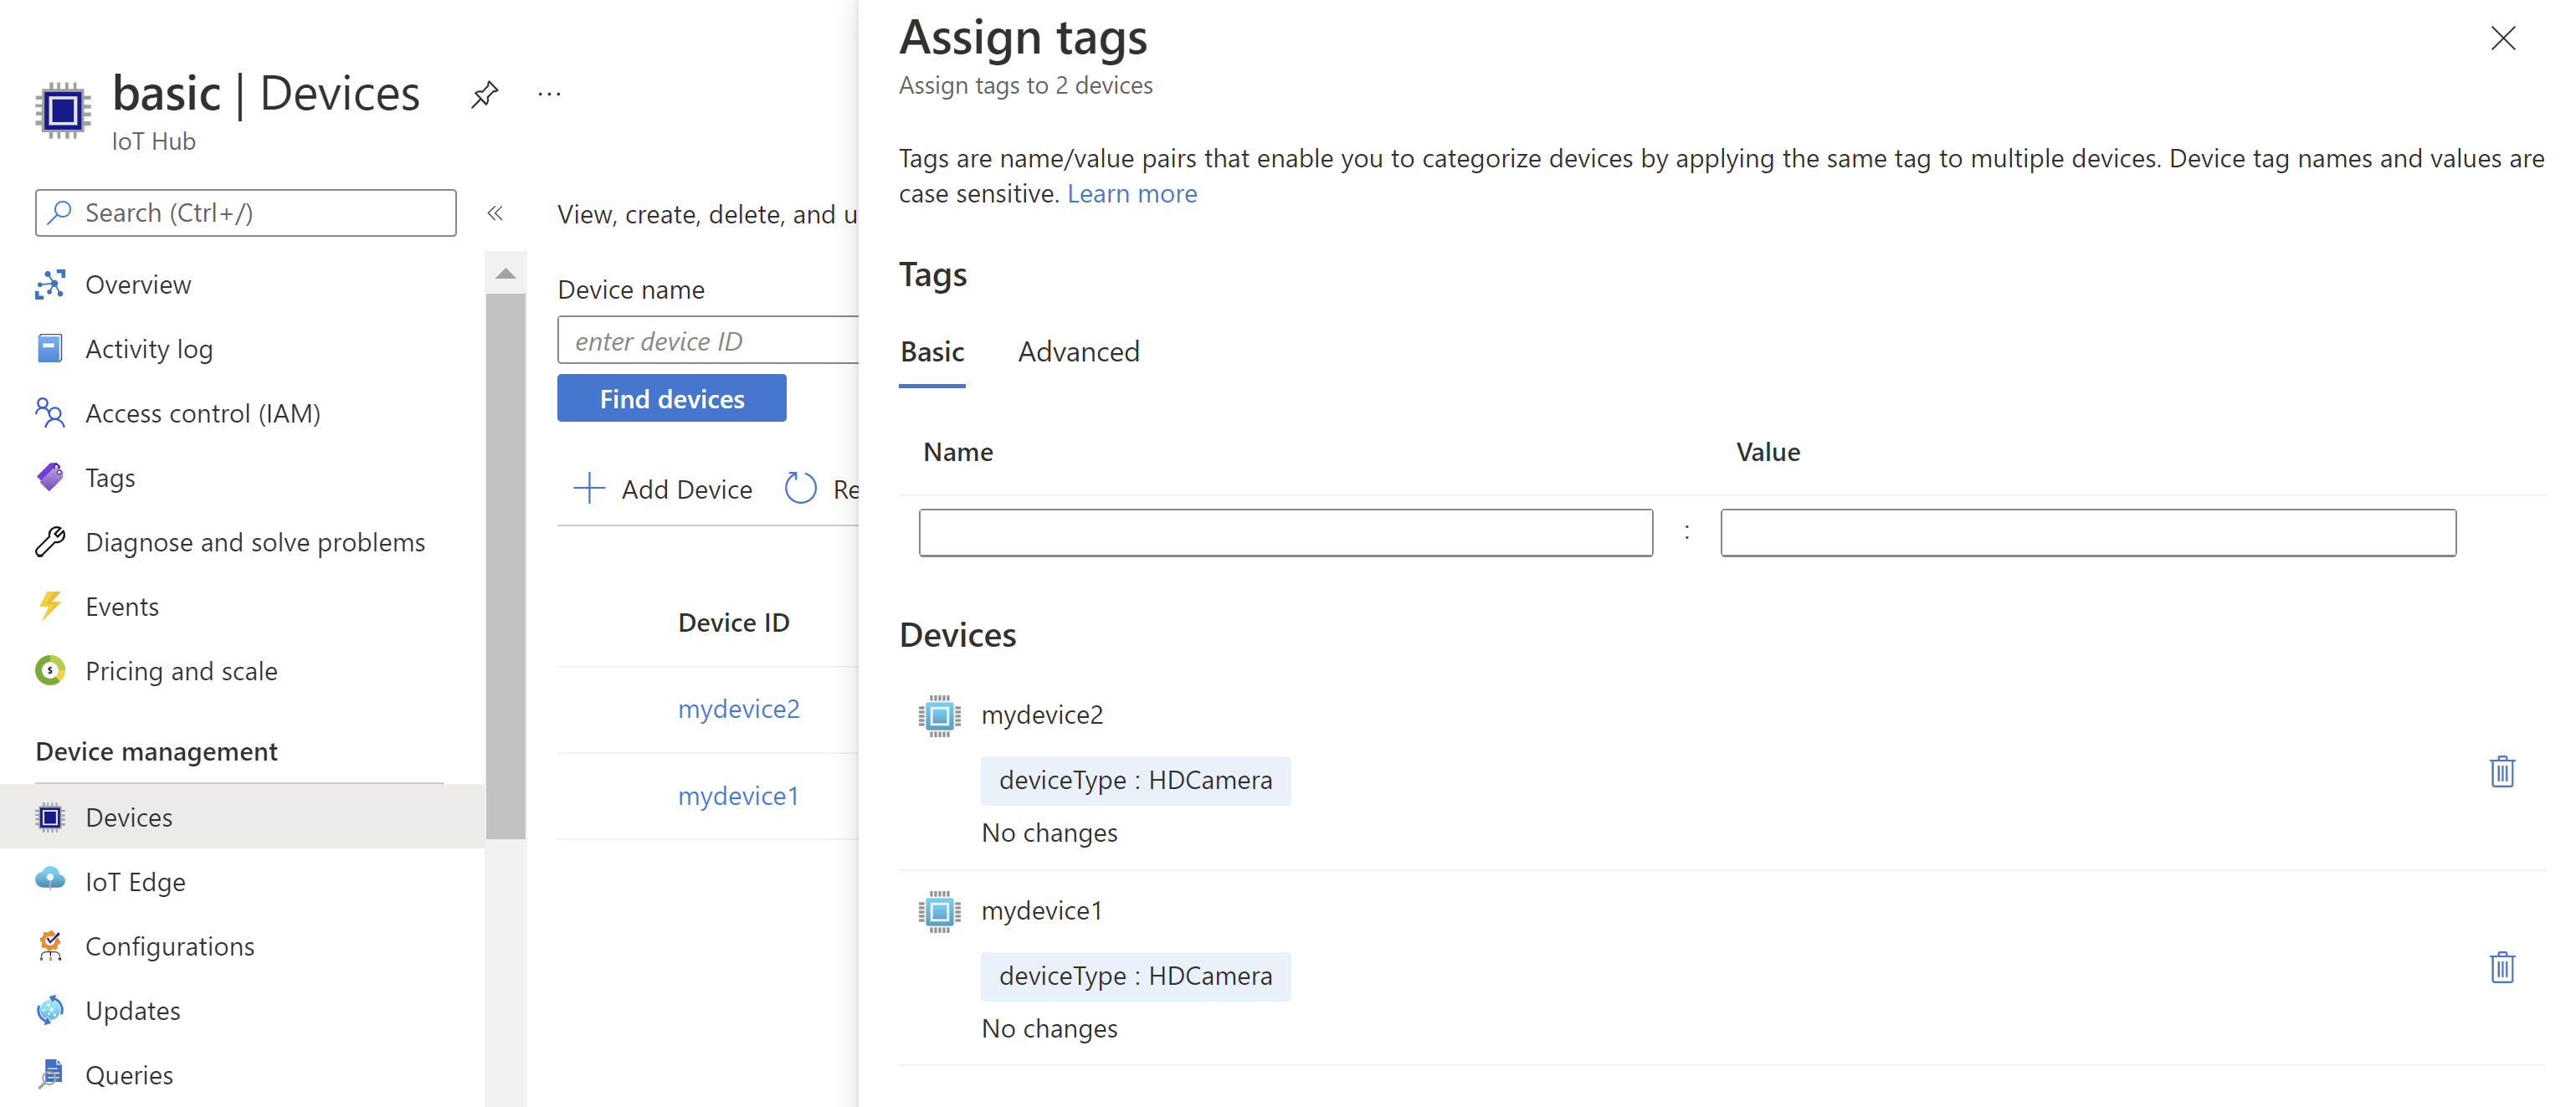
After saving, you can view the tags that were added by selecting Assign Tags again.
Add and view nested tags
- Following the example above, you can add a nested tag by selecting the advanced tab in the Assign Tags and add a nested json object with two values.
{ "deploymentLocation": { "building": "43", "floor": "1" } } - Select Save
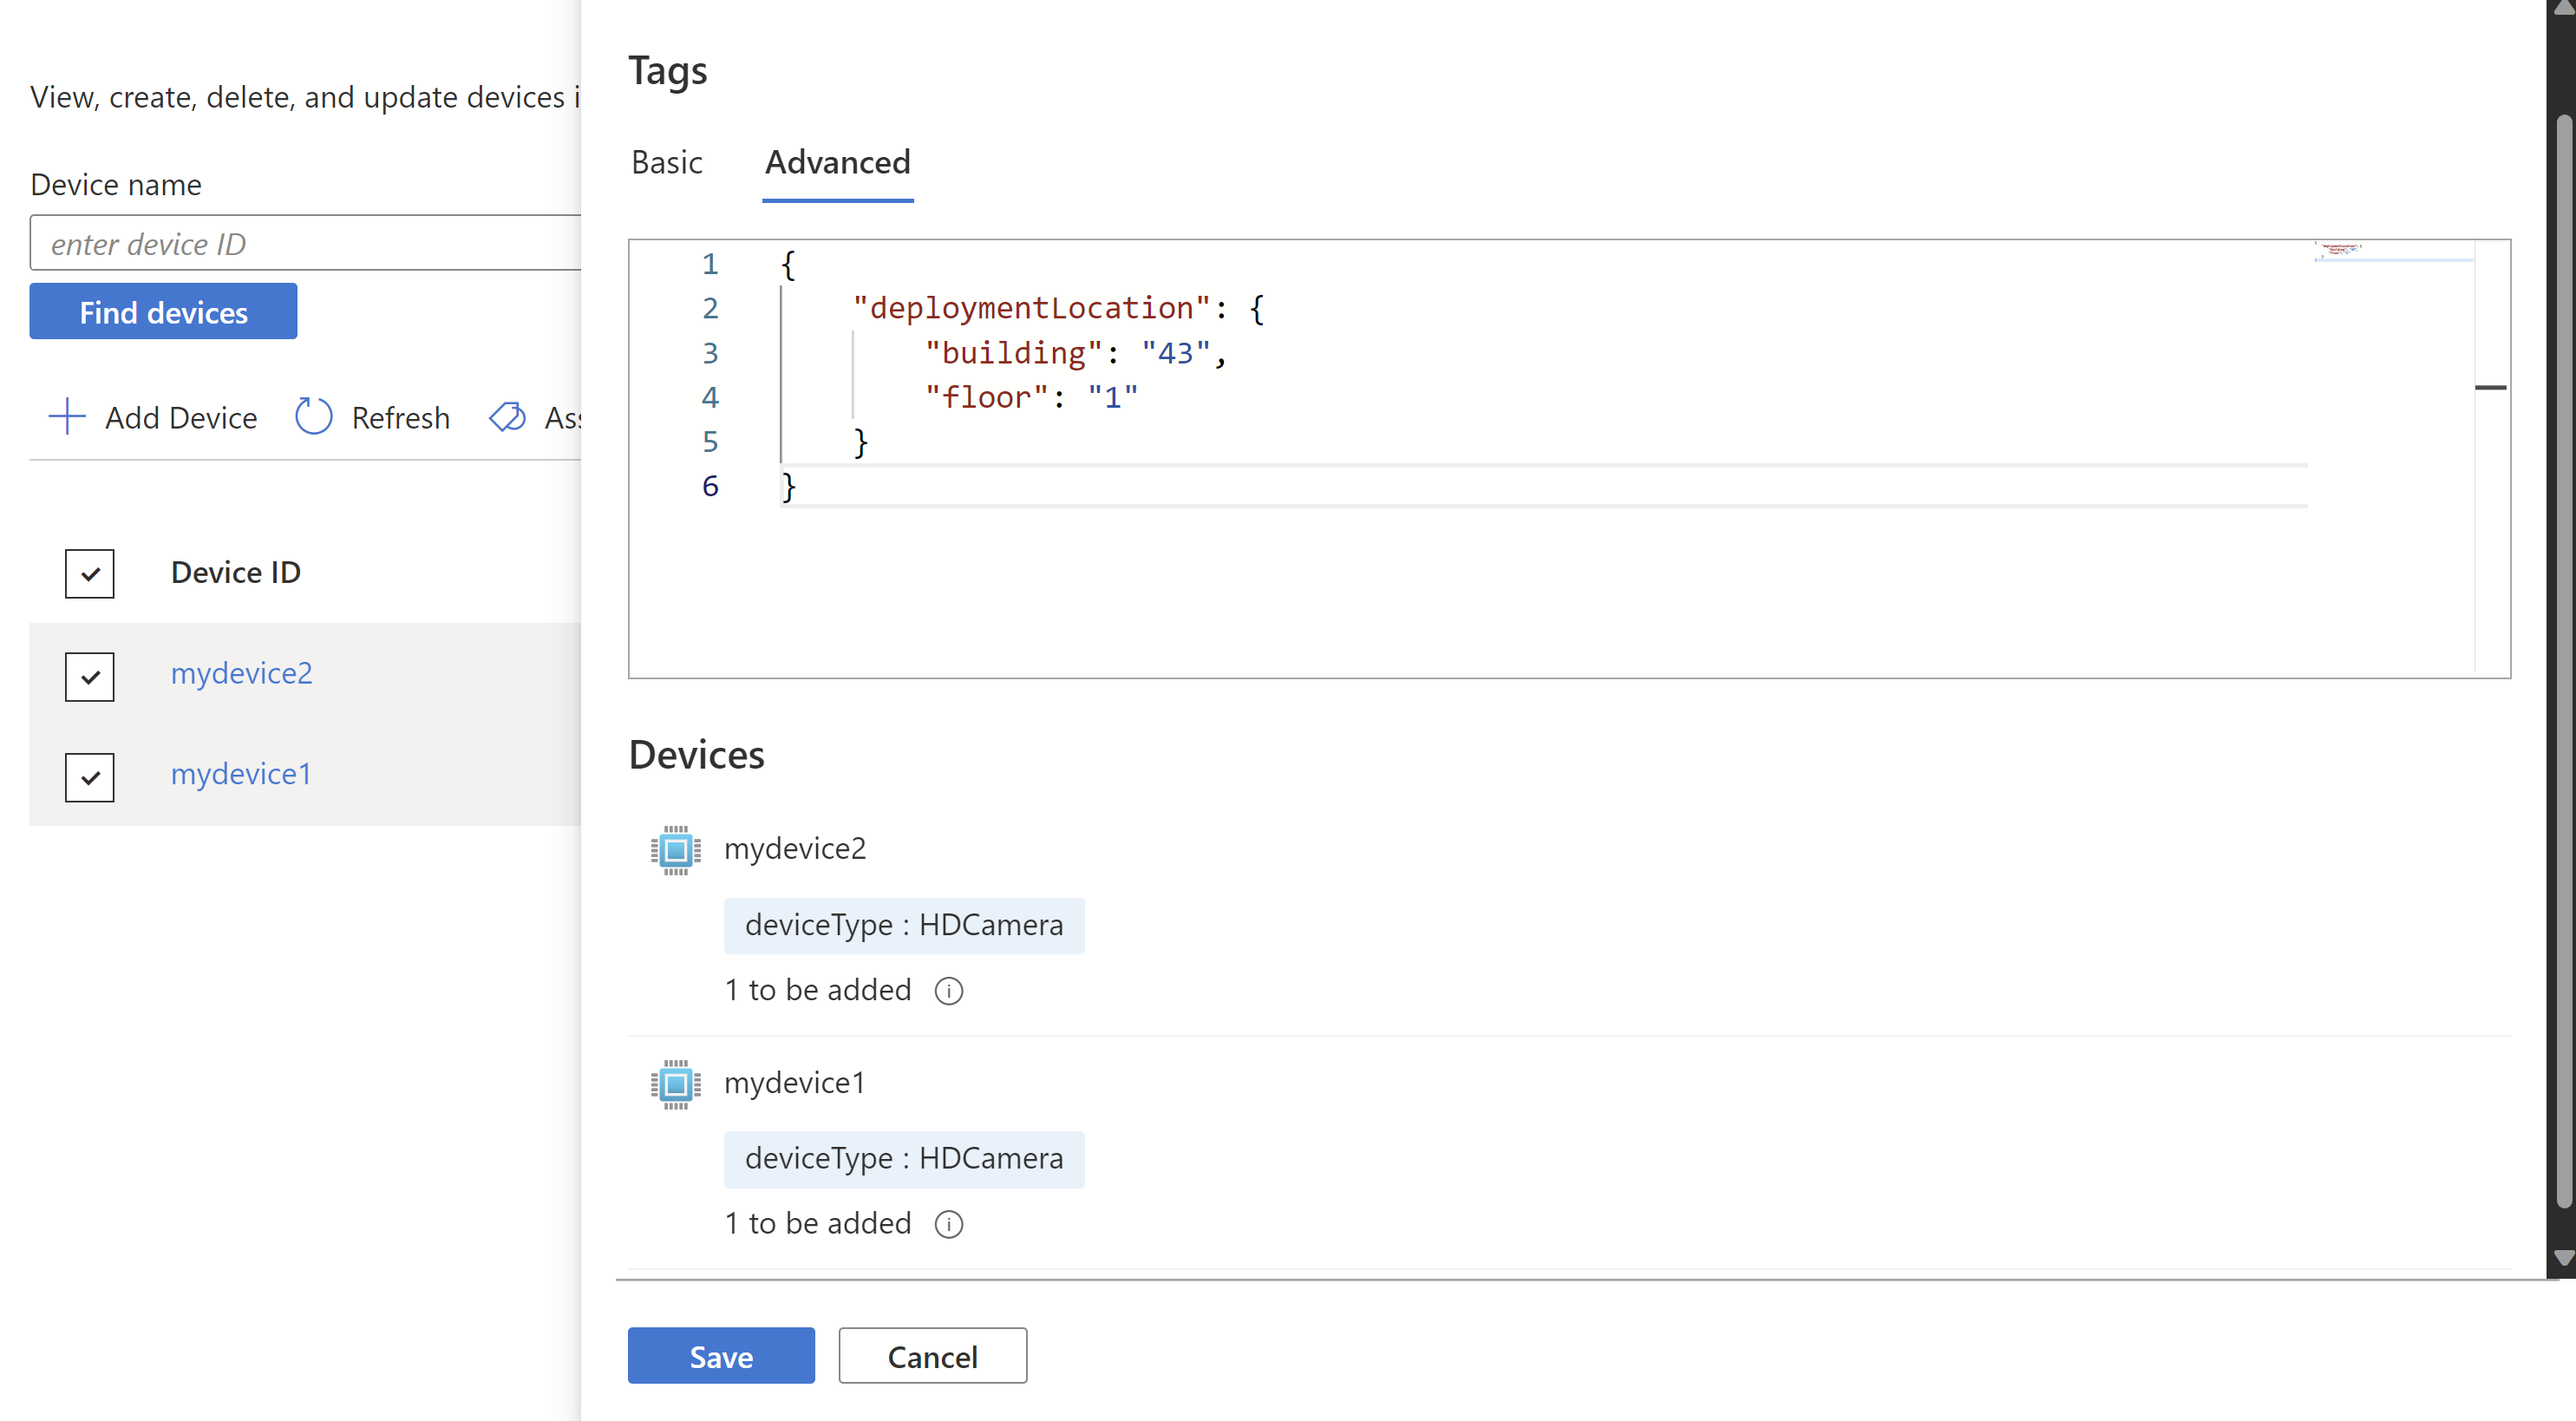
- Select the devices again and select Assign Tags to view the newly added tags
Filtering devices with device twin tags
Device twin tags is a great way to group devices by type, location etc., and you can manage your devices by filtering through device tags.
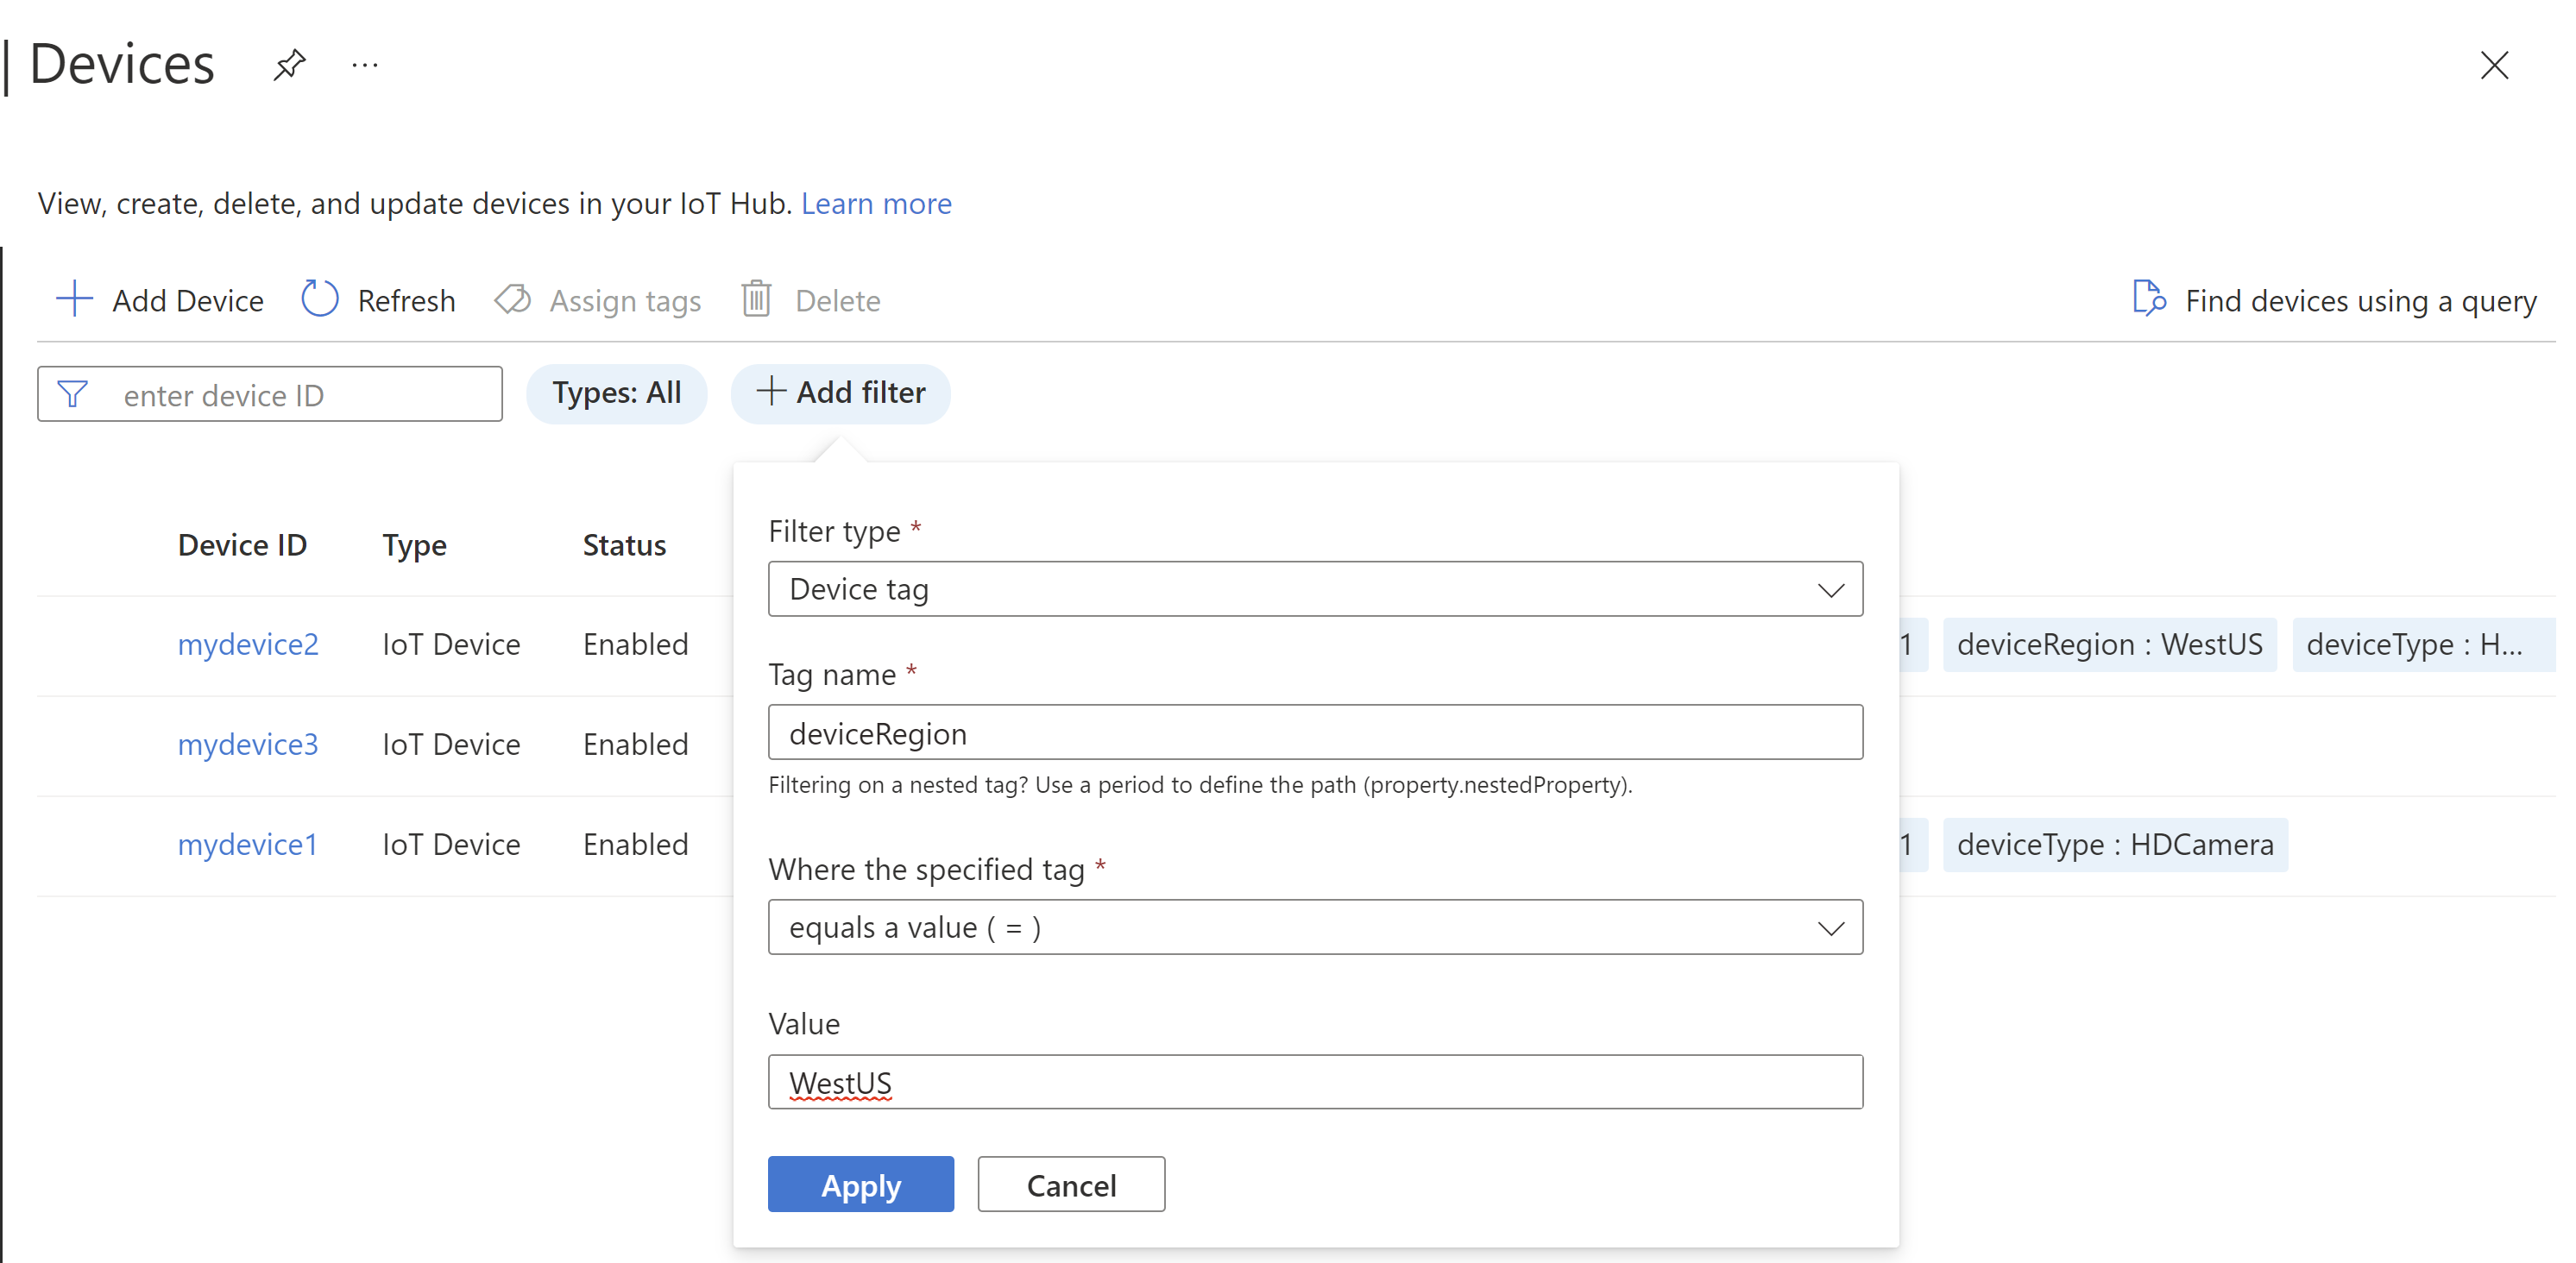
- Select + Add filter, and select Device Tag as the filter type
- Enter the desired tag name and value, select Apply to retrieve the list of devices that matches the criteria
Update and delete device twin tags from multiple devices using the Azure portal
- Select the two or more devices, select Assign Tags.
- In the opened panel, you can update existing tags by typing the target tag name in the Name field, and the new string in the Value field.
- To delete a tag from multiple devices, type the target tag name in the Name field, and the select the Delete Tags button.
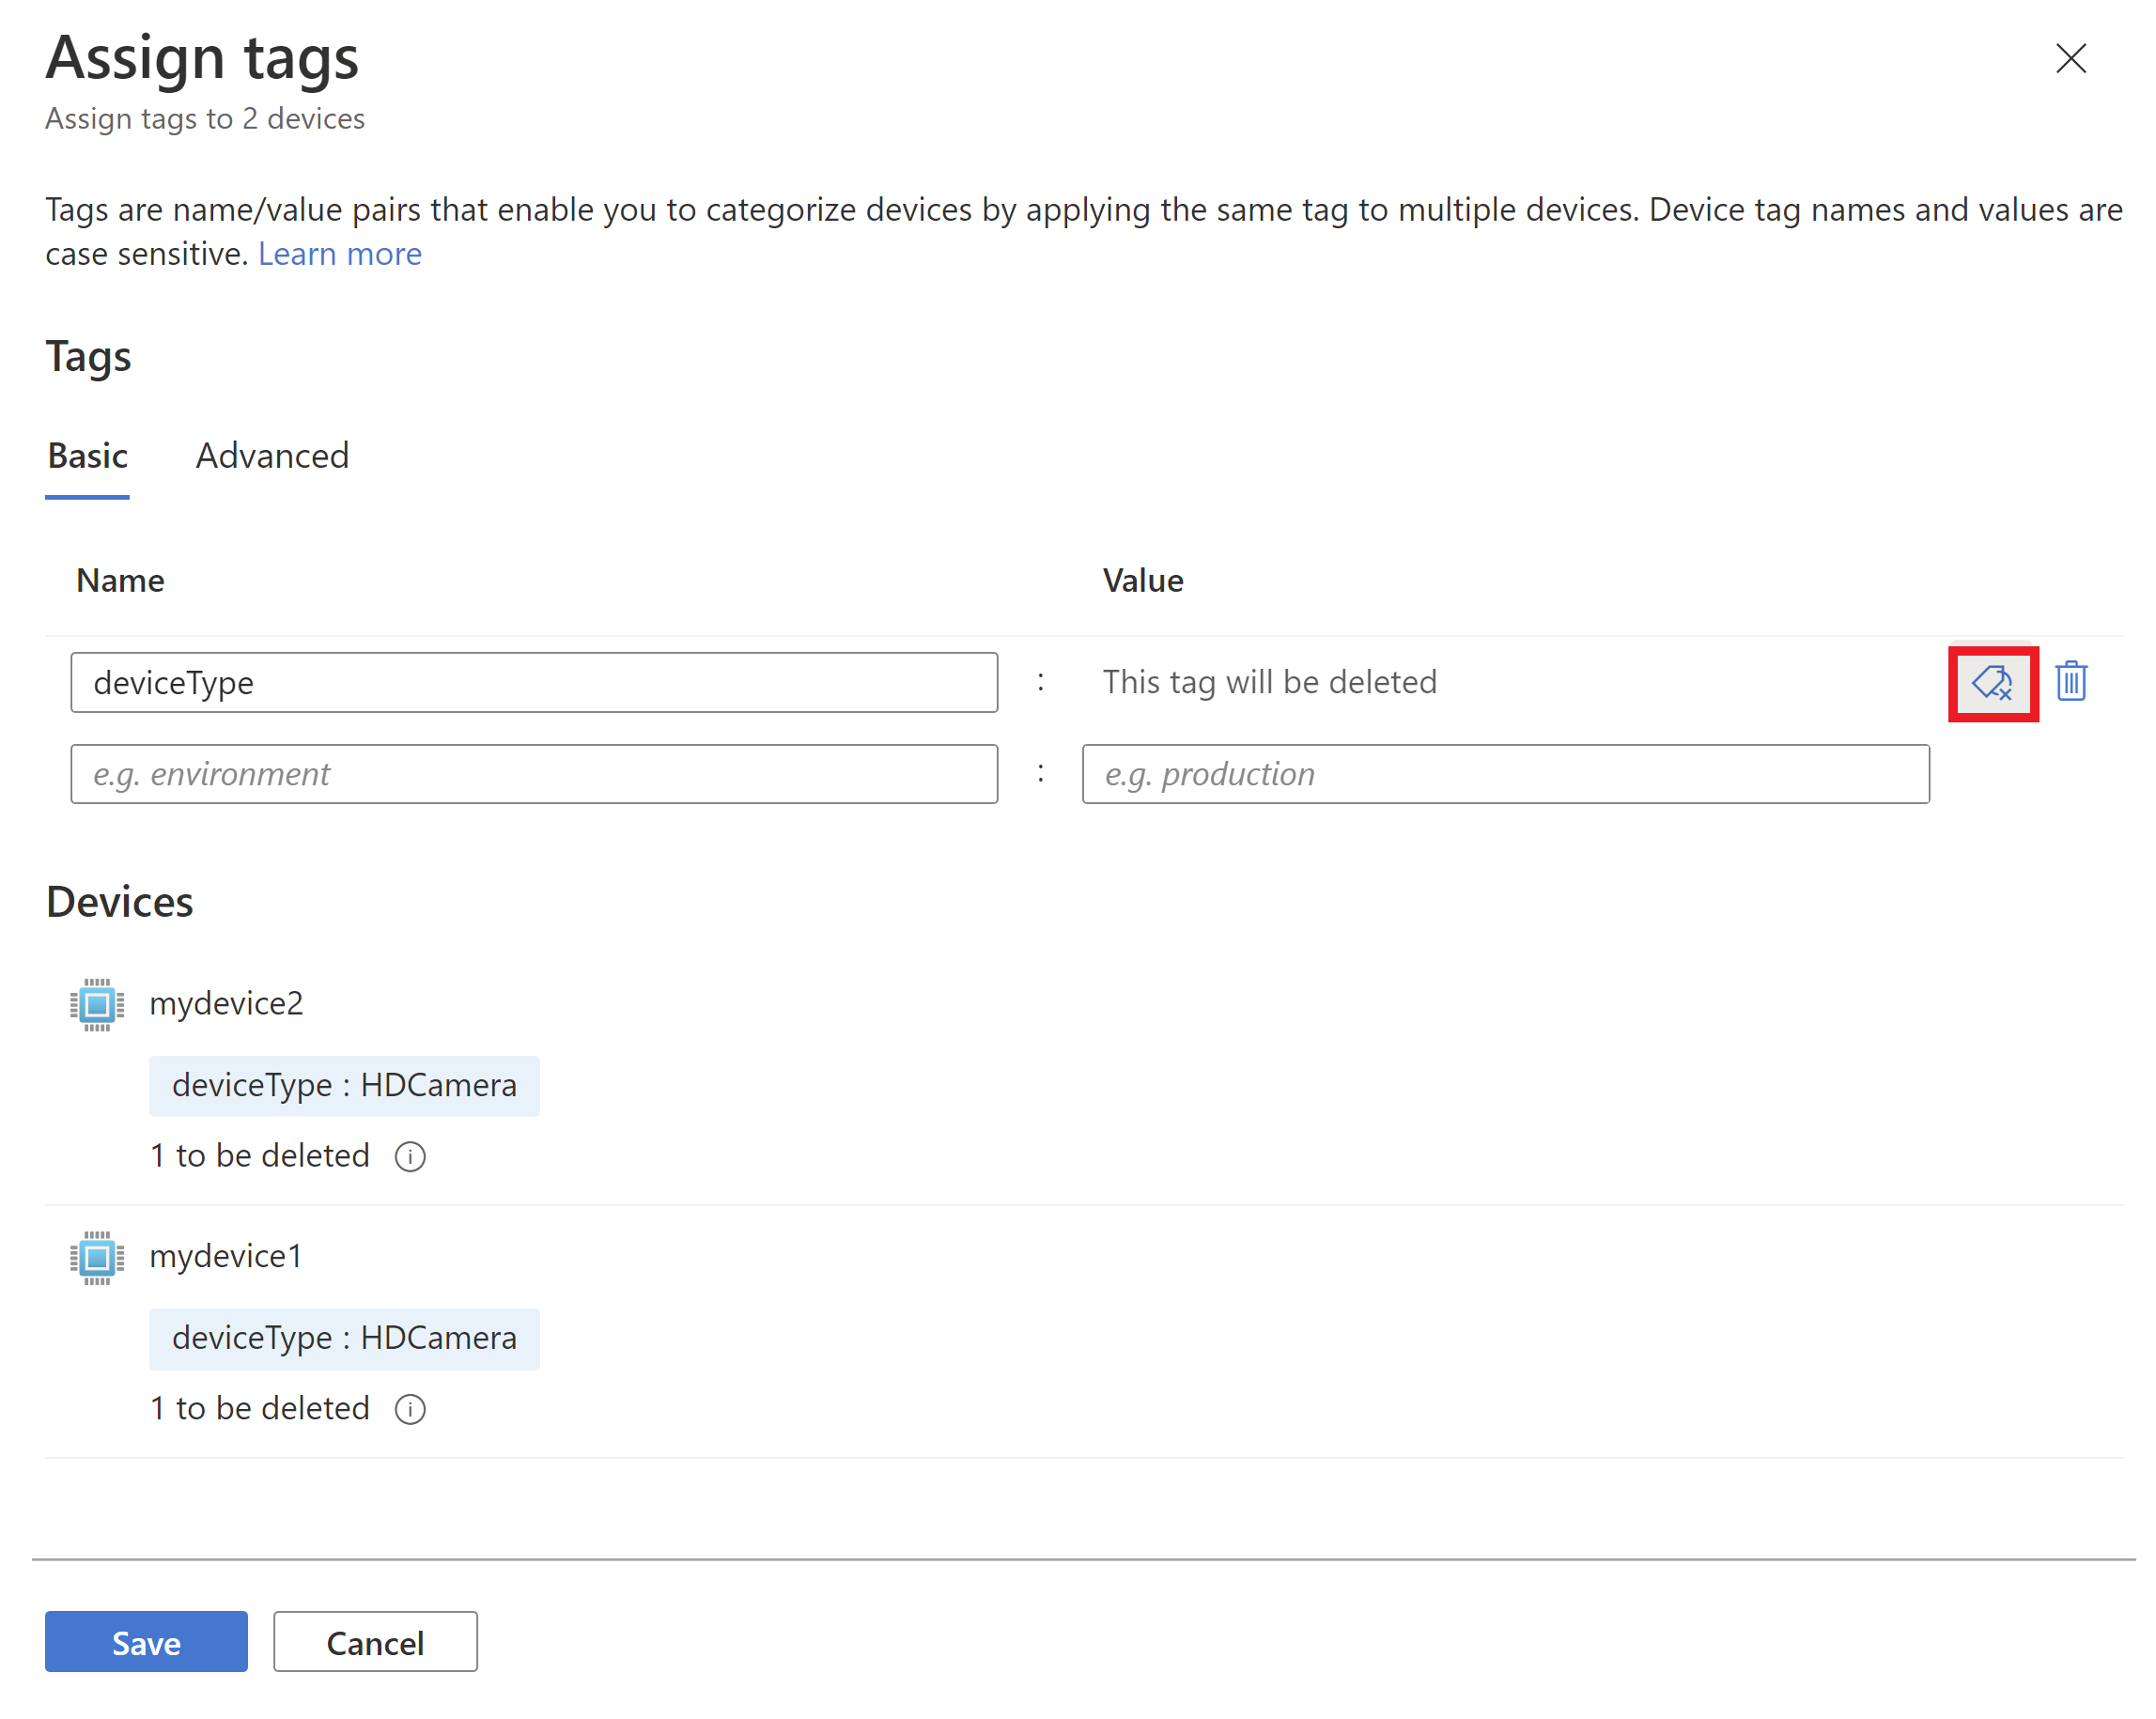
- Select Save to delete the tag from the devices that contains the matching tag name.
Managing device twin tags using the Azure CLI
The following section walk-through several examples of tagging using the Azure CLI. For full references to the device twin CLI
At the command prompt, run the login command:
az loginFollow the instructions to authenticate using the code and sign in to your Azure account through a web browser.
If you have multiple Azure subscriptions, signing in to Azure grants you access to all the Azure accounts associated with your credentials. Use the az account list to view the full list of accounts:
az account listUse the following command to select the subscription that you want to use to run the commands to create your IoT hub. You can use either the subscription name or ID from the output of the previous command:
az account set --subscription {your subscription name or id}The following command enables file notifications and sets the file notification properties to their default values. (The file upload notification time to live is set to one hour and the lock duration is set to 60 seconds.)
az iot hub device-twin update -n {iothub_name} \
    -d {device_id} --tags '{"country": "USA"}'
You can add complex nested tags by importing a json file or adding json directly to the input:
az iot hub device-twin update --name {your iot hub name} \
    -d {device_id} --tags /path/to/file
az iot hub device-twin update --name {your iot hub name} \ -d {device_id} --tags '{"country":{"county":"king"}}'Use the command on an existing tag to update the value:
az iot hub device-twin update --name {your iot hub name} \
    -d {device_id} --tags '{"country": "Germany"}'
The following command removes the tag that was added by setting the value to null.
az iot hub device-twin update --name {your iot hub name} \
    -d {device_id} --tags '{"country": null}'
Note
If you are using Powershell or CloudShell>Powershell mode, you need to add a forward slash '\' to escape all the double quotes. Example: --tags '{\"country\":\"US\"}'
Create jobs to set tags using Azure CLI
For full references to the IoT Hub Jobs CLI
Next steps
Now you have learned about device twins, you may be interested in the following IoT Hub developer guide topics:
- Understand and use module twins in IoT Hub
- Invoke a direct method on a device
- Schedule jobs on multiple devices
To try out some of the concepts described in this article, see the following IoT Hub tutorials:
Feedback
Coming soon: Throughout 2024 we will be phasing out GitHub Issues as the feedback mechanism for content and replacing it with a new feedback system. For more information see: https://aka.ms/ContentUserFeedback.
Submit and view feedback for