Request a core limit increase
This article describes how you can submit a support request to increase the number of cores for Azure Lab Services in your Azure subscription. First, collect the necessary information for the request.
When you reach the cores limit for your subscription, you can request a core limit increase to continue using Azure Lab Services. An increase is sometimes called an increase in capacity or a quota increase. The request process allows the Azure Lab Services team to ensure that your subscription isn't involved in any cases of fraud or unintentional, sudden large-scale deployments.
Prerequisites
To create a support request, your Azure account needs the Owner, Contributor, or Support Request Contributor role at the subscription level.
To verify current quota for a subscription before you submit a support request, your Azure account needs the Owner or Contributor role at the subscription level.
Prepare to submit a request
Before you create a support request for a core limit increase, gather necessary information, such as the number and size of cores and the Azure regions. You might also have to do some preparation before you create the request.
Create a lab plan
To create a request for Azure Lab Services capacity, you need to have a lab plan. If you don't already have a lab plan, follow these steps to create a lab plan.
Verify available capacity
Before you calculate the number of extra cores that you need, verify the capacity available in your subscription by determining the current usage and quota. You can see exactly where your current capacity is used. You might discover extra capacity in an unused lab plan or lab.
Determine the regions for your labs
Azure Lab Services resources can exist in different regions. You can choose to deploy resources in multiple regions close to the lab users. For more information about Azure regions, how they relate to global geographies, and which services are available in each region, see Azure global infrastructure.
Determine the number of VM cores in your request
In your support request, provide the total number of cores. This total includes both your existing cores and the cores you want to add.
Azure Lab Services groups VM sizes together in size groups:
- Small / Medium / Large cores
- Medium (Nested Virtualization) / Large (Nested Virtualization) cores
- Small (GPU Compute) cores
- Small GPU (Visualization) cores
- Medium GPU (Visualization) cores
You request VM cores for a specific Azure region. When you select the region in the support request, you can view your current usage and current limit per size group.
To determine the total number of cores for your request, use this equation: total VM cores = (current # cores for the size group) + ((# cores for the selected VM size) * (# VMs))
For example, you need more capacity for 20 Medium VMs. You already have the following VMs:
| VM size | Cores per VM | # VMs | Total cores |
|---|---|---|---|
| Small | 2 | 10 | 20 |
| Medium | 4 | 20 | 80 |
| Small GPU | 6 | 5 | 30 |
The current number of cores for the Small/Medium/Large size group is 20 (Small) + 80 (Medium) = 100 cores. You don't count the Small GPU cores because they're in a different size group.
The total number of VM cores for 20 more Medium VMs is 100 + (4 cores per Medium VM) * 20 = 180 cores.
Best practices for requesting a core limit increase
The time it takes to assign capacity varies depending on the VM size, region, and number of cores requested. You don't need to go through the process of requesting extra capacity often. To ensure that you have the resources you require when you need them, you should:
- Request capacity as far in advance as possible.
- Be flexible on the region where you're requesting capacity, if possible.
- Recognize that capacity remains assigned for the lifetime of a subscription. When lab plans or labs are deleted, the capacity remains assigned to the subscription.
- Request extra capacity only if you need more than is already assigned to your subscription.
- Make incremental requests for VM cores rather than making large, bulk requests. Break requests for large numbers of cores into smaller requests for extra flexibility in how those requests are fulfilled.
Start a new support request
You can follow these steps to request a core limit increase:
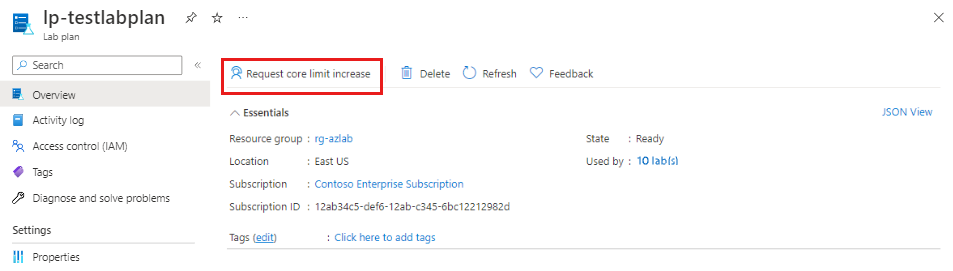
In the Azure portal, navigate to your lab plan or lab account, and then select Request core limit increase.
On the New support request page, enter the following information, and then select Next.
Name Value Issue type Service and subscription limits (quotas) Subscription Select the subscription to which the request applies. Quota type Azure Lab Services On the Additional details tab, select Enter details in the Problem details section.


Make core limit increase request
When you request a core limit increase, supply information to help the Azure Lab Services team evaluate and act on your request as quickly as possible. The more information you supply and the earlier you supply it, the quicker the Azure Lab Services team can process your request.
Depending on whether you use lab accounts or lab plans, you need to provide different information on the Quota details page.

| Name | Value |
|---|---|
| Deployment Model | Lab Plan |
| Region | Select the region in the Azure geography where you want the extra cores. |
| Does your virtual network reside in the same region as above? | Select Yes, No, or N/A, depending on whether you use advanced networking and have virtual networks in the region you selected. |
| Virtual machine size | Select the virtual machine size that you require for the new cores. |
| Requested total core limit | Enter the total number of cores you require. This number includes your existing cores and the number of extra cores you're requesting. To learn how to calculate the total number of cores, see Determine the total number of cores in your request. |

After you enter the required information and details, select Save and continue.
Complete the support request
To complete the support request, enter the following information:
Complete the remainder of the support request Additional details tab:
Advanced diagnostic information
Name Value Allow collection of advanced diagnostic information Select yes or no. Support method
Name Value Support plan Select your support plan. Severity Select the severity of the issue. Preferred contact method Select email or phone. Your availability Enter your availability. Support language Select your language preference. Contact information
Name Value First name Enter your first name. Last name Enter your last name. Email Enter your contact email. Additional email for notification Enter an email for notifications. Phone Enter your contact phone number. Country/region Enter your location. Save contact changes for future support requests. Select the check box to save changes. Select Next.
On the Review + create tab, review the information, and then select Create.
Related content
- For more information about capacity limits, see Capacity limits in Azure Lab Services.
- Learn more about the different virtual machine sizes in the administrator's guide.
- Learn more about the general process for creating Azure support requests.
Feedback
Coming soon: Throughout 2024 we will be phasing out GitHub Issues as the feedback mechanism for content and replacing it with a new feedback system. For more information see: https://aka.ms/ContentUserFeedback.
Submit and view feedback for