Tutorial: Set up lab to lab communication with advanced networking
Note
This article references features available in lab plans, which replaced lab accounts.
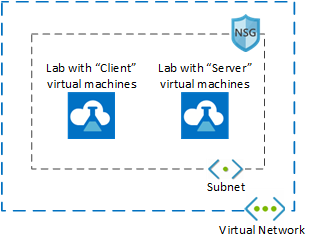
Azure Lab Services advanced networking enables you to control the network for labs created using lab plans. You can use advanced networking to implement various scenarios including connecting to licensing servers, using hub-spoke model for Azure Networking, or lab to lab communication. In this tutorial, you set up lab-to-lab communication for a web development class.
After you complete this tutorial, you'll have a lab with two lab virtual machines that are able to communicate with each other: a server VM and a client VM.
Learn more about the supported networking scenarios in Azure Lab Services.
In this tutorial, you learn how to:
- Create a resource group
- Create a virtual network and subnet
- Delegate subnet to Azure Lab Services
- Create a network security group
- Update the network security group inbound rules
- Associate the network security group to virtual network
- Create a lab plan using advanced networking
- Create two labs
- Enable ICMP on the templates VMs
- Publish both labs
- Test communication between lab VMs
Prerequisites
- An Azure account with an active subscription. If you don't have an Azure subscription, create a free account before you begin.
- An Azure account with permission to create and manage resources in the subscription, such as the Contributor or Owner Azure RBAC role.
Create a resource group
A resource group is a logical container into which Azure resources, such as web apps, databases, and storage accounts, are deployed and managed. For example, you can choose to delete the entire resource group in one simple step later.
The following steps show how to use the Azure portal to create a resource group. For simplicity, you create all resources for this tutorial in the same resource group.
- Sign in to the Azure portal.
- Select Resource groups.
- Select + Create from the top menu.
- On the Basics tab of the Create a resource group page, do the following actions:
- For Subscription, choose the subscription in which you want to create your labs.
- For Resource group, type MyResourceGroup.
- For Region, select the region closest to you. For more information about available regions, see Azure geographies.

- Select Review + Create.
- Review the summary, and select Create.
Create a virtual network and subnet
The following steps show how to use the Azure portal to create a virtual network and subnet that can be used with Azure Lab Services.
Important
When using Azure Lab Services with advanced networking, the virtual network, subnet, lab plan and lab must all be in the same region. For more information about which regions are supported by various products, see Azure products by region.
Open MyResourceGroup created previously.
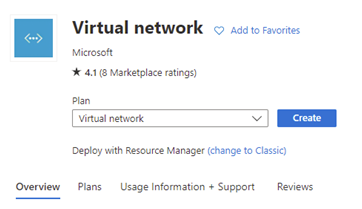
Select + Create in the upper left corner of the Azure portal and search for "virtual network".
Select the Virtual network tile and then select Create.
On the Basics tab of the Create virtual network, do the following actions:
- For Subscription, choose the same subscription as the resource group.
- For Resource group, choose MyResourceGroup.
- For Name, enter MyVirtualNetwork.
- For Region, choose region that is also supported by Azure Lab Services. For more information about supported regions, see Azure Lab Services by region.
- Select Next: IP Addresses.

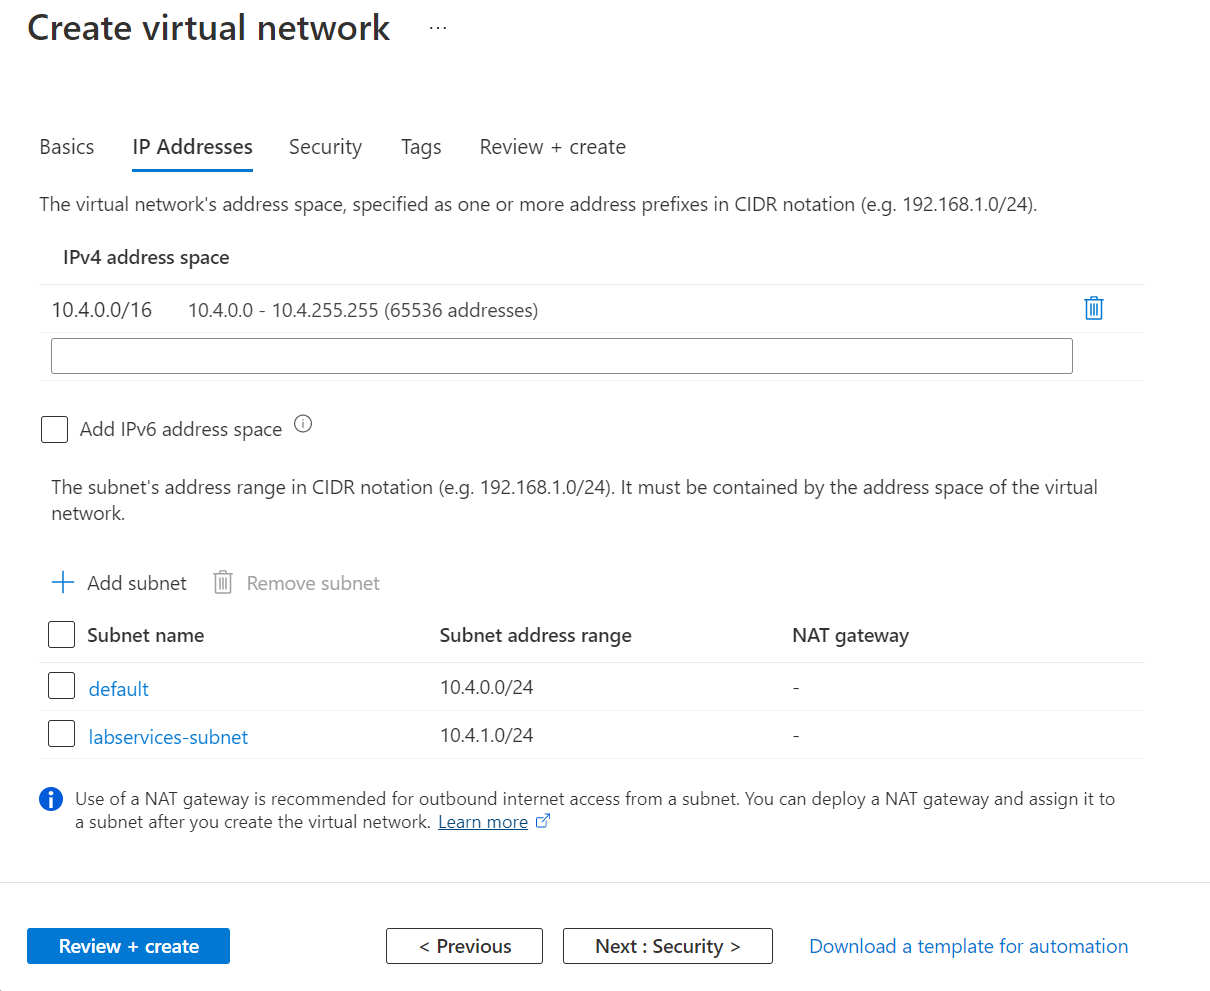
On the IP Addresses tab, create a subnet that is used by the labs.
- Select + Add subnet
- For Subnet name, enter labservices-subnet.
- For Subnet address range, enter range in CIDR notation. For example, 10.0.1.0/24 has enough IP addresses for 251 lab VMs. (Azure reserves five IP addresses for every subnet.) To create a subnet with more available IP addresses for VMs, use a different CIDR prefix length. For example, 10.0.0.0/20 would have room for over 4000 IP addresses for lab VMs. For more information about adding subnets, see Add a subnet.
- Select OK.
Select Review + Create.
Once validation passes, select Create.
Delegate subnet to Azure Lab Services
Next, you configure the subnet to be used with Azure Lab Services. To use a subnet with Azure Lab Services, the subnet must be delegated to the service.
- Open the MyVirtualNetwork resource.
- Select the Subnets item on the left menu.
- Select labservices-subnet subnet.
- Under the Subnet delegation section, select Microsoft.LabServices/labplans for the Delegate subnet to a service setting.
- Select Save.

Create a network security group
You can use an NSG to control traffic to one or more virtual machines (VMs), role instances, network adapters (NICs), or subnets in your virtual network. An NSG contains access control rules that allow or deny traffic based on traffic direction, protocol, source address and port, and destination address and port. The rules of an NSG can be changed at any time, and changes are applied to all associated instances.
For more information about NSGs, visit what is an NSG.
An NSG is required when using advanced networking in Azure Lab Services.
To create an NSG, complete the following steps:
- Select + Create a Resource in the upper left corner of the Azure portal and search for "network security group".
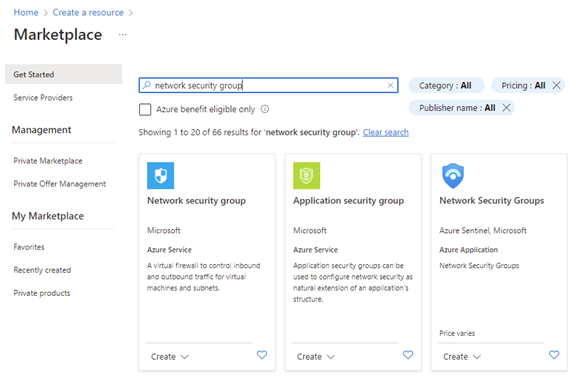
- Select the Network security group tile and then select Create.
- On the Basics tab, of the Create network security group, do the following actions:
- For Subscription, choose the same subscription as used previously.
- For Resource group, choose MyResourceGroup.
- For the Name, enter MyNsg.
- For Region, choose same region as MyVirtualNetwork that was created previously.
- Select Review + Create.

- When validation passes, select Create.
Update the network security group inbound rules
To ensure that lab users can use remote desktop to connect to the lab VMs, you need to create a security rule to allow this type of traffic. When you use Linux, you need to adapt the rule for SSH.
To create a rule that allows both RDP and SSH traffic for the subnet you created previously:
Open MyNsg.
Select Inbound security rules on the left menu.
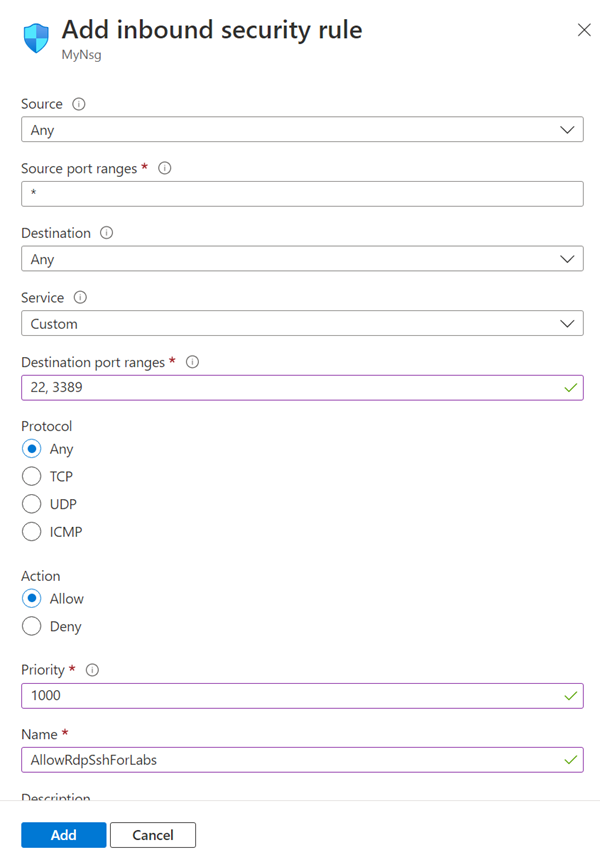
Select + Add from the top menu bar. Fill in the details for adding the inbound security rule as follows:
- For Source, select Any.
- For Source port ranges, select *.
- For Destination, select IP Addresses.
- For Destination IP addresses/CIDR ranges, select subnet range from labservices-subnet created previously.
- For Service, select Custom.
- For Destination port ranges, enter 22, 3389. Port 22 is for Secure Shell protocol (SSH). Port 3389 is for Remote Desktop Protocol (RDP).
- For Protocol, select Any.
- For Action, select Allow.
- For Priority, select 1000. Priority must be higher than other Deny rules for RDP and/or SSH.
- For Name, enter AllowRdpSshForLabs.
- Select Add.
Wait for the rule to be created.
Select Refresh on the menu bar. The new rule now shows in the list of rules.
Associate network security group to virtual network
You now have an NSG with an inbound security rule to allow lab VMs to connect to the virtual network.
To associate the NSG with the virtual network you created earlier:
- Open MyVirtualNetwork.
- Select Subnets on the left menu.
- Select + Associate from the top menu bar.
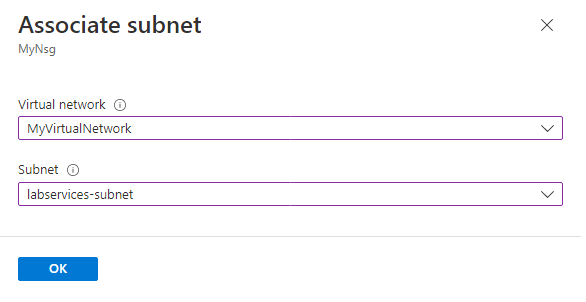
- On the Associate subnet page, do the following actions:
- For Virtual network, select MyVirtualNetwork.
- For Subnet, select labservices-subnet.
- Select OK.
Warning
Connecting the network security group to the subnet is a required step. Lab users are not able to connect to their lab VMs if there is no network security group associated with the subnet.
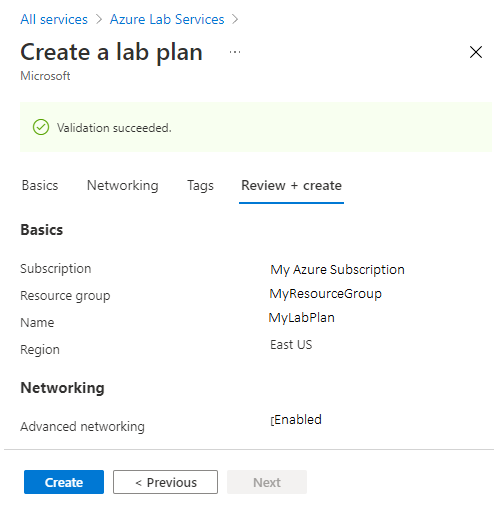
Create a lab plan using advanced networking
Now that the virtual network is created and configured, you can create the lab plan:
Select Create a resource in the upper left-hand corner of the Azure portal.
Search for lab plan.
On the Lab plan tile, select the Create dropdown and choose Lab plan.

On the Basics tab of the Create a lab plan page, do the following actions:
- For Azure subscription, select the subscription used earlier.
- For Resource group, select an existing resource group or select Create new, and enter a name for the new resource group.
- For Name, enter a lab plan name. For more information about naming restrictions, see Microsoft.LabServices resource name rules.
- For Region, select a location/region in which you want to create the lab plan.
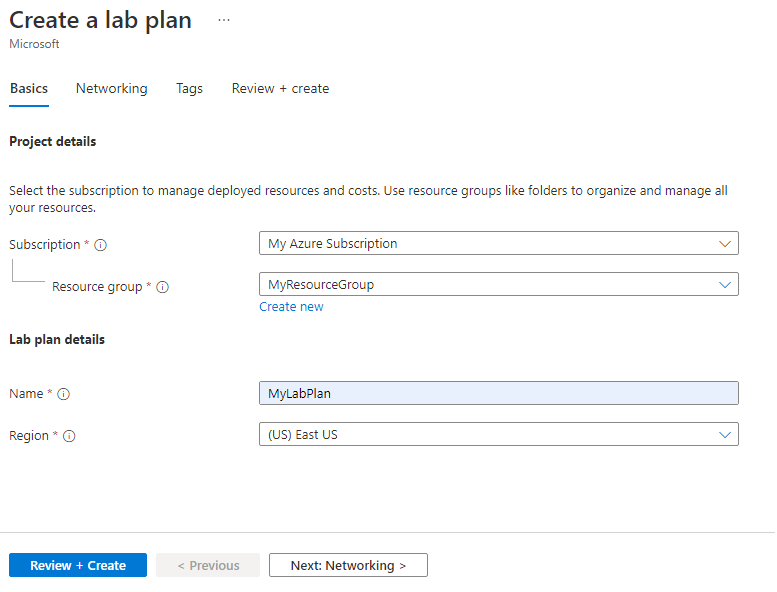
Select Next: Networking.
On the Networking tab, do the following actions:
- Check Enable advanced networking.
- For Virtual network, choose MyVirtualNetwork.
- For Subnet, choose labservices-subnet.
- Select Review + Create.
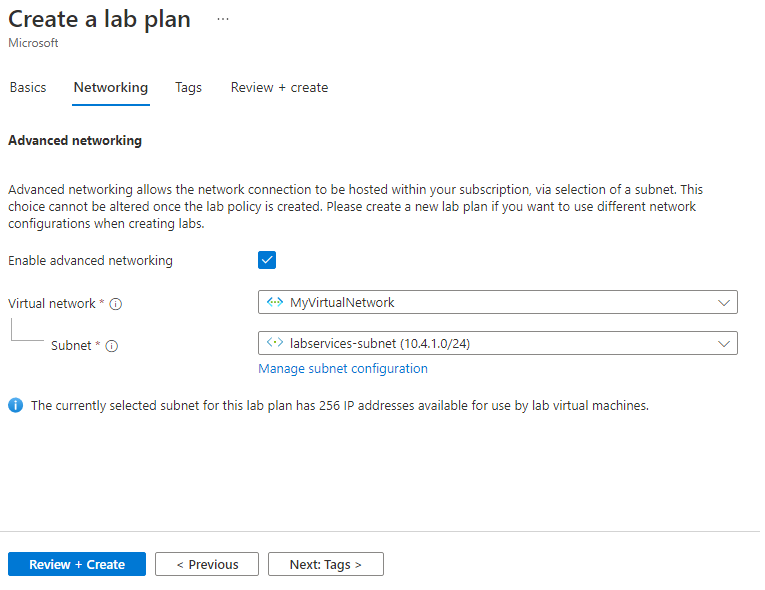
When the validation succeeds, select Create.
Note
Advanced networking can only be enabled when lab plans are created. Advanced networking can't be added later.
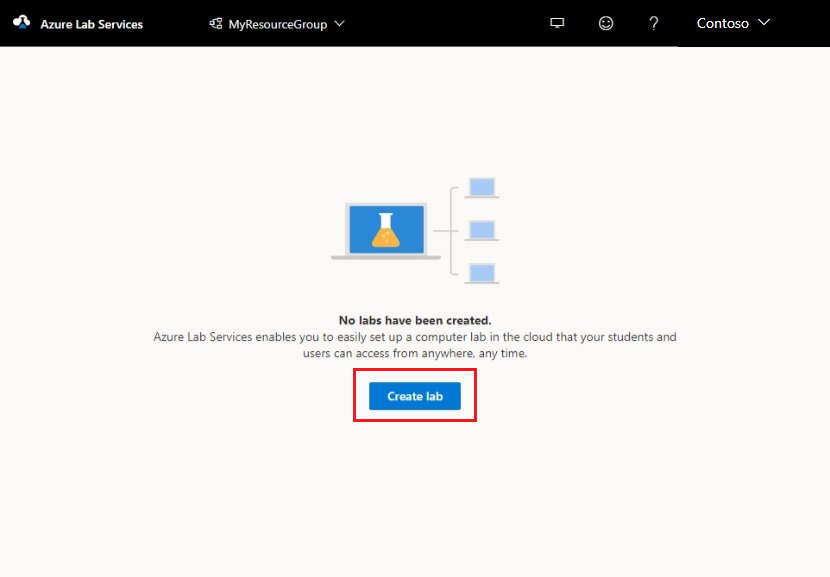
Create two labs
Next, create two labs that use advanced networking. These labs use the labservices-subnet that's associated with Azure Lab Services. Any lab VMs created using MyLabPlan can communicate with each other. Communication can be restricted by using NSGs, firewalls, and more.
Perform the following steps to create both labs. Repeat these steps the server VM and the client VM.
Navigate to the Azure Lab Services website: https://labs.azure.com.
Select Sign in and enter your credentials. Azure Lab Services supports organizational accounts and Microsoft accounts.
Select MyResourceGroup from the dropdown on the menu bar.
Select New lab.
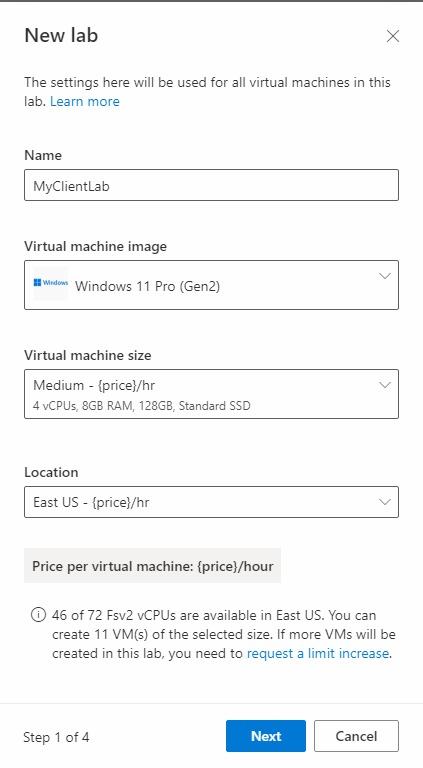
In the New Lab window, do the following actions:
- Specify a name. The name should be easily identifiable. Use MyServerLab for the lab with the server VMs and MyClientLab for the lab with the client VMs. For more information about naming restrictions, see Microsoft.LabServices resource name rules.
- Choose a virtual machine image. For this tutorial, use Windows 11 Pro, but you can choose another available image if you want. For more information about enabling virtual machine images, see Specify Marketplace images available to lab creators.
- For size, select Medium.
- Region only has one region. When a lab uses advanced networking, the lab must be in the same region as the associated subnet.
- Select Next.
On the Virtual machine credentials page, specify default administrator credentials for all VMs in the lab. Specify the name and password for the administrator. By default all the lab VMs have the same password as the one specified here. Select Next.

Important
Make a note of user name and password. They won't be shown again.
On the Lab policies page, leave the default selections and select Next.
On the Template virtual machine settings window, leave the selection on Create a template virtual machine. Select Finish.
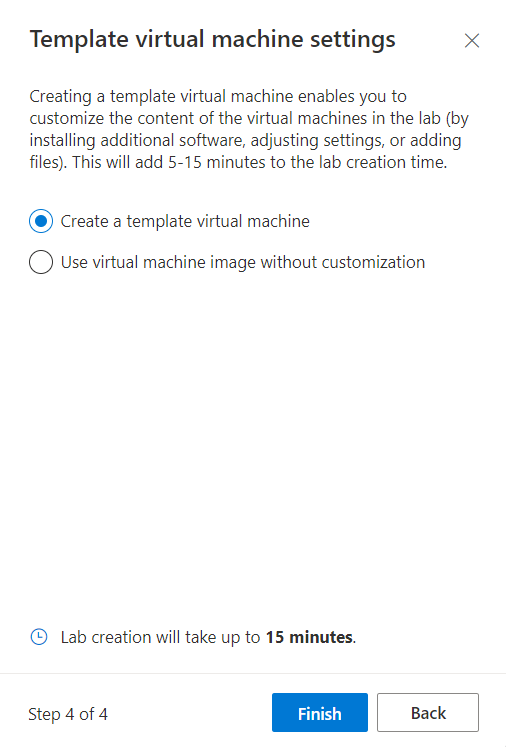
You should see the following screen that shows the status of the template VM creation.
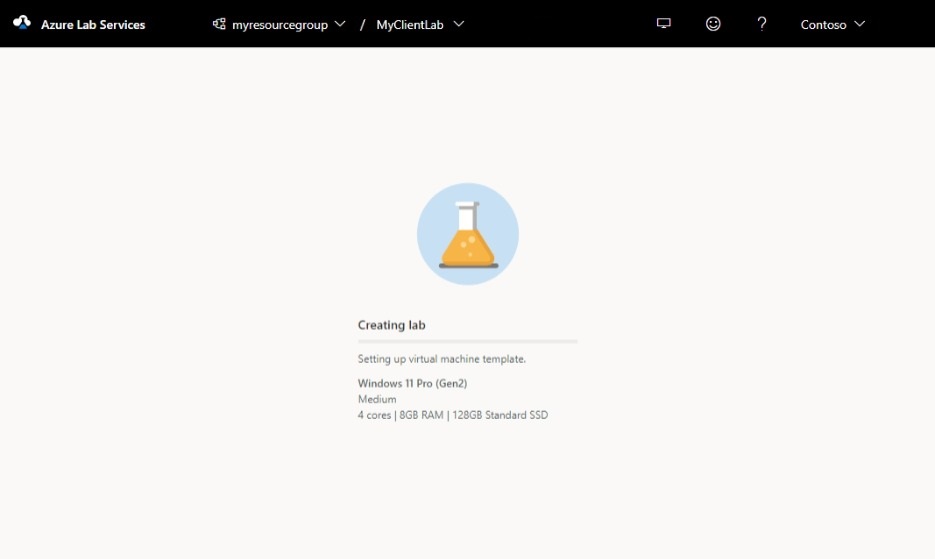
Wait for the template VM to be created.
Enable ICMP on the lab templates
Once the labs are created, enable ICMP (ping) for testing communication between the lab VMs. First, enable ICMP on the template VMs for both labs. Enabling ICMP on the template VM also enables it on the lab VMs. Once the labs are published, the lab VMs are able to ping each other.
To enable ICMP, complete the following steps for each template VM in each lab.
On the Template page for the lab, start and connect to the template VM.
- Select Start template.
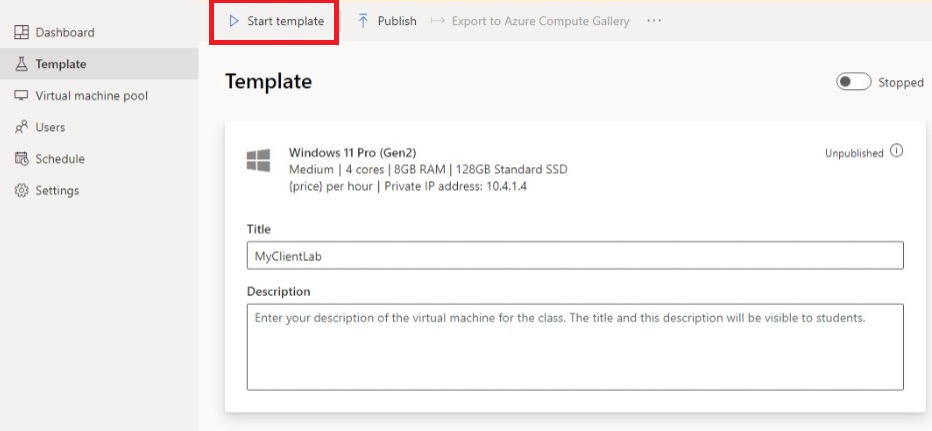
Note
Template VMs incur cost when running, so ensure that the template VM is shutdown when you don’t need it to be running.
- Once the template is started, select Connect to template.
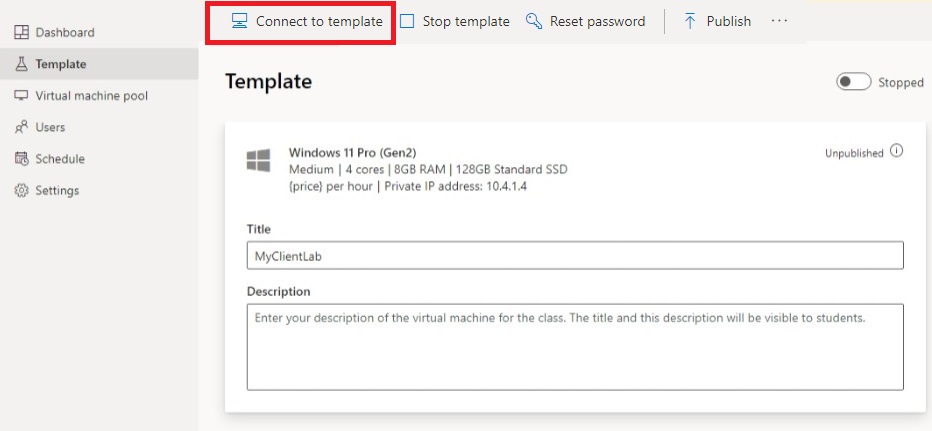
When you're logged in to the template VM, modify the firewall rules on the VM to allow ICMP. Because you're using Windows 11, you can use PowerShell and the Enable-NetFilewallRule cmdlet. To open a PowerShell window:
- Select the Start button.
- Type "PowerShell"
- Select the Windows PowerShell app.
Run the following code:
Enable-NetFirewallRule -Name CoreNet-Diag-ICMP4-EchoRequest-In
Enable-NetFirewallRule -Name CoreNet-Diag-ICMP4-EchoRequest-Out
On the Template page for the lab, select Stop to stop the template VM.
Publish both labs
In this step, you publish the lab. When you publish the template VM, Azure Lab Services creates VMs in the lab by using the template. All virtual machines have the same configuration as the template.
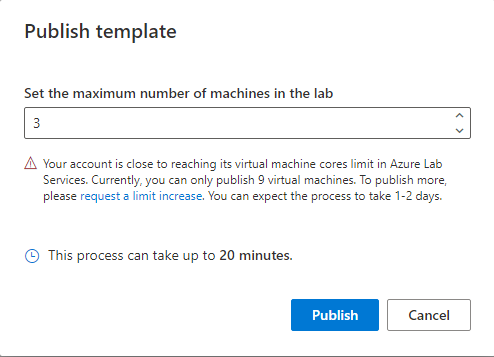
On the Template page, select Publish.
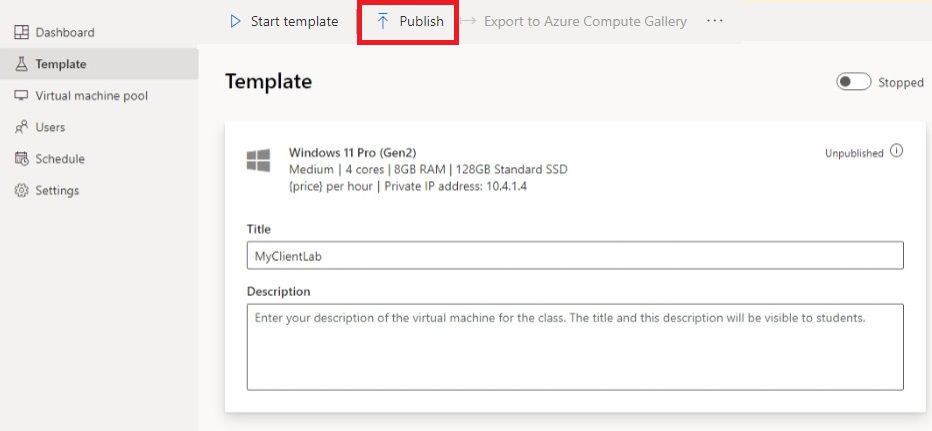
Enter the number of machines that are needed for the lab, then select Publish.
Warning
Publishing is an irreversible action! It can't be undone.
You see the status of publishing the template page. Wait until the publishing is complete.
Test communication between lab VMs
In this section, confirm that the two lab virtual machines in different labs are able to communicate with each other.
First, start and connect to a lab VM from each lab. Complete the following steps for each lab.
Open the lab in the Azure Lab Services website.
Select Virtual machine pool on the left menu.
Select a single VM listed in the virtual machine pool.
Take note of the Private IP Address for the VM. You need the private IP addresses of both the server lab and client lab VMs later.
Select the State slider to change the state from Stopped to Starting.
Note
When an lab educator starts a lab VM, quota for the lab user isn't affected. Quota for a user specifies the number of lab hours available to a lab user outside of the scheduled class time. For more information on quotas, see Set quotas for users.
Once the State is Running, select the connect icon for the running VM. Open the download RDP file to connect to the VM. For more information about connection experiences on different operating systems, see Connect to a lab VM.

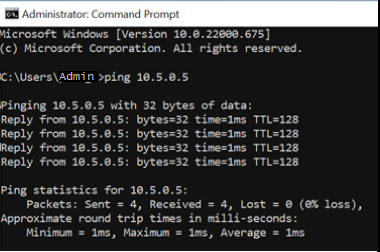
Now, use the ping utility to test cross-lab communication. From the lab VM in the server lab, open a command prompt. Use ping {ip-address}. The {ip-address} is the Private IP Address of the client VM, that you noted previously. This test can also be done from the lab VM from the client lab to the lab VM in the server lab.
When done, navigate to the Virtual machine pool page for each lab, select the lab VM and select the State slider to stop the lab VM.
Clean up resources
If you're not going to continue to use this application, delete the virtual network, network security group, lab plan and labs with the following steps:
- In the Azure portal, select the resource group you want to delete.
- Select Delete resource group.
- To confirm the deletion, type the name of the resource group
Troubleshooting
Lab creation fails with You are not authorized to access this resource
When you create a new lab plan, it might take a few minutes for the permissions to propagate to the lab level. You can assign the Lab Creator role at the resource group level to prevent this behavior:
- In the Azure portal, go to the resource group that contains the lab plan.
- Select Access control (IAM) from the left navigation.
- Select Add > Add role assignment.
- Assign the Lab Creator role to the user account.
Next steps
Feedback
Coming soon: Throughout 2024 we will be phasing out GitHub Issues as the feedback mechanism for content and replacing it with a new feedback system. For more information see: https://aka.ms/ContentUserFeedback.
Submit and view feedback for