Labeling images and text documents
After your project administrator creates an Azure Machine Learning image data labeling project or an Azure Machine Learning text data labeling project, you can use the labeling tool to rapidly prepare data for a Machine Learning project. This article describes:
- How to access your labeling projects
- The labeling tools
- How to use the tools for specific labeling tasks
Prerequisites
- A Microsoft account, or a Microsoft Entra account, for the organization and project.
- Contributor-level access to the workspace that contains the labeling project.
Sign in to the studio
Sign in to Azure Machine Learning studio.
Select the subscription and the workspace containing the labeling project. Your project administrator has this information.
You may notice multiple sections on the left, depending on your access level. If you do, select Data labeling on the left-hand side to find the project.
Understand the labeling task
In the data labeling project table, select the Label data link for your project.
You'll see instructions, specific to your project. They explain the type of data involved, how you should make your decisions, and other relevant information. Read the information, and select Tasks at the top of the page. You can also select Start labeling at the bottom of the page.
Selecting a label
In all data labeling tasks, you choose an appropriate tag or tags from a set specified by the project administrator. You can use the keyboard number keys to select the first nine tags.
Assisted machine learning
Machine learning algorithms may be triggered during your labeling. If your project has these algorithms enabled, you may see:
Images
After some amount of data is labeled, you might notice Tasks clustered at the top of your screen, next to the project name. Images are grouped together to present similar images on the same page. If you notice this, switch to one of the multiple image views to take advantage of the grouping.
Later on, you might notice Tasks prelabeled next to the project name. Items appear with a suggested label produced by a machine learning classification model. No machine learning model has 100% accuracy. While we only use data for which the model has confidence, these data values might still have incorrect prelabels. When you notice labels, correct any wrong labels before you submit the page.
For object identification models, you may notice bounding boxes and labels already present. Correct all mistakes with them before you submit the page.
For segmentation models, you may notice polygons and labels already present. Correct all mistakes with them before you submit the page.
Text
- You may eventually see Tasks prelabeled next to the project name. Items appear with a suggested label that a machine learning classification model produces. No machine learning model has 100% accuracy. While we only use data for which the model is confident, these data values might still be incorrectly prelabeled. When you see labels, correct any wrong labels before submitting the page.
Early in a labeling project, the machine learning model may only have enough accuracy to prelabel a small image subset. Once these images are labeled, the labeling project will return to manual labeling to gather more data for the next model training round. Over time, the model will become more confident about a higher proportion of images. Later in the project, its confidence results in more prelabel tasks.
When there are no more prelabeled tasks, you stop confirming or correcting labels, and go back to manual item tagging.
Image tasks
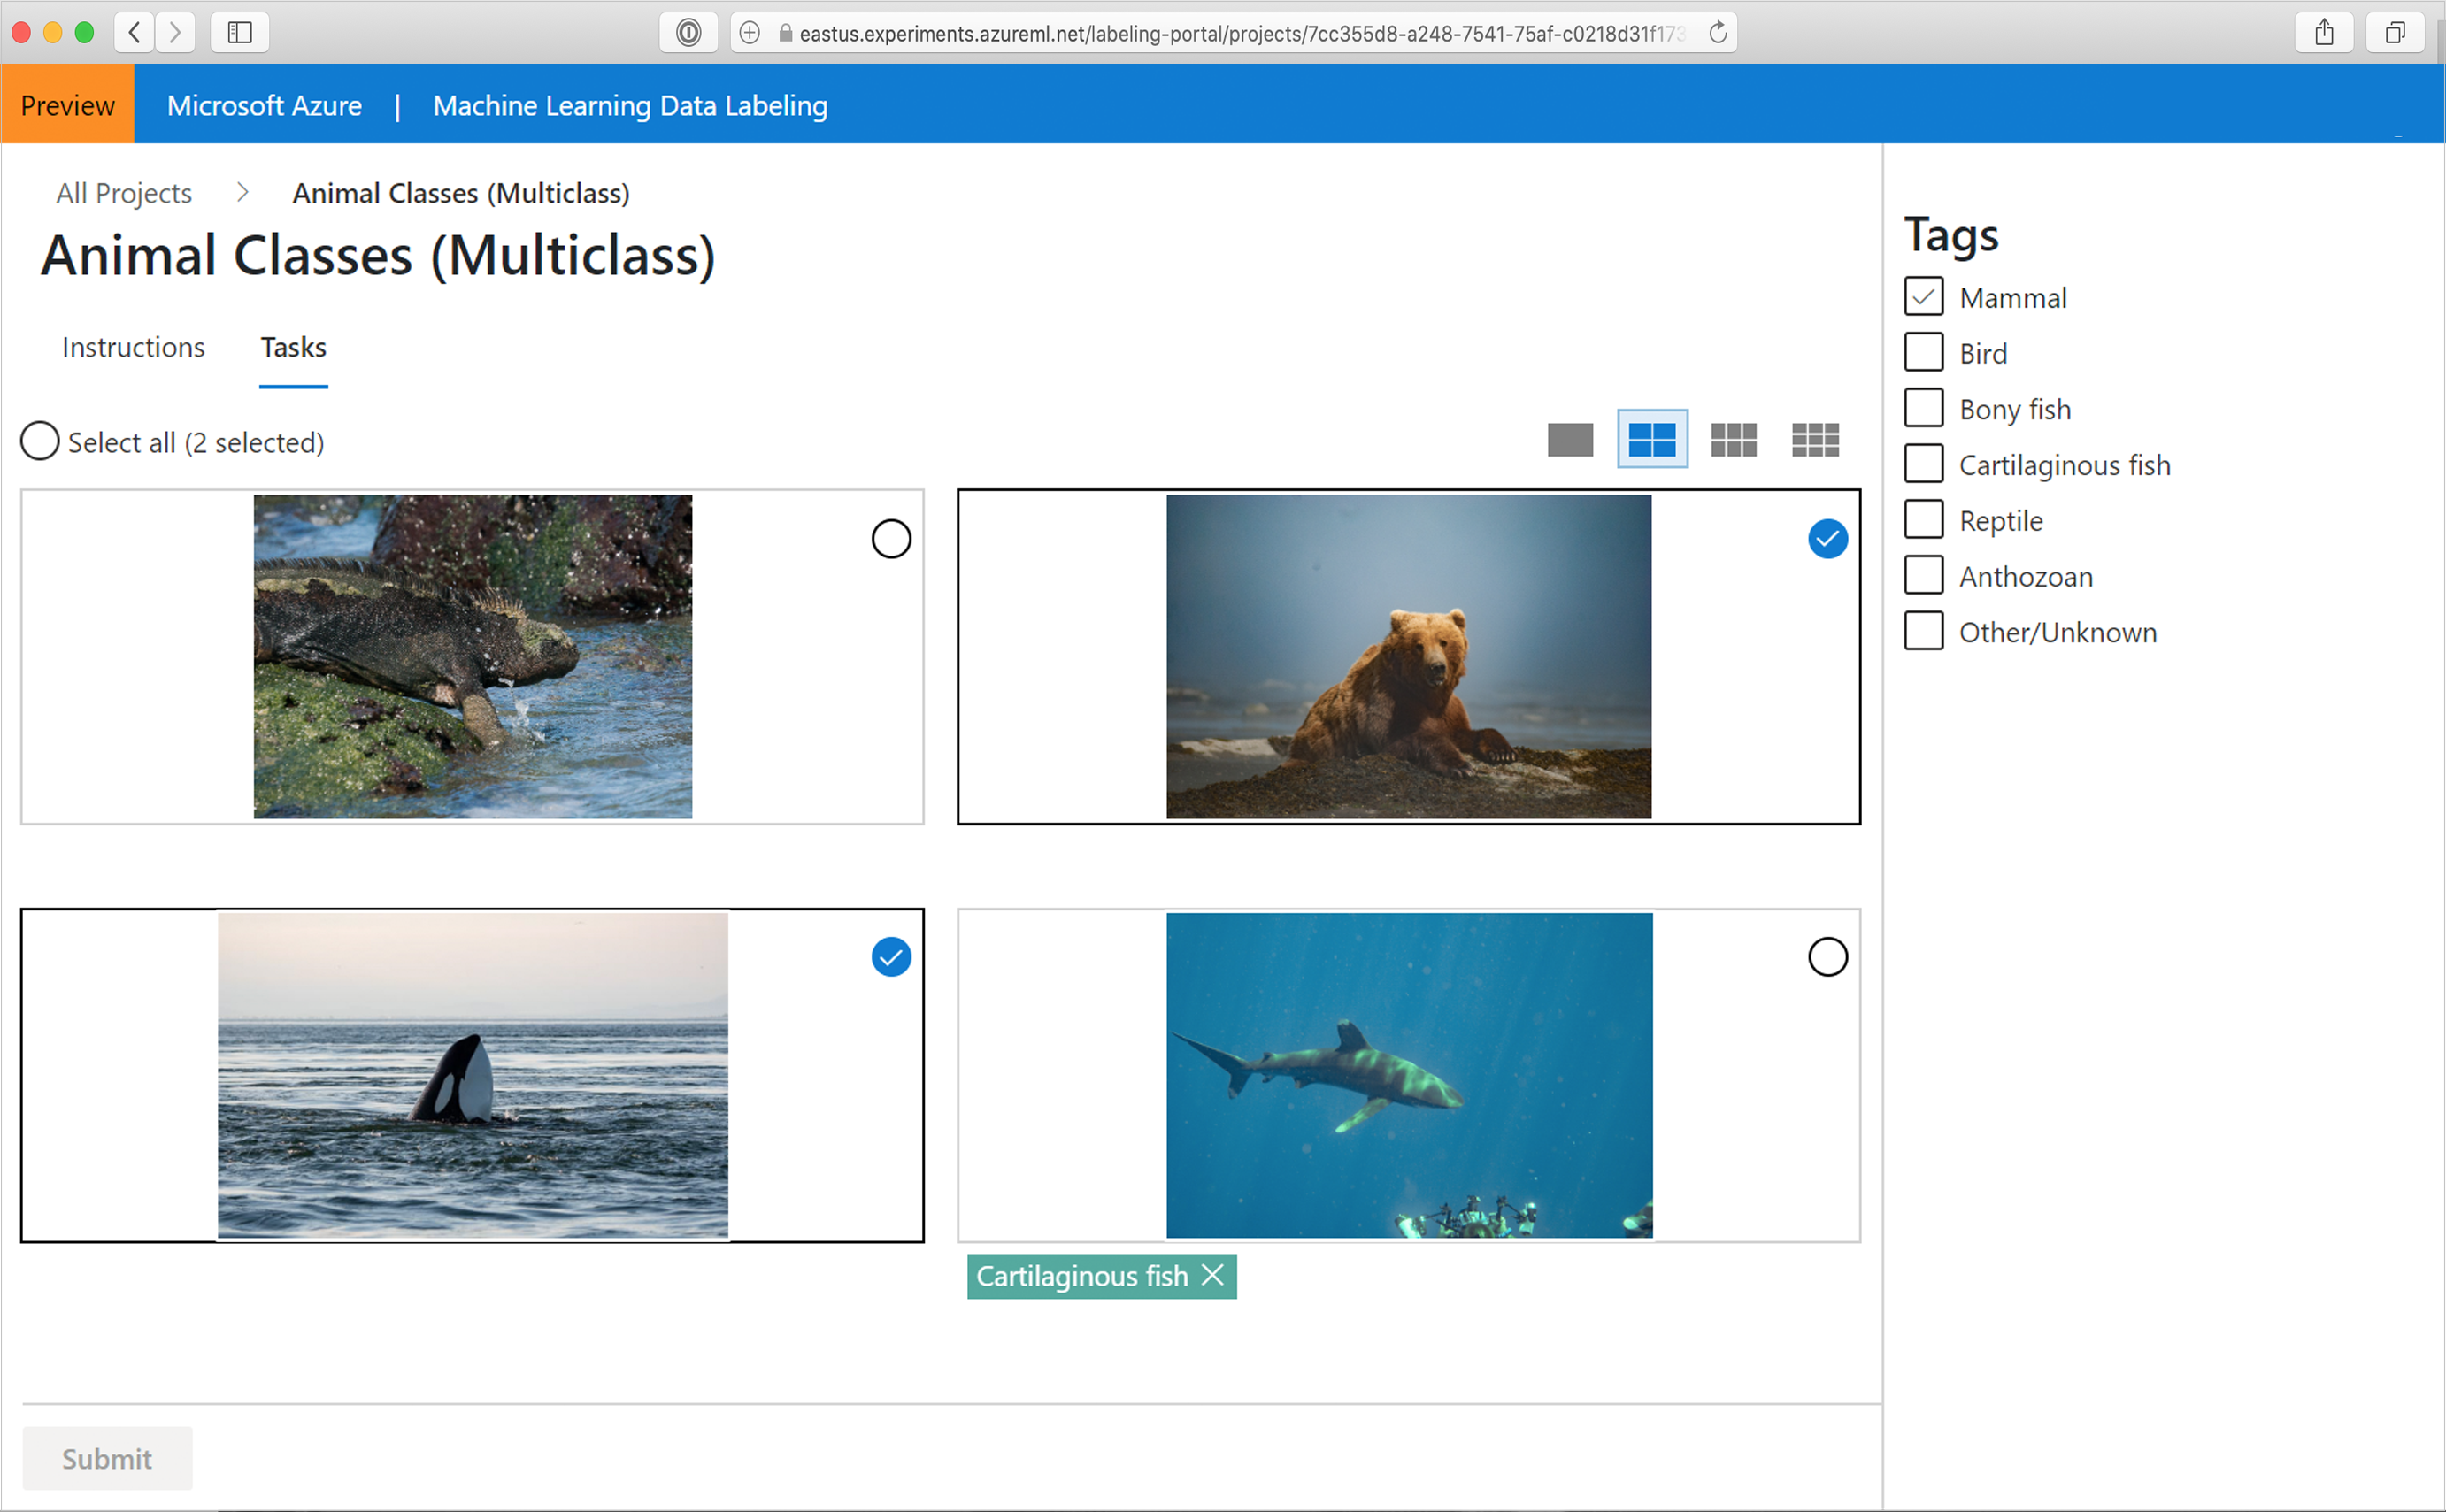
For image-classification tasks, you can choose to view multiple images simultaneously. Use the icons above the image area to select the layout.
To select all the displayed images simultaneously, use Select all. To select individual images, use the circular selection button in the upper-right corner of the image. You must select at least one image to apply a tag. If you select multiple images, any tag that you select applies to all the selected images.
Here, we chose a two-by-two layout, and applied the tag "Mammal" to the bear and orca images. The shark image was already tagged as "Cartilaginous fish," and the iguana doesn't yet have a tag.
Important
Switch layouts only when you have a fresh page of unlabeled data. Switching layouts clears the in-progress tagging work of the page.
Once you tag all the images on the page, Azure enables the Submit button. Select Submit to save your work.
After you submit tags for the data at hand, Azure refreshes the page with a new set of images from the work queue.
Medical image tasks
Important
The capability to label DICOM or similar image types is not intended or made available for use as a medical device, clinical support, diagnostic tool, or other technology intended to be used in the diagnosis, cure, mitigation, treatment, or prevention of disease or other conditions, and no license or right is granted by Microsoft to use this capability for such purposes. This capability is not designed or intended to be implemented or deployed as a substitute for professional medical advice or healthcare opinion, diagnosis, treatment, or the clinical judgment of a healthcare professional, and should not be used as such. The customer is solely responsible for any use of Data Labeling for DICOM or similar image types.
Image projects support DICOM image format for X-ray file images.
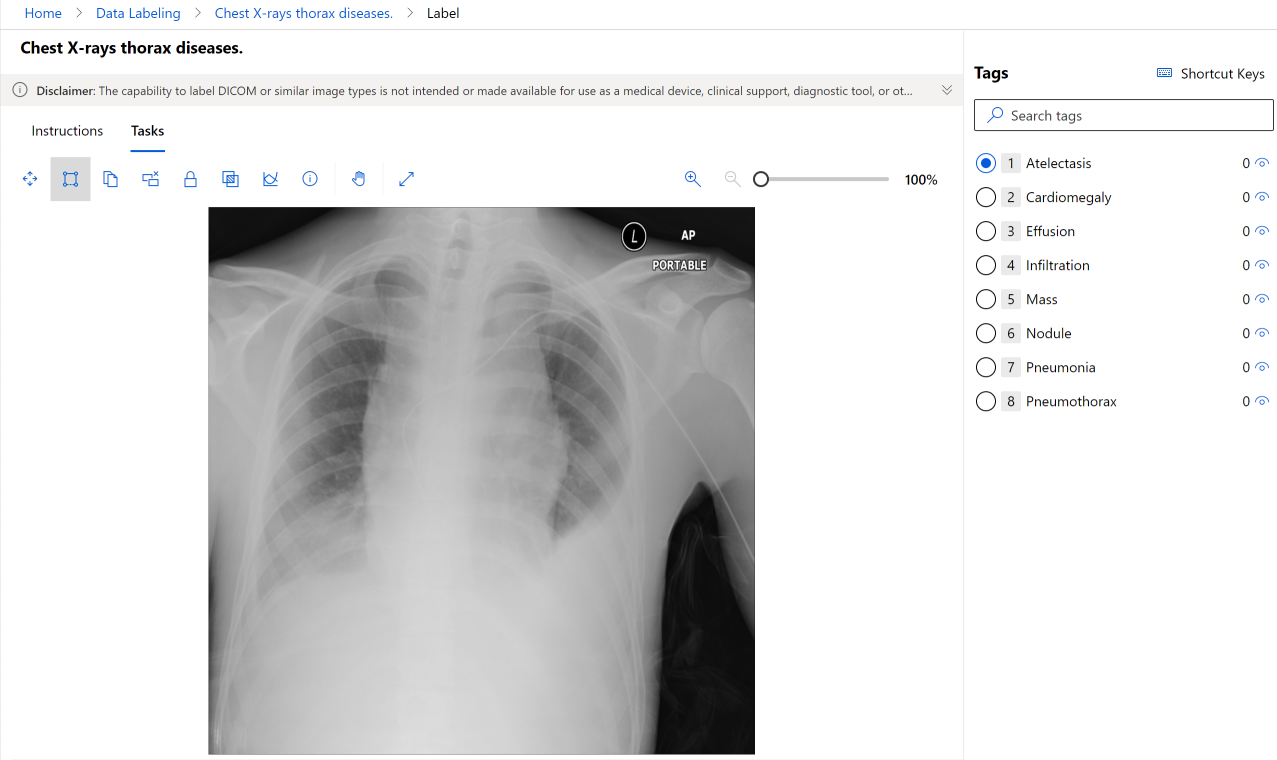
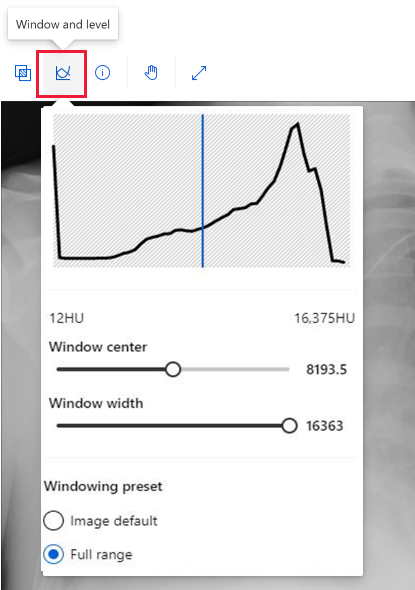
While you label the medical images with the same tools as any other images, you can use a different tool for DICOM images. Select the Window and level tool to change the intensity of the image. This tool is available only for DICOM images.
Tag images for multi-class classification
Assign a single tag to the entire image for an "Image Classification Multi-Class" project type. To review the directions at any time, go to the Instructions page, and select View detailed instructions.
If you realize that you made a mistake after you assign a tag to an image, you can fix it. Select the "X" on the label displayed below the image to clear the tag. You can also select the image and choose another class. The newly selected value replaces the previously applied tag.
Tag images for multi-label classification
If your project is of type "Image Classification Multi-Label," you apply one or more tags to an image. To see the project-specific directions, select Instructions, and go to View detailed instructions.
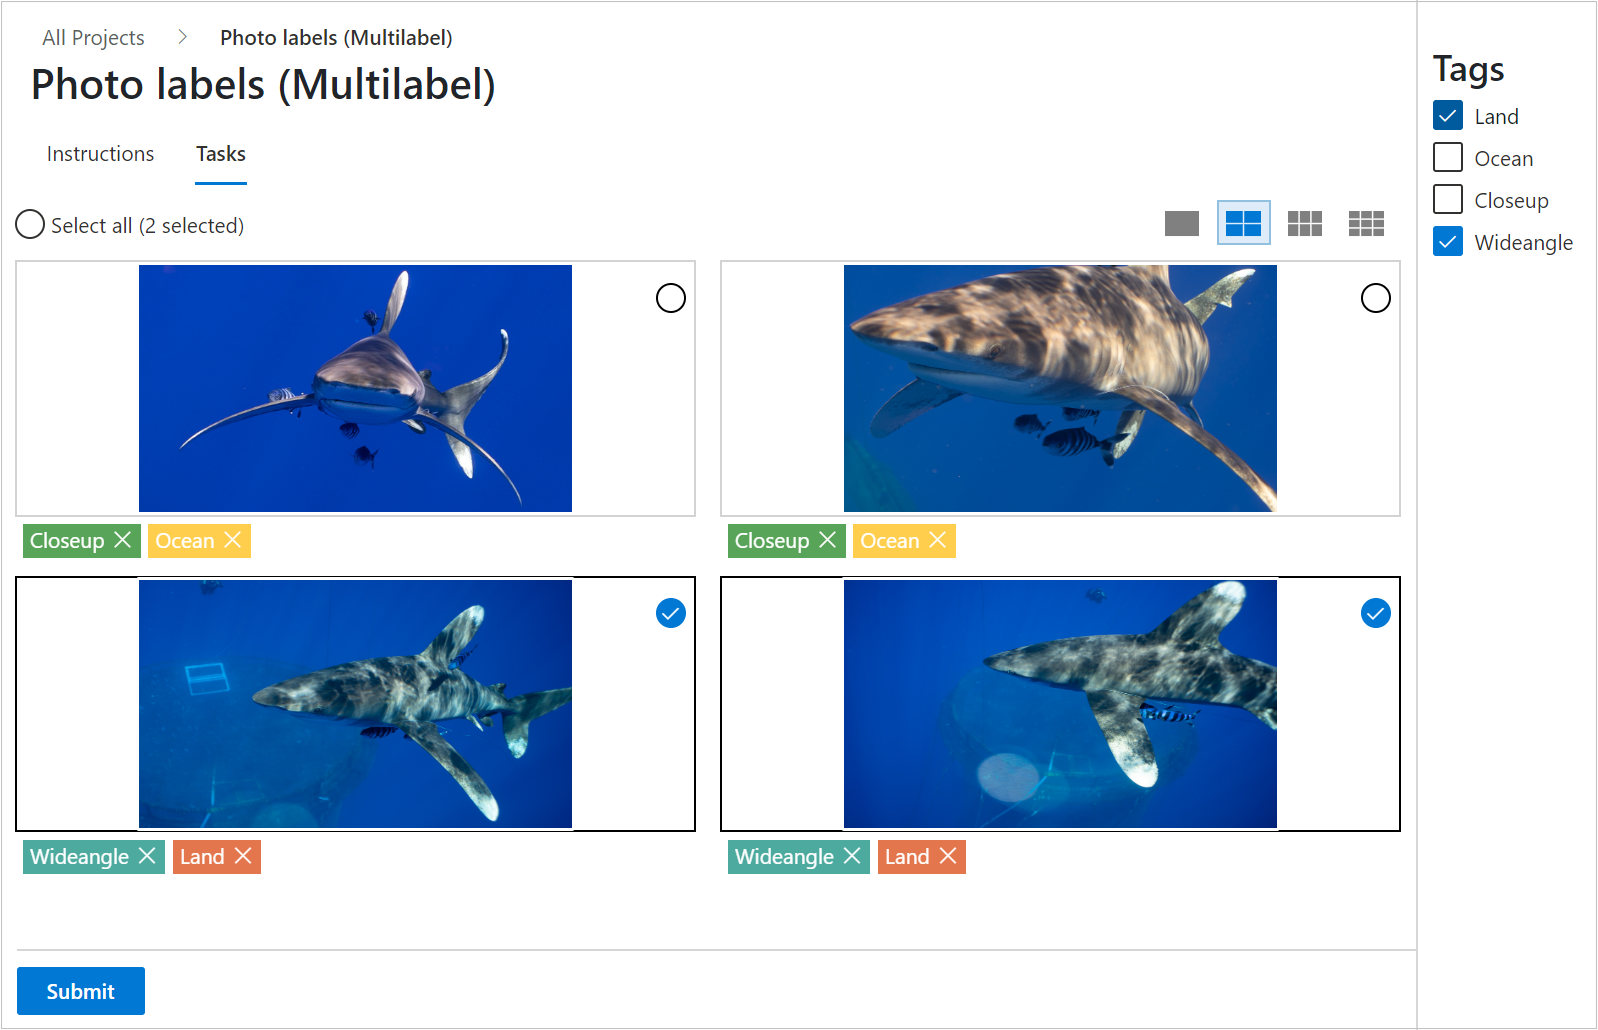
Select the image that you want to label, and then select the tag. The tag is applied to all the selected images, and then the images are deselected. To apply more tags, you must reselect the images. The following animation shows multi-label tagging:
- Select all is used to apply the "Ocean" tag.
- A single image is selected and tagged "Closeup."
- Three images are selected and tagged "Wide angle."

To correct a mistake, select the "X" to clear an individual tag, or select the images and then select the tag, to clear the tag from all the selected images. This scenario is shown here. Selecting "Land" clears that tag from the two selected images.
Azure will only enable the Submit button after you apply at least one tag to each image. Select Submit to save your work.
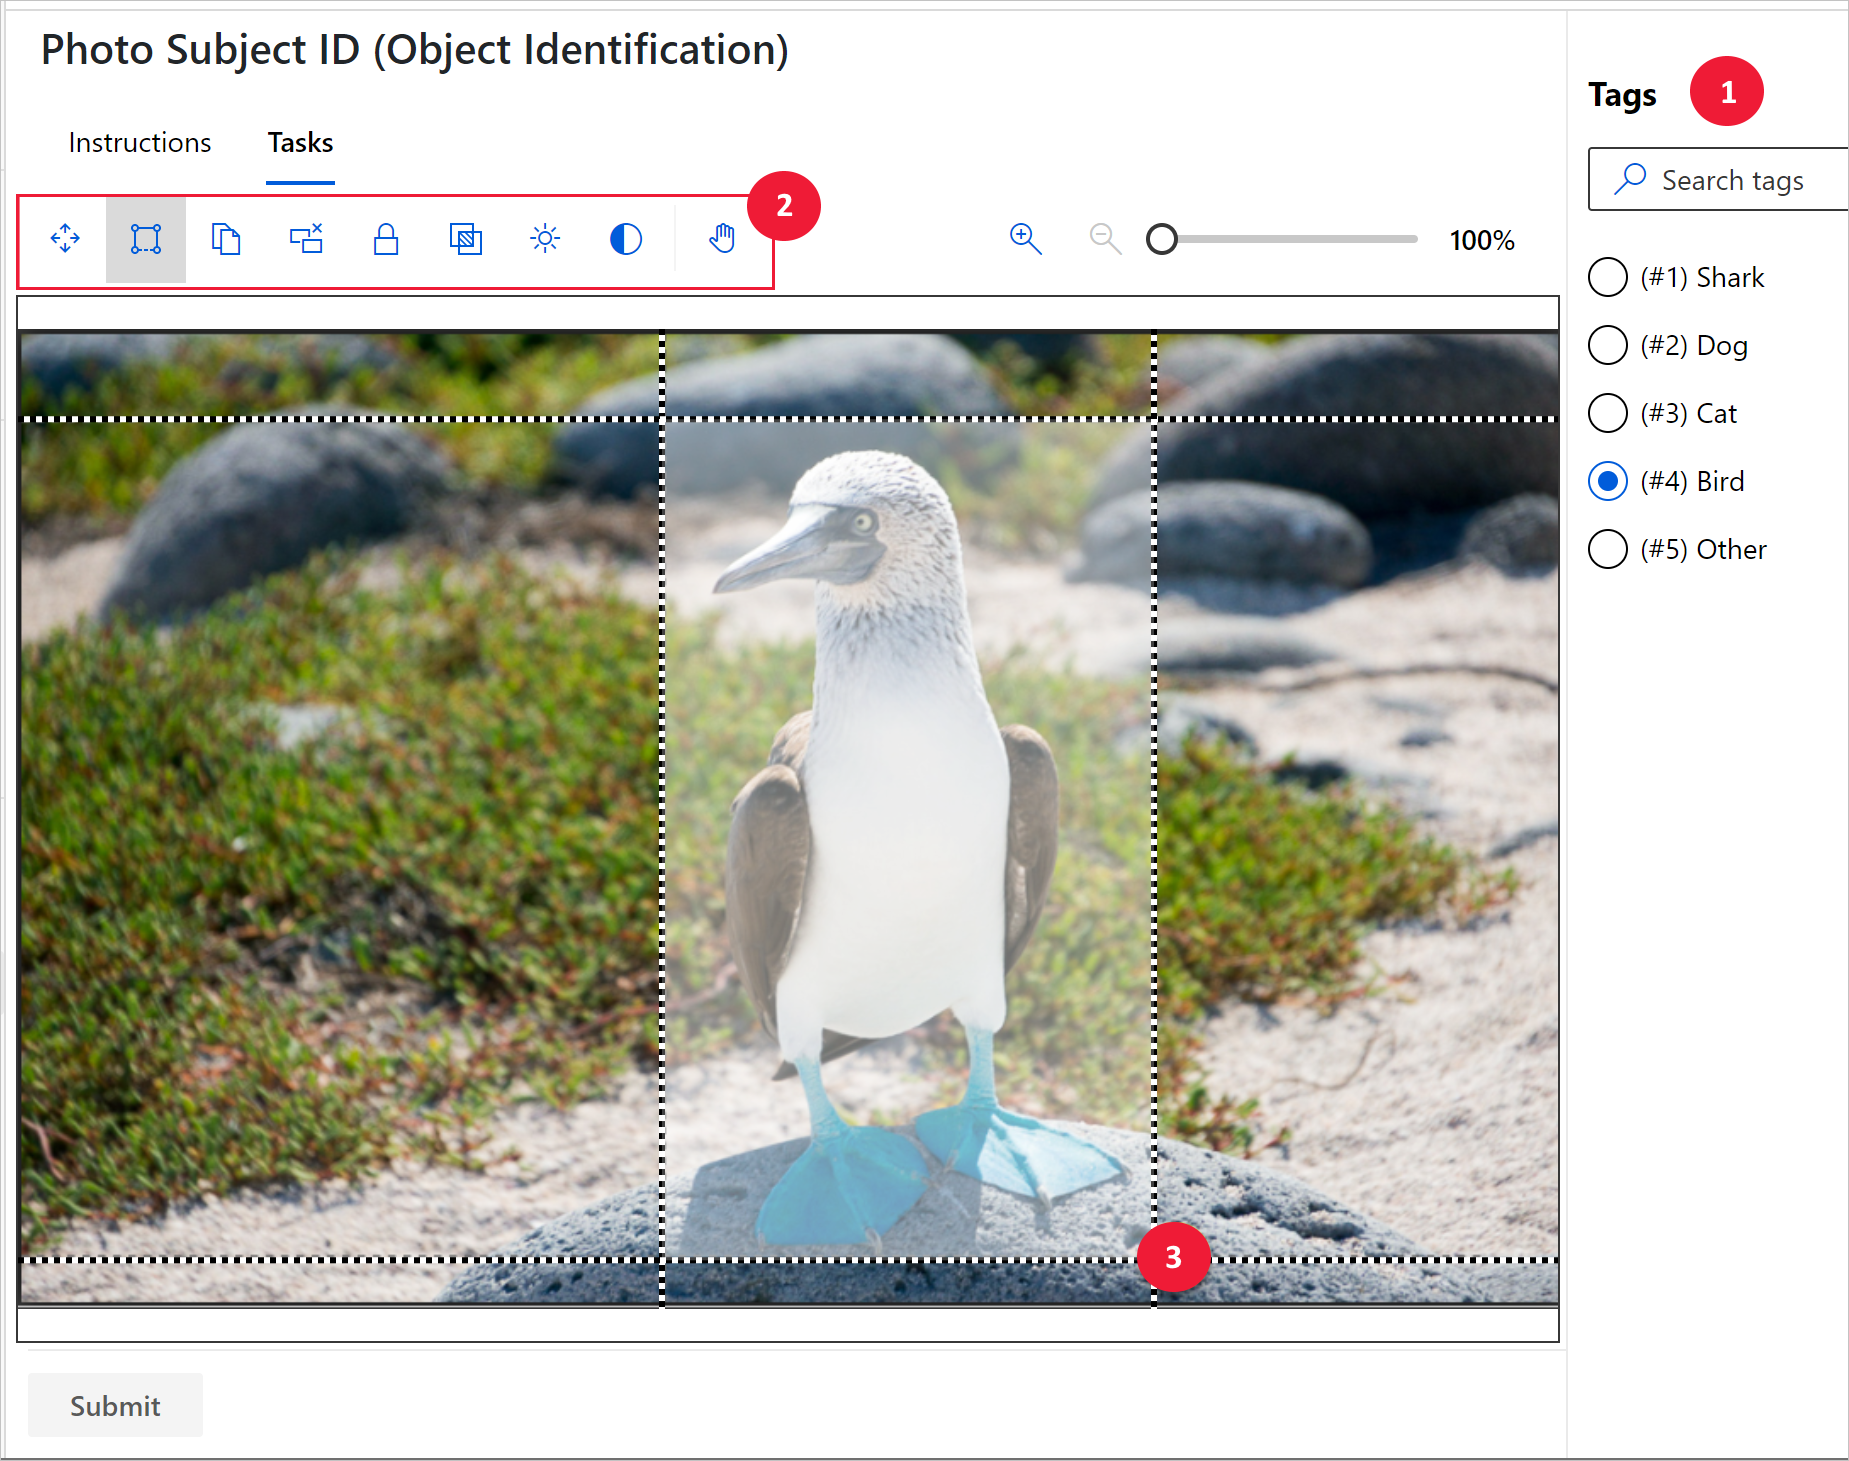
Tag images and specify bounding boxes for object detection
If your project is of type "Object Identification (Bounding Boxes)," specify one or more bounding boxes in the image, and apply a tag to each box. Images can have multiple bounding boxes, each with a single tag. Use View detailed instructions to determine if your project uses multiple bounding boxes.
- Select a tag for the bounding box you plan to create.
- Select the Rectangular box tool
 , or select "R."
 - Select and diagonally drag across your target, to create a rough bounding box. Drag the edges or corners to adjust the bounding box.
To delete a bounding box, select the X-shaped target that appears next to the bounding box after creation.
You can't change the tag of an existing bounding box. To fix a tag-assignment mistake, you must delete the bounding box, and create a new one with the correct tag.
By default, you can edit existing bounding boxes. The Lock/unlock regions tool  or "L" toggles that behavior. If regions are locked, you can only change the shape or location of a new bounding box.
Use the Regions manipulation tool  , or "M", to adjust an existing bounding box. Drag the edges or corners to adjust the shape. Select in the interior if you want to drag the whole bounding box. If you can't edit a region, you probably toggled the Lock/unlock regions tool.
Use the Template-based box tool  , or "T", to create multiple bounding boxes of the same size. If the image has no bounding boxes, and you activate template-based boxes, the tool produces 50-by-50-pixel boxes. If you create a bounding box, and then activate template-based boxes, the size of any new bounding boxes matches the size of the last box that you created. You can resize template-based boxes after placement. Resizing a template-based box only resizes that particular box.
To delete all bounding boxes in the current image, select the Delete all regions tool  .
.
After you create the bounding boxes for an image, select Submit to save your work, or your work in progress won't be saved.
Tag images and specify polygons for image segmentation
If your project is of type "Instance Segmentation (Polygon)," specify one or more polygons in the image, and apply a tag to each polygon. Images can have multiple bounding polygons, each with a single tag. Use View detailed instructions to determine if your project uses multiple bounding polygons.
Select a tag for the polygon that you plan to create.
Select the Draw polygon region tool
 , or select "P."
Select for each point in the polygon. When you complete the shape, double-click to finish.

To delete a polygon, select the X-shaped target that appears next to the polygon after creation.
To change the tag for a polygon, select the Move region tool, select the polygon, and select the correct tag.
You can edit existing polygons. The Lock/unlock regions tool , or "L", toggles that behavior. If regions are locked, you can only change the shape or location of a new polygon.
Use the Add or remove polygon points tool  , or "U", to adjust an existing polygon. Select the polygon to add or remove a point. If you can't edit a region, you probably toggled the Lock/unlock regions tool.
To delete all polygons in the current image, select the Delete all regions tool .
After you create the polygons for an image, select Submit to save your work, or your work in progress won't be saved.
Tag images and draw masks for semantic segmentation
If your project is of type "Semantic segmentation (Preview)," use the paintbrush to paint a mask over the area you wish to tag.
Select a tag for the area you will paint over.
Select the paintbrush tool
 .
.Select the size tool
 to pick a size for your paintbrush.
Paint over the area you wish to tag. The color corresponding to your tag will be applied to the area you paint over.
To delete parts of the area, select Eraser tool.
To change the tag for an area, select the new tag and re-paint the area.
You can also use the Polygon tool to specify a region.
After you create the areas for an image, select Submit to save your work, or your work in progress won't be saved. If you used the Polygon tool, all polygons will be converted to a mask when you submit.
Label text
When you tag text, use the toolbar to:
- Increase or decrease the text size
- Change the font
- Skip labeling this item and move to the next item
If you notice that you made a mistake after you assign a tag, you can fix it. Select the "X" on the label that's displayed below the text to clear the tag.
There are three text project types:
| Project type | Description |
|---|---|
| Classification Multi-Class | Assign a single tag to the entire text entry. You can only select one tag for each text item. Select a tag, and then select Submit to move to the next entry. |
| Classification Multi-Label | Assign one or more tags to each text entry. You can select multiple tags for each text item. Select all the tags that apply, and then select Submit to move to the next entry. |
| Named entity recognition | Tag different words or phrases in each text entry. See directions in the next section. |
To see the project-specific directions, select Instructions, and go to View detailed instructions.
Tag words and phrases
If your project is set up for named entity recognition, you tag different words or phrases in each text item. To label text:
- Select the label, or type the number corresponding to the appropriate label
- Double-click on a word, or use your mouse to select multiple words.

To change a label, you can:
- Delete the label and start over.
- Change the value for some or all of a specific label in your current item:
- Select the label itself, which selects all instances of that label.
- Select again on the instances of this label, to unselect any instances you want to keep.
- Finally, select a new label to change all the labels that are still selected.
Once you tag all the items in an entry, select Submit to move to the next entry.
Finish up
When you submit a page of tagged data, Azure assigns new unlabeled data to you from a work queue. If there's no more unlabeled data available, a new message says so, along with a link to the portal home page.
When you finish labeling, select your image inside a circle in the upper-right corner of the studio, and then select sign-out. If you don't sign out, Azure times you out and assigns your data to another labeler.
Next steps
Feedback
Coming soon: Throughout 2024 we will be phasing out GitHub Issues as the feedback mechanism for content and replacing it with a new feedback system. For more information see: https://aka.ms/ContentUserFeedback.
Submit and view feedback for