Configure Azure application offer properties
This article describes how to configure the properties for an Azure Application offer in the commercial marketplace.
On the Properties page, you’ll define the categories applicable to your offer, and legal contracts. Be sure to provide complete and accurate details about your offer on this page, so that it’s displayed appropriately and offered to the right set of customers.
Select a category for your offer
Under Categories, select the Categories link and then choose at least one and up to two categories for grouping your offer into the appropriate commercial marketplace search areas. Select up to two subcategories for each primary and secondary category. If no subcategory is applicable to your offer, select Not applicable.
If you’re working with a Microsoft product engineering team, select an option from the list to enable product specific certification and a custom Azure portal experience, such as Microsoft Sentinel Solutions.
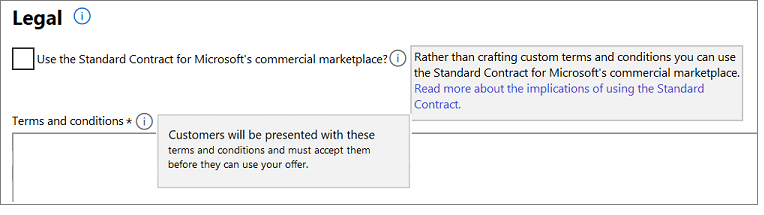
Provide terms and conditions
Under Legal, provide terms and conditions for your offer. You have two options:
To learn about the standard contract and optional amendments, see Standard Contract for the Microsoft commercial marketplace. You can download the Standard Contract PDF (make sure your pop-up blocker is off).
Use the standard contract
To simplify the procurement process for customers and reduce legal complexity for software vendors, Microsoft offers a standard contract you can use for your offers in the commercial marketplace. When you offer your software under the standard contract, customers only need to read and accept it one time, and you don't have to create custom terms and conditions.
Select the Use the Standard Contract for Microsoft's commercial marketplace checkbox.
In the Confirmation dialog box, select Accept. You might have to scroll up to see it.
Select Save draft before continuing.
Note
After you publish an offer using the Standard Contract for the commercial marketplace, you can't use your own custom terms and conditions. Either offer your solution under the standard contract with optional amendments or under your own terms and conditions.
Add amendments to the standard contract (optional)
There are two kinds of amendments available: universal and custom.
Add universal amendment terms
In the Universal amendment terms to the standard contract for Microsoft's commercial marketplace box, enter your universal amendment terms. You can enter an unlimited number of characters in this box. These terms are displayed to customers in AppSource, Azure Marketplace, and/or Azure portal during the discovery and purchase flow.
Add one or more custom amendments
Under Custom amendments terms to the Standard Contract for Microsoft's commercial marketplace, select the Add custom amendment term (Max 10) link.
In the Custom amendment terms box, enter your amendment terms.
In the Tenant ID box, enter a tenant ID. Only customers associated with the tenant IDs you specify for these custom terms will see them in the offer's purchase flow in the Azure portal.
Tip
A tenant ID identifies your customer in Azure. You can ask your customer for this ID and they can find it by going to https://portal.azure.com > Microsoft Entra ID > Properties. The directory ID value is the tenant ID (for example,
50c464d3-4930-494c-963c-1e951d15360e). You can also look up the organization's tenant ID of your customer by using their domain name URL at What is my Microsoft Azure and Office 365 tenant ID?.In the Description box, optionally enter a friendly description for the tenant ID. This description helps you identify the customer you're targeting with the amendment.
To add another tenant ID, select the Add a customer's tenant ID link and repeat steps 3 and 4. You can add up to 20 tenant IDs.
To add another amendment term, repeat steps 1 through 5. You can provide up to ten custom amendment terms per offer.
Select Save draft before continuing.
Use your own terms and conditions
You can choose to provide your own terms and conditions, instead of the standard contract. Customers must accept these terms before they can try your offer.
- Under Legal, make sure the Use the Standard Contract for Microsoft's commercial marketplace check box is cleared.
- In the Terms and conditions box, enter up to 10,000 characters of text.
- Select Save draft before continuing to the next tab: Offer listing.
Next steps
Feedback
Coming soon: Throughout 2024 we will be phasing out GitHub Issues as the feedback mechanism for content and replacing it with a new feedback system. For more information see: https://aka.ms/ContentUserFeedback.
Submit and view feedback for