Point-in-time restore in Azure Database for MySQL - Flexible Server with the Azure portal
APPLIES TO:  Azure Database for MySQL - Flexible Server
This article provides step-by-step procedure to perform point-in-time recoveries in Azure Database for MySQL flexible server using backups.
Prerequisites
To complete this how-to guide, you need:
- You must have an Azure Database for MySQL flexible server instance.
Restore to the latest restore point
Follow these steps to restore your Azure Database for MySQL flexible server instance using an earliest existing backup.
In the Azure portal, choose your Azure Database for MySQL flexible server instance that you want to restore the backup from.
Select Overview from the left panel.
From the overview page, select Restore.
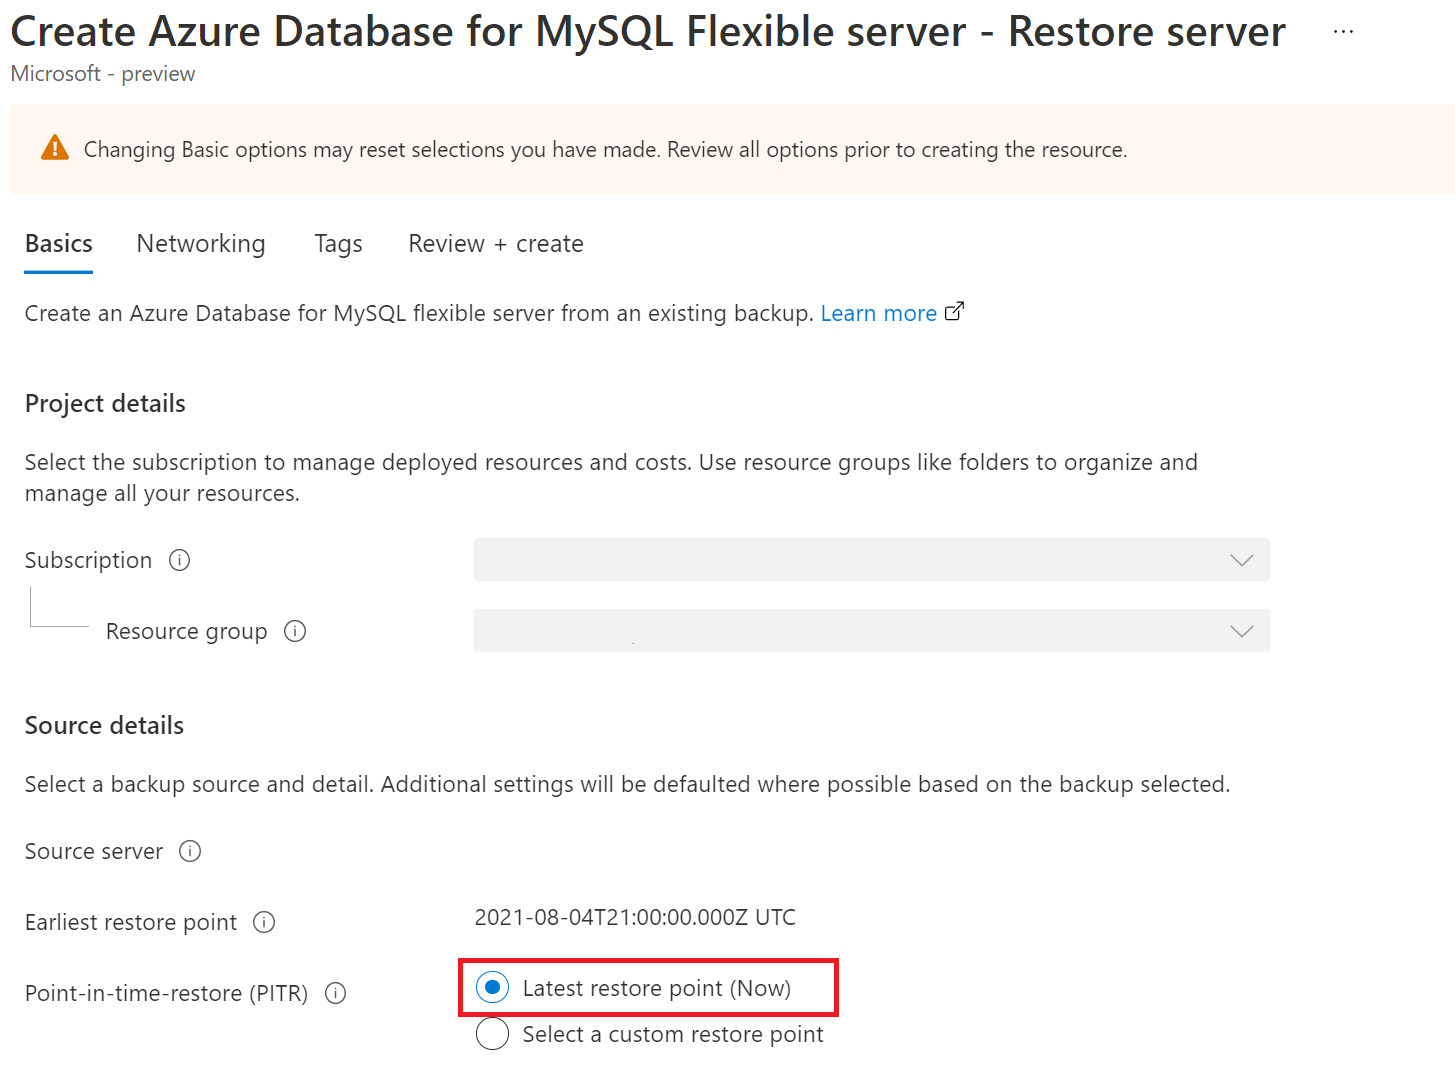
Restore page is shown with an option to choose between Latest restore point and Custom restore point.
Select Latest restore point.
Provide a new server name in the Restore to new server field.
Select OK.
A notification is shown that the restore operation has been initiated.

Restore to a fastest restore point
Follow these steps to restore your Azure Database for MySQL flexible server instance using an existing full backup as the fastest restore point.
In the Azure portal, choose your Azure Database for MySQL flexible server instance that you want to restore the backup from.
Select Overview from the left panel.
From the overview page, select Restore.
Restore page is shown with an option to choose between Latest restore point, Custom restore point and Fastest Restore Point.
Select option Select fastest restore point (Restore using full backup).
Select the desired full backup from the Fastest Restore Point (UTC) dropdown list.

Provide a new server name in the Restore to new server field.
Select Review + Create.
Post selecting Create, a notification is shown that the restore operation has been initiated.

Restore from a full backup through the Backup and Restore page
Follow these steps to restore your Azure Database for MySQL flexible server instance using an existing full backup.
In the Azure portal, choose your Azure Database for MySQL flexible server instance that you want to restore the backup from.
Select Backup and Restore from the left panel.
View Available Backups page is shown with the option to restore from available full automated backups and on-demand backups taken for the server within the retention period.
Select the desired full backup from the list by selecting on corresponding Restore action.

Restore page is shown with the Fastest Restore Point option selected by default and the desired full backup timestamp selected on the View Available backups page.
Provide a new server name in the Restore to new server field.
Select Review + Create.
Post selecting Create, a notification is shown that the restore operation has been initiated.

Geo restore to latest restore point
In the Azure portal, choose your Azure Database for MySQL flexible server instance that you want to restore the backup from.
Select Overview from the left panel.
From the overview page, select Restore.
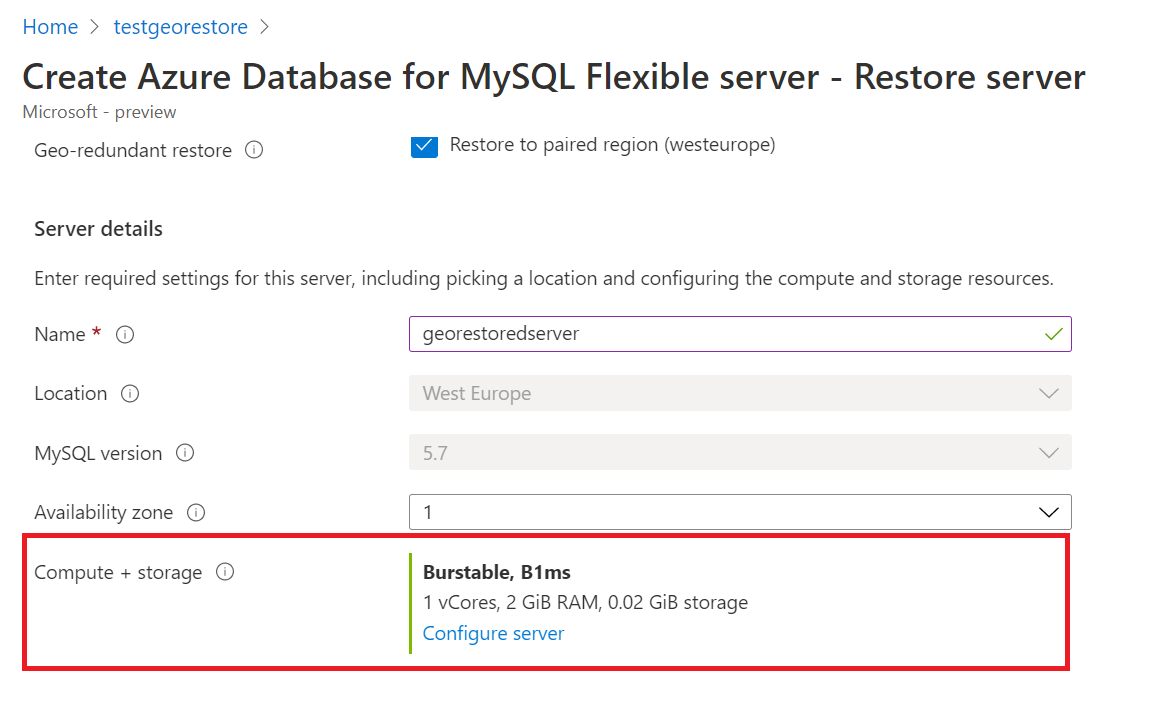
Restore page is shown with an option to choose Geo-redundant restore. If you have configured your server for geographically redundant backups, the server can be restored to the corresponding Azure paired region and the geo-redundant restore option can be enabled. Geo-redundant restore option restores the server to Latest UTC Now timestamp and hence after selection of Geo-redundant restore, the point-in-time restore options can't be selected simultaneously.


Provide a new server name in the Name field in the Server details section.
When primary region is down, one can't create geo-redundant servers in the respective geo-paired region as storage can't be provisioned in the primary region. One must wait for the primary region to be up to provision geo-redundant servers in the geo-paired region. With the primary region down one can still geo-restore the source server to the geo-paired region by disabling the geo-redundancy option in the Compute + Storage Configure Server settings in the restore portal experience and restore as a locally redundant server to ensure business continuity.


Select Review + Create to review your selections.
A notification is shown that the restore operation has been initiated. This operation may take a few minutes.


The new server created by geo restore has the same server admin sign-in name and password that was valid for the existing server at the time the restore was initiated. The password can be changed from the new server's Overview page. Additionally during a restore, Networking settings such as virtual network settings and firewall rules can be configured as described in the below section.
Use restore to move a server from Public access to Private access
Follow these steps to restore your Azure Database for MySQL flexible server instance using an earliest existing backup.
In the Azure portal, choose your Azure Database for MySQL flexible server instance that you want to restore the backup from.
From the overview page, select Restore.
Restore page is shown with an option to choose between geo restore or point-in-time restore options.
Choose either Geo restore or a Point-in-time restore option.
Provide a new server name in the Restore to new server field.
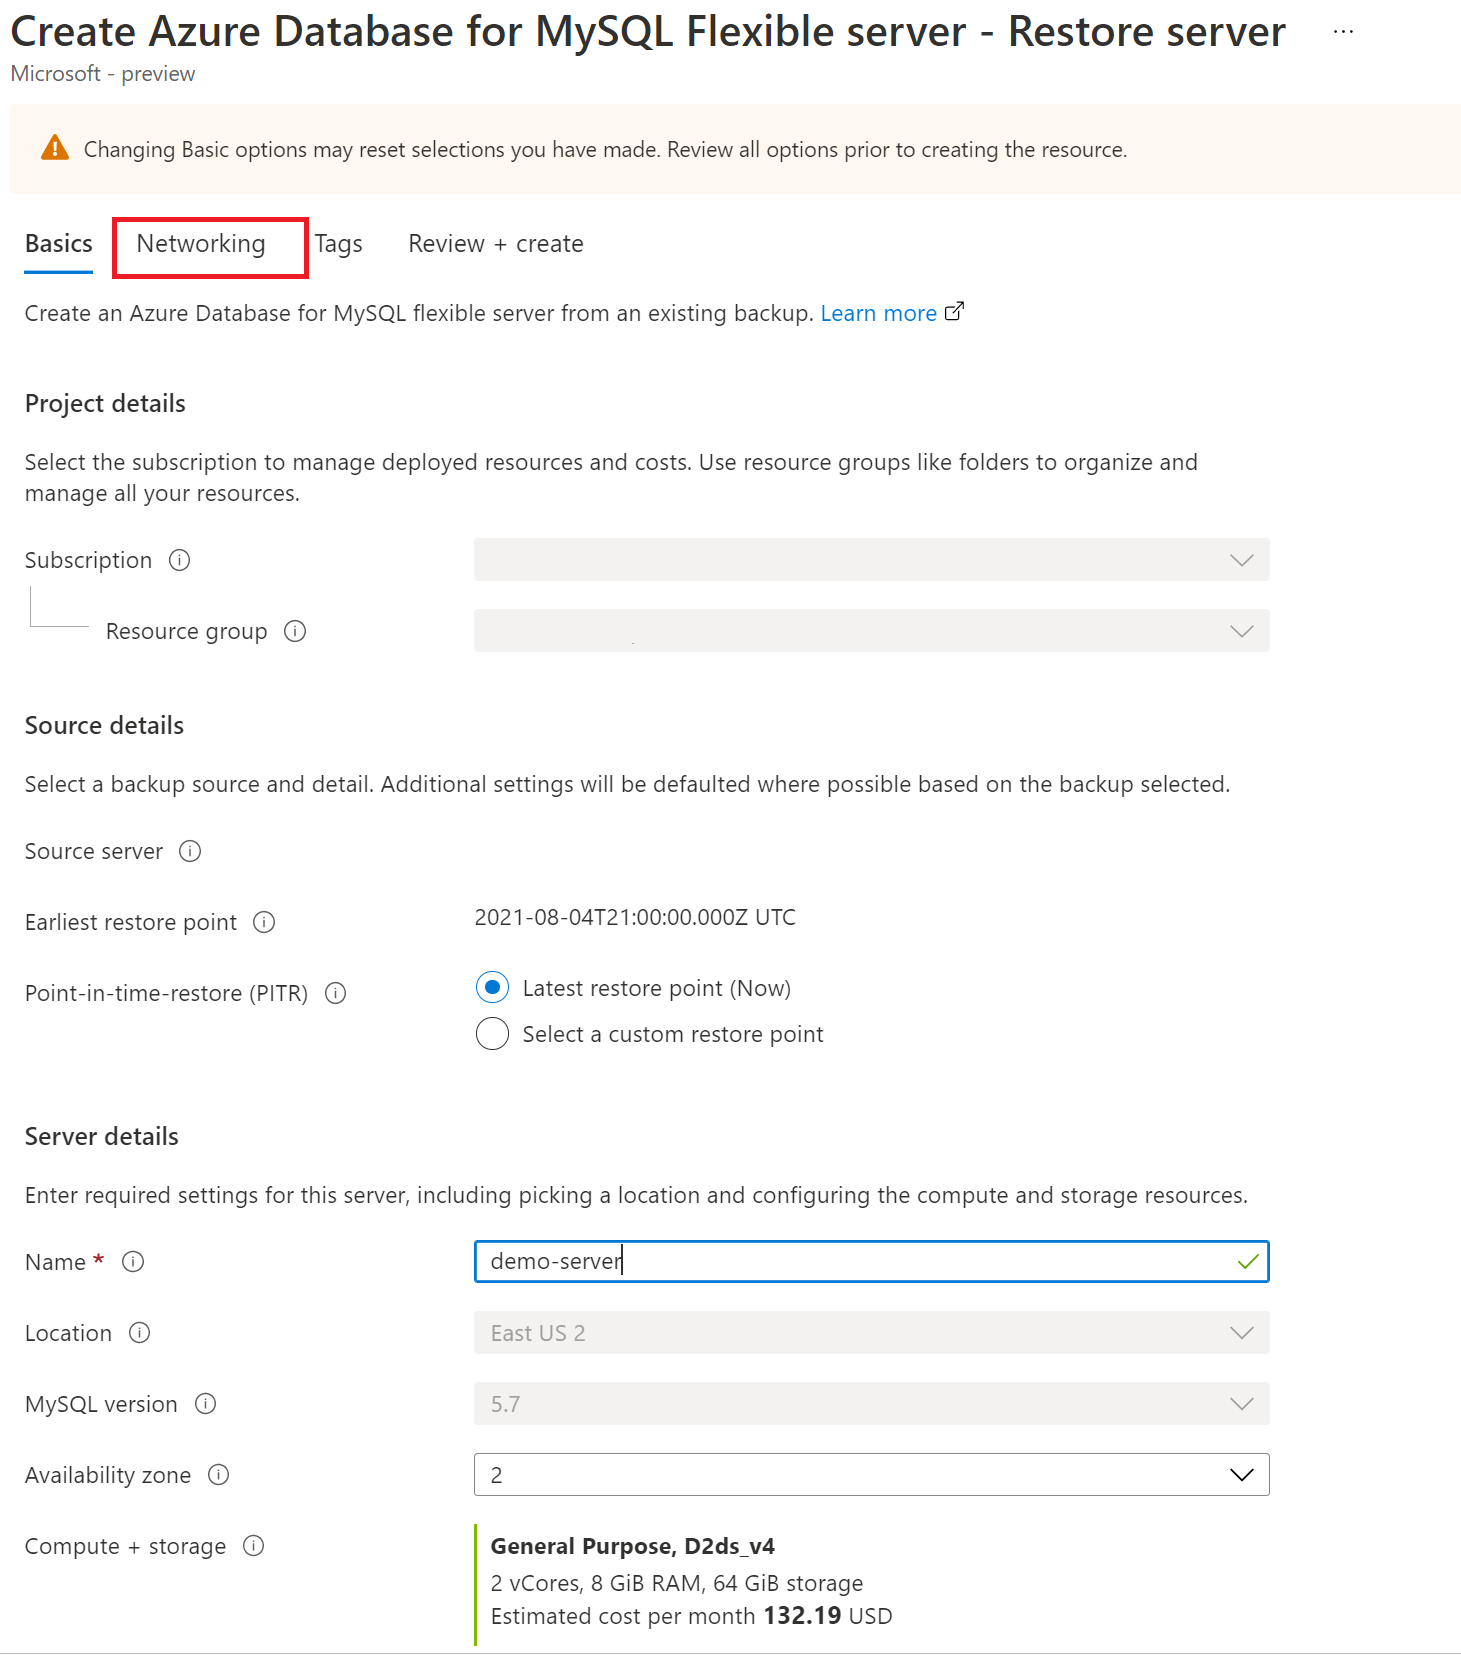
Go to the Networking tab to configure networking settings.
In the Connectivity method, select Private access (VNet Integration). Go to Virtual Network section, you can either select an already existing virtual network and Subnet that is delegated to Microsoft.DBforMySQL/flexibleServers or Create a new one by selecting the create virtual network link.
Note
Only virtual networks and subnets in the same region and subscription is listed in the dropdown list. The chosen subnet is delegated to Microsoft.DBforMySQL/flexibleServers. It means that only Azure Database for MySQL flexible server instances can use that subnet.

Create a new or Select an existing Private DNS Zone.
Note
Private DNS zone names must end with
mysql.database.azure.com. If you don't see the option to create a new private dns zone, enter the server name on the Basics tab. After the Azure Database for MySQL flexible server instance is deployed to a virtual network and subnet, you can't move it to Public access (allowed IP addresses).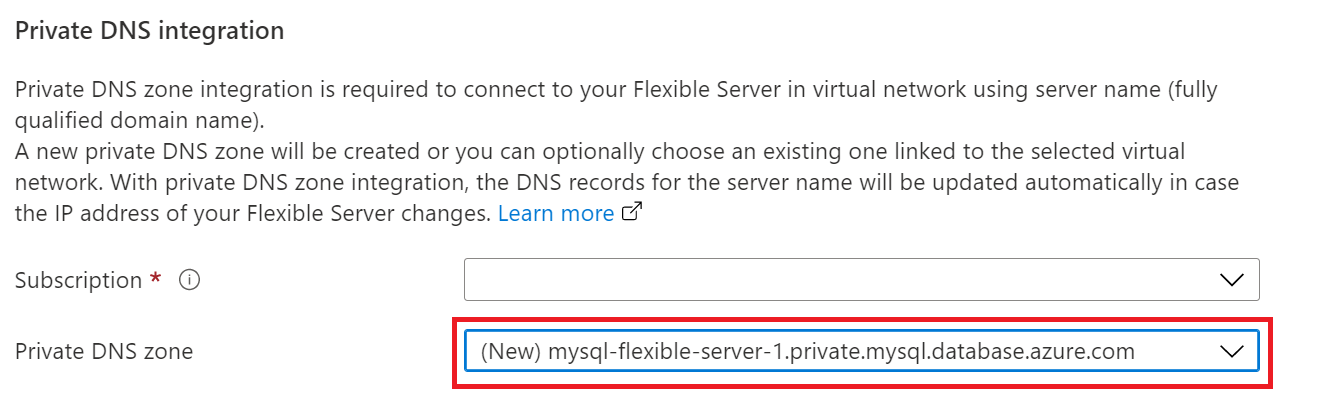
Select Review + create to review your Azure Database for MySQL flexible server configuration.
Select Create to provision the server. Provisioning can take a few minutes.
A notification is shown that the restore operation has been initiated.


Perform post-restore tasks
After the restore is completed, you should perform the following tasks to get your users and applications back up and running:
- If the new server is meant to replace the original server, redirect clients and client applications to the new server.
- Ensure appropriate virtual network rules are in place for users to connect. These rules aren't copied over from the original server.
- Ensure appropriate logins and database level permissions are in place.
- Configure alerts as appropriate for the newly restored server.
Next steps
- Learn more about business continuity
Feedback
Coming soon: Throughout 2024 we will be phasing out GitHub Issues as the feedback mechanism for content and replacing it with a new feedback system. For more information see: https://aka.ms/ContentUserFeedback.
Submit and view feedback for