Manage Elastic Cloud (Elasticsearch) - An Azure Native ISV Service
This article describes how to manage your integration of Elastic with Azure. It shows how to configure the diagnostic settings and delete the Elastic resource.
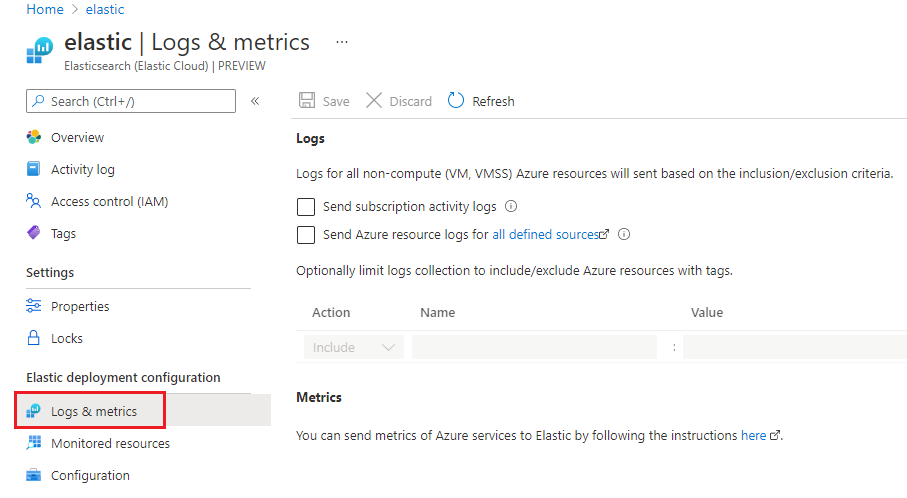
Reconfigure rules for metrics and logs
When you created the Elastic resource, you configured which logs are sent to Elastic. If you need to change those settings, select Metrics and Logs in the left pane. Make the needed changes to how logs are sent to Elastic.
For more information about the two types of logs, see QuickStart: Get started with Elastic.
View monitored resources
To see a list of resources sending logs to Elastic, select Monitored Resources in the left pane.
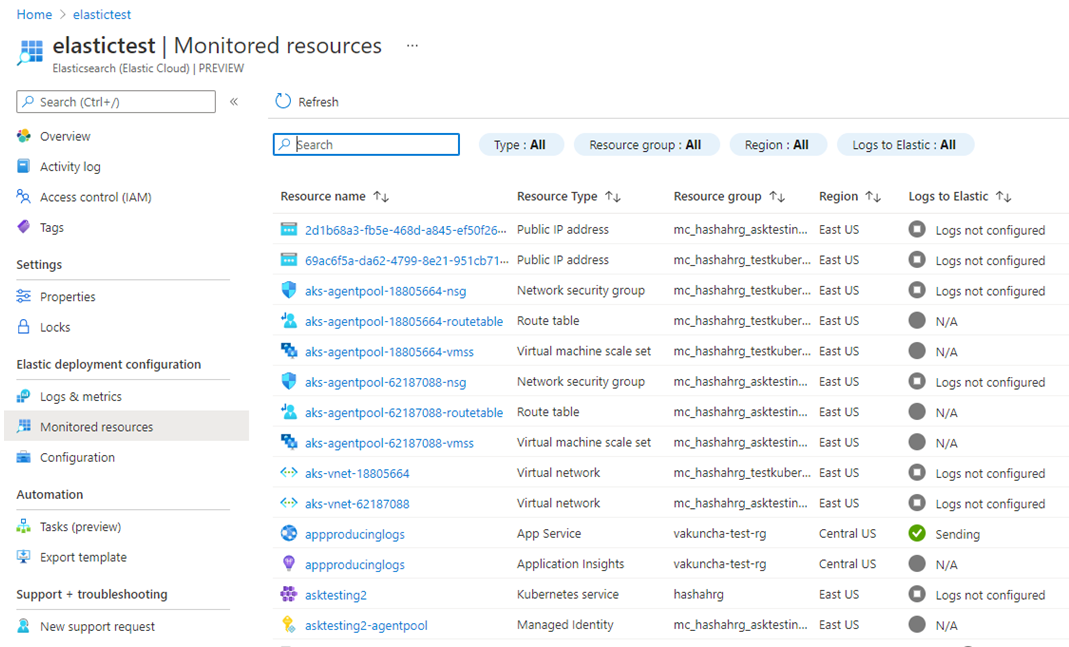
You can filter the list by resource type, resource group name, location, and whether the resource is sending logs.
The Logs to Elastic column indicates whether the resource is sending Logs to Elastic. If the resource isn't sending logs, this field specifies why logs aren't being sent. The reasons could be:
- Resource doesn't support sending logs. Only Azure resource logs for all resources types and log categories defined here can be configured to send logs to Elastic
- Limit of five diagnostic settings reached. Each Azure resource can have a maximum of five diagnostic settings.
- An error is blocking the logs from being sent to Elastic.
- Logs aren't configured for the resource. Only resources that have the appropriate resource tags are sent to Elastic. You specified the tag rules in the log configuration.
- Region isn't supported. The Azure resource is in a region that doesn't currently send logs to Elastic.
Monitor virtual machines using Elastic agent
You can install Elastic agents on virtual machines as an extension. To see the available virtual machines in your subscription, select Virtual Machines from the left pane of your Elastic resource.
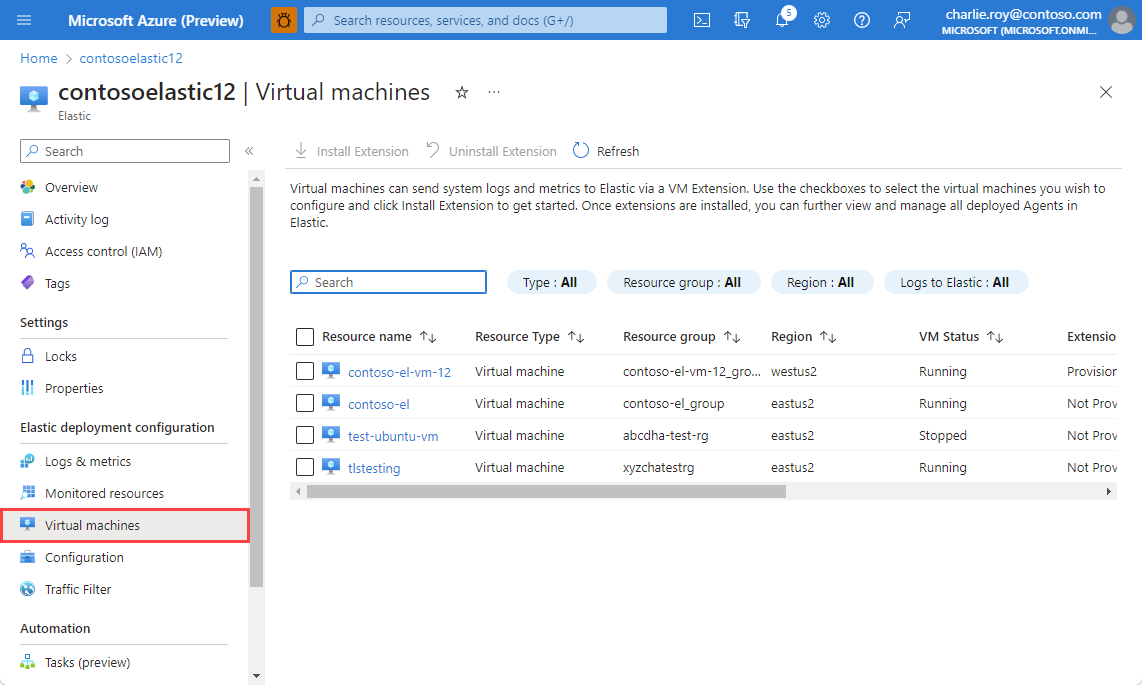
For each virtual machine, the following data is displayed:
- Resource Name – Virtual machine name.
- Resource Status – Whether the virtual machine is stopped or running. The Elastic agent can only be installed on virtual machines that are running. If the virtual machine is stopped, installing the Elastic agent is disabled.
- Agent version – The Elastic agent version number.
- Agent status – Whether the Elastic agent is running on the virtual machine.
- Integrations enabled – The key metrics that are being collected by the Elastic agent.
- Sending logs – Whether the Elastic agent is sending logs to Elastic.
To install the Elastic agent, select a virtual machine and select Install Extension.
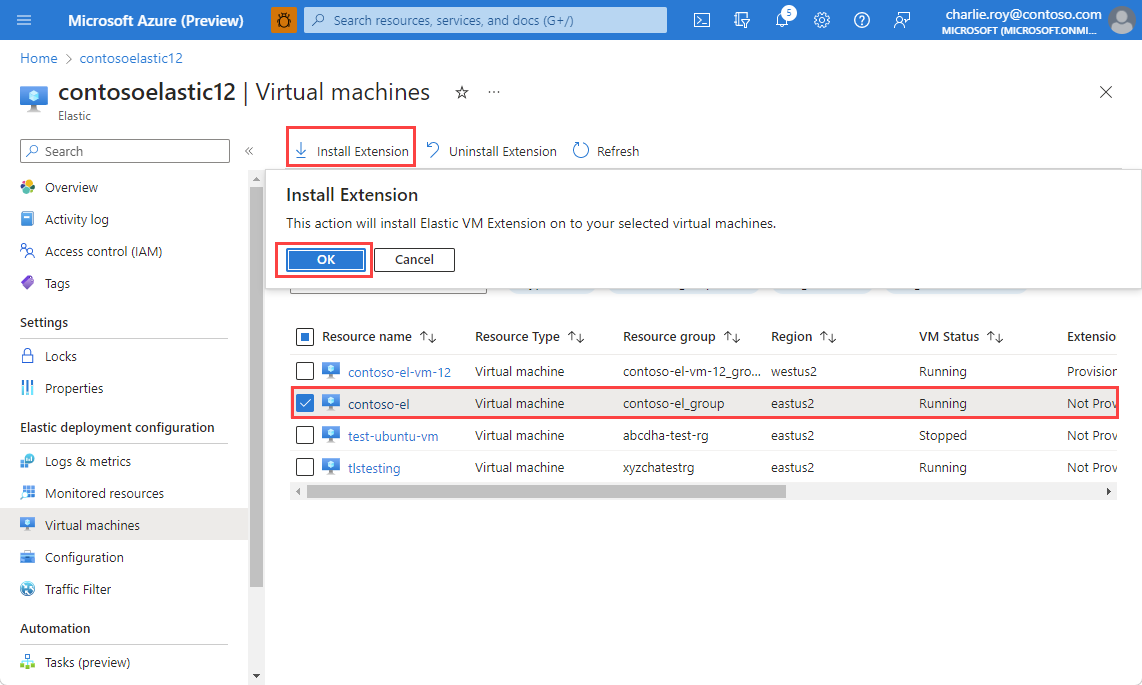
The portal asks for confirmation that you want to install the agent with the default authentication. Select OK to begin installation. The portal shows the status as Installing until the agent is installed and provisioned.
After the Elastic agent is installed, the status changes to Installed.
To see that the Elastic agent has been installed, select the virtual machine and navigate to Extensions.
To uninstall the Elastic agent on a virtual machine, select the virtual machine and Uninstall Extension.
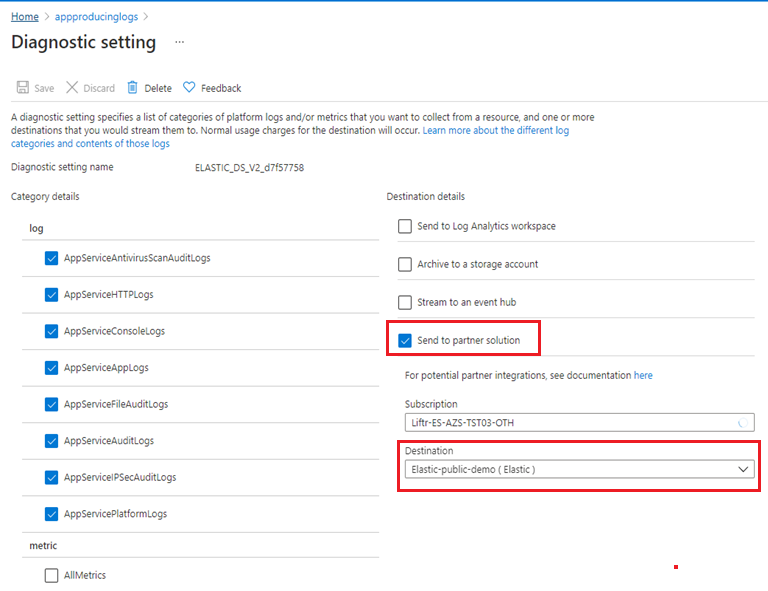
Configure diagnostic settings
To configure the diagnostic settings for a resource, select that resource. In the left pane, select Diagnostic settings.
In the destination details section, check the option to send to partner solutions to select Elastic as a destination target. The option is only available after an Elastic resource has been created.
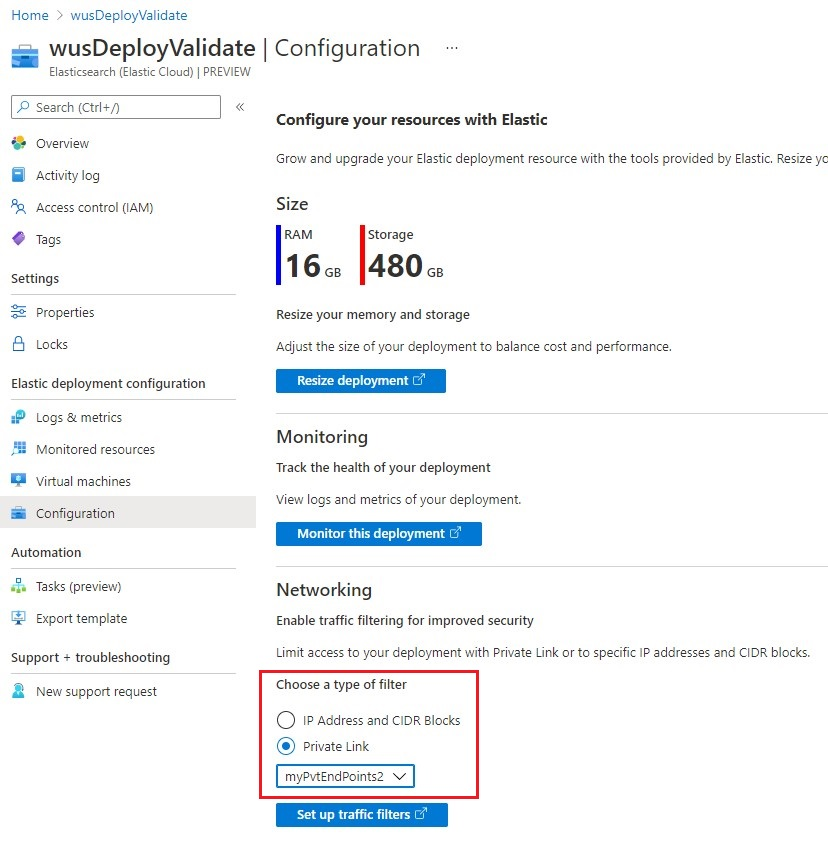
Private link management
You can limit network access to a private link. To enable private link access, select Configuration in the left navigation. Under Networking, select Private Link and the name of the private link.
Traffic filters
To manage how Elastic deployments can be accessed, you can set Traffic filters for Azure Private Links.
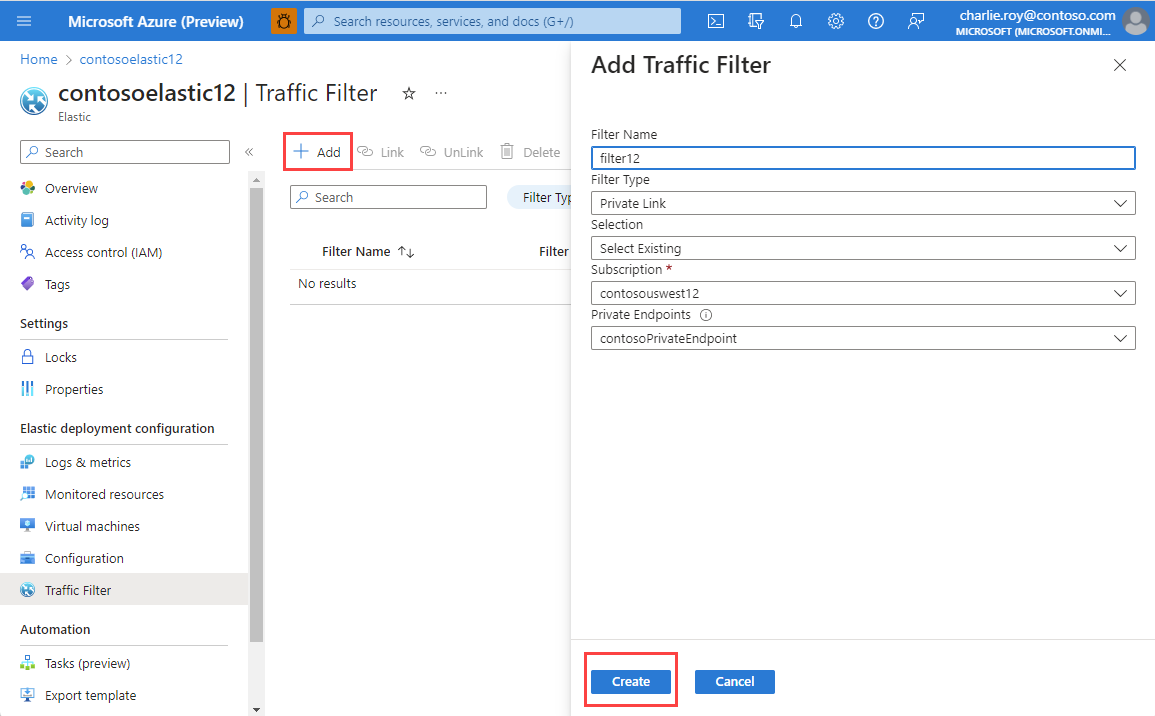
There are two types of filters available:
- IP traffic filter
- Private Link traffic filter
Select Add to set up and automatically associate a new traffic filter to and Elastic deployment.
To associate an already existing traffic filter to the current deployment, you select Link. The traffic filter must be in the same region as the deployment.
If a traffic filter is no longer needed, unlink it from deployment and then delete it.
Connected Elastic resources
To access all Elastic resources and deployments you have created using the Azure or Elastic portal experience, go to the Connected Elastic resources tab in any of your Azure Elastic resources.
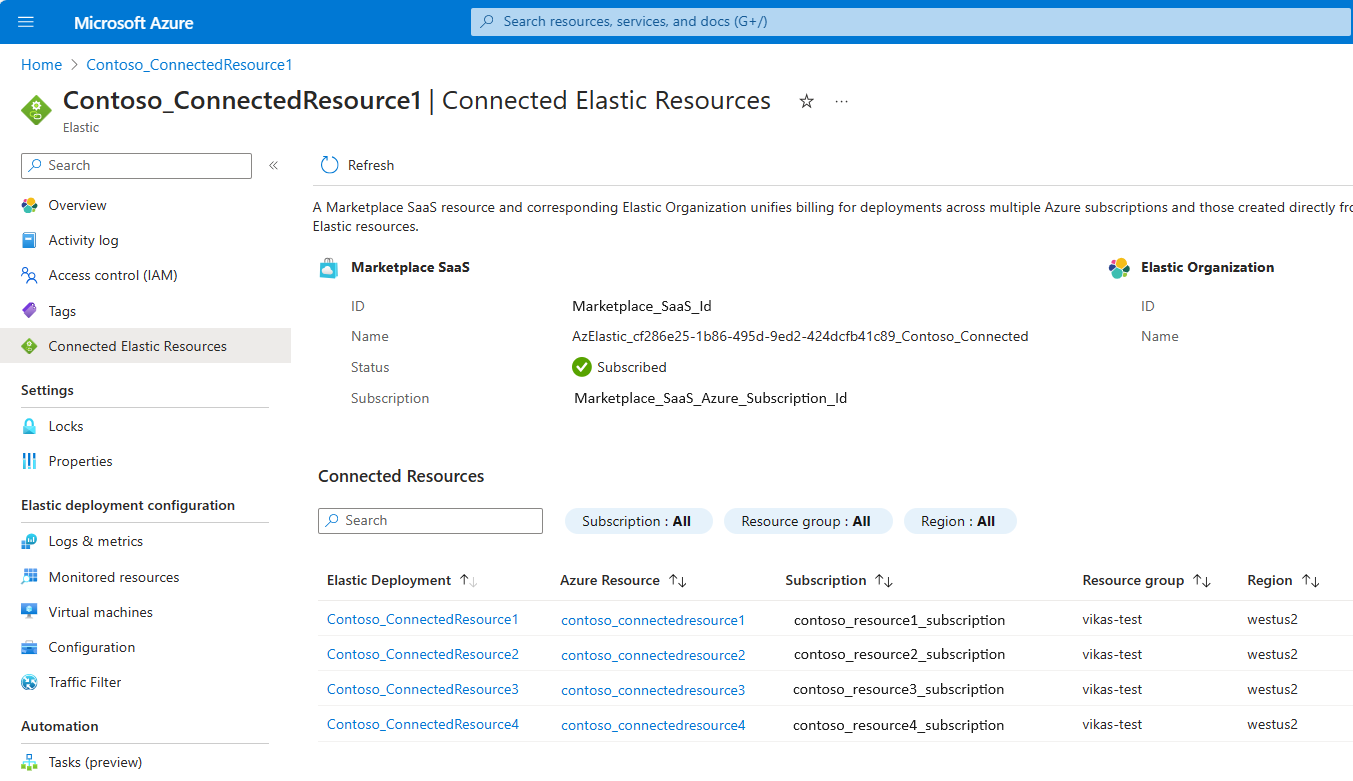
You can easily manage the corresponding Elastic deployments or Azure resources using the links, provided you have owner or contributor rights to those deployments and resources.
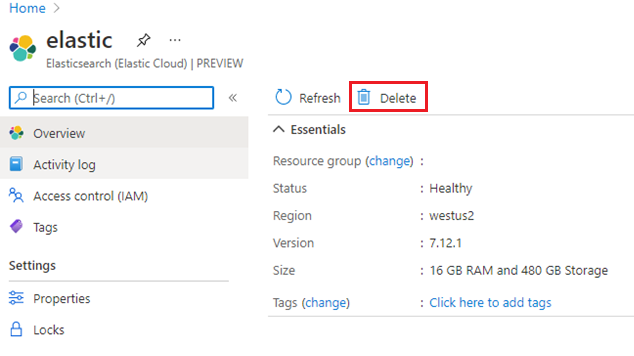
Delete Elastic resource
When you no longer need your Elastic resource, delete the resource in the Azure portal.
Important
Deleting an Elastic resource stops billing only for the corresponding Elastic deployment.
Important
A single Azure marketplace SaaS unifies billing for multiple Elastic deployments. If you are looking to completely stop billing for the marketplace SaaS, you need to delete all linked Elastic deployments (created from Azure or Elastic portal). Deleting the Azure subscription or resource group corresponding to marketplace SaaS does not guarantee billing stop, as this does not clean up corresponding Elastic deployments.
To delete the resource in Azure, select your Elastic resource. In Overview, select Delete. Confirm that you want to delete Elastic resource.
When the Elastic resource is deleted, logs are no longer sent to Elastic. All billing stops for Elastic through the Azure Marketplace.
Next steps
For help with troubleshooting, see Troubleshooting Elastic integration with Azure.
Get started with Elastic Cloud (Elasticsearch) - An Azure Native ISV Service on
Feedback
Coming soon: Throughout 2024 we will be phasing out GitHub Issues as the feedback mechanism for content and replacing it with a new feedback system. For more information see: https://aka.ms/ContentUserFeedback.
Submit and view feedback for