Receive Azure Storage in-place share with Microsoft Purview Data Sharing (preview)
Important
This feature is currently in preview. The Supplemental Terms of Use for Microsoft Azure Previews include additional legal terms that apply to Azure features that are in beta, in preview, or otherwise not yet released into general availability.
Microsoft Purview Data Sharing supports in-place data sharing from Azure Data Lake Storage (ADLS Gen2) to ADLS Gen2, and Blob storage account to Blob storage account. This article explains how to receive a share and access shared data.
Note
This feature has been updated in February 2023, and permissions needed to view and manage Data Sharing in Microsoft Purview have changed. Now only Reader permissions are needed on the collection where the shared data is housed. Refer to Microsoft Purview permissions to learn more about the Microsoft Purview collection and roles.
Prerequisites to receive shared data
Microsoft Purview prerequisites
- A Microsoft Purview account.
- A minimum of Data Reader role on a Microsoft Purview collection to use data sharing user experience in the Microsoft Purview governance portal. Refer to Microsoft Purview permissions to learn more about the Microsoft Purview collection and roles.
- To use the SDK, no Microsoft Purview permission is needed.
Azure Storage account prerequisites
Your Azure subscription must be registered for the AllowDataSharing preview feature. Follow the below steps using Azure portal or PowerShell.
- In the Azure portal, select the Azure subscription that you use to create the source and target storage account.
- From the left menu, select Preview features under Settings.
- Select AllowDataSharing and Register.
- Refresh the Preview features screen to verify the State is Registered. It could take 15 minutes to 1 hour for registration to complete.
- In addition, to use data share for storage accounts in East US, East US2, North Europe, South central US, West Central US, West Europe, West US, West US2, West US3: Select AllowDataSharingInHeroRegion and Register
For more information, see the register preview feature article.
The RegistrationState should be Registered. It could take 15 minutes to 1 hour for registration to complete. For more information, see the register preview feature article.
Note
The following are supported storage account configurations:
- Azure regions: Canada Central, Canada East, UK South, UK West, Australia East, Japan East, Korea South, and South Africa North
- Additional Azure Regions: East US, East US2, North Europe, Southcentral US, West Central US, West Europe, West US, West US2, West US3
- Performance: Standard
- Redundancy options: LRS
A target storage account created after the registration step is completed. The target storage account must be in the same Azure region as the source storage account. If you don't know the Azure region of the source storage account, you can find out during the share attaching step later in the process. Target storage account can be in a different Azure region from your Microsoft Purview account.
Important
The target storage account must be in the same Azure region as the source storage account.
You need the Contributor or Owner or Storage Blob Data Owner or Storage Blob Data Contributor role on the target storage account. You can find more details on the ADLS Gen2 or Blob storage data source pages.
If the target storage account is in a different Azure subscription than the one for Microsoft Purview account, the
Microsoft.Purviewresource provider needs to be registered in the Azure subscription where the Storage account is located. It's automatically registered at the time of share consumer attaching the share and if the user has permission to do the/register/actionoperation and therefore, Contributor or Owner roles to the subscription where the Storage account is located. This registration is only needed the first time when sharing or receiving data into a storage account in the Azure subscription.A storage account needs to be registered in the collection where you'll receive the share. For instructions to register, see the ADLS Gen2 or Blob storage data source pages. This step isn't required to use the SDK.
Latest version of the storage SDK, PowerShell, CLI and Azure Storage Explorer. Storage REST API version must be February 2020 or later.
Receive share
You can view your share invitations in any Microsoft Purview account. Open the Microsoft Purview governance portal by browsing directly to the classic portal or the new Microsoft Purview portal and selecting your Microsoft Purview account.
In the classic portal, select the Data Map icon from the left navigation. In the new portal, navigate to the Data Catalog application.
Select Share invites. If you received an email invitation, you can also select the View share invite link in the email to select a Microsoft Purview account.
If you're a guest user of a tenant, you'll be asked to verify your email address for the tenant before viewing share invitation for the first time. You can see our guide below for steps. Once verified, it's valid for 12 months.
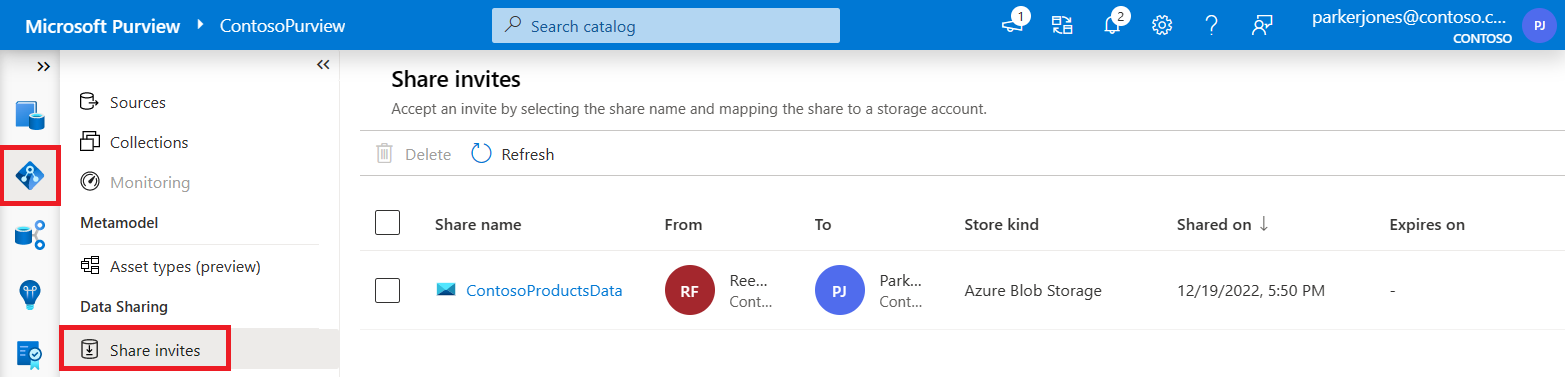
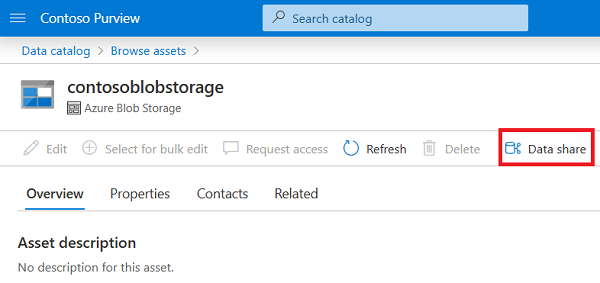
Alternately, within the Microsoft Purview portal, find the Azure Storage or Azure Data Lake Storage (ADLS) Gen 2 data asset you would like to receive the share into using either the data catalog search or browse. Select the Data Share button. You can see all the invitations in the Share invites tab.
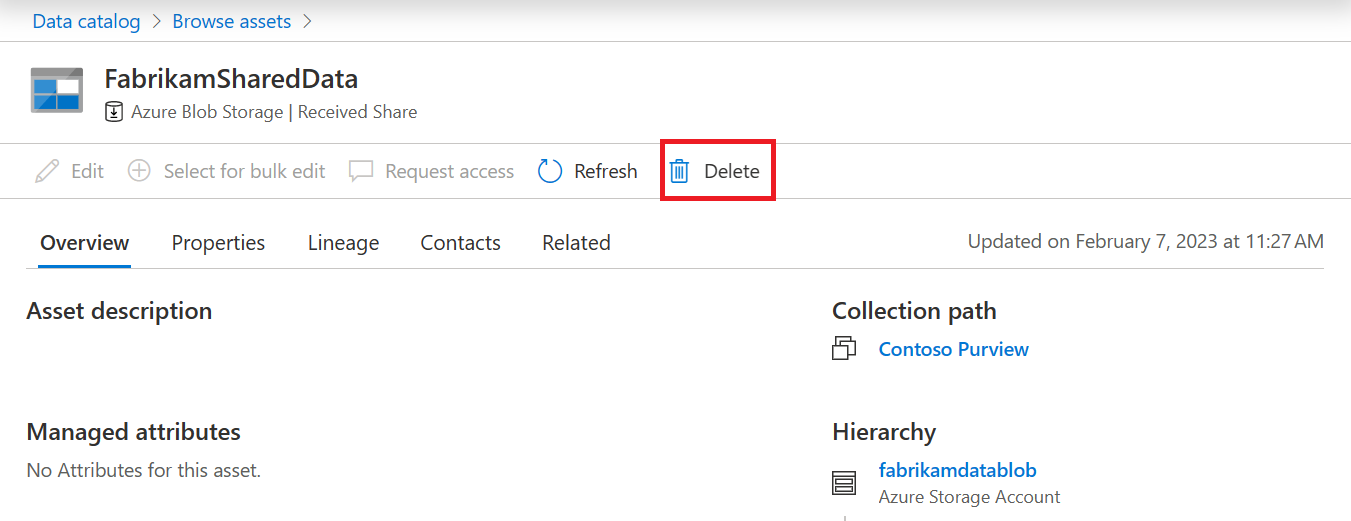
Select name of the share invite to view or configure.
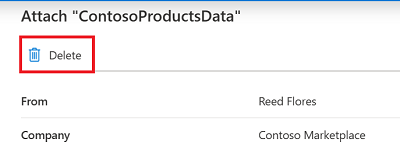
If you don't want to accept the invitation, select Delete.
Note
If you delete an invitation, if you want to accept the share in future it will need to be resent. To deselect the share without deleting select the Cancel button instead.
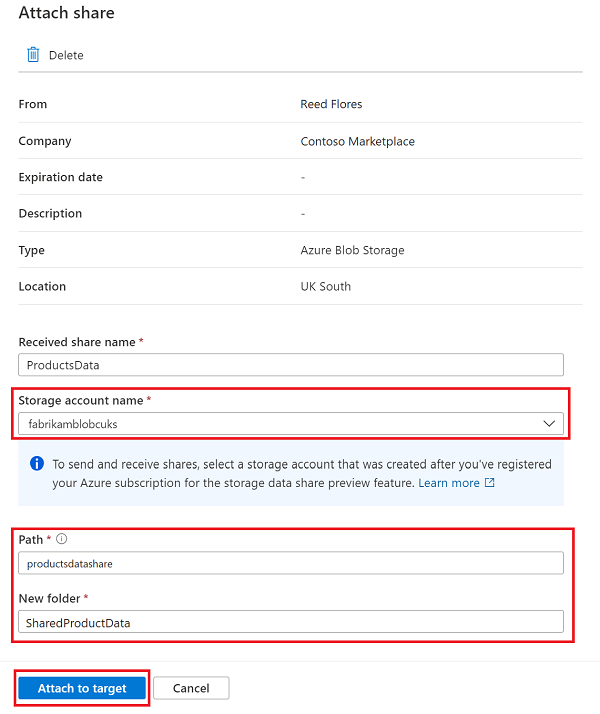
You can edit the Received share name if you like. Then select a Storage account name for a target storage account in the same region as the source. You can choose to Register a new storage account to attach the share in the drop-down as well.
Important
The target storage account needs to be in the same Azure region as the source storage account.
Configure the Path (either a new container name, or the name of an existing share container) and, New folder (a new folder name for the share within in your container).
Select Attach to target.
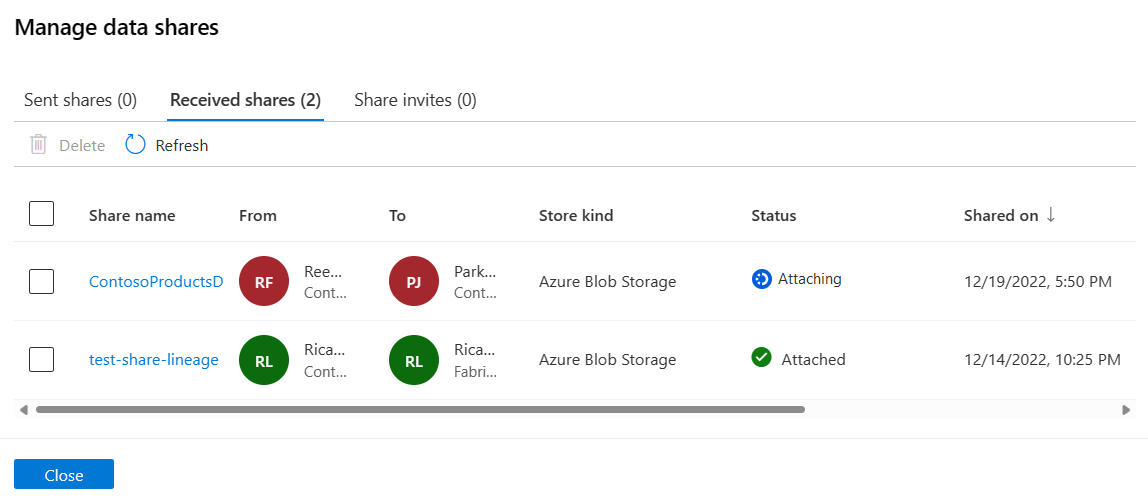
On the Manage data shares page, you'll see the new share with the status of Attaching until it has completed and is attached.
You can access shared data from the target storage account through Azure portal, Azure Storage Explorer, Azure Storage SDK, PowerShell or CLI. You can also analyze the shared data by connecting your storage account to Azure Synapse Analytics Spark or Databricks.


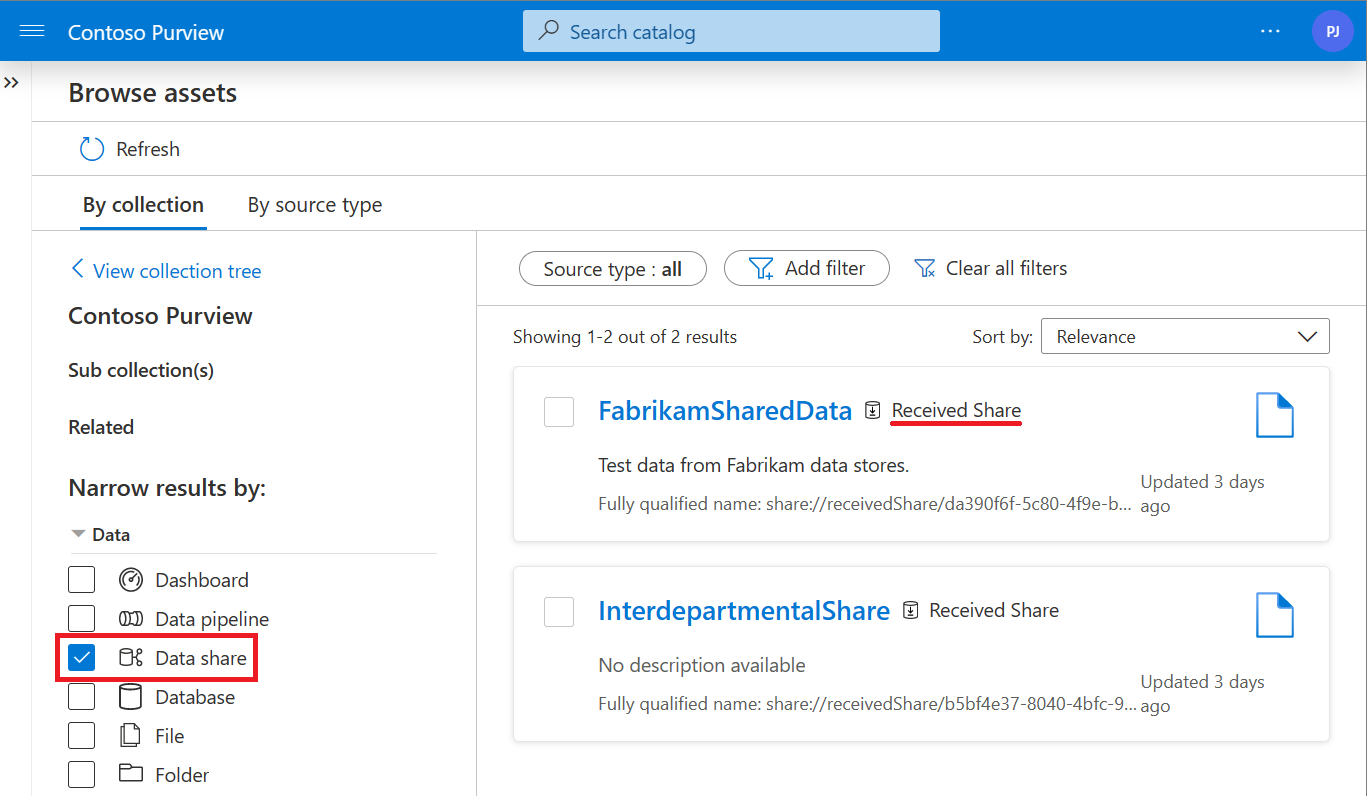
When a share is attached, a new asset of type received share is ingested into the Microsoft Purview catalog, in the same collection as the storage account to which you attached the share is registered. You can search or browse for it like any other asset.
Refer to Microsoft Purview Data Sharing lineage to learn more about share assets and data sharing lineage.
Note
Shares attached using the SDK without registering the storage account with Microsoft Purview will not be ingested into the catalog. User can register their storage account if desired. If a storage account is un-registered or re-registered to a different collection, share assets of that storage account continue to be in the initial collection.
Update received share
Once you attach a share, you can edit the received share by reattaching the share to a new storage account, or stop the sharing relationship by deleting the received share.
You can find and edit received share asset one of two ways:
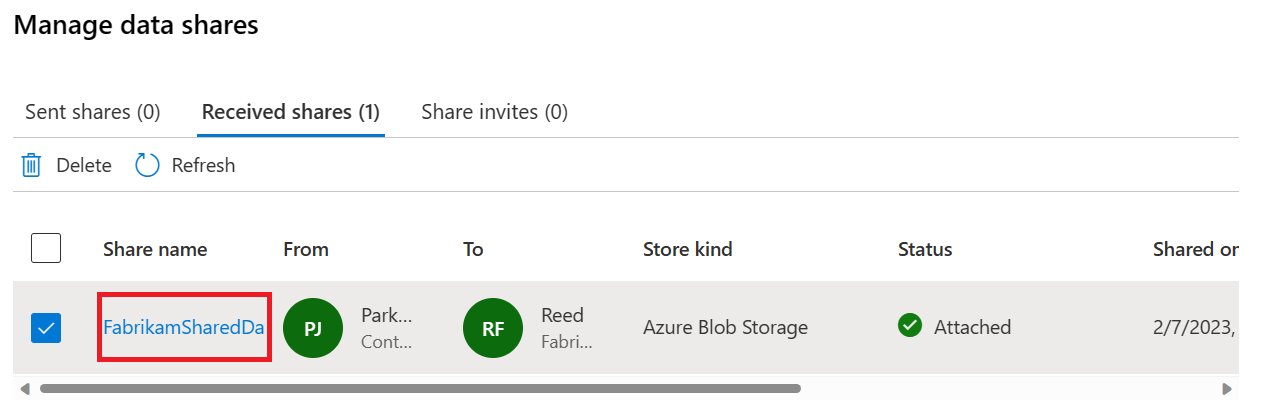
Access the blob storage or ADLS Gen2 asset where the data was received in the data catalog and open it, then select Data Share and Manage data shares. There you're able to see all the shares for that asset. Select the Received shares tab, select a share, and then select your share.
Search or browse the data catalog for data share assets and select your received share. Then select the Edit button.

Reattach share
After you've selected your data share to edit, you can reattach the share to a new storage account or path in your current storage account by selecting a storage account, providing a path, and providing the folder.

If you're updating the target, select Attach to target to save your changes. Attaching can take a couple minutes to complete after the process has been started.
Note
While re-attaching, if you selected a storage account that is registered to a collection that you don't have permissions to or a storage account that is not registered in Microsoft Purview, you will be shown the appropriate message. You will see the shared data in your target data store.
Delete received share
To delete a received share, select the share and then select Delete.
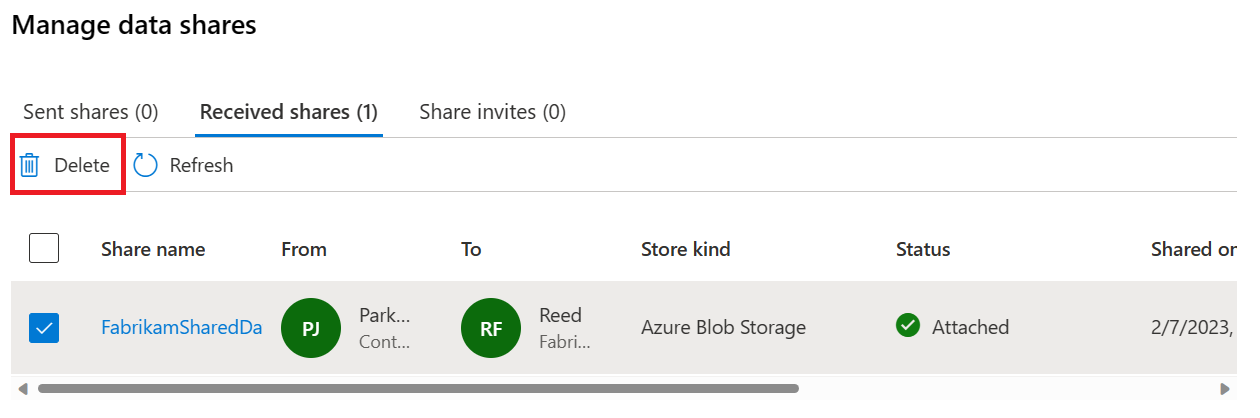
Deleting a received share stops the sharing relationship, and you won't be able to access shared data. Deleting a received share can take a few minutes.
Guest user verification
If you're a guest user in Azure, to be able to receive shares your account must first be associated with the Microsoft Entra ID. You can start this process from within Microsoft Purview.
In the Microsoft Purview Governance Portal, select the Data Map and then Share invites.
You'll see text indicating that you need to be associated with Microsoft Entra ID. Select the Get verification code button.
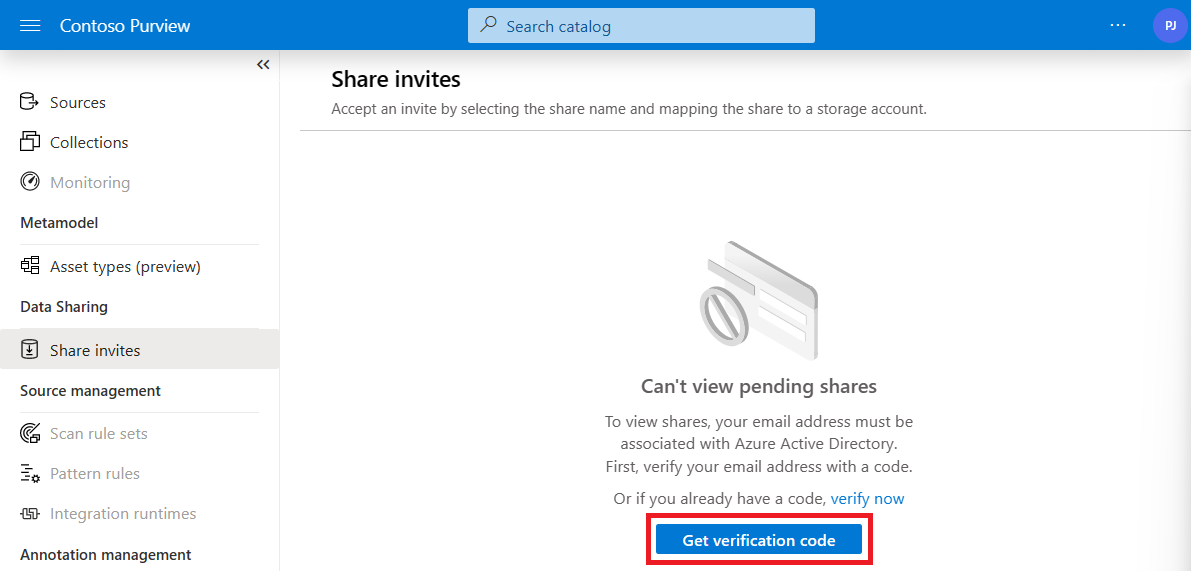
You'll receive an email from Microsoft Azure with the verification code. Copy it.
Return to the Share invites page in the Microsoft Purview Governance Portal, select Verify, and enter the code you received.
Troubleshoot
Here are some common issues for receiving share and how to troubleshoot them.
Can't create Microsoft Purview account
If you're getting an error related to quota when creating a Microsoft Purview account, it means your organization has exceeded Microsoft Purview service limit. If you require an increase in limit, contact support.
Can't find my Storage account asset in the Catalog
- Data source isn't registered in Microsoft Purview. Refer to the registration steps for Blob Storage and ADLSGen2 respectively. Performing a scan isn't necessary.
- Data source is registered to a Microsoft Purview collection that you don't have a minimum of Data Reader permission to. Refer to Microsoft Purview catalog permissions and reach out to your collection admin for access.
Can't view list of shares in the storage account asset
- Permission issue to the data store that you want to see shares for. You need a minimum of Reader role on the source storage account to see a read-only view of sent shares and received shares. You can find more details on the ADLS Gen2 or Blob storage data source page.
Can't view received share in the storage account asset
- You may have selected a different storage account to attach the share to, that may not be registered in Microsoft Purview or maybe registered to a collection you don't have permissions to. Refer to the registration steps for Blob Storage and ADLSGen2 respectively. Refer to Microsoft Purview catalog permissions and reach out to your collection admin for access to collections.
Can't view share invite
If you've been notified that you've received a share, but can't view share invite in your Microsoft Purview account, it could be due to the following reasons:
- You don't have a minimum of Data Reader role to any collections in this Microsoft Purview account. Contact your Microsoft Purview Collection Admin to grant you access to Data Reader role to view, accept and configure the received share.
- Share invitation is sent to your email alias or an email distribution group instead of your Azure sign-in email. Contact your data provider and ensure that they've sent the invitation to your Azure sign-in e-mail address.
- Share has already been accepted. If you've already accepted the share, it will no longer show up in Share invites tab. Select Received shares in any Storage account that you have permissions to and see your active shares.
- You're a guest user of the tenant. If you're a guest user of a tenant, you need to verify your email address for the tenant in order to view a share invitation for the first time. Once verified, it's valid for 12 months.
Can't see target storage account in the list when attaching a share
When you attach a share to a target, if your storage account isn't listed for you to select, it's likely due to the following reasons:
- You don't have required permissions to the storage account. Check prerequisites for details on required storage permissions.
Failed to attach share
If you failed to attach a share, it's likely due to the following reasons:
- Permission issue to the target data store. Check prerequisites for required data store permissions.
- The storage account isn't supported. Microsoft Purview Data share only supports storage accounts with specific configurations.
- The Path you specified includes container created outside of Microsoft Purview Data Sharing. You can only receive data into containers created while attaching.
- The New Folder you specified to receive storage data isn't empty.
- Source and target storage account is the same. Sharing from the same source storage account to the same target isn't supported.
- Exceeding limit. Source storage account can support up to 20 targets, and target storage account can support up to 100 sources. If you require an increase in limit, contact support.
Can't access shared data in the target data store
If you can't access shared data, it's likely due to the following reasons:
- After share attaching is successful, it may take some time for the data to appear in the target data store. Try again in a few minutes. Likewise, after you delete a share, it may take a few minutes for the data to disappear in the target data store.
- You're accessing shared data using a storage API version prior to February 2020. Only storage API version February 2020 and later are supported for accessing shared data. Ensure you're using the latest version of the storage SDK, PowerShell, CLI and Azure Storage Explorer.
- You're accessing shared data using an analytics tool that uses a storage API version prior to February 2020. You can access shared data from Azure Synapse Analytics Spark and Databricks. You won't be able to access shared data using Azure Data Factory, Power BI or AzCopy.
Next steps
Feedback
Coming soon: Throughout 2024 we will be phasing out GitHub Issues as the feedback mechanism for content and replacing it with a new feedback system. For more information see: https://aka.ms/ContentUserFeedback.
Submit and view feedback for