Tutorial: Configure peering between Azure Route Server and Network Virtual Appliance
This tutorial shows you how to deploy an Azure Route Server into a virtual network and establish a BGP peering connection with a Quagga network virtual appliance (NVA). You deploy a virtual network with four subnets. One subnet is dedicated to the Route Server and another subnet dedicated to the Quagga NVA. The Quagga NVA will be configured to exchange routes with the Route Server. Lastly, you'll test to make sure routes are properly exchanged on the Route Server and Quagga NVA.
In this tutorial, you learn how to:
- Create a virtual network with four subnets
- Deploy an Azure Route Server
- Deploy a virtual machine running Quagga
- Configure Route Server peering
- Check learned routes
If you don't have an Azure subscription, create a free account before you begin.
Prerequisites
- An active Azure subscription
Sign in to Azure
Sign in to the Azure portal.
Create a virtual network
You need a virtual network to deploy both the Route Server and the Quagga NVA. Azure Route Server must be deployed in a dedicated subnet called RouteServerSubnet.
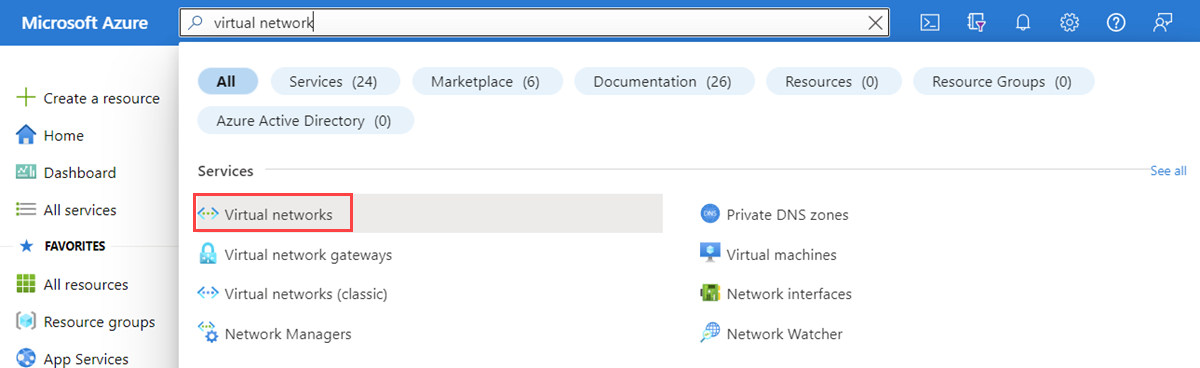
On the Azure portal home page, search for virtual network, and select Virtual networks from the search results.
On the Virtual networks page, select + Create.
On the Basics tab of Create virtual network, enter or select the following information:
Settings Value Project details Subscription Select your Azure subscription. Resource group Select Create new. In Name enter myRouteServerRG. Select OK. Instance details Name Enter myVirtualNetwork. Region Select East US. 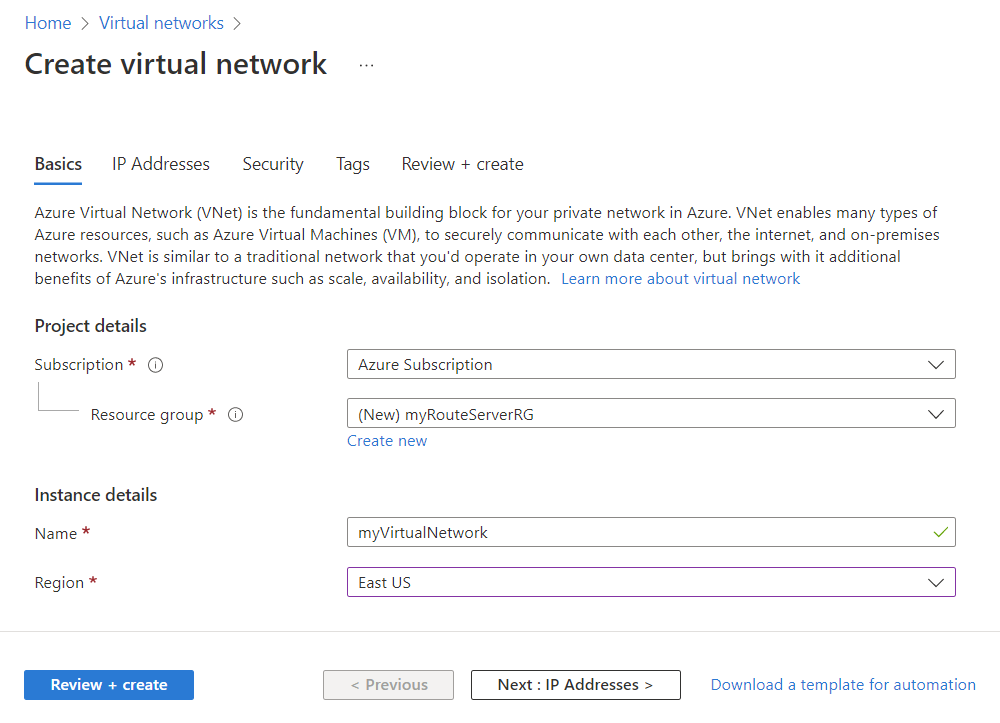
Select IP Addresses tab or Next : IP Addresses > button.
On the IP Addresses tab, configure IPv4 address space to 10.1.0.0/16, then configure the following subnets:
Subnet name Subnet address range RouteServerSubnet 10.1.1.0/25 subnet1 10.1.2.0/24 subnet2 10.1.3.0/24 subnet3 10.1.4.0/24 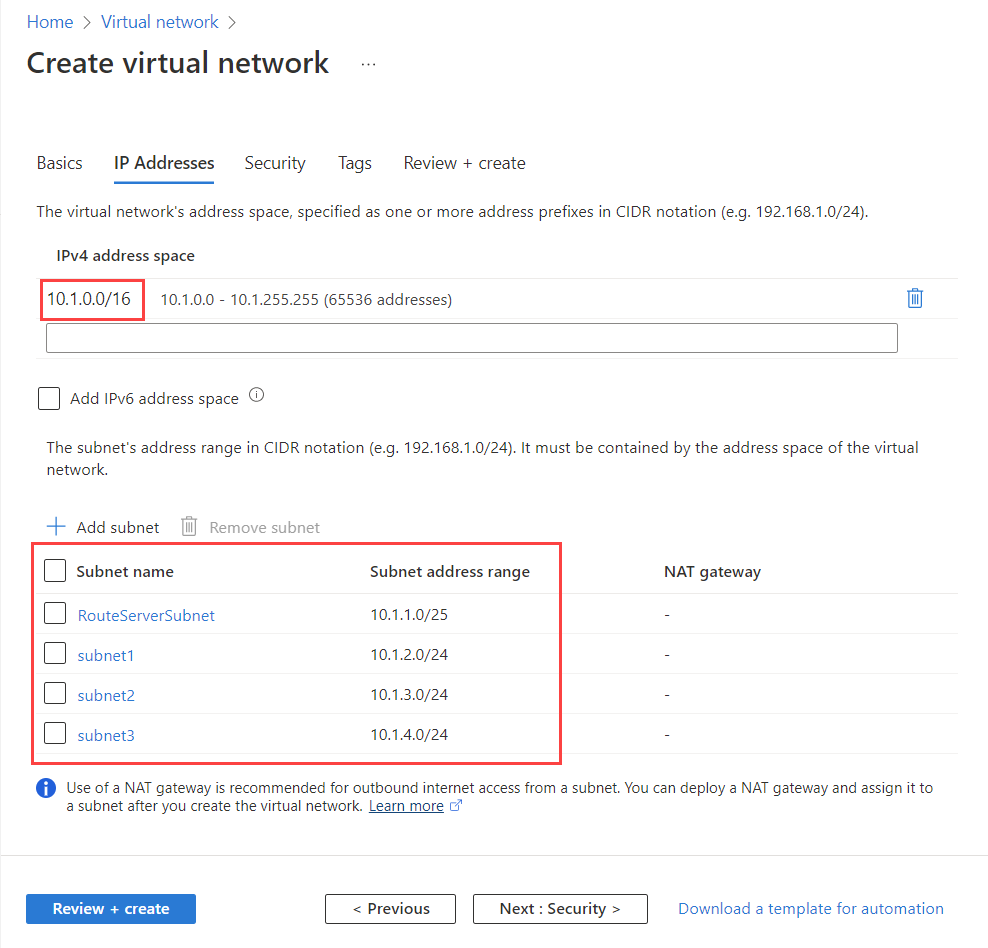
Select Review + create and then select Create after the validation passes.
Create the Azure Route Server
The Route Server is used to communicate with your NVA and exchange virtual network routes using a BGP peering connection.
On the Azure portal, search for route server, and select Route Servers from the search results.
On the Route Servers page, select + Create.
On the Basics tab of Create a Route Server page, enter or select the following information:
Settings Value Project details Subscription Select your Azure subscription that you used for the virtual network. Resource group Select myRouteServerRG. Instance details Name Enter myRouteServer. Region Select East US region. Configure virtual networks Virtual Network Select myVirtualNetwork. Subnet Select RouteServerSubnet (10.1.0.0/25). This subnet is a dedicated Route Server subnet. Public IP address Public IP address Select Create new, and then enter myRouteServer-ip. This Standard IP address ensures connectivity to the backend service that manages the Route Server configuration. 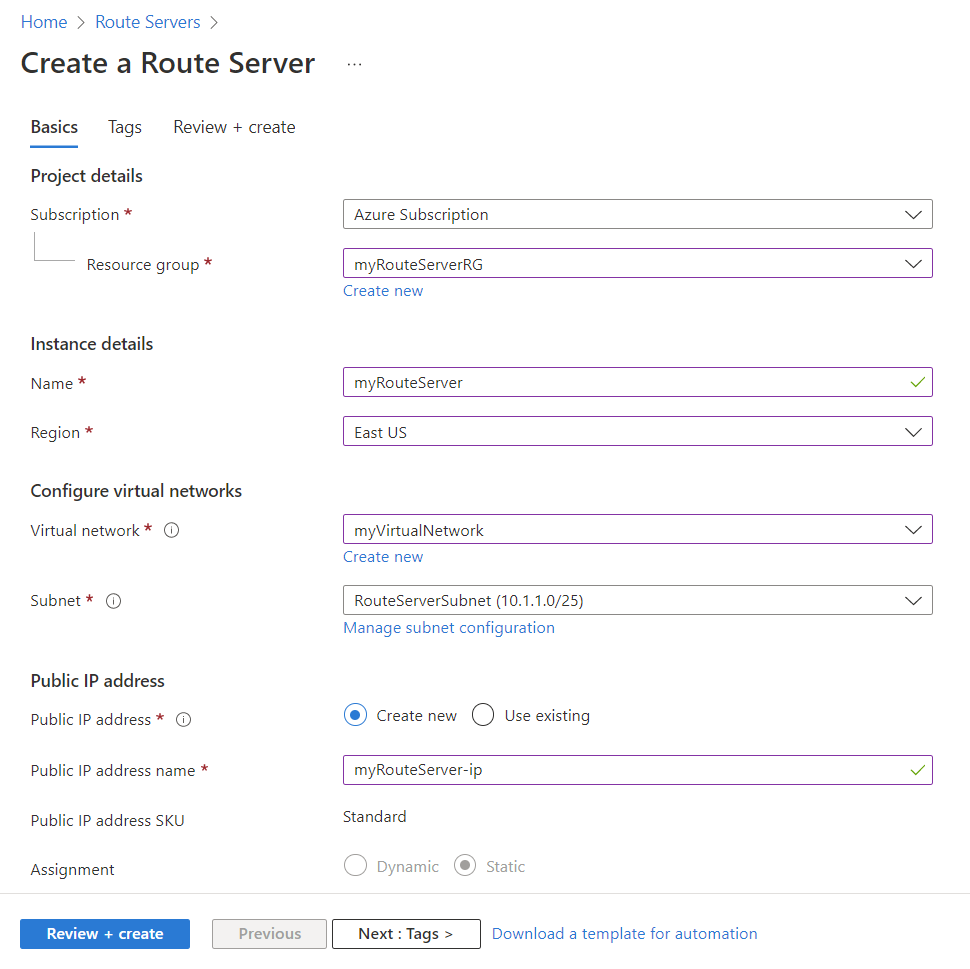
Select Review + create and then select Create after validation passes. The Route Server takes about 15 minutes to deploy.
Create Quagga network virtual appliance
To configure the Quagga network virtual appliance, you need to deploy a Linux virtual machine, and then configure it with this script.
Create Quagga virtual machine (VM)
On the Azure portal, search for virtual machine, and select Virtual machines from the search results.
Select Create, then select Azure virtual machine.
On the Basics tab of Create a virtual machine, enter or select the following information:
Settings Value Project details Subscription Select your Azure subscription that you used for the virtual network. Resource group Select myRouteServerRG. Instance details Virtual machine name Enter Quagga. Region Select (US) East US. Availability options Select No infrastructure required. Security type Select Standard. Image Select an Ubuntu image. This tutorial uses Ubuntu 18.04 LTS - Gen 2 image. Size Select Standard_B2s - 2vcpus, 4GiB memory. Administrator account Authentication type Select Password. Username Enter azureuser. Don't use quagga for the username as it causes the setup to fail in a later step. Password Enter a password of your choosing. Confirm password Reenter the password. Inbound port rules Public inbound ports Select Allow selected ports. Select inbound ports Select SSH (22). 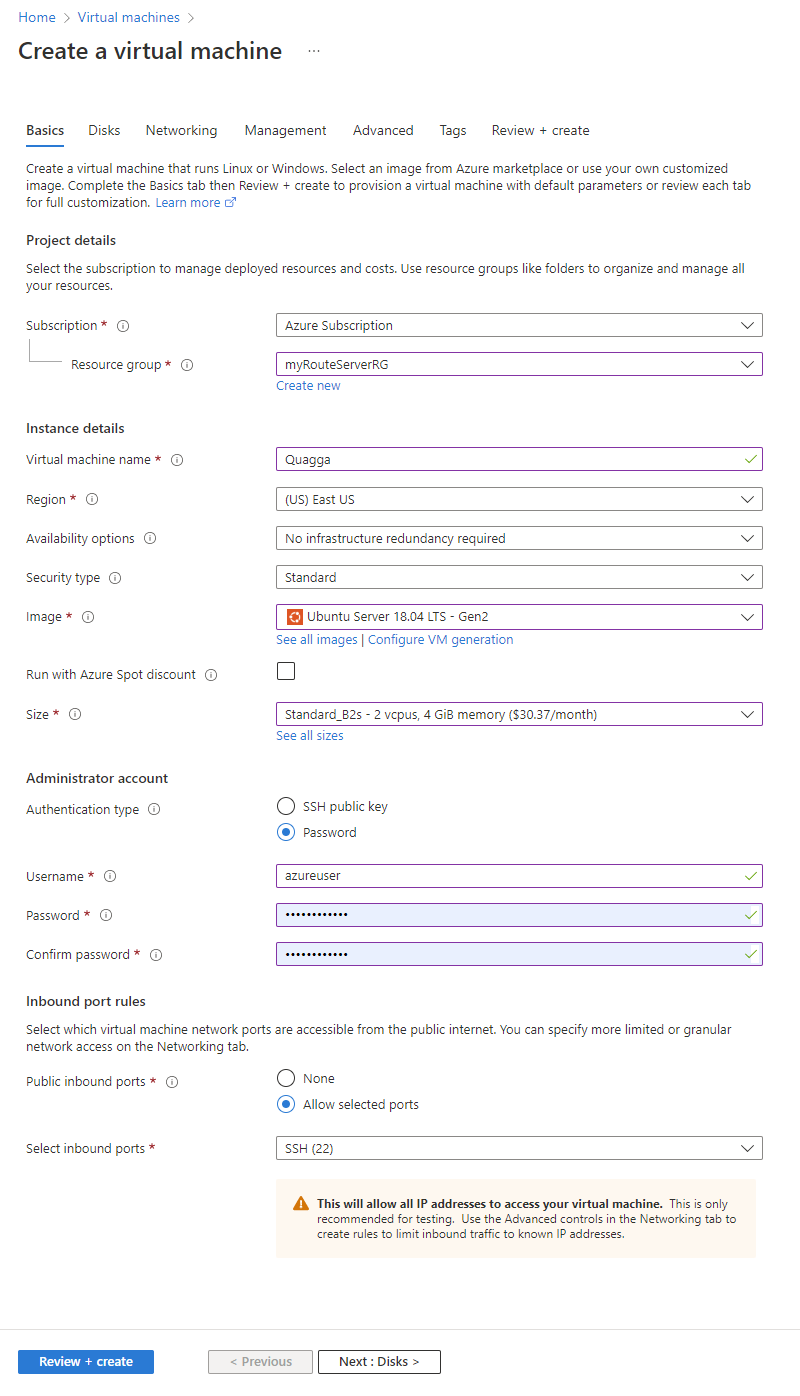
On the Networking tab, select the following network settings:
Settings Value Virtual network Select myVirtualNetwork. Subnet Select subnet3 (10.1.4.0/24). Public IP Leave as default. NIC network security group Select Basic. Public inbound ports Select Allow selected ports. Select inbound ports Select SSH (22). 
Select Review + create and then Create after validation passes.
Once the virtual machine has deployed, go to the Networking page of Quagga virtual machine and select the network interface.
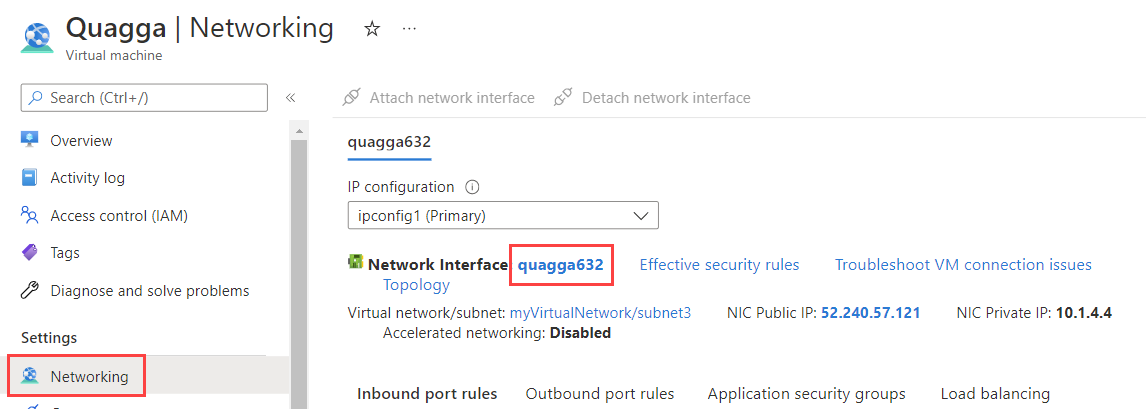
Select IP configuration under Settings and then select ipconfig1.
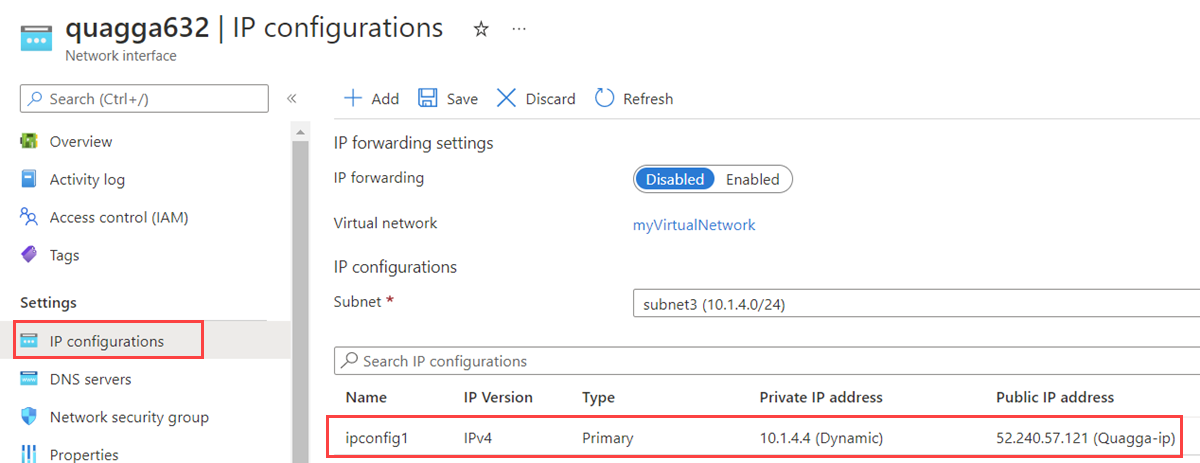
Under Private IP address Settings, change the Assignment from Dynamic to Static, and then change the IP address from 10.1.4.4 to 10.1.4.10. The script that you run in a later step uses 10.1.4.10. If you want to use a different IP address, ensure to update the IP in the script.
Take note of the public IP, and select Save to update the IP configurations of the virtual machine.


Configure Quagga virtual machine
If you are on a Mac or Linux machine, open a Bash prompt. If you are on a Windows machine, open a PowerShell prompt.
At your prompt, open an SSH connection to the Quagga VM by executing the following command. Replace the IP address with the one you took note of in the previous step.
ssh azureuser@52.240.57.121When prompted, enter the password you previously created for the Quagga VM.
Once logged in, enter
sudo suto switch to super user to avoid errors running the script.Copy and paste the following commands into the SSH session. These commands download and install this script to configure the virtual machine with Quagga along with other network settings.
wget "raw.githubusercontent.com/Azure/azure-quickstart-templates/master/quickstarts/microsoft.network/route-server-quagga/scripts/quaggadeploy.sh"

chmod +x quaggadeploy.sh

./quaggadeploy.sh
Configure Route Server peering
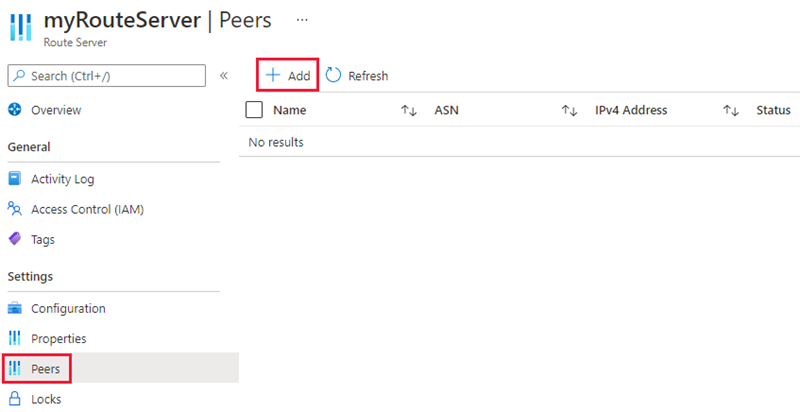
Go to the Route Server you created in the previous step.
Select Peers under Settings. Then, select + Add to add a new peer.
On the Add Peer page, enter the following information, and then select Add to save the configuration:
Setting Value Name Enter Quagga. This name is used to identify the peer. ASN Enter 65001. This ASN is defined in the script for Quagga NVA. IPv4 Address Enter 10.1.4.10. This IPv4 is the private IP of the Quagga NVA. 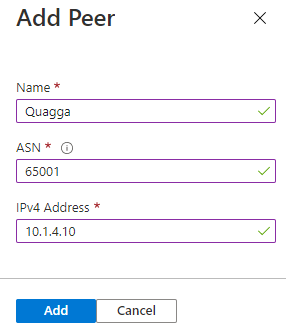
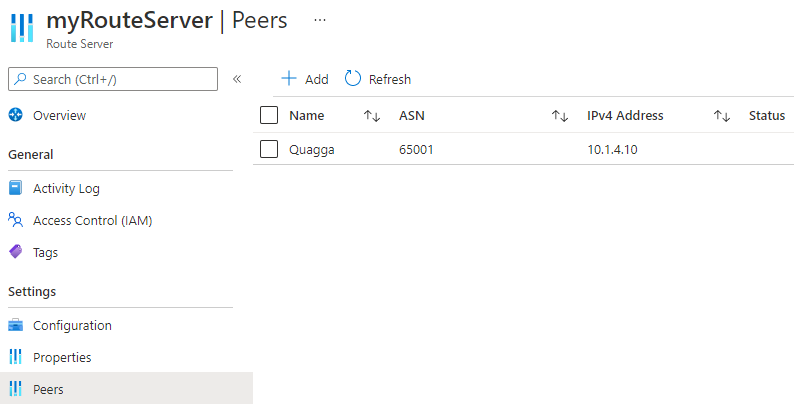
Once you add the Quagga NVA as a peer, the Peers page should look like this:
Check learned routes
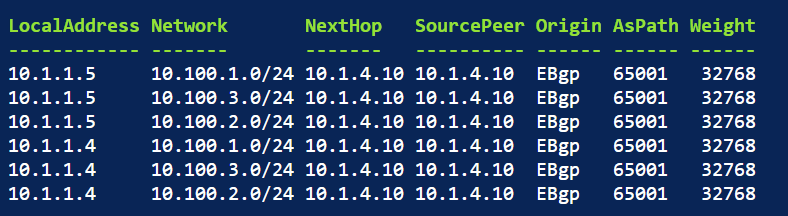
To check the routes learned by the Route Server, use this command in Azure portal Cloud Shell:
$routes = @{
    RouteServerName = 'myRouteServer'
    ResourceGroupName = 'myRouteServerRG'
    PeerName = 'Quagga'
}
Get-AzRouteServerPeerLearnedRoute @routes | ft
The output should look like the following output:
To check the routes learned by the Quagga NVA, enter
vtyshand then entershow ip bgpon the NVA. The output should look like the following output:root@Quagga:/home/azureuser# vtysh Hello, this is Quagga (version 1.2.4). Copyright 1996-2005 Kunihiro Ishiguro, et al. Quagga# show ip bgp BGP table version is 0, local router ID is 10.1.4.10 Status codes: s suppressed, d damped, h history, * valid, > best, = multipath, i internal, r RIB-failure, S Stale, R Removed Origin codes: i - IGP, e - EGP, ? - incomplete Network Next Hop Metric LocPrf Weight Path 10.1.0.0/16 10.1.1.4 0 65515 i 10.1.1.5 0 65515 i *> 10.100.1.0/24 0.0.0.0 0 32768 i *> 10.100.2.0/24 0.0.0.0 0 32768 i *> 10.100.3.0/24 0.0.0.0 0 32768 i
Clean up resources
When no longer needed, you can delete all resources created in this tutorial by following these steps:
On the Azure portal menu, select Resource groups.
Select the myRouteServerRG resource group.
Select Delete a resource group.
Select Apply force delete for selected Virtual machines and Virtual machine scale sets.
Enter myRouteServerRG and select Delete.
Next steps
In this tutorial, you learned how to create and configure an Azure Route Server with a network virtual appliance (NVA). To learn more about Route Servers, see Azure Route Server frequently asked questions (FAQs).
Feedback
Coming soon: Throughout 2024 we will be phasing out GitHub Issues as the feedback mechanism for content and replacing it with a new feedback system. For more information see: https://aka.ms/ContentUserFeedback.
Submit and view feedback for