Organize subscriptions into management groups and assign roles to users
Manage your organization’s security posture at scale by applying security policies to all Azure subscriptions linked to your Microsoft Entra tenant.
For visibility into the security posture of all subscriptions linked to a Microsoft Entra tenant, you'll need an Azure role with sufficient read permissions assigned on the root management group.
Organize your subscriptions into management groups
Overview of management groups
Use management groups to efficiently manage access, policies, and reporting on groups of subscriptions, and effectively manage the entire Azure estate by performing actions on the root management group. You can organize subscriptions into management groups and apply your governance policies to the management groups. All subscriptions within a management group automatically inherit the policies applied to the management group.
Each Microsoft Entra tenant is given a single top-level management group called the root management group. This root management group is built into the hierarchy to have all management groups and subscriptions fold up to it. This group allows global policies and Azure role assignments to be applied at the directory level.
The root management group is created automatically when you do any of the following actions:
- In the Azure portal, select Management Groups.
- Create a management group with an API call.
- Create a management group with PowerShell. For PowerShell instructions, see Create management groups for resource and organization management.
Management groups aren't required to onboard Defender for Cloud, but we recommend creating at least one so that the root management group gets created. After the group is created, all subscriptions under your Microsoft Entra tenant will be linked to it.
For a detailed overview of management groups, see the Organize your resources with Azure management groups article.
View and create management groups in the Azure portal
Sign in to the Azure portal.
Search for and select Management Groups.
To create a management group, select Create, enter the relevant details, and select Submit.

The Management Group ID is the directory unique identifier that is used to submit commands on this management group. This identifier isn't editable after creation as it is used throughout the Azure system to identify this group.
The display name field is the name that is displayed within the Azure portal. A separate display name is an optional field when creating the management group and can be changed at any time.

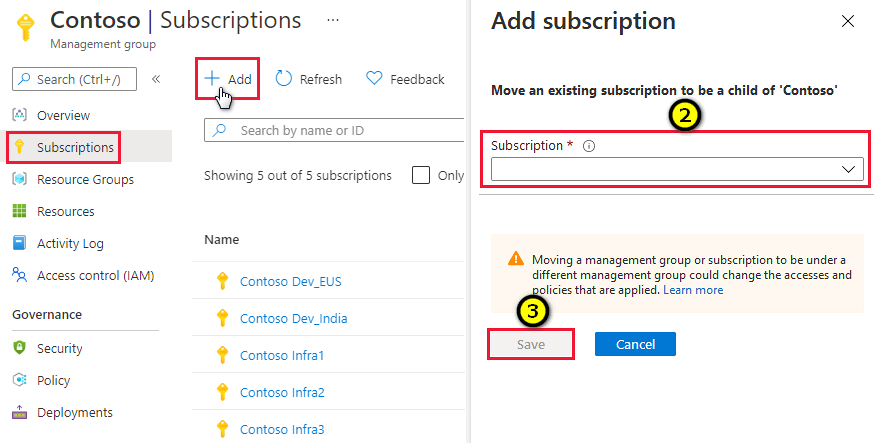
Add subscriptions to a management group
You can add subscriptions to the management group that you created.
Sign in to the Azure portal.
Search for and select Management Groups.
Select the management group for your subscription.
When the group's page opens, select Subscriptions.
From the subscriptions page, select Add, then select your subscriptions and select Save. Repeat until you've added all the subscriptions in the scope.
Important
Management groups can contain both subscriptions and child management groups. When you assign a user an Azure role to the parent management group, the access is inherited by the child management group's subscriptions. Policies set at the parent management group are also inherited by the children.

Assign Azure roles to other users
Assign Azure roles to users through the Azure portal
Sign in to the Azure portal.
Search for and select Management Groups.
Select the relevant management group.
Select Access control (IAM), open the Role assignments tab and select Add > Add role assignment.

From the Add role assignment page, select the relevant role.

From the Members tab, select + Select members and assign the role to the relevant members.
On the Review + assign tab, select Review + assign to assign the role.


Assign Azure roles to users with PowerShell
Install Azure PowerShell.
Run the following commands:
# Login to Azure as a Global Administrator user
Connect-AzAccount
When prompted, sign in with global admin credentials.
Grant reader role permissions by running the following command:
# Add Reader role to the required user on the Root Management Group
# Replace "user@domian.com” with the user to grant access to
New-AzRoleAssignment -SignInName "user@domain.com" -RoleDefinitionName "Reader" -Scope "/"
To remove the role, use the following command:
Remove-AzRoleAssignment -SignInName "user@domain.com" -RoleDefinitionName "Reader" -Scope "/"
Remove elevated access
Once the Azure roles are assigned to the users, the tenant administrator should remove itself from the user access administrator role.
Sign in to the Azure portal.
In the navigation list, select Microsoft Entra ID and then select Properties.
Under Access management for Azure resources, set the switch to No.
To save your setting, select Save.
Next steps
On this page, you learned how to organize subscriptions into management groups and assign roles to users. For related information, see:
Feedback
Coming soon: Throughout 2024 we will be phasing out GitHub Issues as the feedback mechanism for content and replacing it with a new feedback system. For more information see: https://aka.ms/ContentUserFeedback.
Submit and view feedback for