Create and use Microsoft Sentinel automation rules to manage response
This article explains how to create and use automation rules in Microsoft Sentinel to manage and orchestrate threat response, in order to maximize your SOC's efficiency and effectiveness.
In this article you'll learn how to define the triggers and conditions that will determine when your automation rule will run, the various actions that you can have the rule perform, and the remaining features and functionalities.
Important
Noted features of automation rules are currently in PREVIEW. See the Supplemental Terms of Use for Microsoft Azure Previews for additional legal terms that apply to Azure features that are in beta, preview, or otherwise not yet released into general availability.
Microsoft Sentinel is available as part of the public preview for the unified security operations platform in the Microsoft Defender portal. For more information, see Microsoft Sentinel in the Microsoft Defender portal.
Design your automation rule
Before you create your automation rule, we recommend that you determine its scope and design, including the trigger, conditions, and actions that will make up your rule.
Determine the scope
The first step in designing and defining your automation rule is figuring out which incidents or alerts you want it to apply to. This determination will directly impact how you create the rule.
You also want to determine your use case. What are you trying to accomplish with this automation? Consider the following options:
- Create tasks for your analysts to follow in triaging, investigating, and remediating incidents.
- Suppress noisy incidents. (Alternatively, use other methods to handle false positives in Microsoft Sentinel.)
- Triage new incidents by changing their status from New to Active and assigning an owner.
- Tag incidents to classify them.
- Escalate an incident by assigning a new owner.
- Close resolved incidents, specifying a reason and adding comments.
- Analyze the incident's contents (alerts, entities, and other properties) and take further action by calling a playbook.
- Handle or respond to an alert without an associated incident.
Determine the trigger
Do you want this automation to be activated when new incidents or alerts are created? Or anytime an incident gets updated?
Automation rules are triggered when an incident is created or updated or when an alert is created. Recall that incidents include alerts, and that both alerts and incidents can be created by analytics rules, of which there are several types, as explained in Detect threats with built-in analytics rules in Microsoft Sentinel.
The following table shows the different possible scenarios that will cause an automation rule to run.
| Trigger type | Events that cause the rule to run |
|---|---|
| When incident is created | Unified security operations platform in Microsoft Defender: Microsoft Sentinel not onboarded to unified platform: |
| When incident is updated | |
| When alert is created |
Create your automation rule
Most of the following instructions apply to any and all use cases for which you'll create automation rules.
If you're looking to suppress noisy incidents, try handling false positives.
If you want to create an automation rule to apply to a specific analytics rule, see Set automated responses and create the rule.
To create your automation rule:
For Microsoft Sentinel in the Azure portal, select the Configuration > Automation page. For Microsoft Sentinel in the Defender portal, select Microsoft Sentinel > Configuration > Automation.
From the Automation page in the Microsoft Sentinel navigation menu, select Create from the top menu and choose Automation rule.
The Create new automation rule panel opens. In the Automation rule name field, enter a name for your rule.


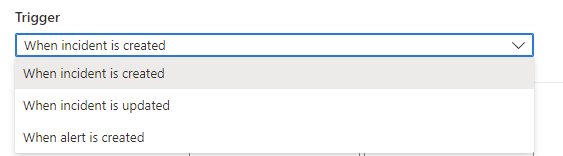
Choose your trigger
From the Trigger drop-down, select the appropriate trigger according to the circumstance for which you're creating the automation rule—When incident is created, When incident is updated, or When alert is created.
Define conditions
Use the options in the Conditions area to define conditions for your automation rule.
Rules you create for when an alert is created support only the If Analytic rule name property in your condition. Select whether you want the rule to be inclusive (Contains) or exclusive (Does not contain), and then select the analytic rule name from the drop-down list.
Analytic rule name values include only analytics rules, and don't include other types of rules, such as threat intelligence or anomaly rules.
Rules you create for when an incident is created or updated support a large variety of conditions, depending on your environment. These options start with whether your workspace is onboarded to the unified security operations platform:
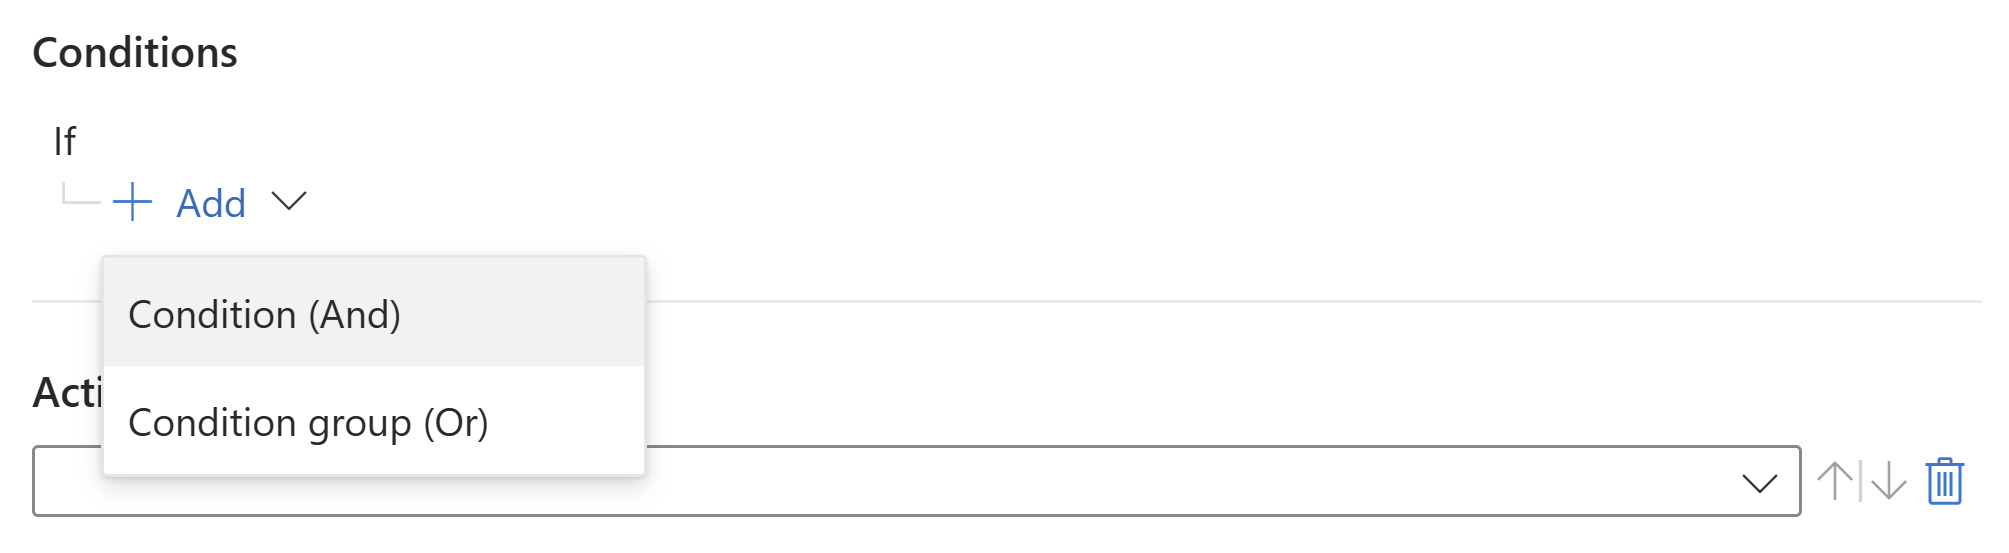
If your workspace is onboarded to the unified security operations platform, start by selecting one of the following operators, in either the Azure or the Defender portal:
AND: individual conditions that are evaluated as a group. The rule executes if all the conditions of this type are met.
To work with the AND operator, select the + Add expander and choose Condition (And) from the drop-down list. The list of conditions is populated by incident property and entity property fields.
OR (also known as condition groups): groups of conditions, each of which are evaluated independently. The rule executes if one or more groups of conditions are true. To learn how to work with these complex types of conditions, see Add advanced conditions to automation rules.
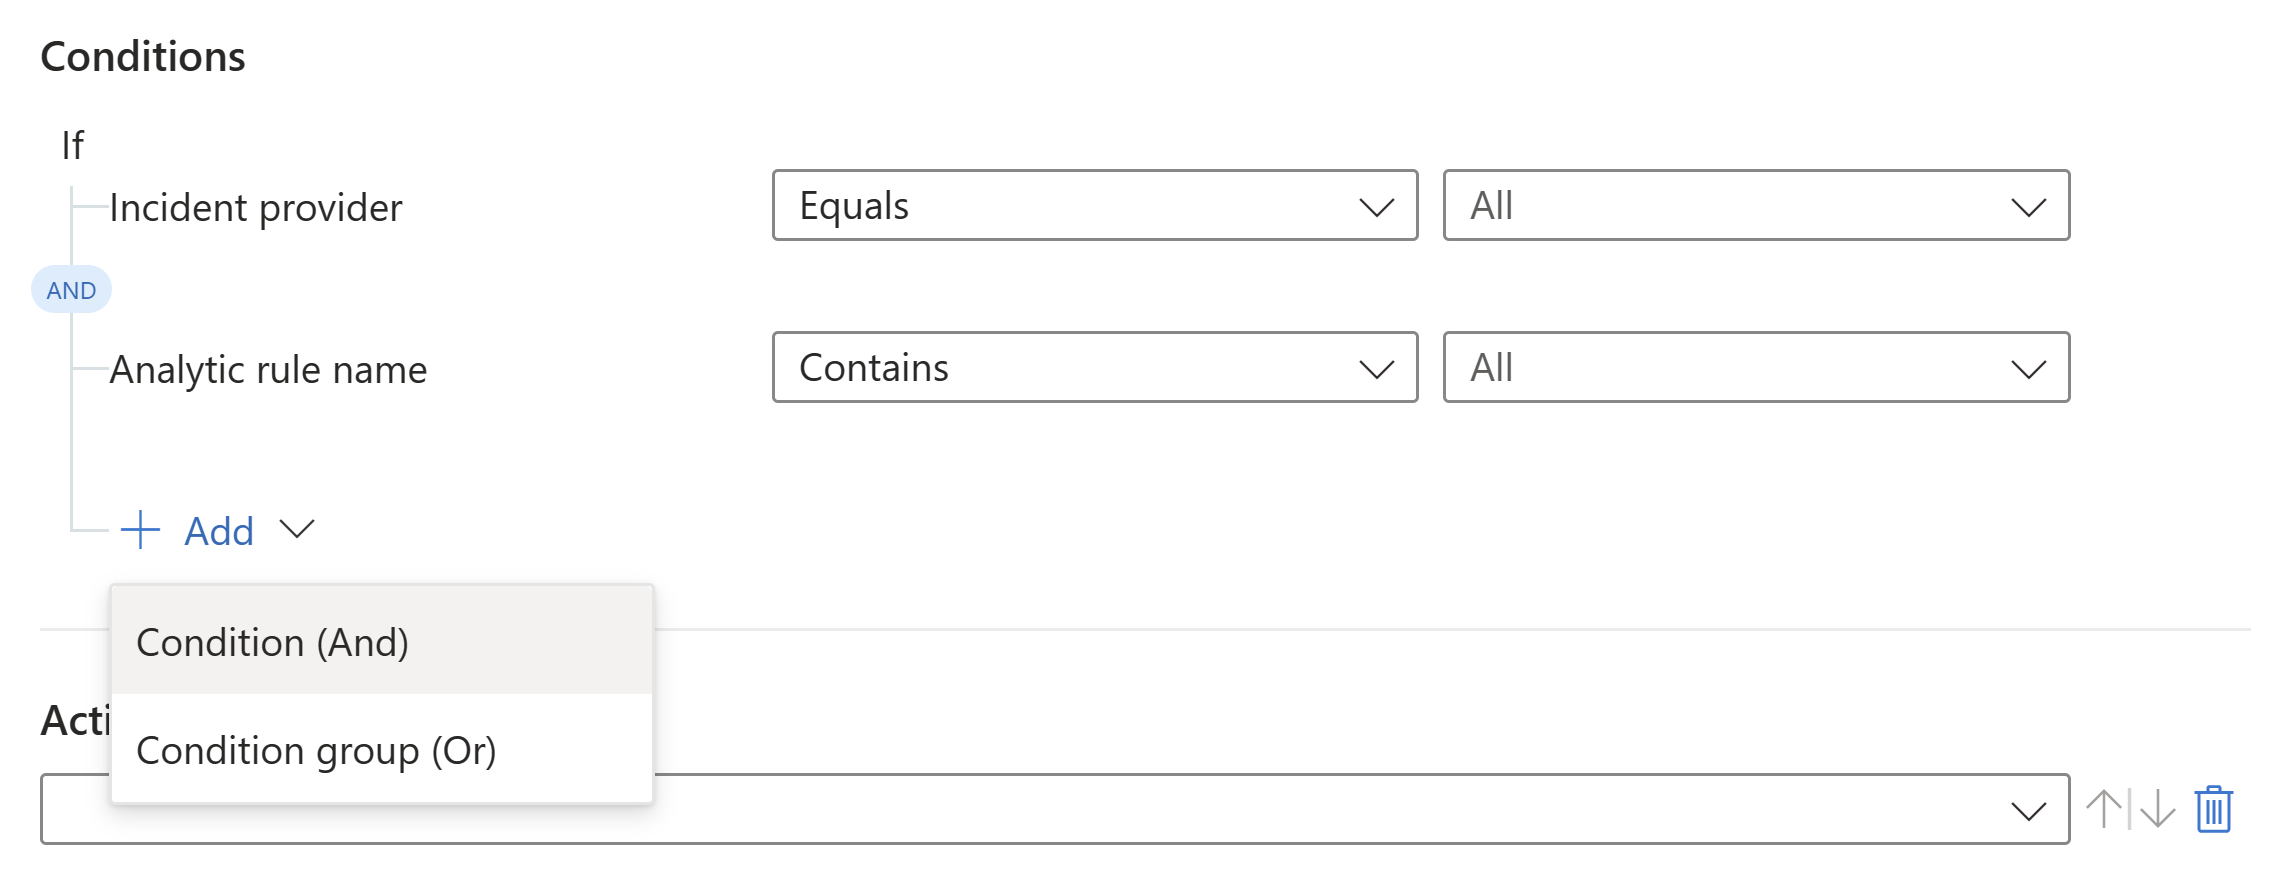
For example:
If you selected When an incident is updated as the trigger, start by defining your conditions, and then adding extra operators and values as needed.
To define your conditions:
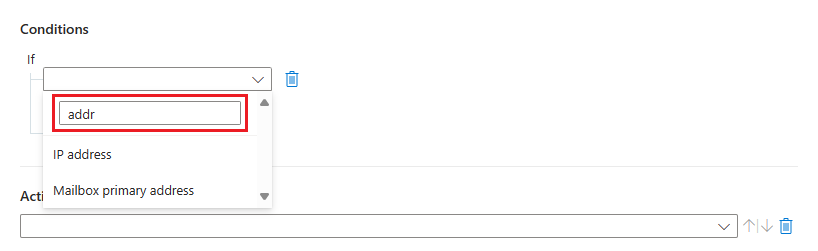
Select a property from the first drop-down box on the left. You can begin typing any part of a property name in the search box to dynamically filter the list, so you can find what you're looking for quickly.
Select an operator from the next drop-down box to the right.
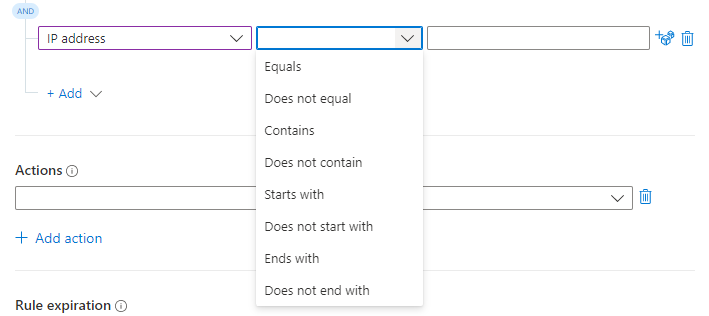
The list of operators you can choose from varies according to the selected trigger and property.
Conditions available with the create trigger
Property Operator set - Title
- Description
- All listed entity properties- Equals/Does not equal
- Contains/Does not contain
- Starts with/Does not start with
- Ends with/Does not end with- Tag (See individual vs. collection) Any individual tag:
- Equals/Does not equal
- Contains/Does not contain
- Starts with/Does not start with
- Ends with/Does not end with
Collection of all tags:
- Contains/Does not contain- Severity
- Status
- Custom details key- Equals/Does not equal - Tactics
- Alert product names
- Custom details value
- Analytic rule name- Contains/Does not contain Conditions available with the update trigger
Property Operator set - Title
- Description
- All listed entity properties- Equals/Does not equal
- Contains/Does not contain
- Starts with/Does not start with
- Ends with/Does not end with- Tag (See individual vs. collection) Any individual tag:
- Equals/Does not equal
- Contains/Does not contain
- Starts with/Does not start with
- Ends with/Does not end with
Collection of all tags:
- Contains/Does not contain- Tag (in addition to above)
- Alerts
- Comments- Added - Severity
- Status- Equals/Does not equal
- Changed
- Changed from
- Changed to- Owner - Changed - Updated by
- Custom details key- Equals/Does not equal - Tactics - Contains/Does not contain
- Added- Alert product names
- Custom details value
- Analytic rule name- Contains/Does not contain Conditions available with the alert trigger
The only condition that can be evaluated by rules based on the alert creation trigger is which Microsoft Sentinel analytics rule created the alert.
Automation rules based on the alert trigger will therefore only run on alerts created by Microsoft Sentinel.
Enter a value in the field on the right. Depending on the property you chose, this might be either a text box or a drop-down in which you select from a closed list of values. You might also be able to add several values by selecting the dice icon to the right of the text box.
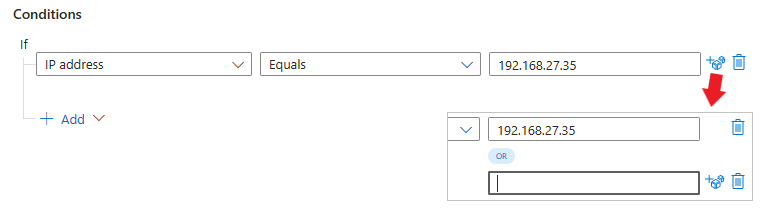
Again, for setting complex Or conditions with different fields, see Add advanced conditions to automation rules.
Conditions based on tags
You can create two kinds of conditions based on tags:
- Conditions with Any individual tag operators evaluate the specified value against every tag in the collection. The evaluation is true when at least one tag satisfies the condition.
- Conditions with Collection of all tags operators evaluate the specified value against the collection of tags as a single unit. The evaluation is true only if the collection as a whole satisfies the condition.
To add one of these conditions based on an incident's tags, take the following steps:
Create a new automation rule as described above.
Add a condition or a condition group.
Select Tag from the properties drop-down list.
Select the operators drop-down list to reveal the available operators to choose from.
See how the operators are divided in two categories as described before. Choose your operator carefully based on how you want the tags to be evaluated.
For more information, see Tag property: individual vs. collection.


Conditions based on custom details
You can set the value of a custom detail surfaced in an incident as a condition of an automation rule. Recall that custom details are data points in raw event log records that can be surfaced and displayed in alerts and the incidents generated from them. Use custom details to get to the actual relevant content in your alerts without having to dig through query results.
To add a condition based on a custom detail:
Create a new automation rule as described earlier.
Add a condition or a condition group.
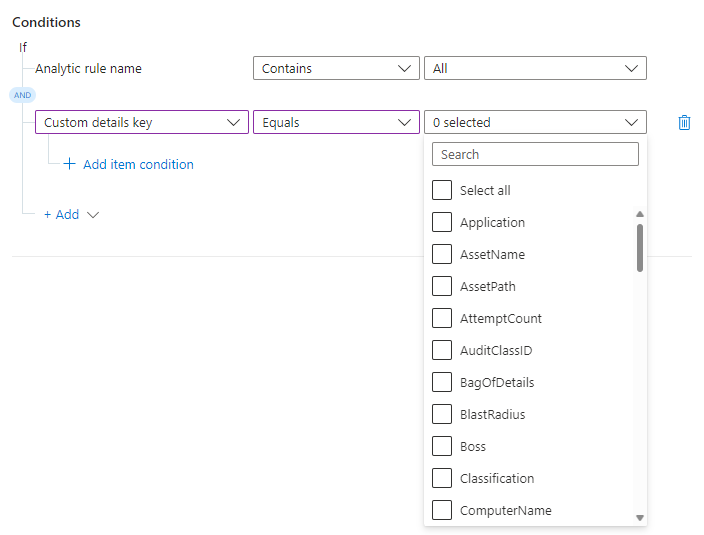
Select Custom details key from the properties drop-down list. Select Equals or Does not equal from the operators drop-down list.
For the custom details condition, the values in the last drop-down list come from the custom details that were surfaced in all the analytics rules listed in the first condition. Select the custom detail you want to use as a condition.
You chose the field you want to evaluate for this condition. Now specify the value appearing in that field that makes this condition evaluate to true.
Select + Add item condition.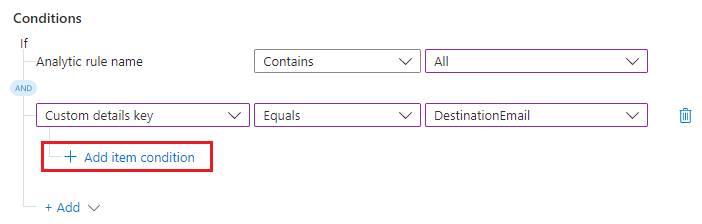
The value condition line appears below.

Select Contains or Does not contain from the operators drop-down list. In the text box to the right, enter the value for which you want the condition to evaluate to true.

In this example, if the incident has the custom detail DestinationEmail, and if the value of that detail is pwned@bad-botnet.com, the actions defined in the automation rule will run.
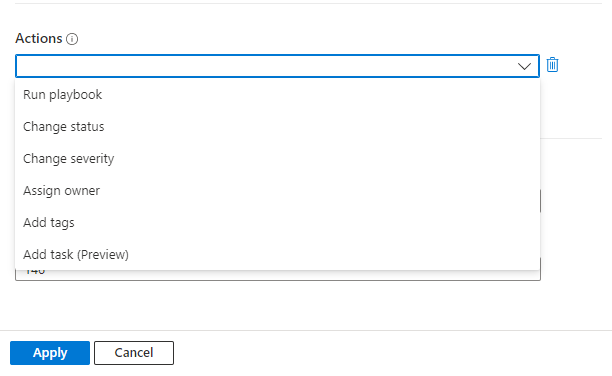
Add actions
Choose the actions you want this automation rule to take. Available actions include Assign owner, Change status, Change severity, Add tags, and Run playbook. You can add as many actions as you like.
Note
Only the Run playbook action is available in automation rules using the alert trigger.
For whichever action you choose, fill out the fields that appear for that action according to what you want done.
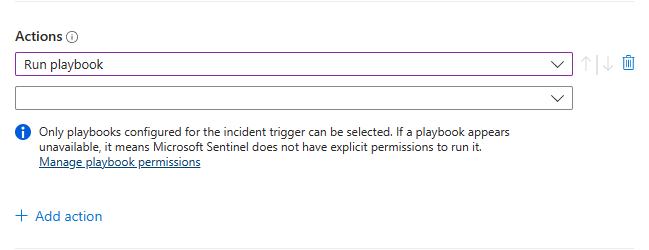
If you add a Run playbook action, you will be prompted to choose from the drop-down list of available playbooks.
Only playbooks that start with the incident trigger can be run from automation rules using one of the incident triggers, so only they will appear in the list. Likewise, only playbooks that start with the alert trigger are available in automation rules using the alert trigger.
Microsoft Sentinel must be granted explicit permissions in order to run playbooks. If a playbook appears "grayed out" in the drop-down list, it means Sentinel does not have permission to that playbook's resource group. Select the Manage playbook permissions link to assign permissions.
In the Manage permissions panel that opens up, mark the check boxes of the resource groups containing the playbooks you want to run, and select Apply.
You yourself must have owner permissions on any resource group to which you want to grant Microsoft Sentinel permissions, and you must have the Microsoft Sentinel Automation Contributor role on any resource group containing playbooks you want to run.
If you don't yet have a playbook that will take the action you have in mind, create a new playbook. You will have to exit the automation rule creation process and restart it after you have created your playbook.
Move actions around
You can change the order of actions in your rule even after you've added them. Select the blue up or down arrows next to each action to move it up or down one step.

Finish creating your rule
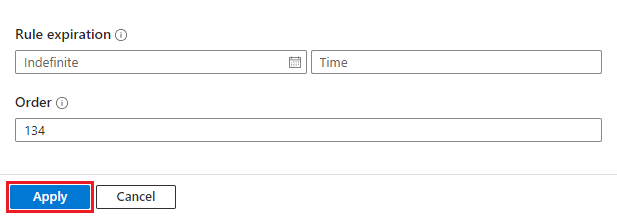
Under Rule expiration, if you want your automation rule to expire, set an expiration date (and optionally, a time). Otherwise, leave it as Indefinite.
The Order field is prepopulated with the next available number for your rule's trigger type. This number determines where in the sequence of automation rules (of the same trigger type) this rule will run. You can change the number if you want this rule to run before an existing rule.
See Notes on execution order and priority for more information.
Select Apply. You're done!
Audit automation rule activity
Find out what automation rules might have done to a given incident. You have a full record of incident chronicles available to you in the SecurityIncident table in the Logs page in the Azure portal, or the Advanced hunting page in the Defender portal. Use the following query to see all your automation rule activity:
SecurityIncident
| where ModifiedBy contains "Automation"
Automation rules execution
Automation rules are run sequentially, according to the order you determine. Each automation rule is executed after the previous one has finished its run. Within an automation rule, all actions are run sequentially in the order in which they are defined. See Notes on execution order and priority for more information.
Playbook actions within an automation rule might be treated differently under some circumstances, according to the following criteria:
| Playbook run time | Automation rule advances to the next action... |
|---|---|
| Less than a second | Immediately after playbook is completed |
| Less than two minutes | Up to two minutes after playbook began running, but no more than 10 seconds after the playbook is completed |
| More than two minutes | Two minutes after playbook began running, regardless of whether or not it was completed |
Next steps
In this document, you learned how to use automation rules to centrally manage response automation for Microsoft Sentinel incidents and alerts.
- To learn how to add advanced conditions with
ORoperators to automation rules, see Add advanced conditions to Microsoft Sentinel automation rules. - To learn more about automation rules, see Automate incident handling in Microsoft Sentinel with automation rules
- To learn more about advanced automation options, see Automate threat response with playbooks in Microsoft Sentinel.
- To learn how to use automation rules to add tasks to incidents, see Create incident tasks in Microsoft Sentinel using automation rules.
- To migrate alert-trigger playbooks to be invoked by automation rules, see Migrate your Microsoft Sentinel alert-trigger playbooks to automation rules
- For help with implementing automation rules and playbooks, see Tutorial: Use playbooks to automate threat responses in Microsoft Sentinel.
Feedback
Coming soon: Throughout 2024 we will be phasing out GitHub Issues as the feedback mechanism for content and replacing it with a new feedback system. For more information see: https://aka.ms/ContentUserFeedback.
Submit and view feedback for