Centrally manage multiple Microsoft Sentinel workspaces with workspace manager (Preview)
Learn how to centrally manage multiple Microsoft Sentinel workspaces within one or more Azure tenants with workspace manager. This article takes you through provisioning and usage of workspace manager. Whether you're a global enterprise or a Managed Security Services Provider (MSSP), workspace manager helps you operate at scale efficiently.
Here are the active content types supported with workspace manager:
- Analytics rules
- Automation rules (excluding Playbooks)
- Parsers, Saved Searches and Functions
- Hunting and Livestream queries
- Workbooks
Important
Support for workspace manager is currently in PREVIEW. The Azure Preview Supplemental Terms include additional legal terms that apply to Azure features that are in beta, preview, or otherwise not yet released into general availability.
Prerequisites
- You need at least two Microsoft Sentinel workspaces. One workspace to manage from and at least one other workspace to be managed.
- The Microsoft Sentinel Contributor role assignment is required on the central workspace (where workspace manager is enabled on), and on the member workspace(s) the contributor needs to manage. To learn more about roles in Microsoft Sentinel, see Roles and permissions in Microsoft Sentinel.
- Enable Azure Lighthouse if you're managing workspaces across multiple Microsoft Entra tenants. To learn more, see Manage Microsoft Sentinel workspaces at scale.
Considerations
Configure a central workspace to be the environment where you consolidate content items and configurations to be published at scale to member workspaces. Create a new Microsoft Sentinel workspace or utilize an existing one to serve as the central workspace.
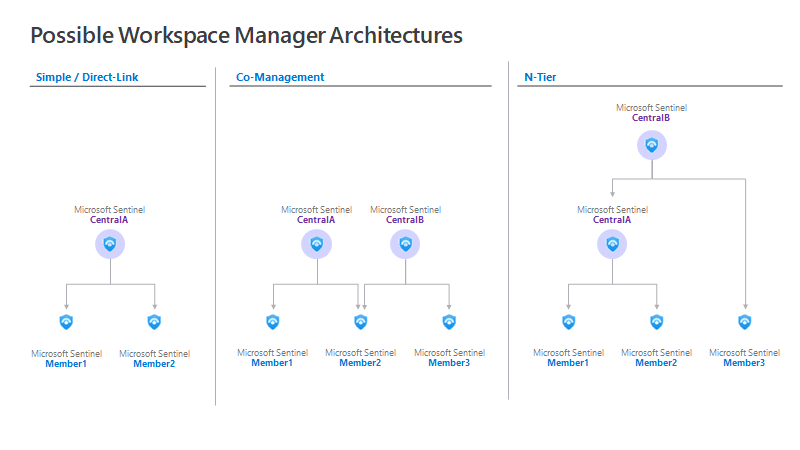
Depending on your scenario, consider these architectures:
- Direct-link is the least complex setup. Control all member workspaces with only one central workspace.
- Co-Management supports scenarios where more than one central workspace needs to manage a member workspace. For example, workspaces simultaneously managed by an in-house SOC team and an MSSP.
- N-Tier supports complex scenarios where a central workspace controls another central workspace. For example, a conglomerate that manages multiple subsidiaries, where each subsidiary also manages multiple workspaces.
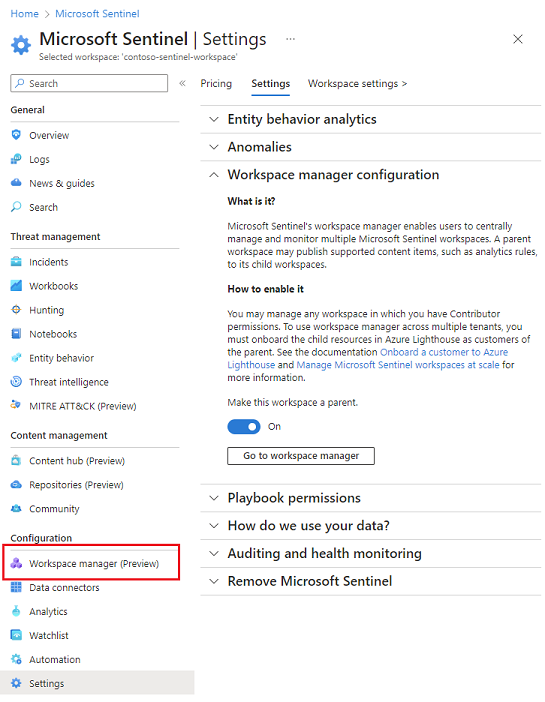
Enable workspace manager on the central workspace
Enable the central workspace once you have decided which Microsoft Sentinel workspace should be the workspace manager.
Navigate to the Settings blade in the parent workspace, and toggle On the workspace manager configuration setting to "Make this workspace a parent".
Once enabled, a new menu Workspace manager (preview) appears under Configuration.
Onboard member workspaces
Member workspaces are the set of workspaces managed by workspace manager. Onboard some or all of the workspaces in the tenant, and across multiple tenants as well (if Azure Lighthouse is enabled).
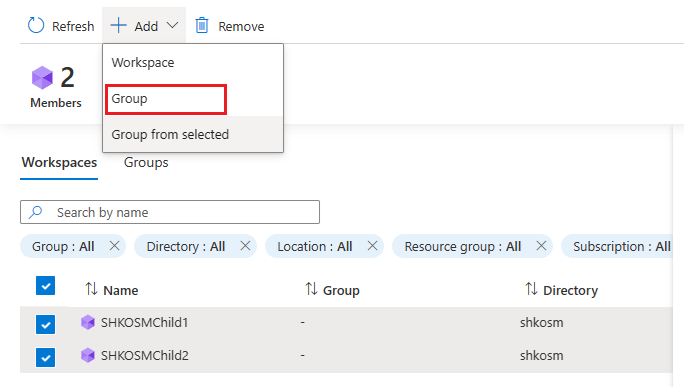
- Navigate to workspace manager and select "Add workspaces"

- Select the member workspace(s) you would like to onboard to workspace manager.
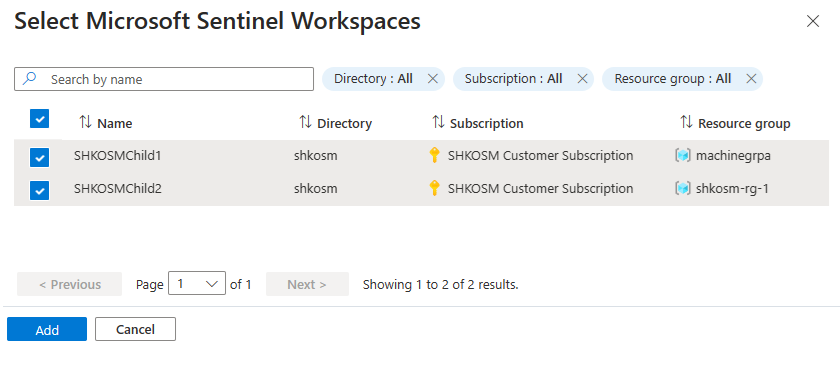
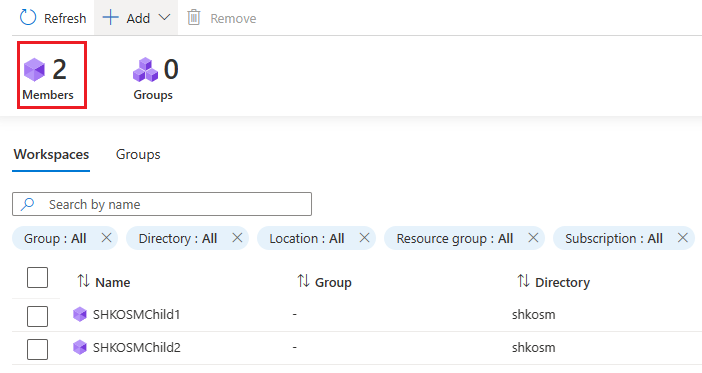
- Once successfully onboarded, the Members count increases and your member workspaces are reflected in the Workspaces tab.

Create a group
Workspace manager groups allow you to organize workspaces together based on business groups, verticals, geography, etc. Use groups to pair content items relevant to the workspaces.
Tip
Make sure you have at least one active content item deployed in the central workspace. This allows you to select content items from the central workspace to be published in the member workspace(s) in the subsequent steps.
To create a group:
- To add one workspace, select Add > Group.
- To add multiple workspaces, select the workspaces and Add > Group from selected.
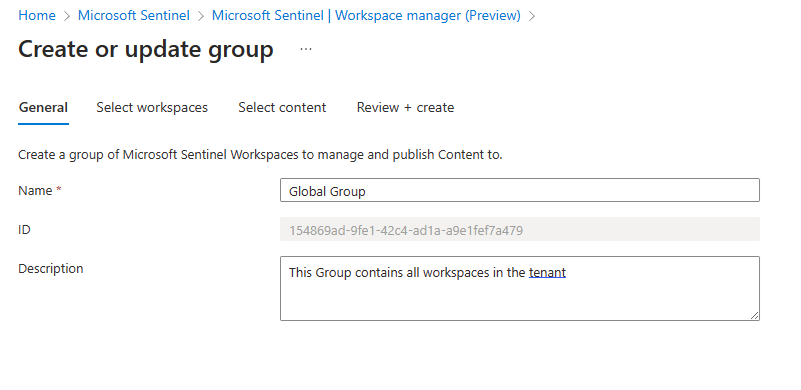
On the Create or update group page, enter a Name and Description for the group.
In the Select workspaces tab, select Add and select the member workspaces that you would like to add to the group.
In the Select content tab, you have 2 ways to add content items.
- Method 1: Select the Add menu and choose All content. All active content currently deployed in the central workspace is added. This list is a point-in-time snapshot that selects only active content, not templates.
- Method 2: Select the Add menu and choose Content. A Select content window opens to custom select the content added.
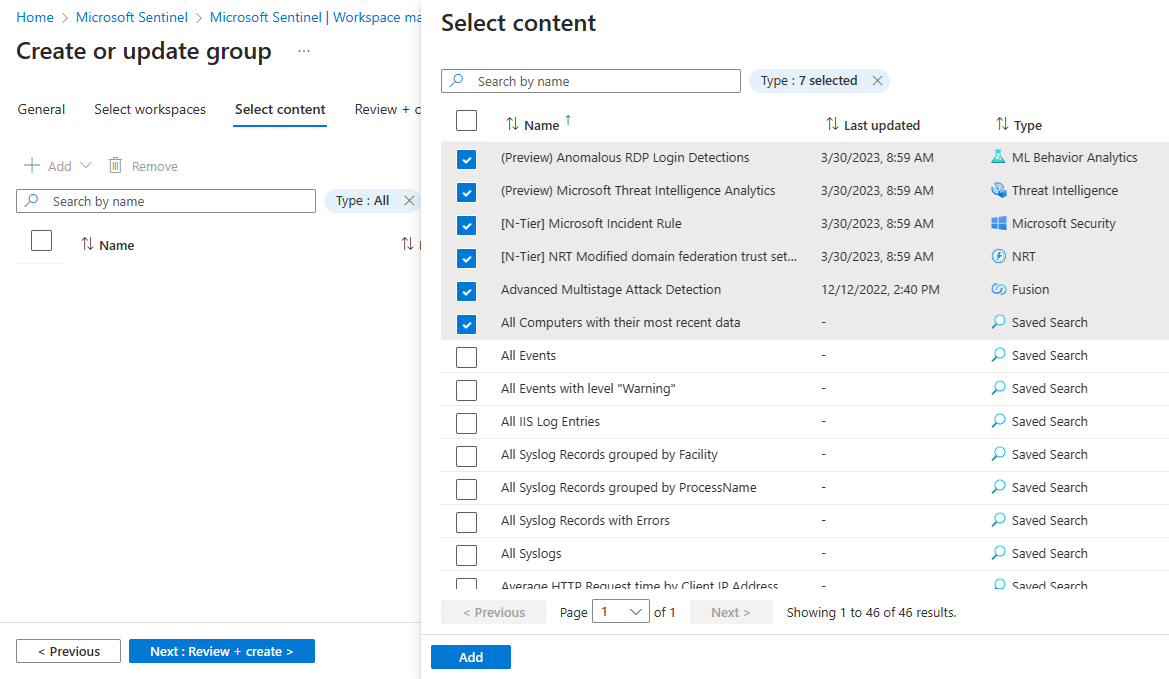
Filter the content as needed before you Review + create.
Once created, the Group count increases and your groups are reflected in the Groups tab.
Publish the Group definition
At this point, the content items selected haven't been published to the member workspace(s) yet.
Note
The publish action will fail if the maximum publish operations are exceeded. Consider splitting up member workspaces into additional groups if you approach this limit.
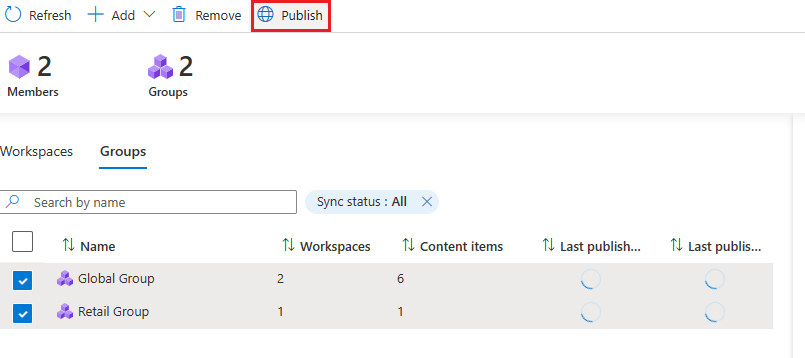
Select the group > Publish content.
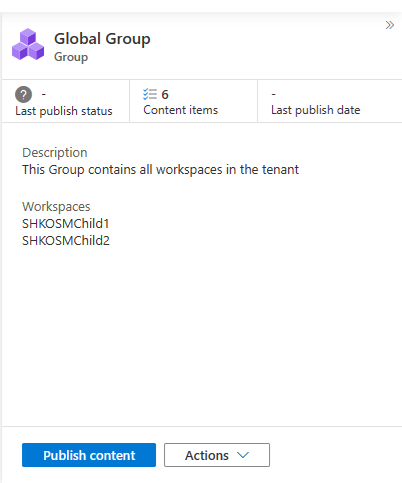
To bulk publish, multi-select the desired groups and select Publish.
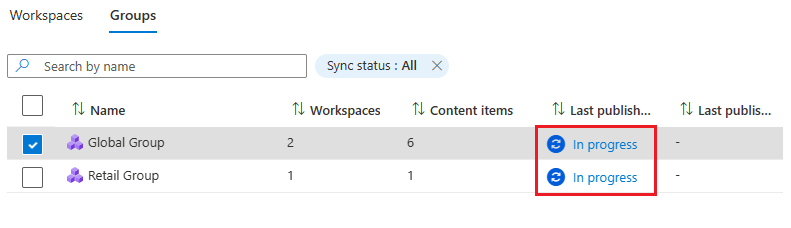
The Last publish status column updates to reflect In progress.
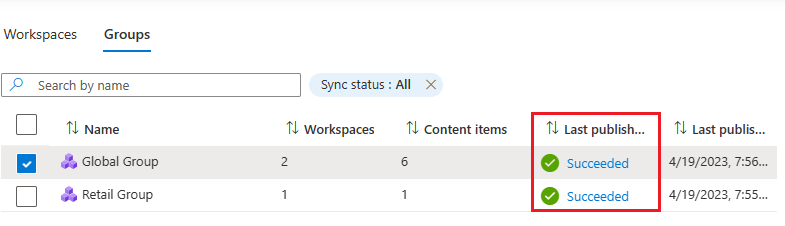
If successful, the Last publish status updates to reflect Succeeded. The selected content items now exist in the member workspaces.
If just one content item fails to publish for the entire group, the Last publish status updates to reflect Failed.
Troubleshooting
Each publish attempt has a link to help with troubleshooting if content items fail to publish.
Select the Failed hyperlink to open the job failure details window. A status for each content item and target workspace pair is displayed.
Filter the Status for failed item pairs.


Common reasons for failure include:
- Content items referenced in the group definition no longer exist at the time of publish (have been deleted).
- Permissions have changed at the time of publish. For example, the user is no longer a Microsoft Sentinel Contributor or doesn't have sufficient permissions on the member workspace anymore.
- A member workspace has been deleted.
Known limitations
- The maximum published operations per group is 2000. Published operations = (member workspaces) * (content items).
For example, if you have 10 member workspaces in a group and you publish 20 content items in that group,
published operations = 10 * 20 = 200. - Playbooks attributed or attached to analytics and automation rules aren't currently supported.
- Workbooks stored in bring-your-own-storage aren't currently supported.
- Workspace manager only manages content items published from the central workspace. It doesn't manage content created locally from member workspace(s).
- Currently, deleting content residing in member workspace(s) centrally via workspace manager isn't supported.
API references
- Workspace Manager Assignment Jobs
- Workspace Manager Assignments
- Workspace Manager Configurations
- Workspace Manager Groups
- Workspace Manager Members
Next steps
Feedback
Coming soon: Throughout 2024 we will be phasing out GitHub Issues as the feedback mechanism for content and replacing it with a new feedback system. For more information see: https://aka.ms/ContentUserFeedback.
Submit and view feedback for