Move Azure VMs between Azure Government and Public regions
You might want to move your IaaS VMs between Azure Government and Public regions to increase availability of your existing VMs, improve manageability, or for governance reasons, as detailed here.
In addition to using the Azure Site Recovery service to manage and orchestrate disaster recovery of on-premises machines and Azure VMs for the purposes of business continuity and disaster recovery (BCDR), you can also use Site Recovery to manage move Azure VMs to a secondary region.
This tutorial shows you how to move Azure VMs between Azure Government and Public regions using Azure Site Recovery. The same can be extended to move VMs between region pairs that are not within the same geographic cluster. In this tutorial, you learn how to:
- Verify prerequisites
- Prepare the source VMs
- Prepare the target region
- Copy data to the target region
- Test the configuration
- Perform the move
- Discard the resources in the source region
Important
This tutorial shows you how to move Azure VMs between Azure Government and Public regions, or between regions pairs that are not supported by the regular disaster recovery solution for Azure VMs. In case, your source and target regions pairs are supported, please refer to this document for the move. If your requirement is to improve availability by moving VMs in an availability set to zone pinned VMs in a different region, refer to the tutorial here.
Important
It is not advisable to use this method to configure DR between unsupported region pairs as the pairs are defined keeping data latency in mind, which is critical for a DR scenario.
Verify prerequisites
Note
Make sure that you understand the architecture and components for this scenario. This architecture will be used to move Azure VMs, by treating the VMs as physical servers.
Review the support requirements for all components.
Make sure that the servers you want to replicate comply with Azure VM requirements.
Prepare an account for automatic installation of the Mobility service on each server you want to replicate.
After you fail over to the target region in Azure, you cannot directly perform a fail back to the source region. You will have to set up replication again back to the target.
Verify Azure account permissions
Make sure your Azure account has permissions for replication of VMs to Azure.
- Review the permissions you need to replicate machines to Azure.
- Verify and modify Azure role-based access control (Azure RBAC) permissions.
Set up an Azure network
Set up the target Azure network.
- Azure VMs are placed in this network when they're created after failover.
- The network should be in the same region as the Recovery Services vault
Set up an Azure storage account
Set up an Azure storage account.
- Site Recovery replicates on-premises machines to Azure storage. Azure VMs are created from the storage after failover occurs.
- The storage account must be in the same region as the Recovery Services vault.
Prepare the source VMs
Prepare an account for Mobility service installation
The Mobility service must be installed on each server you want to replicate. Site Recovery installs this service automatically when you enable replication for the server. To install automatically, you need to prepare an account that Site Recovery will use to access the server.
- You can use a domain or local account
- For Windows VMs, if you're not using a domain account, disable Remote User Access control on the local machine. To do this, in the register under HKEY_LOCAL_MACHINE\SOFTWARE\Microsoft\Windows\CurrentVersion\Policies\System, add the DWORD entry LocalAccountTokenFilterPolicy, with a value of 1.
- To add the registry entry to disable the setting from a CLI, type:
REG ADD HKEY_LOCAL_MACHINE\SOFTWARE\Microsoft\Windows\CurrentVersion\Policies\System /v LocalAccountTokenFilterPolicy /t REG_DWORD /d 1. - For Linux, the account should be root on the source Linux server.
Prepare the target region
Verify that your Azure subscription allows you to create VMs in the target region used for disaster recovery. Contact support to enable the required quota.
Make sure your subscription has enough resources to support VMs with sizes that match your source VMs. if you are using Site Recovery to copy data to the target, it picks the same size or the closest possible size for the target VM.
Ensure that you create a target resource for every component identified in the source networking layout. This is important to ensure that, post cutting over to the target region, your VMs have all the functionality and features that you had in the source.
Note
Azure Site Recovery automatically discovers and creates a virtual network when you enable replication for the source VM, or you can also pre-create a network and assign to the VM in the user flow for enable replication. But for any other resources, you need to manually create them in the target region.
Please refer to the following documents to create the most commonly used network resources relevant for you, based on the source VM configuration.
For any other networking components, refer to the networking documentation.
Manually create a non-production network in the target region if you wish to test the configuration before you perform the final cut over to the target region. This will create minimal interference with the production and is recommended.
Copy data to the target region
The below steps will guide you how to use Azure Site Recovery to copy data to the target region.
Create the vault in any region, except the source region.
- Sign in to the Azure portal > Recovery Services.
- Click Create a resource > Management Tools > Backup and Site Recovery.
- In Name, specify the friendly name ContosoVMVault. If you have more than one a. subscription, select the appropriate one.
- Create a resource group ContosoRG.
- Specify an Azure region. To check supported regions, see geographic availability in Azure Site Recovery Pricing Details.
- In Recovery Services vaults, click Overview > ConsotoVMVault > +Replicate
- Select To Azure > Not virtualized/Other.
Set up the configuration server to discover VMs.
Set up the configuration server, register it in the vault, and discover VMs.
Click Site Recovery > Prepare Infrastructure > Source.
If you don't have a configuration server ready, you can use the Add Configuration Server option.
In Add Server, check that Configuration Server appears in Server type.
Download the Site Recovery Unified Setup installation file.
Download the vault registration key. You need this when you run Unified Setup. The key is valid for five days after you generate it.
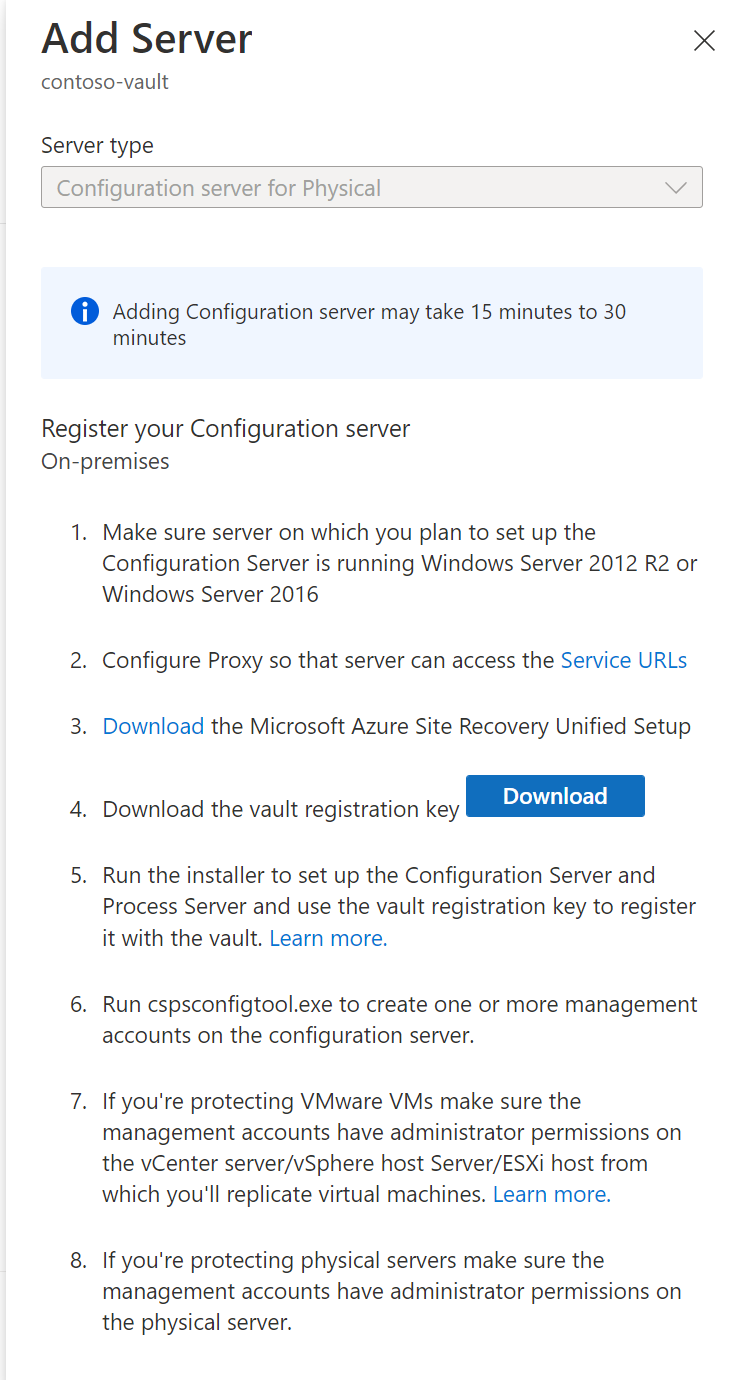
Register the configuration server in the vault
Do the following before you start:
Verify time accuracy
On the configuration server machine, make sure that the system clock is synchronized with a Time Server. It should match. If it's 15 minutes in front or behind, setup might fail.
Verify connectivity
Make sure the machine can access these URLs based on your environment:
| Name | Commercial URL | Government URL | Description |
|---|---|---|---|
| Microsoft Entra ID | login.microsoftonline.com |
login.microsoftonline.us |
Used for access control and identity management. |
| Backup | *.backup.windowsazure.com |
*.backup.windowsazure.us |
Used for replication data transfer and coordination. |
| Replication | *.hypervrecoverymanager.windowsazure.com |
*.hypervrecoverymanager.windowsazure.us |
Used for replication management operations and coordination. |
| Storage | *.blob.core.windows.net |
*.blob.core.usgovcloudapi.net |
Used for access to the storage account that stores replicated data. |
| Telemetry (optional) | dc.services.visualstudio.com |
dc.services.visualstudio.com |
Used for telemetry. |
| Time synchronization | time.windows.com |
time.nist.gov |
Used to check time synchronization between system and global time in all deployments. |
IP address-based firewall rules should allow communication to all of the Azure URLs that are listed above over HTTPS (443) port. To simplify and limit the IP Ranges, it is recommended that URL filtering is done.
- Commercial IPs - Allow the Azure Datacenter IP Ranges, and the HTTPS (443) port. Allow IP address ranges for the Azure region of your subscription to support the Microsoft Entra ID, Backup, Replication, and Storage URLs.
- Government IPs - Allow the Azure Government Datacenter IP Ranges, and the HTTPS (443) port for all USGov Regions (Virginia, Texas, Arizona, and Iowa) to support Microsoft Entra ID, Backup, Replication, and Storage URLs.
Run setup
Run Unified Setup as a Local Administrator, to install the configuration server. The process server and the master target server are also installed by default on the configuration server.
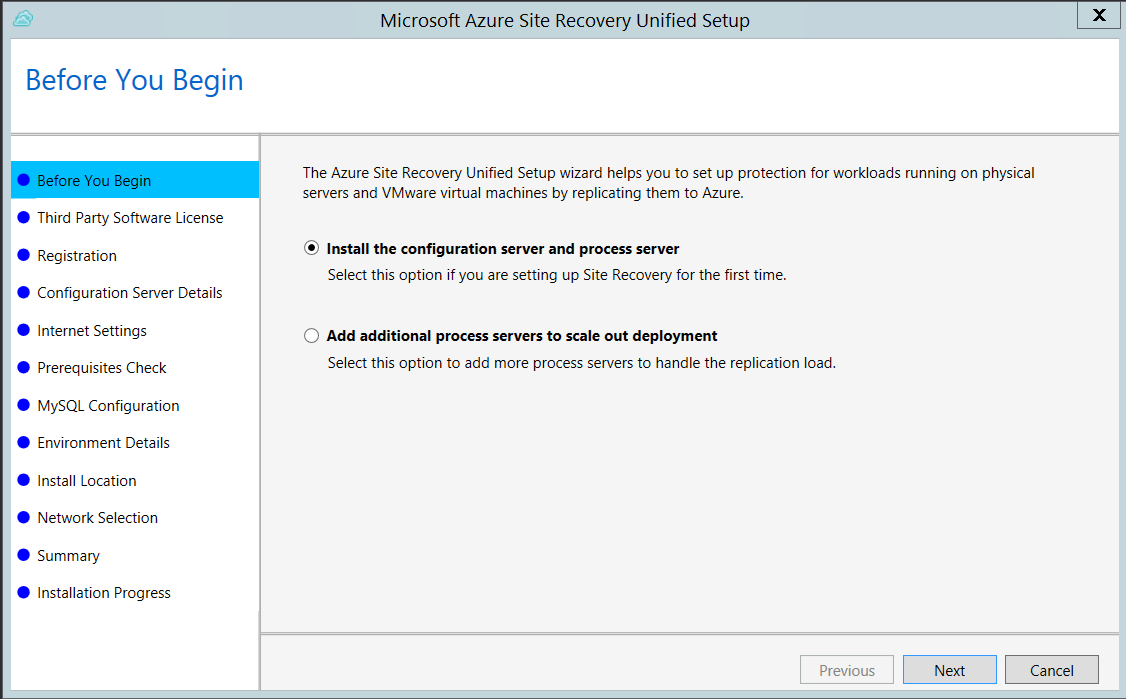
Run the Unified Setup installation file.
In Before You Begin, select Install the configuration server and process server.
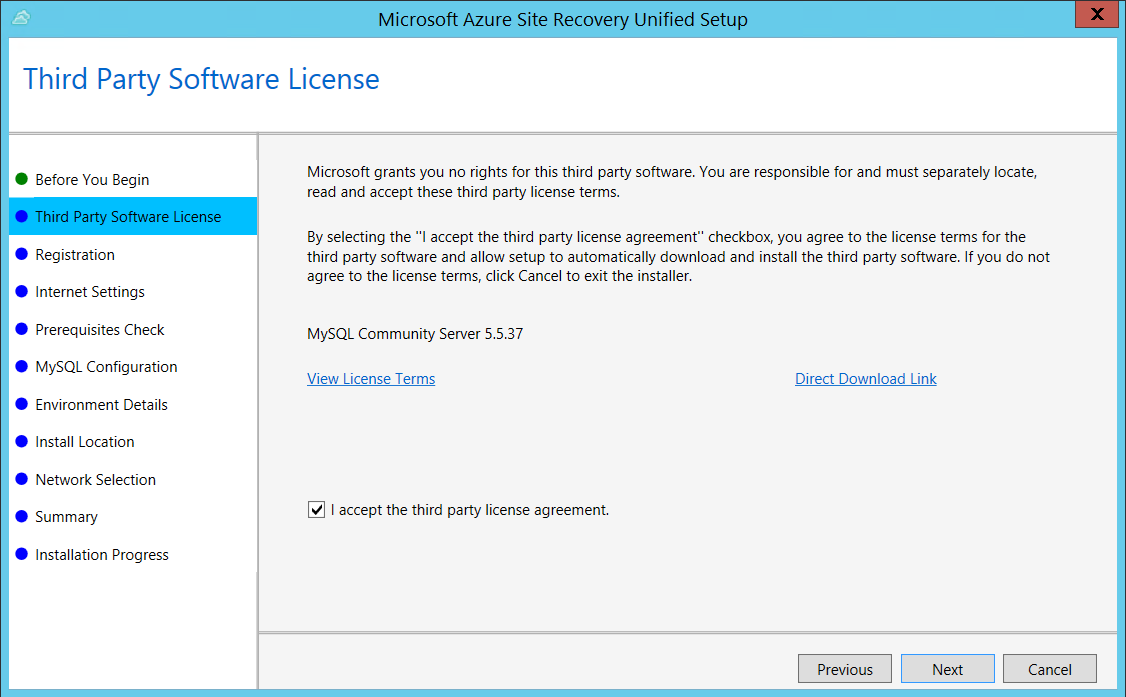
In Third Party Software License, click I Accept to download and install MySQL.
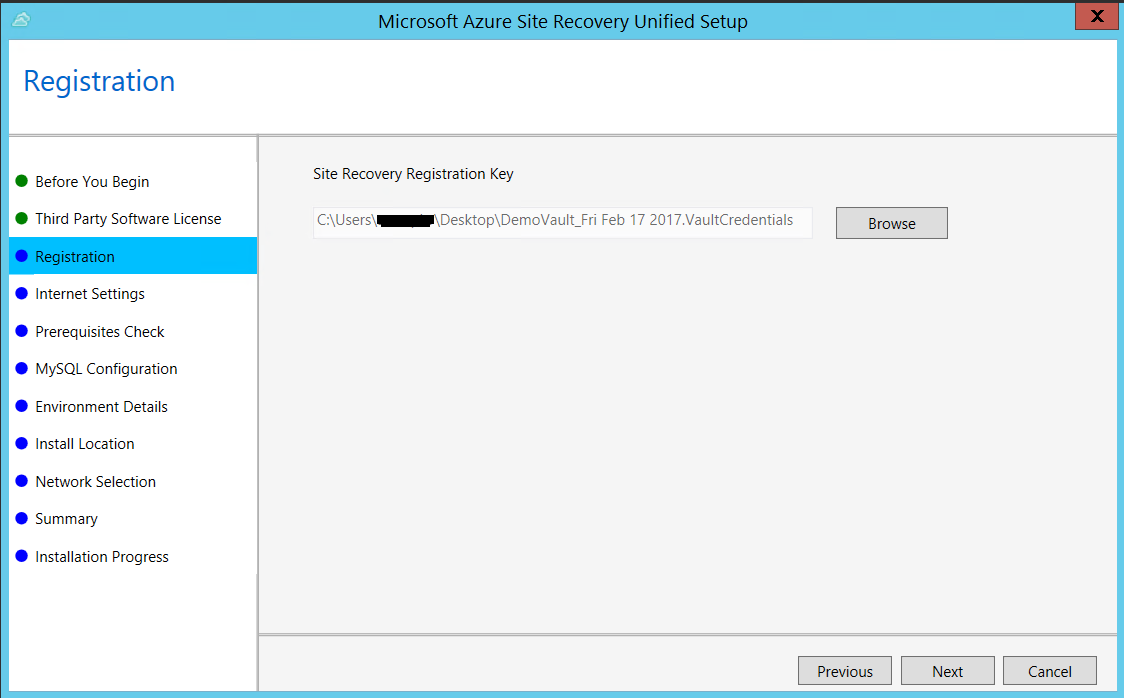
In Registration, select the registration key you downloaded from the vault.
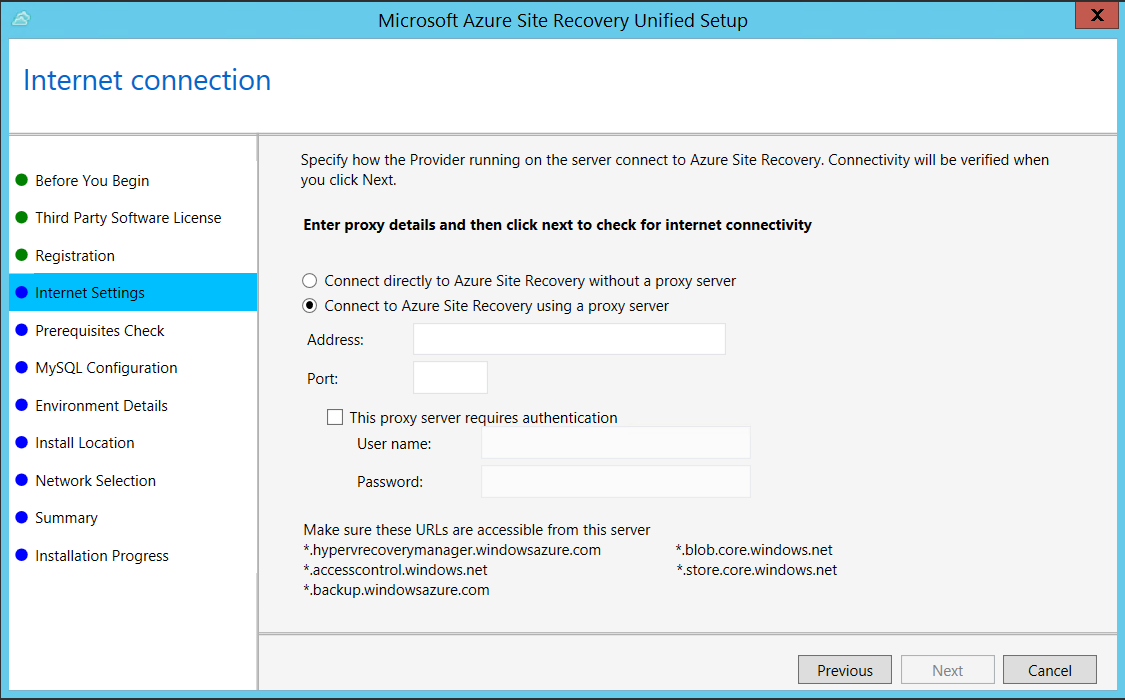
In Internet Settings, specify how the Provider running on the configuration server connects to Azure Site Recovery over the Internet. Make sure you've allowed the required URLs.
- If you want to connect with the proxy that's currently set up on the machine, select Connect to Azure Site Recovery using a proxy server.
- If you want the Provider to connect directly, select Connect directly to Azure Site Recovery without a proxy server.
- If the existing proxy requires authentication, or if you want to use a custom proxy for the Provider connection, select Connect with custom proxy settings, and specify the address, port, and credentials.
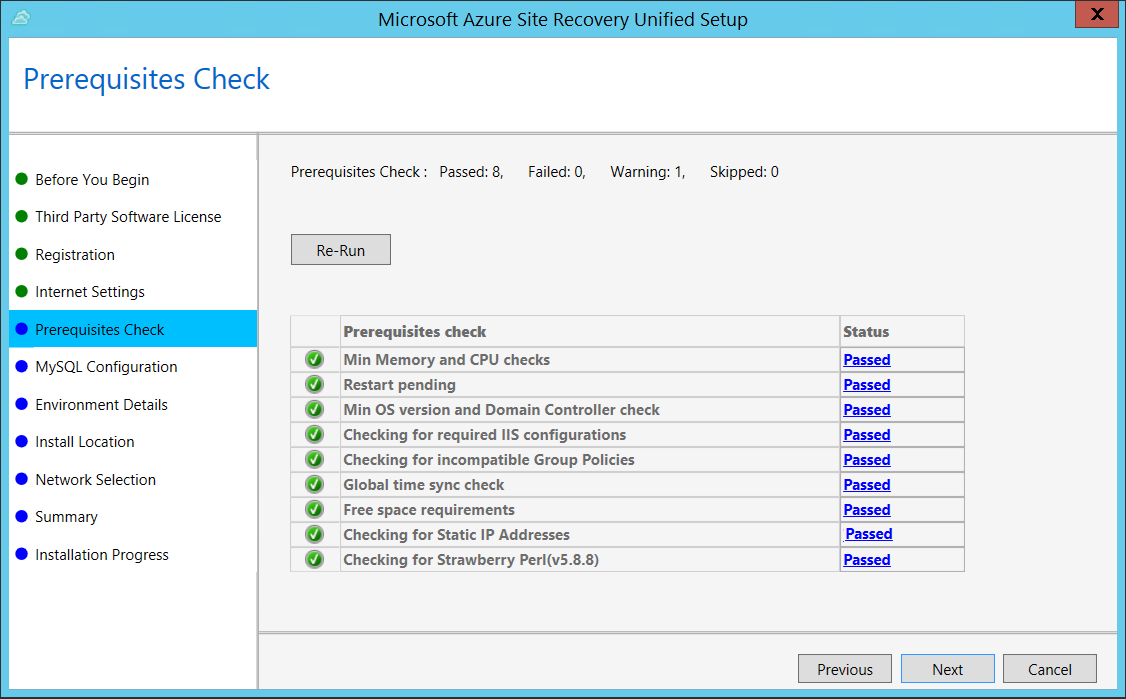
In Prerequisites Check, Setup runs a check to make sure that installation can run. If a warning appears about the Global time sync check, verify that the time on the system clock (Date and Time settings) is the same as the time zone.
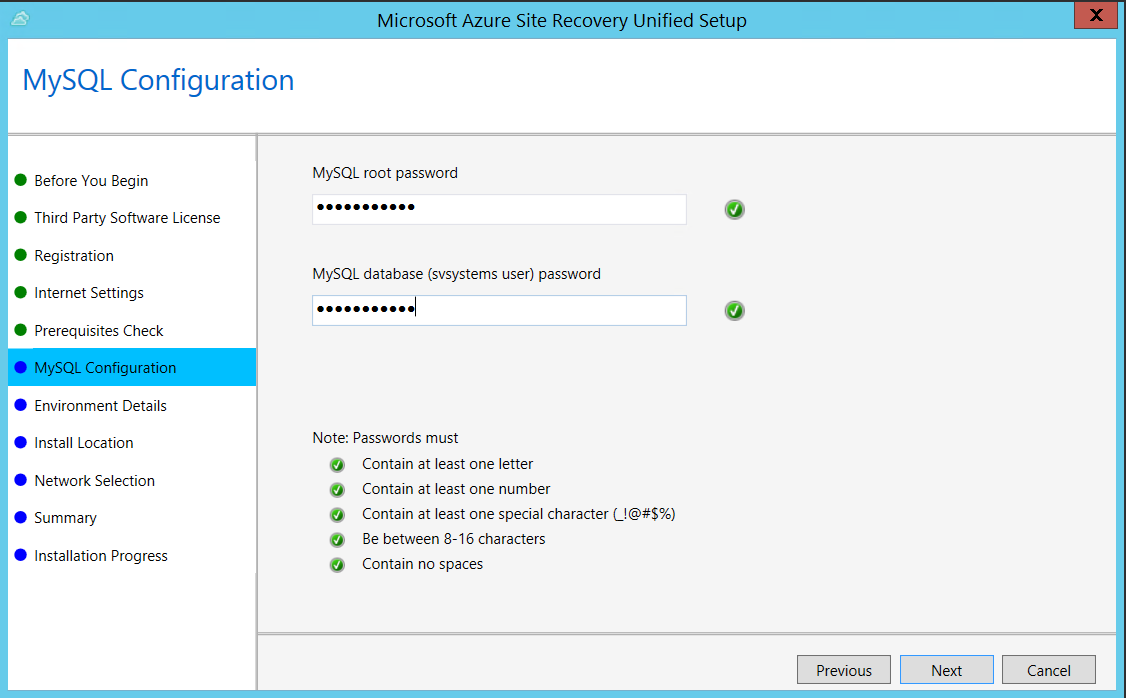
In MySQL Configuration, create credentials for logging on to the MySQL server instance that is installed.
In Environment Details, select No if you're replicating Azure Stack VMs or physical servers.
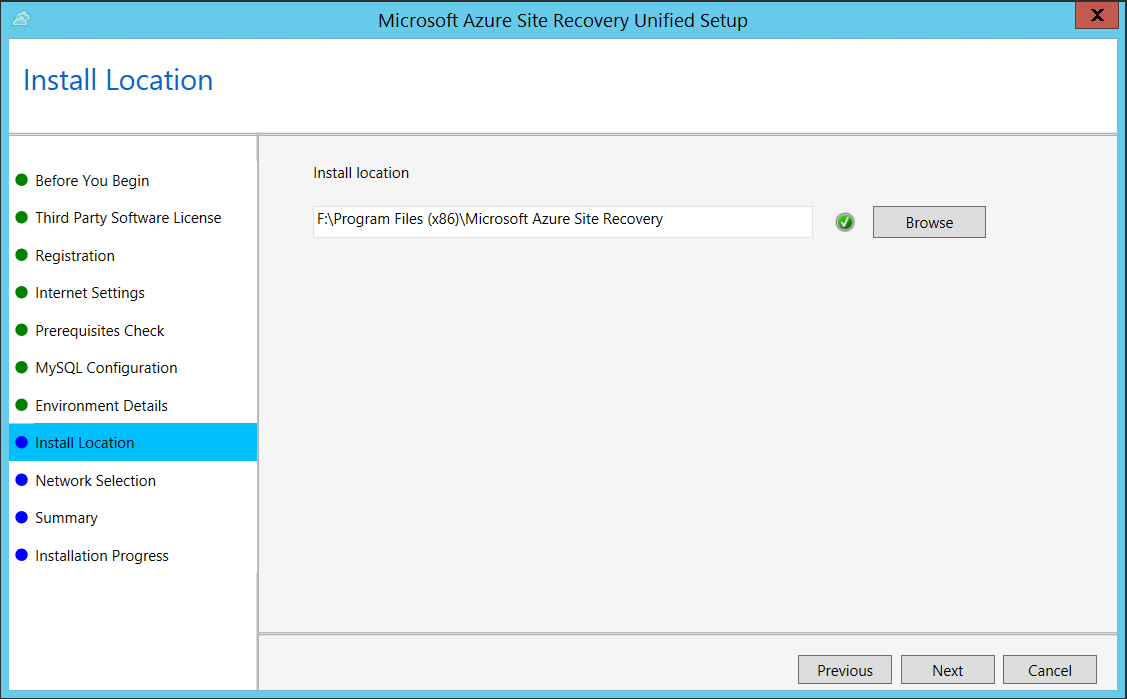
In Install Location, select where you want to install the binaries and store the cache. The drive you select must have at least 5 GB of disk space available, but we recommend a cache drive with at least 600 GB of free space.
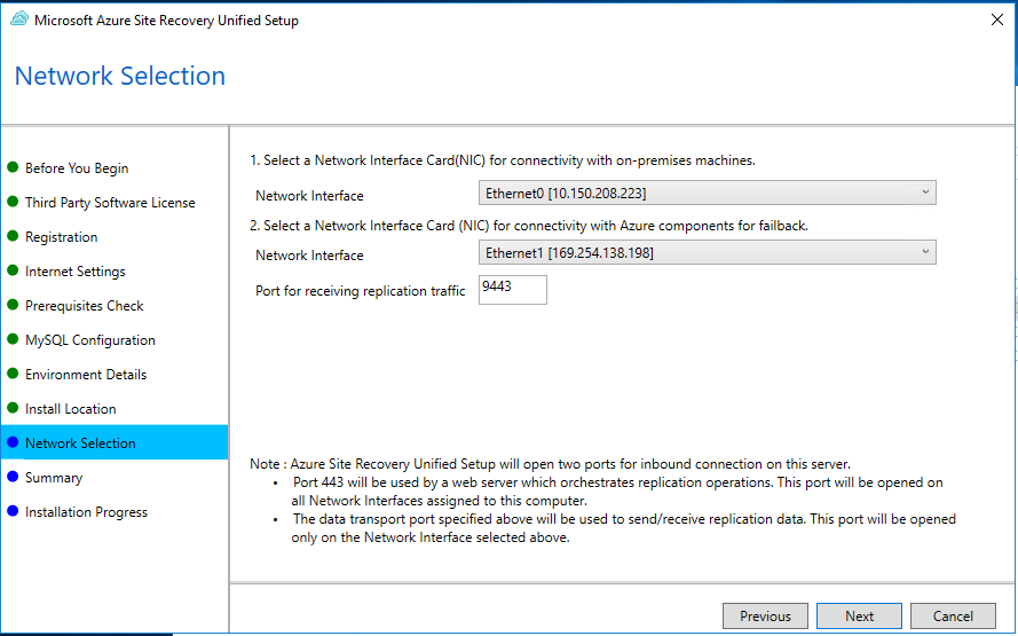
In Network Selection, first select the NIC that the in-built process server uses for discovery and push installation of mobility service on source machines, and then select the NIC that Configuration Server uses for connectivity with Azure. Port 9443 is the default port used for sending and receiving replication traffic, but you can modify this port number to suit your environment's requirements. In addition to the port 9443, we also open port 443, which is used by a web server to orchestrate replication operations. Do not use port 443 for sending or receiving replication traffic.
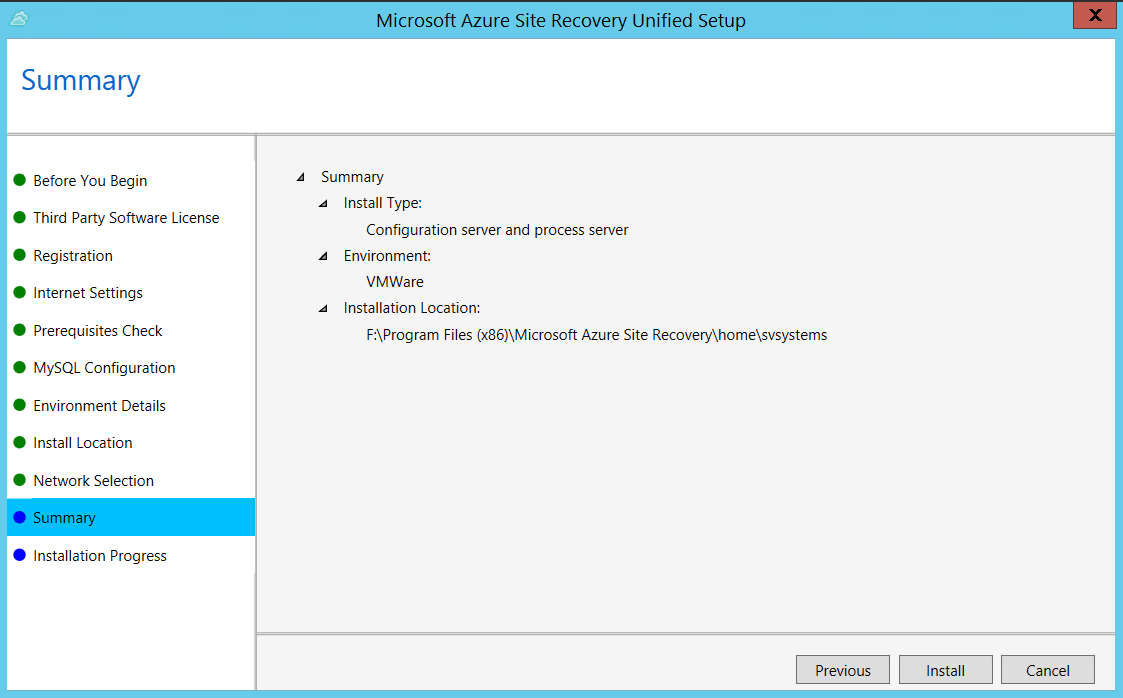
In Summary, review the information and click Install. When installation finishes, a passphrase is generated. You will need this when you enable replication, so copy it and keep it in a secure location.
After registration finishes, the server is displayed on the Settings > Servers blade in the vault.
After registration finishes, the configuration server is displayed on the Settings > Servers page in the vault.
Configure target settings for replication
Select and verify target resources.
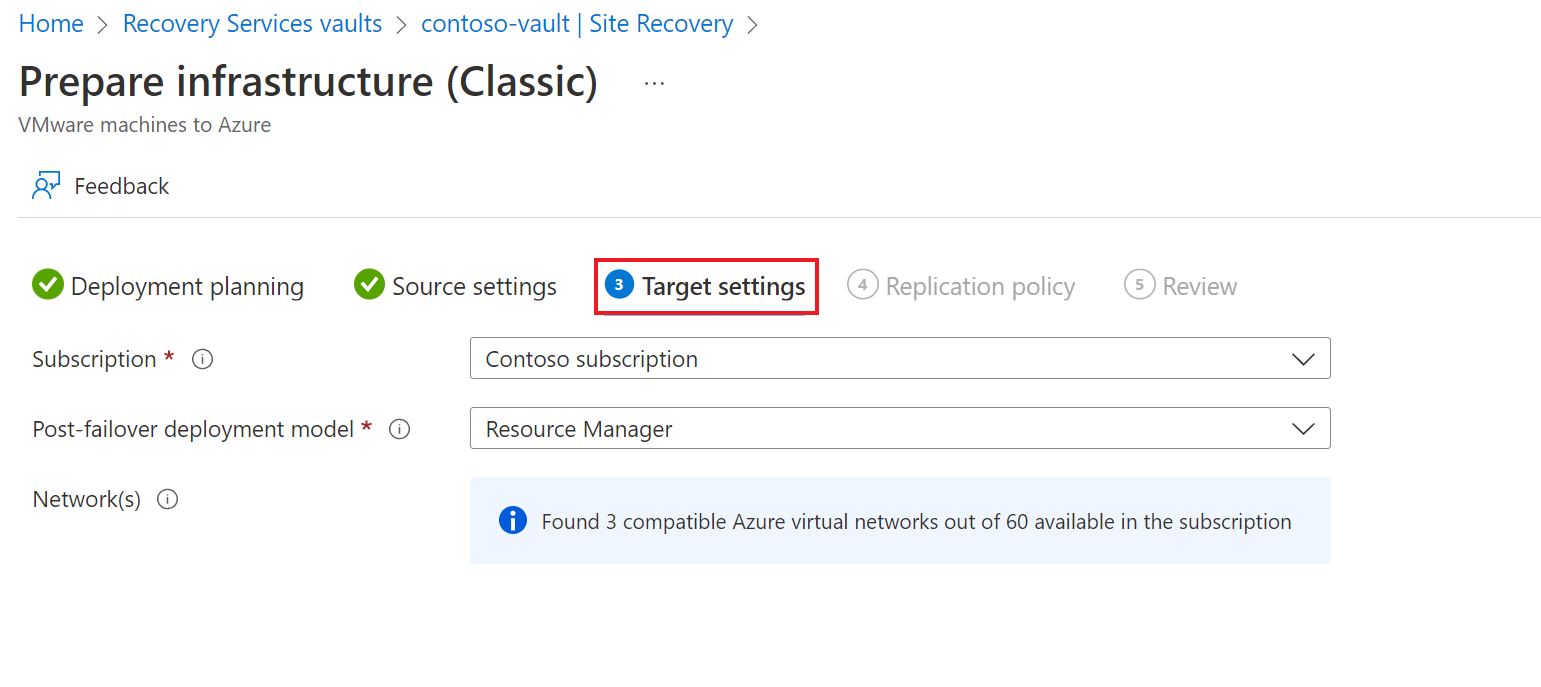
Click Prepare infrastructure > Target, and select the Azure subscription you want to use.
On the Target settings tab, do the following:
- Under Subscription, select the Azure subscription you want to use.
- Under Post-failover deployment model, specify the target deployment model.
Site Recovery checks that you have one or more compatible Azure storage accounts and networks.
Create a replication policy
- To create a new replication policy, click Site Recovery infrastructure > Replication Policies > +Replication Policy.
- In Create replication policy, specify a policy name.
- In RPO threshold, specify the recovery point objective (RPO) limit. This value specifies how often data recovery points are created. An alert is generated if continuous replication exceeds this limit.
- In Recovery point retention, specify how long (in hours) the retention window is for each recovery point. Replicated VMs can be recovered to any point in a window. Up to 24 hours retention is supported for machines replicated to premium storage, and 72 hours for standard storage.
- In App-consistent snapshot frequency, specify how often (in minutes) recovery points containing application-consistent snapshots will be created. Click OK to create the policy.
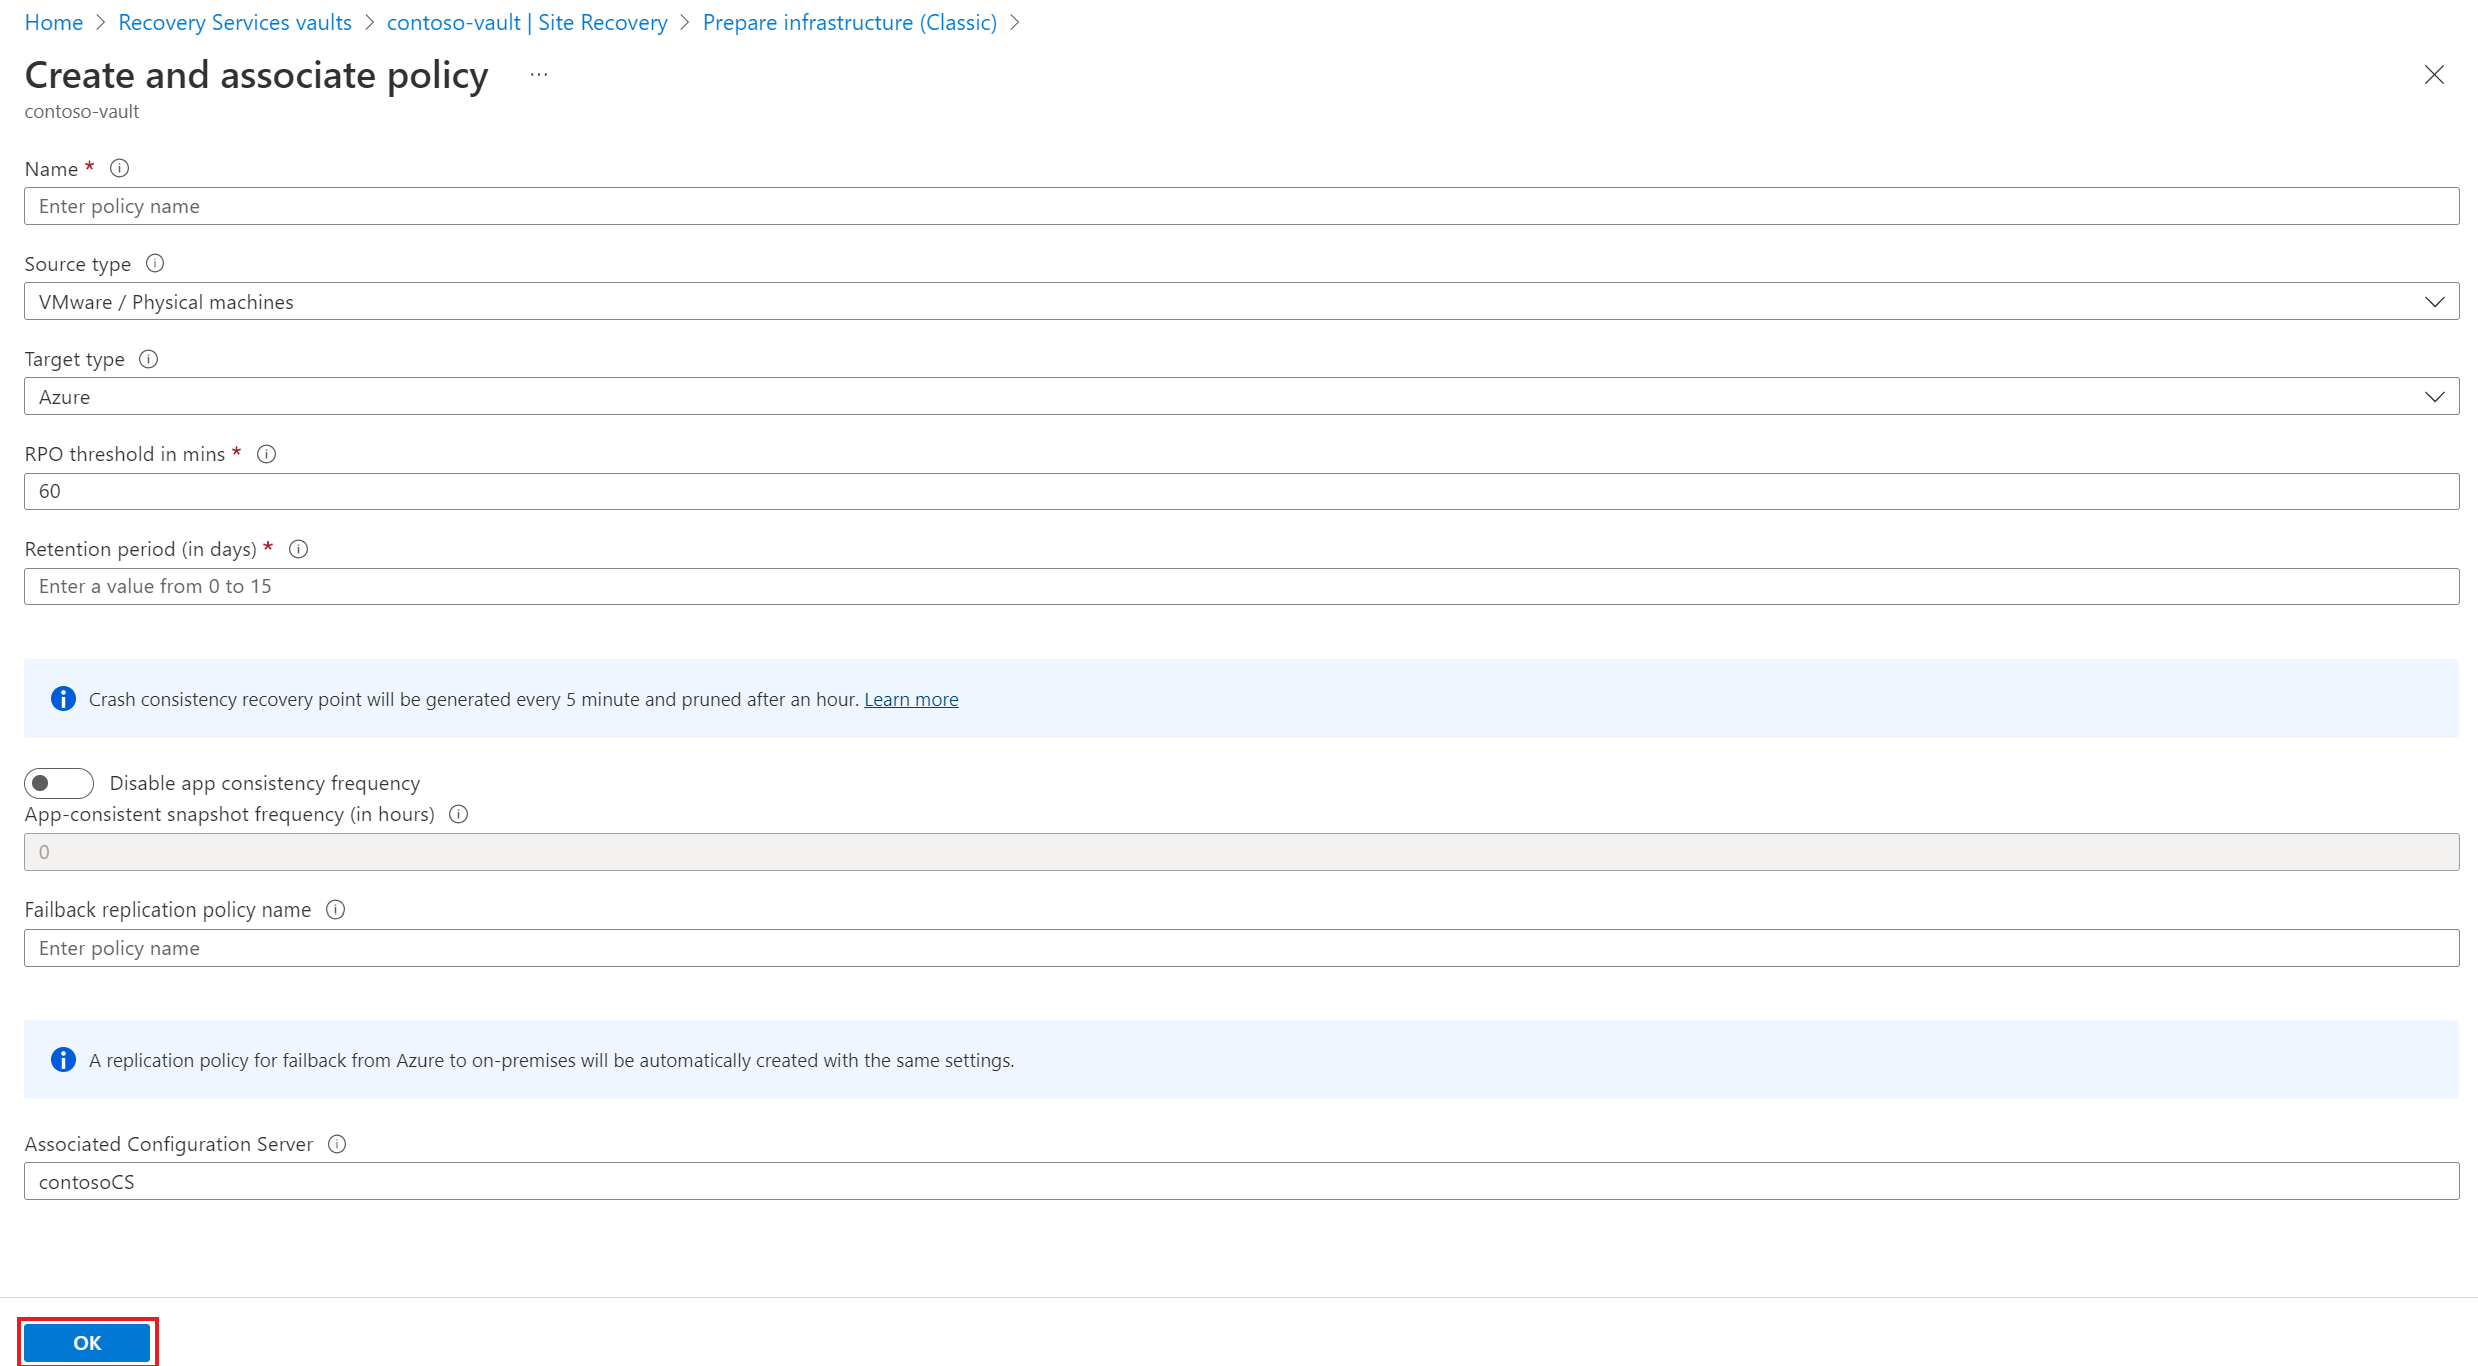
The policy is automatically associated with the configuration server. By default, a matching policy is automatically created for failback. For example, if the replication policy is rep-policy then a failback policy rep-policy-failback is created. This policy isn't used until you initiate a failback from Azure.
Enable replication
- Site Recovery will install the Mobility service when replication is enabled.
- When you enable replication for a server, it can take 15 minutes or longer for changes to take effect, and appear in the portal.
Click Replicate application > Source.
In Source, select the configuration server.
In Machine type, select Physical machines.
Select the process server (the configuration server). Then click OK.
In Target, select the subscription and the resource group in which you want to create the Azure VMs after failover. Choose the deployment model that you want to use in Azure (classic or resource management).
Select the Azure storage account you want to use for replicating data.
Select the Azure network and subnet to which Azure VMs will connect, when they're created after failover.
Select Configure now for selected machines, to apply the network setting to all machines you select for protection. Select Configure later to select the Azure network per machine.
In Physical Machines, and click +Physical machine. Specify the name and IP address. Select the operating system of the machine you want to replicate. It takes a few minutes for the servers to be discovered and listed.
Warning
You need to enter the IP address of the Azure VM you intend to move
In Properties > Configure properties, select the account that will be used by the process server to automatically install the Mobility service on the machine.
In Replication settings > Configure replication settings, verify that the correct replication policy is selected.
Click Enable Replication. You can track progress of the Enable Protection job in Settings > Jobs > Site Recovery Jobs. After the Finalize Protection job runs the machine is ready for failover.
To monitor servers you add, you can check the last discovered time for them in Configuration Servers > Last Contact At. To add machines without waiting for a scheduled discovery time, highlight the configuration server (don’t click it), and click Refresh.
Test the configuration
Navigate to the vault, in Settings > Replicated items, click on the Virtual machine you intend to move to the target region, click +Test Failover icon.
In Test Failover, Select a recovery point to use for the failover:
- Latest processed: Fails the VM over to the latest recovery point that was processed by the Site Recovery service. The time stamp is shown. With this option, no time is spent processing data, so it provides a low RTO (Recovery Time Objective)
- Latest app-consistent: This option fails over all VMs to the latest app-consistent recovery point. The time stamp is shown.
- Custom: Select any recovery point.
Select the target Azure virtual network to which you want to move the Azure VMs to test the configuration.
Important
We recommend that you use a separate Azure VM network for the test failover, and not the production network into which you want to move your VMs eventually that was set up when you enabled replication.
To start testing the move, click OK. To track progress, click the VM to open its properties. Or, you can click the Test Failover job in the vault name > Settings > Jobs > Site Recovery jobs.
After the failover finishes, the replica Azure VM appears in the Azure portal > Virtual Machines. Make sure that the VM is running, sized appropriately, and connected to the appropriate network.
If you wish to delete the VM created as part of testing the move, click Cleanup test failover on the replicated item. In Notes, record and save any observations associated with the test.
Perform the move to the target region and confirm.
- Navigate to the vault, in Settings > Replicated items, click on the virtual machine, and then click Failover.
- In Failover, select Latest.
- Select Shut down machine before beginning failover. Site Recovery attempts to shut down the source VM before triggering the failover. Failover continues even if shutdown fails. You can follow the failover progress on the Jobs page.
- Once the job is complete, check that the VM appears in the target Azure region as expected.
- In Replicated items, right-click the VM > Commit. This finishes the move process to the target region. Wait till the commit job completes.
Discard the resource in the source region
Navigate to the VM. Click on Disable Replication. This stops the process of copying the data for the VM.
Important
It is important to perform this step to avoid getting charged for ASR replication.
In case you have no plans to reuse any of the source resources please proceed with the next set of steps.
- Proceed to delete all the relevant network resources in the source region that you listed out as part of Step 4 in Prepare the source VMs
- Delete the corresponding storage account in the source region.
Next steps
In this tutorial you moved an Azure VM to a different Azure region. Now you can configure disaster recovery for the moved VM.
Feedback
Coming soon: Throughout 2024 we will be phasing out GitHub Issues as the feedback mechanism for content and replacing it with a new feedback system. For more information see: https://aka.ms/ContentUserFeedback.
Submit and view feedback for