Configure VMware Spring Cloud Gateway
Note
Azure Spring Apps is the new name for the Azure Spring Cloud service. Although the service has a new name, you'll see the old name in some places for a while as we work to update assets such as screenshots, videos, and diagrams.
This article applies to: ❌ Basic/Standard ✔️ Enterprise
This article shows you how to configure VMware Spring Cloud Gateway for VMware Tanzu with the Azure Spring Apps Enterprise plan.
VMware Spring Cloud Gateway is a commercial VMware Tanzu component based on the open-source Spring Cloud Gateway project. VMware Spring Cloud Gateway for Tanzu handles the cross-cutting concerns for API development teams, such as single sign-on (SSO), access control, rate limiting, resiliency, and security. You can accelerate API delivery by using modern cloud-native patterns in your choice of programming language for API development.
A VMware Spring Cloud Gateway instance routes traffic according to rules. It supports scaling in/out and up/down to meet a dynamic traffic load.
VMware Spring Cloud Gateway includes the following features:
- Dynamic routing configuration, independent of individual applications, that you can apply and change without recompiling
- Commercial API route filters for transporting authorized JSON Web Token (JWT) claims to application services
- Client certificate authorization
- Rate-limiting approaches
- Circuit breaker configuration
- Support for accessing application services via HTTP Basic Authentication credentials
To integrate with API portal for VMware Tanzu, VMware Spring Cloud Gateway automatically generates OpenAPI version 3 documentation after any additions or changes to route configuration. For more information, see Use API portal for VMware Tanzu.
Prerequisites
- An already provisioned Azure Spring Apps Enterprise plan service instance with VMware Spring Cloud Gateway enabled. For more information, see Quickstart: Build and deploy apps to Azure Spring Apps using the Enterprise plan.
- Azure CLI version 2.0.67 or later. Use the following command to install the Azure Spring Apps extension:
az extension add --name spring.
Enable or disable VMware Spring Cloud Gateway
You can enable or disable VMware Spring Cloud Gateway after creation of the service instance by using the Azure portal or the Azure CLI. Before you disable VMware Spring Cloud Gateway, you must unassign its endpoint and remove all route configurations.
Use the following steps to enable or disable VMware Spring Cloud Gateway by using the Azure portal:
- Go to your service resource, and then select Spring Cloud Gateway.
- Select Manage.
- Select or clear the Enable Spring Cloud Gateway checkbox, and then select Save.
You can now view the state of the Spring Cloud Gateway on the Spring Cloud Gateway page.

Restart VMware Spring Cloud Gateway
After you complete the restart action, VMware Spring Cloud Gateway instances are restarted on a rolling basis.
Use the following steps to restart VMware Spring Cloud Gateway by using the Azure portal:
- Go to your service resource, and then select Spring Cloud Gateway.
- Select Restart.
- Select OK to confirm the restart.

Assign a public endpoint to VMware Spring Cloud Gateway
This section describes how to assign a public endpoint to VMware Spring Cloud Gateway and configure its properties.
To assign an endpoint in the Azure portal, use the following steps:
- Open your Azure Spring Apps instance.
- Select Spring Cloud Gateway on the navigation pane, and then select Overview.
- Set Assign endpoint to Yes.
After a few minutes, URL shows the configured endpoint URL. Save the URL to use later.

Configure VMware Spring Cloud Gateway metadata
VMware Spring Cloud Gateway metadata automatically generates OpenAPI version 3 documentation. You can configure VMware Spring Cloud Gateway metadata to display route groups in API portal for VMware Tanzu. For more information, see Use API portal for VMware Tanzu.
The following table describes the available metadata options:
| Property | Description |
|---|---|
title |
A title that describes the context of the APIs available on the VMware Spring Cloud Gateway instance. The default value is Spring Cloud Gateway for K8S. |
description |
A detailed description of the APIs available on the VMware Spring Cloud Gateway instance. The default value is Generated OpenAPI 3 document that describes the API routes configured for '[Gateway instance name]' Spring Cloud Gateway instance deployed under '[namespace]' namespace.*. |
documentation |
The location of API documentation that's available on the VMware Spring Cloud Gateway instance. |
version |
The version of APIs available on this VMware Spring Cloud Gateway instance. The default value is unspecified. |
serverUrl |
The base URL to access APIs on the VMware Spring Cloud Gateway instance. This property is mandatory if you want to integrate with the API portal. |
You can use the Azure portal or the Azure CLI to edit metadata properties.
To edit metadata in the Azure portal, use the following steps:
- Open your Azure Spring Apps instance.
- Select Spring Cloud Gateway on the navigation pane, and then select Configuration.
- Specify values for the properties listed for API.
- Select Save.

Configure single sign-on
VMware Spring Cloud Gateway supports authentication and authorization through single sign-on (SSO) with an OpenID identity provider. The provider supports the OpenID Connect Discovery protocol. The following table describes the SSO properties:
| Property | Required? | Description |
|---|---|---|
issuerUri |
Yes | The URI that is asserted as its issuer identifier. For example, if issuerUri is https://example.com, an OpenID Provider Configuration Request is made to https://example.com/.well-known/openid-configuration. The result is expected to be an OpenID Provider Configuration Response. |
clientId |
Yes | The OpenID Connect client ID from your identity provider. |
clientSecret |
Yes | The OpenID Connect client secret from your identity provider. |
scope |
Yes | A list of scopes to include in JWT identity tokens. This list should be based on the scopes that your identity provider allows. |
To set up SSO with Microsoft Entra ID, see Set up single sign-on using Microsoft Entra ID for Spring Cloud Gateway and API Portal.
You can use the Azure portal or the Azure CLI to edit SSO properties.
To edit SSO properties in the Azure portal, use the following steps:
- Open your Azure Spring Apps instance.
- Select Spring Cloud Gateway on the navigation pane, and then select Configuration.
- Specify values for the properties listed for SSO.
- Select Save.

VMware Spring Cloud Gateway supports only the authorization servers that support the OpenID Connect Discovery protocol. Also, be sure to configure the external authorization server to allow redirects back to the gateway. Refer to your authorization server's documentation and add https://<gateway-external-url>/login/oauth2/code/sso to the list of allowed redirect URIs.
If you configure the wrong SSO property, such as the wrong password, you should remove the entire SSO property and then add the correct configuration.
After you configure SSO, remember to set ssoEnabled: true for the VMware Spring Cloud Gateway routes.
Configure SSO logout
VMware Spring Cloud Gateway service instances provide a default API endpoint to log out of the current SSO session. The path to this endpoint is /scg-logout. The logout results in one of the following outcomes, depending on how you call the logout endpoint:
- Log out of the session and redirect to the identity provider (IdP) logout.
- Log out of the service instance session.
Log out of the IdP and SSO session
If you send a GET request to the /scg-logout endpoint, the endpoint sends a 302 redirect response to the IdP logout URL. To get the endpoint to return the user to a path on the gateway service instance, add a redirect parameter to the GET request with the /scg-logout endpoint. For example, you can use ${server-url}/scg-logout?redirect=/home.
The value of the redirect parameter must be a valid path on the VMware Spring Cloud Gateway service instance. You can't redirect to an external URL.
The following steps describe an example of how to implement the function in your microservices:
Get a route configuration to route the logout request to your application. For an example, see the route configuration in the animal-rescue repository on GitHub.
Add whatever logout logic you need to the application. At the end, you need a
GETrequest to the gateway's/scg-logoutendpoint, as shown in thereturnvalue for thegetActionButtonmethod in the animal-rescue repository.
Log out of just the SSO session
If you send the GET request to the /scg-logout endpoint by using XMLHttpRequest, the 302 redirect could be swallowed and not handled in the response handler. In this case, the user would only be logged out of the SSO session on the VMware Spring Cloud Gateway service instance. The user would still have a valid IdP session. Typically, if the user tries to log in again, they're automatically sent back to the gateway as authenticated from IdP.
You need to have a route configuration to route the logout request to your application, as shown in the following example. This code makes a gateway-only logout SSO session.
const req = new XMLHttpRequest();
req.open("GET", "/scg-logout);
req.send();
Configure cross-origin resource sharing
Cross-origin resource sharing (CORS) allows restricted resources on a webpage to be requested from another domain outside the domain from which the first resource was served. The following table describes the available CORS configuration options.
| Property | Description |
|---|---|
allowedOrigins |
Allowed origins to make cross-site requests |
allowedOriginPatterns |
Allowed origin patterns to make cross-site requests |
allowedMethods |
Allowed HTTP methods on cross-site requests |
allowedHeaders |
Allowed headers in cross-site requests |
maxAge |
How long, in seconds, clients cache the response from a preflight request |
allowCredentials |
Whether user credentials are supported on cross-site requests |
exposedHeaders |
HTTP response headers to expose for cross-site requests |
Be sure that you have the correct CORS configuration if you want to integrate with the API portal. For more information, see the Assign a public endpoint to VMware Spring Cloud Gateway section.
Use service scaling
You can customize resource allocation for VMware Spring Cloud Gateway instances, including vCPU, memory, and instance count.
For high availability, we don't recommend using a single replica.
The following table describes the default resource usage.
| Component name | Instance count | vCPU per instance | Memory per instance |
|---|---|---|---|
| VMware Spring Cloud Gateway | 2 | 1 core | 2 GiB |
| VMware Spring Cloud Gateway operator | 2 | 1 core | 2 GiB |
Configure TLS between the gateway and applications
To enhance security and help protect sensitive information from interception by unauthorized parties, you can enable Transport Layer Security (TLS) between VMware Spring Cloud Gateway and your applications.
Before you configure TLS, you need to have a TLS-enabled application and a TLS certificate. To prepare a TLS certificate, generate a certificate from a trusted certificate authority (CA). The certificate verifies the identity of the server and establishes a secure connection.
After you have a TLS-enabled application running in Azure Spring Apps, upload the certificate to Azure Spring Apps. For more information, see the Import a certificate section of Use TLS/SSL certificates in your application in Azure Spring Apps.
With the certificate updated to Azure Spring Apps, you can configure the TLS certificate for the gateway and enable certificate verification. You can configure the certificate in the Azure portal or by using the Azure CLI.
Use the following steps to configure the certificate in the Azure portal:
- In your Azure Spring Apps instance, select Spring Cloud Gateway on the navigation pane.
- On the Spring Cloud Gateway page, select Certificate management.
- Select Enable cert verification.
- Select the TLS certificate in Certificates.
- Select Save.
Updating the configuration can take a few minutes. You should get a notification when the configuration is complete.
Prepare the route configuration
You must specify the protocol as HTTPS in the route configuration. The following JSON object instructs VMware Spring Cloud Gateway to use the HTTPS protocol for all traffic between the gateway and the app.
Create a file named test-tls-route.json with the following content:
{
    "routes": [
      {
        "title": "Test TLS app",
        "predicates": [
          "Path=/path/to/your/app",
          "Method=GET"
        ]
      }
     ],
    "uri": "https://<app-custom-domain-name>"
}
Use the following command to apply the rule to the application:
az spring gateway route-config create \
    --resource-group <resource-group-name> \
    --service <Azure-Spring-Apps-instance-name> \
    --name test-tls-app \
    --routes-file test-tls-route.json
You can now test whether the application is TLS enabled with the endpoint of the gateway. For more information, see the Configure routes section of Use Spring Cloud Gateway.
Rotate certificates
As certificates expire, you need to rotate certificates in VMware Spring Cloud Gateway by using the following steps:
- Generate new certificates from a trusted CA.
- Import the certificates into Azure Spring Apps. For more information, see the Import a certificate section of Use TLS/SSL certificates in your application in Azure Spring Apps.
- Synchronize the certificates by using the Azure portal or the Azure CLI.
VMware Spring Cloud Gateway restarts to ensure that the gateway uses the new certificate for all connections.
Use the following steps to synchronize certificates:
- In your Azure Spring Apps instance, select Spring Cloud Gateway on the navigation pane.
- On the Spring Cloud Gateway page, select Restart, and then confirm the operation.
Set up autoscale settings
You can set autoscale modes for VMware Spring Cloud Gateway.
The following list shows the options available for Autoscale demand management:
- The Manual scale option maintains a fixed instance count. You can scale out to a maximum of 10 instances. This value changes the number of separate running instances of the Spring Cloud Gateway.
- The Custom autoscale option scales on any schedule, based on any metrics.
On the Azure portal, choose how you want to scale. The following screenshot shows the Custom autoscale option and mode settings:

For more information on the available metrics, see the User metrics options section of Metrics for Azure Spring Apps.
Configure the response cache
Response cache configuration provides a way to define an HTTP response cache that you can apply globally or at the route level.
Enable the response cache globally
After you enable the response cache globally, the response cache is automatically enabled for all applicable routes.
Use the following steps to enable the response cache globally:
- In your Azure Spring Apps instance, select Spring Cloud Gateway on the navigation pane.
- On the Spring Cloud Gateway page, select Configuration.
- In the Response Cache section, select Enable response cache and then set Scope to Instance.
- Set Size and Time to live for the response cache.
- Select Save.
Use the following steps to disable the response cache:
- In your Azure Spring Apps instance, select Spring Cloud Gateway on the navigation pane.
- On the Spring Cloud Gateway page, select Configuration.
- In the Response Cache section, clear Enable response cache.
- Select Save.
Enable the response cache at the route level
To enable the response cache for any route, use the LocalResponseCache filter. The following example shows you how to use the LocalResponseCache filter in the routing rule configuration:
{
   "filters": [
      "<other-app-level-filter-of-route>",
   ],
   "routes": [
      {
        "predicates": [
            "Path=/api/**",
            "Method=GET"
         ],
         "filters": [
            "<other-filter-of-route>",
            "LocalResponseCache=3m, 1MB"
         ],
      }
   ]
}
For more information, see the LocalResponseCache section of How to use VMware Spring Cloud Gateway route filters with the Azure Spring Apps Enterprise plan and LocalResponseCache in the VMware documentation.
Instead of configuring size and timeToLive for each LocalResponseCache filter individually, you can set these parameters at the Spring Cloud Gateway level. This option enables you to use the LocalResponseCache filter without specifying these values initially, while retaining the flexibility to override them later.
Use the following steps to enable the response cache at the route level and set size and timeToLive:
- In your Azure Spring Apps instance, select Spring Cloud Gateway on the navigation pane.
- On the Spring Cloud Gateway page, select Configuration.
- In the Response Cache section, select Enable response cache and then set Scope to Route.
- Set Size and Time to live for the response cache.
- Select Save.
Use the following steps to disable the response cache at the route level, which clears size and timeToLive:
- In your Azure Spring Apps instance, select Spring Cloud Gateway on the navigation pane.
- On the Spring Cloud Gateway page, select Configuration.
- In the Response Cache section, clear Enable response cache.
- Select Save.
The following example shows you how to use the LocalResponseCache filter when size and timeToLive are set at the Spring Cloud Gateway level:
{
   "filters": [
      "<other-app-level-filter-of-route>",
   ],
   "routes": [
      {
        "predicates": [
            "Path=/api/path1/**",
            "Method=GET"
         ],
         "filters": [
            "<other-filter-of-route>",
            "LocalResponseCache"
         ],
      },
      {
        "predicates": [
            "Path=/api/path2/**",
            "Method=GET"
         ],
         "filters": [
            "<other-filter-of-route>",
            "LocalResponseCache=3m, 1MB"
         ],
      }
   ]
}
Configure environment variables
The Azure Spring Apps service manages and tunes VMware Spring Cloud Gateway. Except for the use cases that configure application performance monitoring (APM) and the log level, you don't normally need to configure VMware Spring Cloud Gateway with environment variables.
If you have requirements that you can't fulfill by other configurations described in this article, you can try to configure the environment variables shown in the Common application properties list. Be sure to verify your configuration in your test environment before applying it to your production environment.
To configure environment variables in the Azure portal, use the following steps:
- In your Azure Spring Apps instance, select Spring Cloud Gateway on the navigation pane, and then select Configuration.
- Fill in the key/value pairs for the environment variables in the Properties and Secrets sections. You can include variables with sensitive information in the Secrets section.
- Select Save to save your changes.
After you update environment variables, VMware Spring Cloud Gateway restarts.
Configure application performance monitoring
To monitor VMware Spring Cloud Gateway, you can configure APM. The following table lists the five types of APM Java agents that VMware Spring Cloud Gateway provides, along with their required environment variables.
| Java agent | Required environment variables |
|---|---|
| Application Insights | APPLICATIONINSIGHTS_CONNECTION_STRING |
| Dynatrace | DT_TENANTDT_TENANTTOKENDT_CONNECTION_POINT |
| New Relic | NEW_RELIC_LICENSE_KEYNEW_RELIC_APP_NAME |
| AppDynamics | APPDYNAMICS_AGENT_APPLICATION_NAMEAPPDYNAMICS_AGENT_TIER_NAMEAPPDYNAMICS_AGENT_NODE_NAMEAPPDYNAMICS_AGENT_ACCOUNT_NAMEAPPDYNAMICS_AGENT_ACCOUNT_ACCESS_KEYAPPDYNAMICS_CONTROLLER_HOST_NAMEAPPDYNAMICS_CONTROLLER_SSL_ENABLEDAPPDYNAMICS_CONTROLLER_PORT |
| Elastic APM | ELASTIC_APM_SERVICE_NAMEELASTIC_APM_APPLICATION_PACKAGESELASTIC_APM_SERVER_URL |
For other supported environment variables, see the following sources:
- Application Insights overview
- Dynatrace environment variables
- New Relic environment variables
- AppDynamics environment variables
- Elastic environment variables
Configure APM integration on the service instance level (recommended)
To enable APM monitoring in your VMware Spring Cloud Gateway, you can create APM configuration on the service instance level and bind it to Spring Cloud Gateway. In this way, you can conveniently configure the APM only once and bind the same APM to Spring Cloud Gateway and to your apps.
Use the following steps to set up APM by using the Azure portal:
Configure APM on the service instance level with the APM name, type, and properties. For more information, see the Manage APMs on the service instance level (recommended) section of How to configure APM integration and CA certificates.
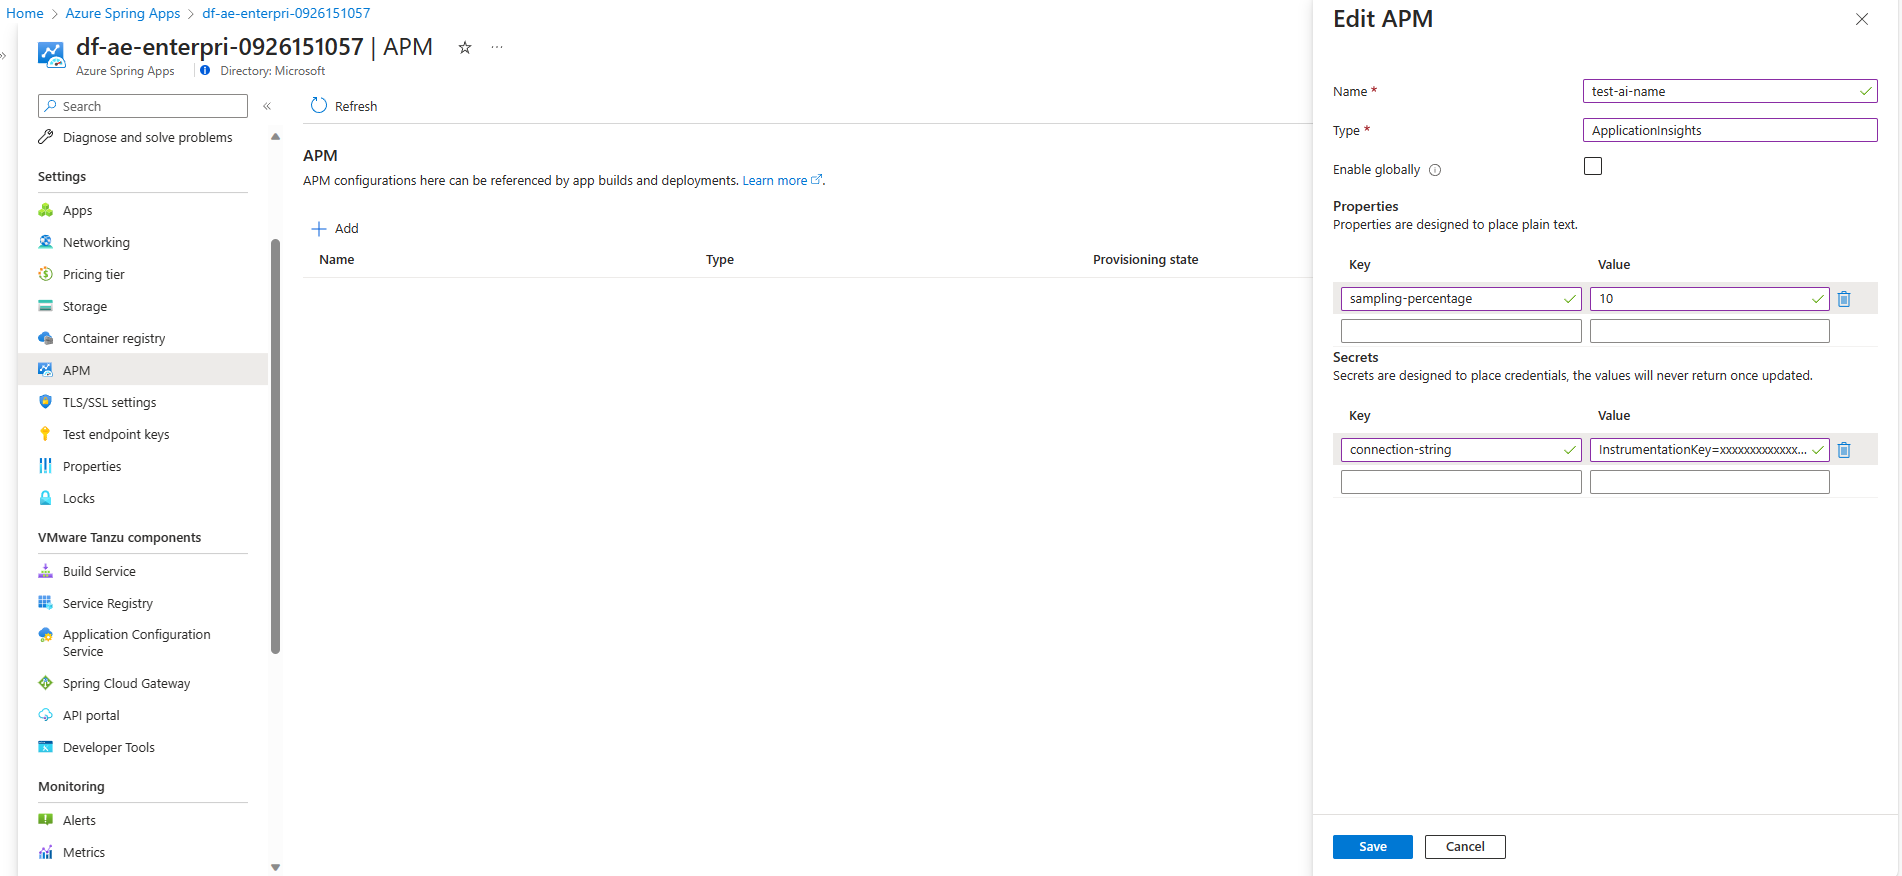
Select Spring Cloud Gateway on the navigation pane, then select APM.
Choose the APM name in the APM reference names list. The list includes all the APM names configured in step 1.
Select Save to bind APM reference names to Spring Cloud Gateway. Your gateway restarts to enable APM monitoring.

Manage APM in VMware Spring Cloud Gateway (deprecated)
You can use the Azure portal or the Azure CLI to set up APM in VMware Spring Cloud Gateway. You can also specify the types of APM Java agents to use and the corresponding APM environment variables that they support.
Use the following steps to set up APM by using the Azure portal:
- In your Azure Spring Apps instance, select Spring Cloud Gateway on the navigation pane, and then select Configuration.
- Choose the APM type in the APM list to monitor a gateway.
- Fill in the key/value pairs for the APM environment variables in the Properties and Secrets sections. You can put variables with sensitive information in Secrets.
- Select Save to save your changes.
Updating the configuration can take a few minutes. You should get a notification when the configuration is complete.
Note
Azure Spring Apps upgrades the APM agent and deployed apps with the same cadence to keep compatibility of agents between VMware Spring Cloud Gateway and Azure Spring Apps.
By default, Azure Spring Apps prints the logs of the APM Java agent to STDOUT. These logs are included with the VMware Spring Cloud Gateway logs. You can check the version of the APM agent used in the logs. You can query these logs in Log Analytics to troubleshoot.
To make the APM agents work correctly, increase the CPU and memory of VMware Spring Cloud Gateway.
Configure log levels
You can configure the log levels of VMware Spring Cloud Gateway in the following ways to get more details or to reduce logs:
- You can set log levels to
TRACE,DEBUG,INFO,WARN,ERROR, orOFF. The default log level for VMware Spring Cloud Gateway isINFO. - You can turn off logs by setting log levels to
OFF. - When the log level is set to
WARN,ERROR, orOFF, you might be required to adjust it toINFOwhen requesting support from the Azure Spring Apps team. This change causes a restart of VMware Spring Cloud Gateway. - When the log level is set to
TRACEorDEBUG, it might affect the performance of VMware Spring Cloud Gateway. Try avoid these settings in your production environment. - You can set log levels for the
rootlogger or for specific loggers likeio.pivotal.spring.cloud.gateway.
The following loggers might contain valuable troubleshooting information at the TRACE and DEBUG levels:
| Logger | Description |
|---|---|
io.pivotal.spring.cloud.gateway |
Filters and predicates, including custom extensions |
org.springframework.cloud.gateway |
API gateway |
org.springframework.http.server.reactive |
HTTP server interactions |
org.springframework.web.reactive |
API gateway reactive flows |
org.springframework.boot.autoconfigure.web |
API gateway autoconfiguration |
org.springframework.security.web |
Authentication and authorization information |
reactor.netty |
Reactor Netty |
To get environment variable keys, add the logging.level. prefix, and then set the log level by configuring environment logging.level.{loggerName}={logLevel}. The following examples show the steps for the Azure portal and the Azure CLI.
To configure log levels in the Azure portal, use the following steps:
- In your Azure Spring Apps instance, select Spring Cloud Gateway on the navigation pane, and then select Configuration.
- Fill in the key/value pairs for the log levels' environment variables in the Properties and Secrets sections. If the log level is sensitive information in your case, you can include it by using the Secrets section.
- Select Save to save your changes.

Update add-on configuration
The add-on configuration feature enables you to customize certain properties of VMware Spring Cloud Gateway by using a JSON format string. The feature is useful when you need to configure properties that aren't exposed through the REST API.
The add-on configuration is a JSON object with key/value pairs that represent the desired configuration. The following example shows the structure of the JSON format:
{
    "<addon-key-name>": {
        "<addon-key-name>": "<addon-value>"
        ...
    },
    "<addon-key-name>": "<addon-value>",
    ...
}
The following list shows the supported add-on configurations for the add-on key names and value types. This list is subject to change as we upgrade the VMware Spring Cloud Gateway version.
SSO configuration:
Key name:
ssoValue type: Object
Properties:
RolesAttributeName(String): Specifies the name of the attribute that contains the roles associated with the SSO session.InactiveSessionExpirationInMinutes(Integer): Specifies the expiration time, in minutes, for inactive SSO sessions. A value of0means the session never expires.
Example:
{
    "sso": {
        "rolesAttributeName": "roles",
        "inactiveSessionExpirationInMinutes": 1
    }
}
Metadata configuration:
Key name:
apiValue type: Object
Properties
groupId(String): A unique identifier for the group of APIs available on the VMware Spring Cloud Gateway instance. The value can contain only lowercase letters and numbers.
Example:
{
    "api": {
        "groupId": "id1"
    }
}
Use the following steps to update the add-on configuration.
- In your Azure Spring Apps instance, select Spring Cloud Gateway on the navigation pane, and then select Configuration.
- Specify the JSON value for Addon Configs.
- Select Save.
Next steps
Feedback
Coming soon: Throughout 2024 we will be phasing out GitHub Issues as the feedback mechanism for content and replacing it with a new feedback system. For more information see: https://aka.ms/ContentUserFeedback.
Submit and view feedback for