Migrate an application to use passwordless connections with Azure Blob Storage
Application requests to Azure services must be authenticated using configurations such as account access keys or passwordless connections. However, you should prioritize passwordless connections in your applications when possible. Traditional authentication methods that use passwords or secret keys create security risks and complications. Visit the passwordless connections for Azure services hub to learn more about the advantages of moving to passwordless connections.
The following tutorial explains how to migrate an existing application to connect using passwordless connections. These same migration steps should apply whether you're using access keys, connection strings, or another secrets-based approach.
Configure roles and users for local development authentication
When developing locally, make sure that the user account that is accessing blob data has the correct permissions. You'll need Storage Blob Data Contributor to read and write blob data. To assign yourself this role, you'll need to be assigned the User Access Administrator role, or another role that includes the Microsoft.Authorization/roleAssignments/write action. You can assign Azure RBAC roles to a user using the Azure portal, Azure CLI, or Azure PowerShell. You can learn more about the available scopes for role assignments on the scope overview page.
In this scenario, you'll assign permissions to your user account, scoped to the storage account, to follow the Principle of Least Privilege. This practice gives users only the minimum permissions needed and creates more secure production environments.
The following example will assign the Storage Blob Data Contributor role to your user account, which provides both read and write access to blob data in your storage account.
Important
In most cases it will take a minute or two for the role assignment to propagate in Azure, but in rare cases it may take up to eight minutes. If you receive authentication errors when you first run your code, wait a few moments and try again.
In the Azure portal, locate your storage account using the main search bar or left navigation.
On the storage account overview page, select Access control (IAM) from the left-hand menu.
On the Access control (IAM) page, select the Role assignments tab.
Select + Add from the top menu and then Add role assignment from the resulting drop-down menu.
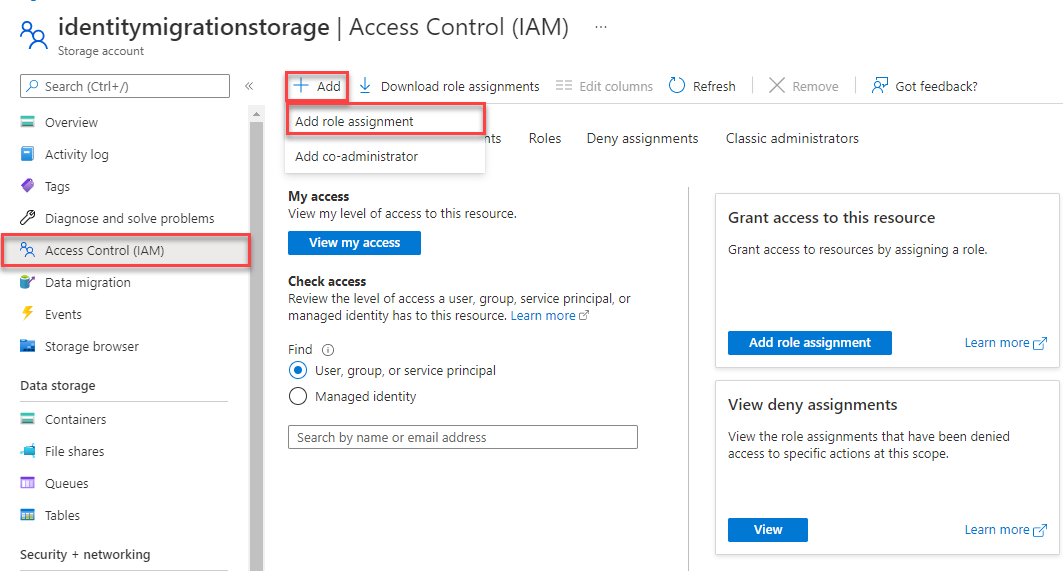
Use the search box to filter the results to the desired role. For this example, search for Storage Blob Data Contributor and select the matching result and then choose Next.
Under Assign access to, select User, group, or service principal, and then choose + Select members.
In the dialog, search for your Microsoft Entra username (usually your user@domain email address) and then choose Select at the bottom of the dialog.
Select Review + assign to go to the final page, and then Review + assign again to complete the process.

Sign-in and migrate the app code to use passwordless connections
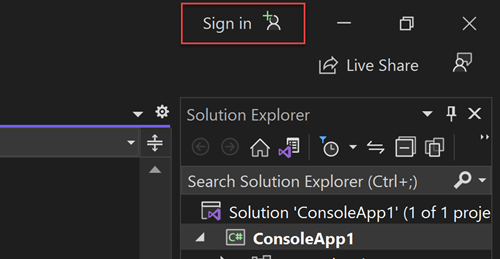
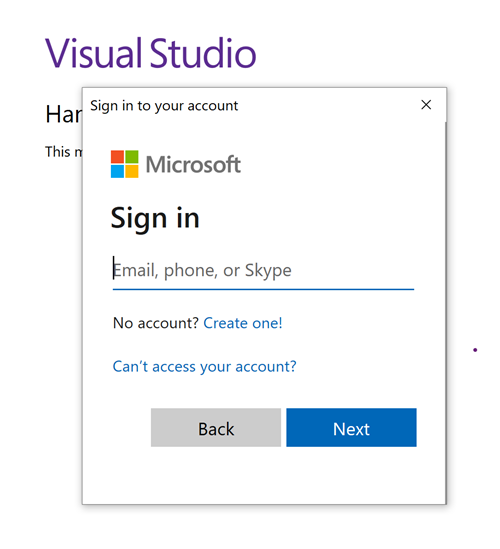
For local development, make sure you're authenticated with the same Microsoft Entra account you assigned the role to. You can authenticate via popular development tools, such as the Azure CLI or Azure PowerShell. The development tools with which you can authenticate vary across languages.
Sign-in to Azure through the Azure CLI using the following command:
az login
Next, update your code to use passwordless connections.
To use
DefaultAzureCredentialin a .NET application, install theAzure.Identitypackage:dotnet add package Azure.IdentityAt the top of your file, add the following code:
using Azure.Identity;Identify the locations in your code that create a
BlobServiceClientto connect to Azure Blob Storage. Update your code to match the following example:DefaultAzureCredential credential = new(); BlobServiceClient blobServiceClient = new( new Uri($"https://{storageAccountName}.blob.core.windows.net"), credential);
Make sure to update the storage account name in the URI of your
BlobServiceClient. You can find the storage account name on the overview page of the Azure portal.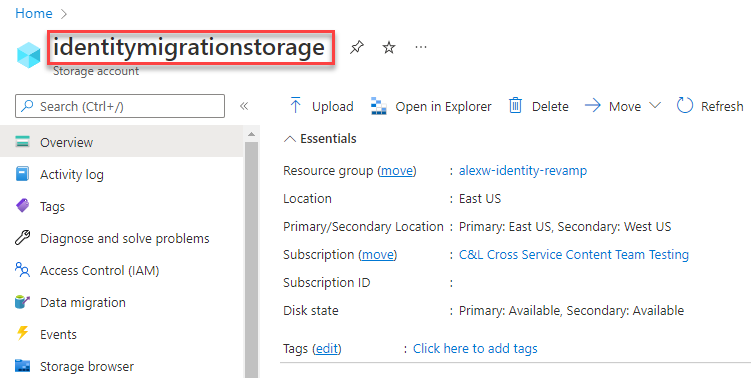
Run the app locally
After making these code changes, run your application locally. The new configuration should pick up your local credentials, such as the Azure CLI, Visual Studio, or IntelliJ. The roles you assigned to your local dev user in Azure allows your app to connect to the Azure service locally.
Configure the Azure hosting environment
Once your application is configured to use passwordless connections and runs locally, the same code can authenticate to Azure services after it's deployed to Azure. The sections that follow explain how to configure a deployed application to connect to Azure Blob Storage using a managed identity.
Create the managed identity
You can create a user-assigned managed identity using the Azure portal or the Azure CLI. Your application uses the identity to authenticate to other services.
- At the top of the Azure portal, search for Managed identities. Select the Managed Identities result.
- Select + Create at the top of the Managed Identities overview page.
- On the Basics tab, enter the following values:
- Subscription: Select your desired subscription.
- Resource Group: Select your desired resource group.
- Region: Select a region near your location.
- Name: Enter a recognizable name for your identity, such as MigrationIdentity.
- Select Review + create at the bottom of the page.
- When the validation checks finish, select Create. Azure creates a new user-assigned identity.
After the resource is created, select Go to resource to view the details of the managed identity.

Associate the managed identity with your web app
You need to configure your web app to use the managed identity you created. Assign the identity to your app using either the Azure portal or the Azure CLI.
Complete the following steps in the Azure portal to associate an identity with your app. These same steps apply to the following Azure services:
- Azure Spring Apps
- Azure Container Apps
- Azure virtual machines
- Azure Kubernetes Service
Navigate to the overview page of your web app.
Select Identity from the left navigation.
On the Identity page, switch to the User assigned tab.
Select + Add to open the Add user assigned managed identity flyout.
Select the subscription you used previously to create the identity.
Search for the MigrationIdentity by name and select it from the search results.
Select Add to associate the identity with your app.


Assign roles to the managed identity
Next, you need to grant permissions to the managed identity you created to access your storage account. Grant permissions by assigning a role to the managed identity, just like you did with your local development user.
Navigate to your storage account overview page and select Access Control (IAM) from the left navigation.
Choose Add role assignment

In the Role search box, search for Storage Blob Data Contributor, which is a common role used to manage data operations for blobs. You can assign whatever role is appropriate for your use case. Select the Storage Blob Data Contributor from the list and choose Next.
On the Add role assignment screen, for the Assign access to option, select Managed identity. Then choose +Select members.
In the flyout, search for the managed identity you created by name and select it from the results. Choose Select to close the flyout menu.
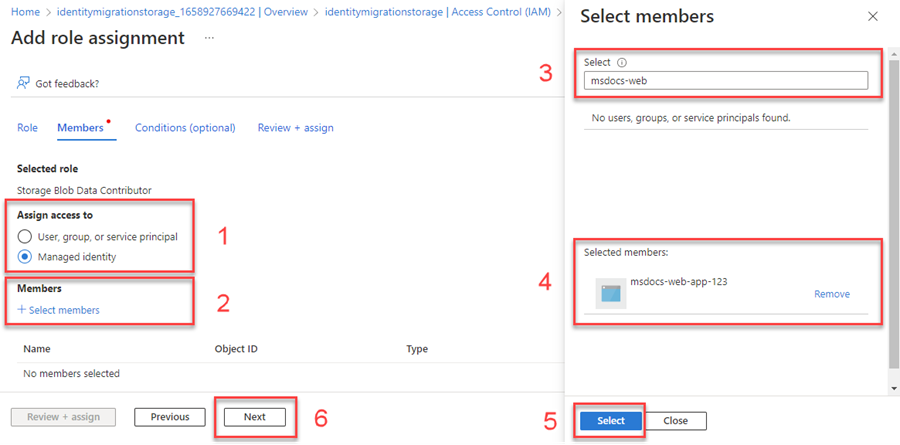
Select Next a couple times until you're able to select Review + assign to finish the role assignment.


Update the application code
You need to configure your application code to look for the specific managed identity you created when it's deployed to Azure. In some scenarios, explicitly setting the managed identity for the app also prevents other environment identities from accidentally being detected and used automatically.
On the managed identity overview page, copy the client ID value to your clipboard.
Apply the following language-specific changes:
Create a
DefaultAzureCredentialOptionsobject and pass it toDefaultAzureCredential. Set the ManagedIdentityClientId property to the client ID.DefaultAzureCredential credential = new( new DefaultAzureCredentialOptions { ManagedIdentityClientId = managedIdentityClientId });Redeploy your code to Azure after making this change in order for the configuration updates to be applied.
Test the app
After deploying the updated code, browse to your hosted application in the browser. Your app should be able to connect to the storage account successfully. Keep in mind that it may take several minutes for the role assignments to propagate through your Azure environment. Your application is now configured to run both locally and in a production environment without the developers having to manage secrets in the application itself.
Next steps
In this tutorial, you learned how to migrate an application to passwordless connections.
You can read the following resources to explore the concepts discussed in this article in more depth:
- Authorize access to blobs using Microsoft Entra ID
- To learn more about .NET Core, see Get started with .NET in 10 minutes.
Feedback
Coming soon: Throughout 2024 we will be phasing out GitHub Issues as the feedback mechanism for content and replacing it with a new feedback system. For more information see: https://aka.ms/ContentUserFeedback.
Submit and view feedback for