Authorize access to blobs and files with AzCopy and Microsoft Entra ID
You can provide AzCopy with authorization credentials by using Microsoft Entra ID. That way, you won't have to append a shared access signature (SAS) token to each command.
Start by verifying your role assignments. Then, choose what type of security principal you want to authorize. A user identity, a managed identity, and a service principal are each a type of security principal.
To authorize access, you'll set in-memory environment variables. Then run any AzCopy command. AzCopy will retrieve the Auth token required to complete the operation. After the operation completes, the token disappears from memory.
AzCopy retrieves the OAuth token by using the credentials that you provide. Alternatively, AzCopy can use the OAuth token of an active Azure CLI or Azure PowerShell session.
For more information about AzCopy, Get started with AzCopy.
Verify role assignments
The level of authorization that you need is based on whether you plan to upload files or just download them.
If you just want to download files, then verify that the Storage Blob Data Reader role (Azure Blob Storage) or the Storage File Data Privileged Reader role (Azure Files) has been assigned to your user identity, managed identity, or service principal.
If you want to upload files to Azure Blob Storage, then verify that one of these roles has been assigned to your security principal.
If you want to upload files to an Azure file share, then verify that the Storage File Data Privileged Reader has been assigned to your security principal.
These roles can be assigned to your security principal in any of these scopes:
- Container (file system) or file share
- Storage account
- Resource group
- Subscription
To learn how to verify and assign roles, see Assign an Azure role for access to blob data (Blob Storage) or Choose how to authorize access to file data in the Azure portal (Azure Files).
Note
Keep in mind that Azure role assignments can take up to five minutes to propagate.
You don't need to have one of these roles assigned to your security principal if your security principal is added to the access control list (ACL) of the target container or directory. In the ACL, your security principal needs write permission on the target directory, and execute permission on container and each parent directory.
To learn more, see Access control model in Azure Data Lake Storage Gen2.
Authorize with AzCopy
AzCopy uses the credentials that you provide to authorize the security principal.
Authorize a user identity
After you've verified that your user identity has been given the necessary authorization level, type the following command, and then press the ENTER key.
export AZCOPY_AUTO_LOGIN_TYPE=DEVICE
Then, run any azcopy command (For example: azcopy list https://contoso.blob.core.windows.net).
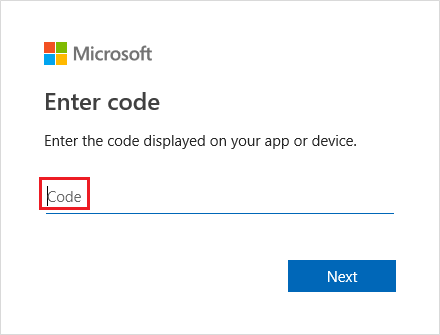
This command returns an authentication code and the URL of a website. Open the website, provide the code, and then choose the Next button.
A sign-in window will appear. In that window, sign into your Azure account by using your Azure account credentials. After you've successfully signed in, the operation can complete.
Authorize a managed identity
This is a great option if you plan to use AzCopy inside of a script that runs without user interaction, and the script runs from an Azure Virtual Machine (VM). When using this option, you won't have to store any credentials on the VM.
You can sign into your account by using a system-wide managed identity that you've enabled on your VM, or by using the client ID, Object ID, or Resource ID of a user-assigned managed identity that you've assigned to your VM.
To learn more about how to enable a system-wide managed identity or create a user-assigned managed identity, see Configure managed identities for Azure resources on a VM using the Azure portal.
Authorize by using a system-wide managed identity
First, make sure that you've enabled a system-wide managed identity on your VM. See System-assigned managed identity.
Type the following command, and then press the ENTER key.
export AZCOPY_AUTO_LOGIN_TYPE=MSI
Then, run any azcopy command (For example: azcopy list https://contoso.blob.core.windows.net).
Authorize by using a user-assigned managed identity
First, make sure that you've enabled a user-assigned managed identity on your VM. See User-assigned managed identity.
Type the following command, and then press the ENTER key.
export AZCOPY_AUTO_LOGIN_TYPE=MSI
Then, type any of the following commands, and then press the ENTER key.
export AZCOPY_MSI_CLIENT_ID=<client-id>
Replace the <client-id> placeholder with the client ID of the user-assigned managed identity.
export AZCOPY_MSI_OBJECT_ID=<object-id>
Replace the <object-id> placeholder with the object ID of the user-assigned managed identity.
export AZCOPY_MSI_RESOURCE_STRING=<resource-id>
Replace the <resource-id> placeholder with the resource ID of the user-assigned managed identity.
After you set these variables, you can run any azcopy command (For example: azcopy list https://contoso.blob.core.windows.net).
Authorize a service principal
This is a great option if you plan to use AzCopy inside of a script that runs without user interaction, particularly when running on-premises. If you plan to run AzCopy on VMs that run in Azure, a managed service identity is easier to administer. To learn more, see the Authorize a managed identity section of this article.
You can sign into your account by using a client secret or by using the password of a certificate that is associated with your service principal's app registration.
To learn more about creating service principal, see How to: Use the portal to create a Microsoft Entra application and service principal that can access resources.
To learn more about service principals in general, see Application and service principal objects in Microsoft Entra ID
Authorize a service principal by using a client secret
Type the following command, and then press the ENTER key.
export AZCOPY_AUTO_LOGIN_TYPE=SPN
export AZCOPY_SPA_APPLICATION_ID=<application-id>
export AZCOPY_SPA_CLIENT_SECRET=<client-secret>
export AZCOPY_TENANT_ID=<tenant-id>
Replace the <application-id> placeholder with the application ID of your service principal's app registration. Replace the <client-secret> placeholder with the client secret. Replace the <tenant-id> placeholder with the tenant ID of the organization to which the storage account belongs. To find the tenant ID, select Microsoft Entra ID > Properties > Directory ID in the Azure portal.
Note
Consider using a prompt to collect the password from the user. That way, your password won't appear in your command history.
Then, run any azcopy command (For example: azcopy list https://contoso.blob.core.windows.net).
Authorize a service principal by using a certificate
If you prefer to use your own credentials for authorization, you can upload a certificate to your app registration, and then use that certificate to log in.
In addition to uploading your certificate to your app registration, you'll also need to have a copy of the certificate saved to the machine or VM where AzCopy will be running. This copy of the certificate should be in .PFX or .PEM format, and must include the private key. The private key should be password-protected. If you're using Windows, and your certificate exists only in a certificate store, make sure to export that certificate to a PFX file (including the private key). For guidance, see Export-PfxCertificate
Type the following command, and then press the ENTER key.
export AZCOPY_AUTO_LOGIN_TYPE=SPN
export AZCOPY_SPA_APPLICATION_ID=<application-id>
export AZCOPY_SPA_CERT_PATH=<path-to-certificate-file>
export AZCOPY_SPA_CERT_PASSWORD=<certificate-password>
export AZCOPY_TENANT_ID=<tenant-id>
Replace the <application-id> placeholder with the application ID of your service principal's app registration. Replace the <path-to-certificate-file> placeholder with the relative or fully qualified path to the certificate file. AzCopy saves the path to this certificate but it doesn't save a copy of the certificate, so make sure to keep that certificate in place. Replace the <certificate-password> placeholder with the password of the certificate. Replace the <tenant-id> placeholder with the tenant ID of the organization to which the storage account belongs. To find the tenant ID, select Microsoft Entra ID > Properties > Directory ID in the Azure portal.
Note
Consider using a prompt to collect the password from the user. That way, your password won't appear in your command history.
Then, run any azcopy command (For example: azcopy list https://contoso.blob.core.windows.net).
Authorize by using the AzCopy login command
As an alternative to using in-memory variables, you authorize access by using the azcopy login command.
The azcopy login command retrieves an OAuth token and then places that token into a secret store on your system. If your operating system doesn't have a secret store such as a Linux keyring, the azcopy login command won't work because there is nowhere to place the token.
Authorize a user identity (azcopy login command)
After you've verified that your user identity has been given the necessary authorization level, open a command prompt, type the following command, and then press the ENTER key.
azcopy login
If you receive an error, try including the tenant ID of the organization to which the storage account belongs.
azcopy login --tenant-id=<tenant-id>
Replace the <tenant-id> placeholder with the tenant ID of the organization to which the storage account belongs. To find the tenant ID, select Microsoft Entra ID > Properties > Directory ID in the Azure portal.
This command returns an authentication code and the URL of a website. Open the website, provide the code, and then choose the Next button.
A sign-in window will appear. In that window, sign into your Azure account by using your Azure account credentials. After you've successfully signed in, you can close the browser window and begin using AzCopy.
Authorize by using a system-wide managed identity (azcopy login command)
First, make sure that you've enabled a system-wide managed identity on your VM. See System-assigned managed identity.
Then, in your command console, type the following command, and then press the ENTER key.
azcopy login --identity
Authorize by using a user-assigned managed identity (azcopy login command)
First, make sure that you've enabled a user-assigned managed identity on your VM. See User-assigned managed identity.
Then, in your command console, type any of the following commands, and then press the ENTER key.
azcopy login --identity --identity-client-id "<client-id>"
Replace the <client-id> placeholder with the client ID of the user-assigned managed identity.
azcopy login --identity --identity-object-id "<object-id>"
Replace the <object-id> placeholder with the object ID of the user-assigned managed identity.
azcopy login --identity --identity-resource-id "<resource-id>"
Replace the <resource-id> placeholder with the resource ID of the user-assigned managed identity.
Authorize a service principal (azcopy login command)
Before you run a script, you have to sign in interactively at least one time so that you can provide AzCopy with the credentials of your service principal. Those credentials are stored in a secured and encrypted file so that your script doesn't have to provide that sensitive information.
You can sign into your account by using a client secret or by using the password of a certificate that is associated with your service principal's app registration.
To learn more about creating service principal, see How to: Use the portal to create a Microsoft Entra application and service principal that can access resources.
Authorize a service principal by using a client secret (azcopy login command)
Start by setting the AZCOPY_SPA_CLIENT_SECRET environment variable to the client secret of your service principal's app registration.
Note
Make sure to set this value from your command prompt, and not in the environment variable settings of your operating system. That way, the value is available only to the current session.
This example shows how you could do this in PowerShell.
$env:AZCOPY_SPA_CLIENT_SECRET="$(Read-Host -prompt "Enter key")"
Note
Consider using a prompt as shown in this example. That way, your password won't appear in your console's command history.
Next, type the following command, and then press the ENTER key.
azcopy login --service-principal --application-id application-id --tenant-id=tenant-id
Replace the <application-id> placeholder with the application ID of your service principal's app registration. Replace the <tenant-id> placeholder with the tenant ID of the organization to which the storage account belongs. To find the tenant ID, select Microsoft Entra ID > Properties > Directory ID in the Azure portal.
Authorize a service principal by using a certificate (azcopy login command)
If you prefer to use your own credentials for authorization, you can upload a certificate to your app registration, and then use that certificate to log in.
In addition to uploading your certificate to your app registration, you'll also need to have a copy of the certificate saved to the machine or VM where AzCopy will be running. This copy of the certificate should be in .PFX or .PEM format, and must include the private key. The private key should be password-protected. If you're using Windows, and your certificate exists only in a certificate store, make sure to export that certificate to a PFX file (including the private key). For guidance, see Export-PfxCertificate
Next, set the AZCOPY_SPA_CERT_PASSWORD environment variable to the certificate password.
Note
Make sure to set this value from your command prompt, and not in the environment variable settings of your operating system. That way, the value is available only to the current session.
This example shows how you could do this task in PowerShell.
$env:AZCOPY_SPA_CERT_PASSWORD="$(Read-Host -prompt "Enter key")"
Next, type the following command, and then press the ENTER key.
azcopy login --service-principal --application-id application-id --certificate-path <path-to-certificate-file> --tenant-id=<tenant-id>
Replace the <application-id> placeholder with the application ID of your service principal's app registration. Replace the <path-to-certificate-file> placeholder with the relative or fully qualified path to the certificate file. AzCopy saves the path to this certificate but it doesn't save a copy of the certificate, so make sure to keep that certificate in place. Replace the <tenant-id> placeholder with the tenant ID of the organization to which the storage account belongs. To find the tenant ID, select Microsoft Entra ID > Properties > Directory ID in the Azure portal.
Note
Consider using a prompt as shown in this example. That way, your password won't appear in your console's command history.
Authorize with Azure CLI
If you sign in by using Azure CLI, then Azure CLI obtains an OAuth token that AzCopy can use to authorize operations.
To enable AzCopy to use that token, type the following command, and then press the ENTER key.
export AZCOPY_AUTO_LOGIN_TYPE=AZCLI
For more information about how to sign in with the Azure CLI, see Sign in with Azure CLI.
Authorize with Azure PowerShell
If you sign in by using Azure PowerShell, then Azure PowerShell obtains an OAuth token that AzCopy can use to authorize operations.
To enable AzCopy to use that token, type the following command, and then press the ENTER key.
$Env:AZCOPY_AUTO_LOGIN_TYPE="PSCRED"
For more information about how to sign in with the Azure PowerShell, see Sign in with Azure PowerShell.
Next steps
For more information about AzCopy, Get started with AzCopy
If you have questions, issues, or general feedback, submit them on GitHub page.
Feedback
Coming soon: Throughout 2024 we will be phasing out GitHub Issues as the feedback mechanism for content and replacing it with a new feedback system. For more information see: https://aka.ms/ContentUserFeedback.
Submit and view feedback for