


Events
Mar 31, 11 PM - Apr 2, 11 PM
The biggest Fabric, Power BI, and SQL learning event. March 31 – April 2. Use code FABINSIDER to save $400.
Register todayThis browser is no longer supported.
Upgrade to Microsoft Edge to take advantage of the latest features, security updates, and technical support.
The Azurite open-source emulator provides a free local environment for testing your Azure Blob, Queue Storage, and Table Storage applications. When you're satisfied with how your application is working locally, switch to using an Azure Storage account in the cloud. The emulator provides cross-platform support on Windows, Linux, and macOS.
Azurite supersedes the Azure Storage Emulator, and continues to be updated to support the latest versions of Azure Storage APIs.
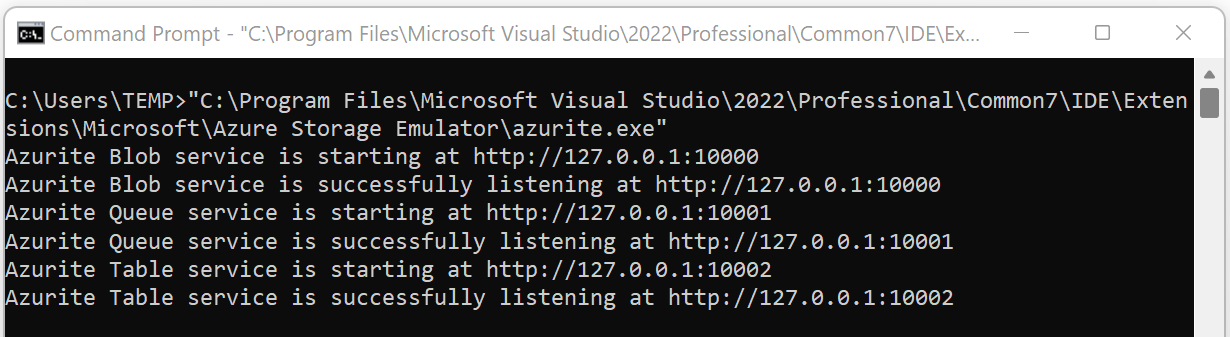
This video shows you how to install and run the Azurite emulator.
The steps in the video are also described in the following sections. Select any of these tabs.
This installation method requires that you have Node.js version 8.0 or later installed. Node Package Manager (npm) is the package management tool included with every Node.js installation. After installing Node.js, execute the following npm command to install Azurite.
npm install -g azurite
Launch Azurite by issuing the following command:
azurite --silent --location c:\azurite --debug c:\azurite\debug.log
This command tells Azurite to store all data in a particular directory, c:\azurite. If the --location option is omitted, it uses the current working directory.
This section details the command line switches available when launching Azurite.
Optional - Get command-line help by using the -h or --help switch.
azurite -h
azurite --help
Optional - By default, Azurite listens to 127.0.0.1 as the local server. Use the --blobHost switch to set the address to your requirements.
Accept requests on the local machine only:
azurite --blobHost 127.0.0.1
Allow remote requests:
azurite --blobHost 0.0.0.0
Caution
Allowing remote requests may make your system vulnerable to external attacks.
Optional - By default, Azurite listens for the Blob service on port 10000. Use the --blobPort switch to specify the listening port that you require.
Note
After using a customized port, you need to update the connection string or corresponding configuration in your Azure Storage tools or SDKs.
Customize the Blob service listening port:
azurite --blobPort 8888
Let the system auto select an available port:
azurite --blobPort 0
The port in use is displayed during Azurite startup.
Optional - Azurite stores data to the local disk during execution. Use the -l or --location switch to specify a path as the workspace location. By default, the current process working directory is used. Note the lowercase 'l'.
azurite -l c:\azurite
azurite --location c:\azurite
Optional - By default, the access log is displayed in the console window. Disable the display of the access log by using the -s or --silent switch.
azurite -s
azurite --silent
Optional - The debug log includes detailed information on every request and exception stack trace. Enable the debug log by providing a valid local file path to the -d or --debug switch.
azurite -d path/debug.log
azurite --debug path/debug.log
Optional - By default, Azurite applies strict mode to block unsupported request headers and parameters. Disable strict mode by using the -L or --loose switch. Note the capital 'L'.
azurite -L
azurite --loose
Optional - Display the installed Azurite version number by using the -v or --version switch.
azurite -v
azurite --version
Optional - By default, Azurite uses the HTTP protocol. You can enable HTTPS mode by providing a path to a Privacy Enhanced Mail (.pem) or Personal Information Exchange (.pfx) certificate file to the --cert switch. HTTPS is required to connect to Azurite using OAuth authentication.
When --cert is provided for a PEM file, you must provide a corresponding --key switch.
azurite --cert path/server.pem --key path/key.pem
When --cert is provided for a PFX file, you must provide a corresponding --pwd switch.
azurite --cert path/server.pfx --pwd pfxpassword
For detailed information on generating PEM and PFX files, see HTTPS Setup.
Optional - Enable OAuth authentication for Azurite by using the --oauth switch.
azurite --oauth basic --cert path/server.pem --key path/key.pem
Note
OAuth requires an HTTPS endpoint. Make sure HTTPS is enabled by providing --cert switch along with the --oauth switch.
Azurite supports basic authentication by specifying the basic parameter to the --oauth switch. Azurite performs basic authentication, like validating the incoming bearer token, checking the issuer, audience, and expiry. Azurite doesn't check the token signature or permissions. To learn more about authorization, see Authorization for tools and SDKs.
Optional - When starting up, Azurite checks that the requested API version is valid. The following command skips the API version check:
azurite --skipApiVersionCheck
Optional. When using the fully qualified domain name instead of the IP in request Uri host, by default Azurite parses the storage account name from request URI host. You can force the parsing of the storage account name from request URI path by using --disableProductStyleUrl:
azurite --disableProductStyleUrl
Optional. By default, blob and queue metadata is persisted to disk and content is persisted to extent files. Table storage persists all data to disk. You can disable persisting any data to disk and only store data in-memory. In the in-memory persistence scenario, if the Azurite process is terminated, all data is lost. The default persistence behavior can be overridden using the following option:
azurite --inMemoryPersistence
This setting is rejected when the SQL-based metadata implementation is enabled (via AZURITE_DB), or when the --location option is specified.
Optional. By default, the in-memory extent store (for blob and queue content) is limited to 50% of the total memory on the host machine. The total is evaluated using os.totalmem(). This limit can be overridden using the following option:
azurite --extentMemoryLimit <megabytes>
There's no restriction on the value specified for this option, but virtual memory might be used if the limit exceeds the amount of available physical memory as provided by the operating system. A high limit might eventually lead to out of memory errors or reduced performance. This option is rejected when --inMemoryPersistence isn't specified.
To learn more, see Use in-memory storage.
You can connect to Azurite from Azure Storage SDKs, or tools like Azure Storage Explorer. Authentication is required, and Azurite supports authorization with OAuth, Shared Key, and shared access signatures (SAS). Azurite also supports anonymous access to public containers.
To learn more about using Azurite with the Azure SDKs, see Azure SDKs.
Azurite accepts the same well-known account and key used by the legacy Azure Storage Emulator.
devstoreaccount1Eby8vdM02xNOcqFlqUwJPLlmEtlCDXJ1OUzFT50uSRZ6IFsuFq2UVErCz4I6tq/K1SZFPTOtr/KBHBeksoGMGw==Azurite supports custom storage account names and keys by setting the AZURITE_ACCOUNTS environment variable in the following format: account1:key1[:key2];account2:key1[:key2];....
For example, use a custom storage account that has one key:
set AZURITE_ACCOUNTS="account1:key1"
export AZURITE_ACCOUNTS="account1:key1"
Note
The account keys must be a base64 encoded string.
Or use multiple storage accounts with two keys each:
set AZURITE_ACCOUNTS="account1:key1:key2;account2:key1:key2"
export AZURITE_ACCOUNTS="account1:key1:key2;account2:key1:key2"
Azurite refreshes custom account names and keys from the environment variable every minute by default. With this feature, you can dynamically rotate the account key, or add new storage accounts without restarting Azurite.
Note
The default devstoreaccount1 storage account is disabled when you set custom storage accounts. If you want to continue using devstoreaccount1 after enabling custom storage accounts, you need to add it to the list of custom accounts and keys in the AZURITE_ACCOUNTS environment variable.
The account keys must be a base64 encoded string.
The easiest way to connect to Azurite from your application is to configure a connection string in your application's configuration file that references the shortcut UseDevelopmentStorage=true. Here's an example of a connection string in an app.config file:
<appSettings>
  <add key="StorageConnectionString" value="UseDevelopmentStorage=true" />
</appSettings>
You can pass the following connection strings to the Azure SDKs or tools, like Azure CLI 2.0 or Storage Explorer.
The full connection string is:
DefaultEndpointsProtocol=http;AccountName=devstoreaccount1;AccountKey=Eby8vdM02xNOcqFlqUwJPLlmEtlCDXJ1OUzFT50uSRZ6IFsuFq2UVErCz4I6tq/K1SZFPTOtr/KBHBeksoGMGw==;BlobEndpoint=http://127.0.0.1:10000/devstoreaccount1;QueueEndpoint=http://127.0.0.1:10001/devstoreaccount1;TableEndpoint=http://127.0.0.1:10002/devstoreaccount1;
To connect to a specific service, you can use the following connection strings:
To connect to Blob Storage only, the connection string is:
DefaultEndpointsProtocol=http;AccountName=devstoreaccount1;AccountKey=Eby8vdM02xNOcqFlqUwJPLlmEtlCDXJ1OUzFT50uSRZ6IFsuFq2UVErCz4I6tq/K1SZFPTOtr/KBHBeksoGMGw==;BlobEndpoint=http://127.0.0.1:10000/devstoreaccount1;
The full HTTPS connection string is:
DefaultEndpointsProtocol=https;AccountName=devstoreaccount1;AccountKey=Eby8vdM02xNOcqFlqUwJPLlmEtlCDXJ1OUzFT50uSRZ6IFsuFq2UVErCz4I6tq/K1SZFPTOtr/KBHBeksoGMGw==;BlobEndpoint=https://127.0.0.1:10000/devstoreaccount1;QueueEndpoint=https://127.0.0.1:10001/devstoreaccount1;TableEndpoint=https://127.0.0.1:10002/devstoreaccount1;
To connect to a specific service, you can use the following connection strings:
To use the blob service only, the HTTPS connection string is:
DefaultEndpointsProtocol=https;AccountName=devstoreaccount1;AccountKey=Eby8vdM02xNOcqFlqUwJPLlmEtlCDXJ1OUzFT50uSRZ6IFsuFq2UVErCz4I6tq/K1SZFPTOtr/KBHBeksoGMGw==;BlobEndpoint=https://127.0.0.1:10000/devstoreaccount1;
If you used dotnet dev-certs to generate your self-signed certificate, use the following connection string.
DefaultEndpointsProtocol=https;AccountName=devstoreaccount1;AccountKey=Eby8vdM02xNOcqFlqUwJPLlmEtlCDXJ1OUzFT50uSRZ6IFsuFq2UVErCz4I6tq/K1SZFPTOtr/KBHBeksoGMGw==;BlobEndpoint=https://localhost:10000/devstoreaccount1;QueueEndpoint=https://localhost:10001/devstoreaccount1;TableEndpoint=https://localhost:10002/devstoreaccount1;
Update the connection string when using custom storage accounts and keys.
For more information, see Configure Azure Storage connection strings.
To connect to Azurite with the Azure SDKs, follow these steps:
--oauth switch. To learn more, see OAuth configuration.--cert and --key/--pwd options. To learn more about generating certificates, see Certificate configuration (HTTPS) and HTTPS setup.Once the certificates are in place, start Azurite with the following command line options:
azurite --oauth basic --cert cert-name.pem --key cert-name-key.pem
Replace cert-name.pem and certname-key.pem with the names of your certificate and key files. If you're using a PFX certificate, use the --pwd option instead of the --key option.
To interact with Blob Storage resources, you can instantiate a BlobContainerClient, BlobServiceClient, or BlobClient.
The following examples show how to authorize a BlobContainerClient object using three different authorization mechanisms: DefaultAzureCredential, connection string, and shared key. DefaultAzureCredential provides a Bearer token-based authentication mechanism, and uses a chain of credential types used for authentication. Once authenticated, this credential provides the OAuth token as part of client instantiation. To learn more, see the DefaultAzureCredential class reference.
// With container URL and DefaultAzureCredential
var client = new BlobContainerClient(
    new Uri("https://127.0.0.1:10000/devstoreaccount1/container-name"), new DefaultAzureCredential()
  );

// With connection string
var client = new BlobContainerClient(
    "DefaultEndpointsProtocol=https;AccountName=devstoreaccount1;AccountKey=Eby8vdM02xNOcqFlqUwJPLlmEtlCDXJ1OUzFT50uSRZ6IFsuFq2UVErCz4I6tq/K1SZFPTOtr/KBHBeksoGMGw==;BlobEndpoint=https://127.0.0.1:10000/devstoreaccount1;", "container-name"
  );

// With account name and key
var client = new BlobContainerClient(
    new Uri("https://127.0.0.1:10000/devstoreaccount1/container-name"),
    new StorageSharedKeyCredential("devstoreaccount1", "Eby8vdM02xNOcqFlqUwJPLlmEtlCDXJ1OUzFT50uSRZ6IFsuFq2UVErCz4I6tq/K1SZFPTOtr/KBHBeksoGMGw==")
  );
You can use Storage Explorer to view the data stored in Azurite.
In Storage Explorer, connect to Azurite by following these steps:
By default, Storage Explorer doesn't open an HTTPS endpoint that uses a self-signed certificate. If you're running Azurite with HTTPS, you're likely using a self-signed certificate. In Storage Explorer, import SSL certificates via the Edit -> SSL Certificates -> Import Certificates dialog.
If you don't import a certificate, you get an error:
unable to verify the first certificate or self signed certificate in chain
Follow these steps to add Azurite HTTPS to Storage Explorer:
The following files and folders might be created in the workspace location when initializing Azurite.
__blobstorage__ - Directory containing Azurite blob service persisted binary data__queuestorage__ - Directory containing Azurite queue service persisted binary data__tablestorage__ - Directory containing Azurite table service persisted binary data__azurite_db_blob__.json - Azurite blob service metadata file__azurite_db_blob_extent__.json - Azurite blob service extent metadata file__azurite_db_queue__.json - Azurite queue service metadata file__azurite_db_queue_extent__.json - Azurite queue service extent metadata file__azurite_db_table__.json - Azurite table service metadata file__azurite_db_table_extent__.json - Azurite table service extent metadata fileTo clean up Azurite, delete above files and folders and restart the emulator.
There are functional differences between a local instance of Azurite and an Azure Storage account in the cloud.
The service endpoints for Azurite are different from the endpoints of an Azure Storage account. The local computer doesn't do domain name resolution, requiring Azurite endpoints to be local addresses.
When you address a resource in an Azure Storage account, the account name is part of the URI host name. The resource being addressed is part of the URI path:
<http|https>://<account-name>.<service-name>.core.windows.net/<resource-path>
The following URI is a valid address for a blob in an Azure Storage account:
https://myaccount.blob.core.windows.net/mycontainer/myblob.txt
Since the local computer doesn't resolve domain names, the account name is part of the URI path instead of the host name. Use the following URI format for a resource in Azurite:
http://<local-machine-address>:<port>/<account-name>/<resource-path>
The following address might be used for accessing a blob in Azurite:
http://127.0.0.1:10000/myaccount/mycontainer/myblob.txt
Optionally, you could modify your hosts file to access an account with production-style URL.
First, add one or more lines to your hosts file. For example:
127.0.0.1 account1.blob.localhost
127.0.0.1 account1.queue.localhost
127.0.0.1 account1.table.localhost
Next, set environment variables to enable customized storage accounts and keys:
set AZURITE_ACCOUNTS="account1:key1:key2"
You could add more accounts. See the Custom storage accounts and keys section of this article.
Start Azurite and use a customized connection string to access your account. In the following example, the connection string assumes that the default ports are used.
DefaultEndpointsProtocol=http;AccountName=account1;AccountKey=key1;BlobEndpoint=http://account1.blob.localhost:10000;QueueEndpoint=http://account1.queue.localhost:10001;TableEndpoint=http://account1.table.localhost:10002;
Don't access default account in this way with Azure Storage Explorer. There's a bug that Storage Explorer is always adding account name in URL path, causing failures.
By default, when using Azurite with a production-style URL, the account name should be the host name in fully qualified domain name such as http://devstoreaccount1.blob.localhost:10000/container. To use production-style URL with account name in the URL path such as http://foo.bar.com:10000/devstoreaccount1/container, make sure to use the --disableProductStyleUrl parameter when you start Azurite.
If you use host.docker.internal as request Uri host (For example: http://host.docker.internal:10000/devstoreaccount1/container), Azurite gets the account name from the request Uri path. This behavior is true regardless of whether you use the --disableProductStyleUrl parameter when you start Azurite.
Azurite doesn't support large numbers of connected clients. There's no performance guarantee. Azurite is intended for development and testing purposes.
Azurite is aligned with Azure Storage error handling logic, but there are differences. For example, error messages might be different, while error status codes align.
Azurite supports read-access geo-redundant replication (RA-GRS). For storage resources, access the secondary location by appending -secondary to the account name. For example, the following address might be used for accessing a blob using the read-only secondary in Azurite:
http://127.0.0.1:10000/devstoreaccount1-secondary/mycontainer/myblob.txt
Support for tables in Azurite is currently in preview. For more information, see the Azurite V3 Table project.
Support for durable functions requires tables.
Important
Azurite support for Table Storage is currently in PREVIEW. See the Supplemental Terms of Use for Microsoft Azure Previews for legal terms that apply to Azure features that are in beta, preview, or otherwise not yet released into general availability.
Contributions and suggestions for Azurite are welcome. Go to the Azurite GitHub project page or GitHub issues for milestones and work items we're tracking for upcoming features and bug fixes. Detailed work items are also tracked in GitHub.
Events
Mar 31, 11 PM - Apr 2, 11 PM
The biggest Fabric, Power BI, and SQL learning event. March 31 – April 2. Use code FABINSIDER to save $400.
Register todayTraining
Module
Use Azure Storage with .NET Aspire - Training
In this module, you'll learn about the integrations built into .NET Aspire that make it simple to store files, data, and messages in Azure Storage accounts.
Certification
Microsoft Certified: Azure Developer Associate - Certifications
Build end-to-end solutions in Microsoft Azure to create Azure Functions, implement and manage web apps, develop solutions utilizing Azure storage, and more.