Quickstart: Create a Stream Analytics job using Visual Studio Code
This quickstart shows you how to create, run and submit an Azure Stream Analytics (ASA) job using the ASA Tools extension for Visual Studio Code in your local machine. You learn to build an ASA job that reads real-time streaming data from IoT Hub and filters events with a temperature greater than 27°. The output results are sent to a file in blob storage. The input data used in this quickstart is generated by a Raspberry Pi online simulator.
Note
Visual Studio Code tools don't support jobs in the China East, China North, Germany Central, and Germany NorthEast regions.
Prerequisites
- Azure subscription. If you don't have an Azure subscription, create a free account.
- Visual Studio Code.
Install the Azure Stream Analytics Tools extension
Open Visual Studio Code (VS Code).
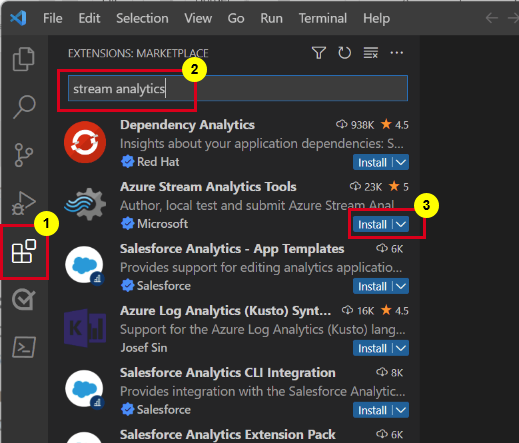
From Extensions on the left pane, search for stream analytics and select Install on the Azure Stream Analytics Tools extension.
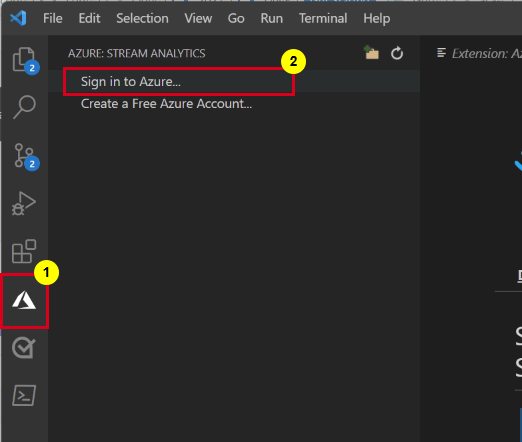
After it's installed, select the Azure icon on the activity bar and sign in to Azure.
Once you're signed in, you can see the subscriptions under your Azure account.
Note
The ASA Tools extension will automatically sign you in every time you open VS Code. If your account has two-factor authentication, we recommend that you use phone authentication rather than using a PIN. To sign out your Azure account, press Ctrl + Shift + P and enter Azure: Sign Out.
Prepare the input data
Before defining the Stream Analytics job, you should prepare the input data. The real-time sensor data is ingested to IoT Hub, which later configured as the job input. To prepare the input data required by the job, follow these steps:
Sign in to the Azure portal.
Select Create a resource > Internet of Things > IoT Hub.

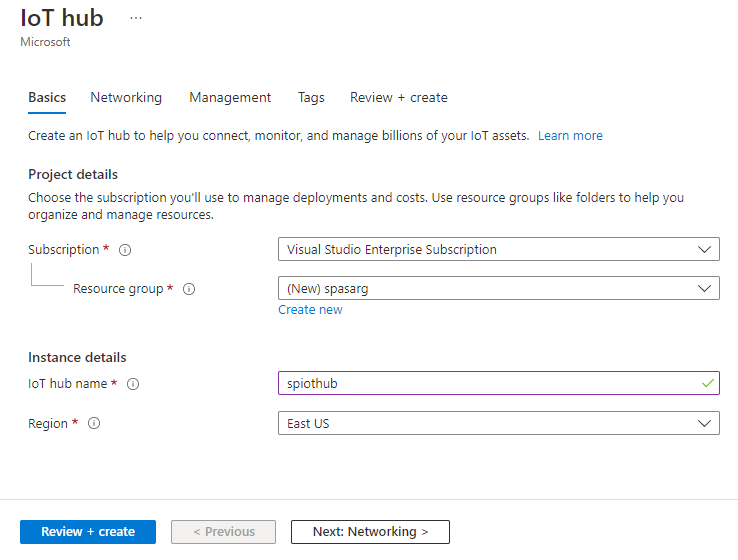
On the IoT Hub page, enter the following information:
- Subscription, select your Azure subscription.
- Resource group, select an existing resource group or create a new resource group.
- IoT hub name, enter a name for your IoT hub.
- Region, select the region that's closest to you.
Go to Management page, for Pricing and scale tier, select F1: Free tier, if it's still available on your subscription. For more information, see Azure IoT Hub pricing.

Select Review + create. Review your IoT hub information and select Create. This process may take a few minutes to deploy your IoT hub.
After your IoT hub is created, select Go to resource to navigate to the IoT Hub page. '
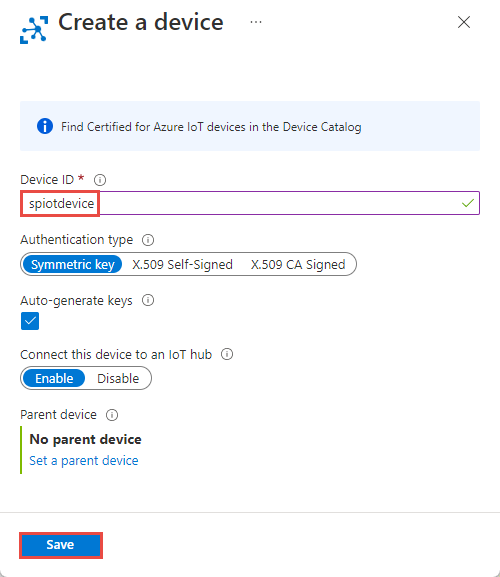
On the IoT Hub page, select Devices on the left menu, and then select + Add Device.

Enter a Device ID and select Save.
Once the device is created, you should see the device from the IoT devices list. Select Refresh button on the page if you don't see it.
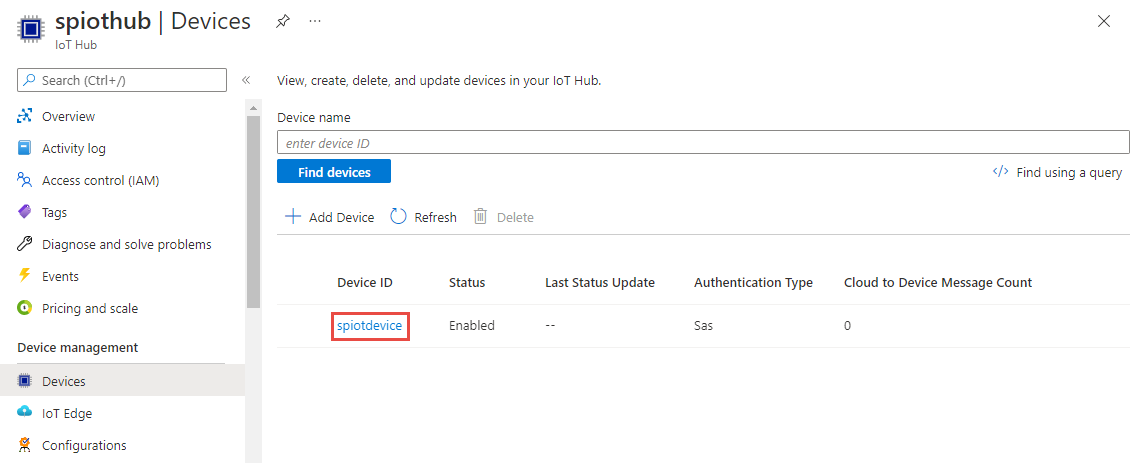
Select your device from the list. Copy Primary Connection String and save it to a notepad to use later.

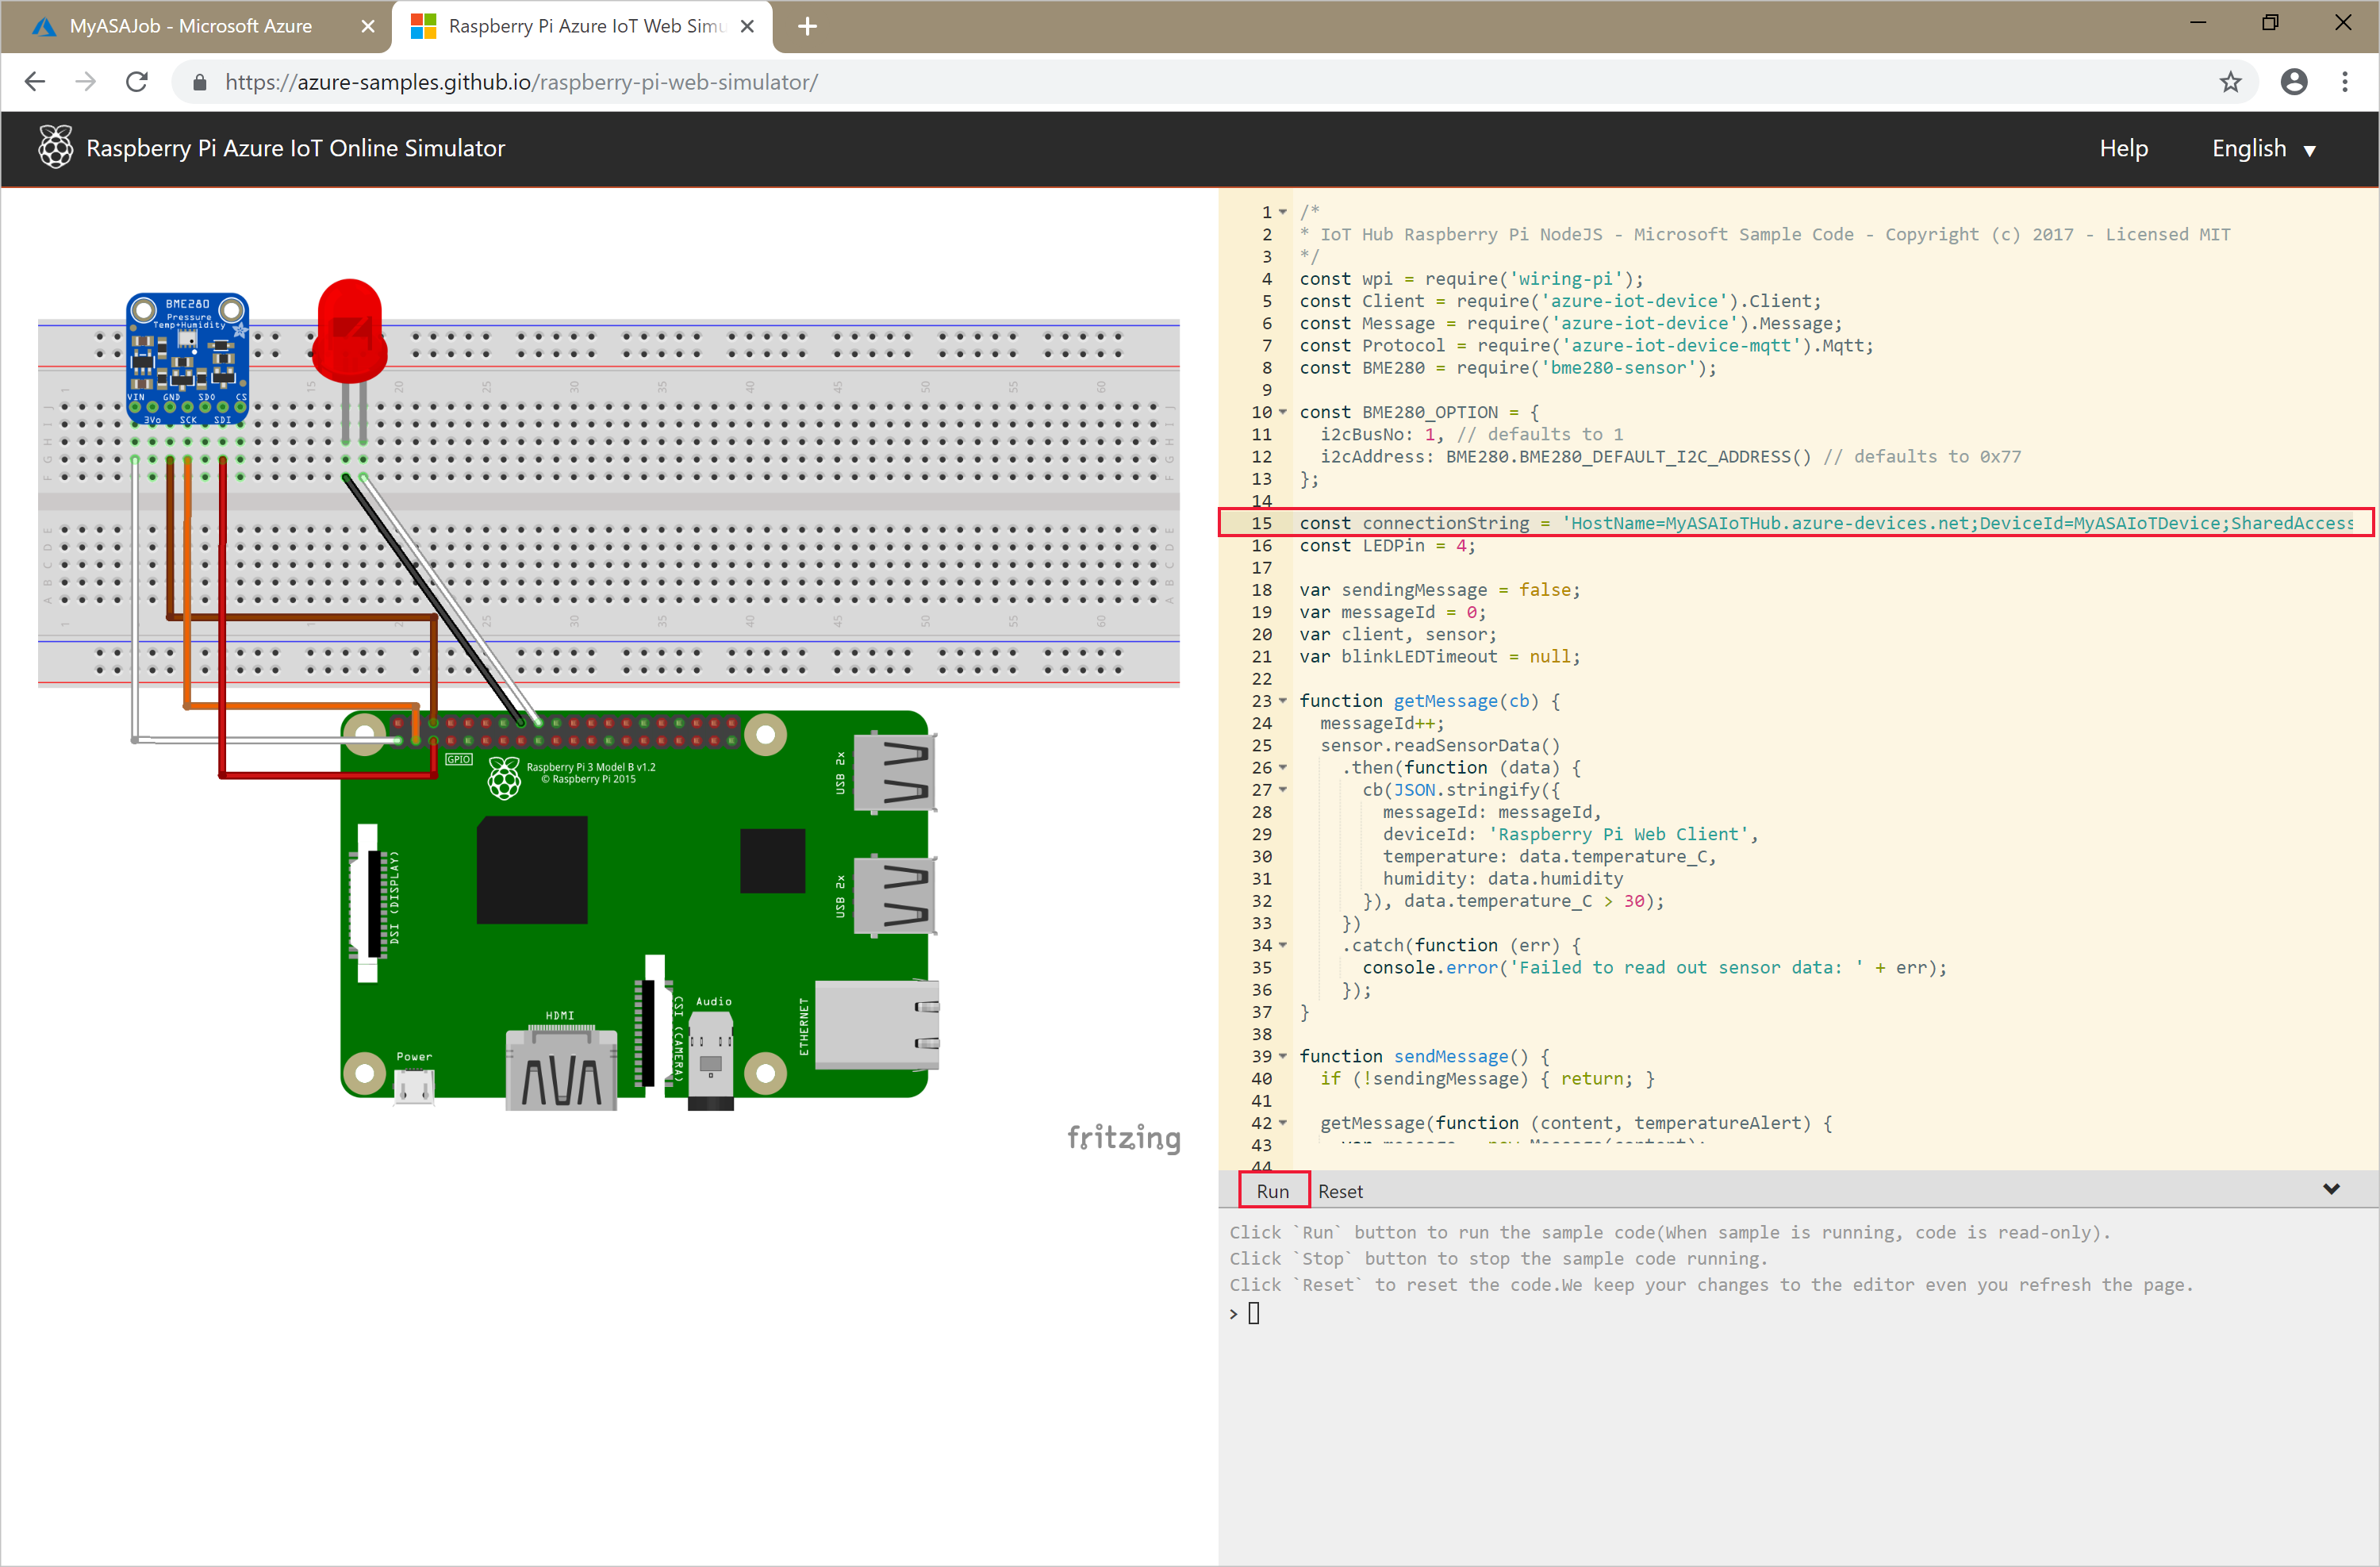
Run the IoT simulator
Open the Raspberry Pi Azure IoT Online Simulator in a new browser tab.
Replace the placeholder in line 15 with the IoT hub device connection string that you saved earlier.
Select Run. The output should show the sensor data and messages that are being sent to your IoT hub.

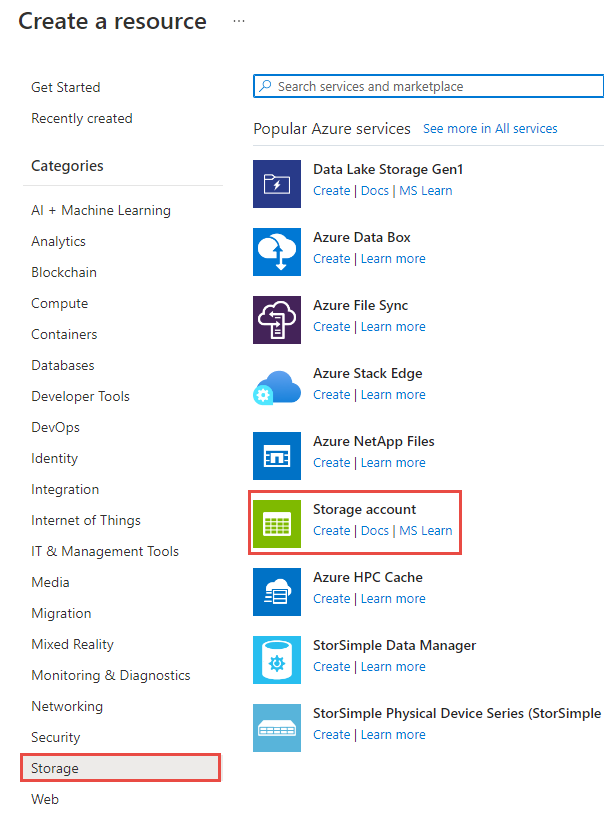
Create blob storage
From the upper-left corner of the Azure portal, select Create a resource > Storage > Storage account.
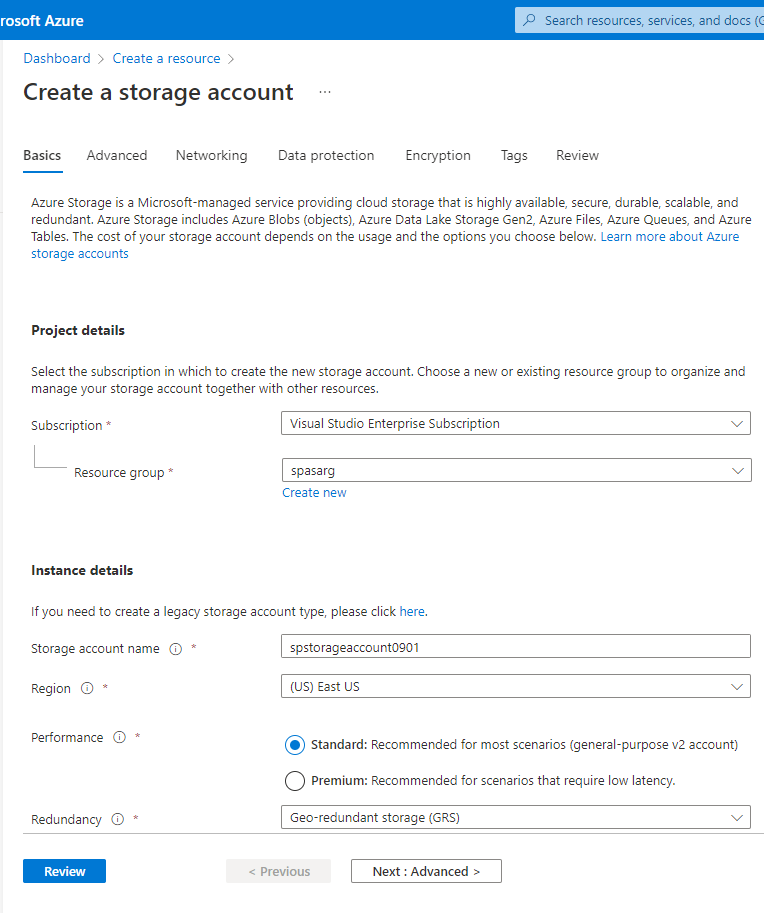
In the Create storage account pane, enter a storage account name, location, and resource group. Choose the same location and resource group as the IoT hub that you created. Then select Review and Create to create the storage account.
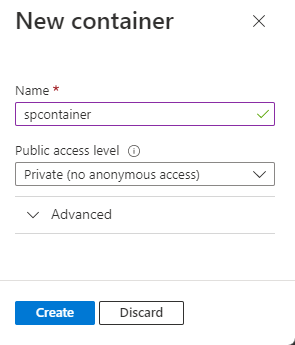
On the Storage account page, select Containers on the left menu, and then select + Container on the command bar.

From the New container page, provide a name for your container, leave Public access level as Private (no anonymous access), and select OK.
Create a Stream Analytics project
In Visual Studio Code, press Ctrl+Shift+P and enter ASA: Create New Project.
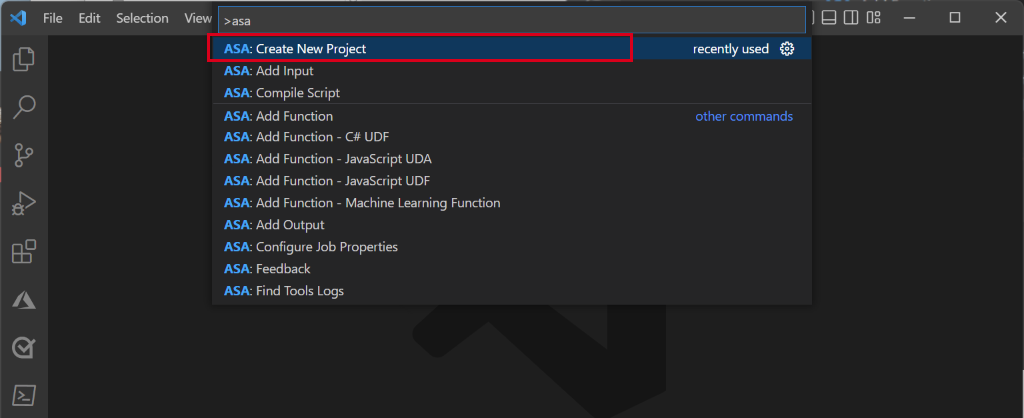
Enter your project name, like myASAproj, and select a folder for your project.

An ASA project is added to your workspace. It consists of three folders: Inputs, Outputs, and Functions. It also has the query script (*.asaql), a JobConfig.json file, and an asaproj.json configuration file.
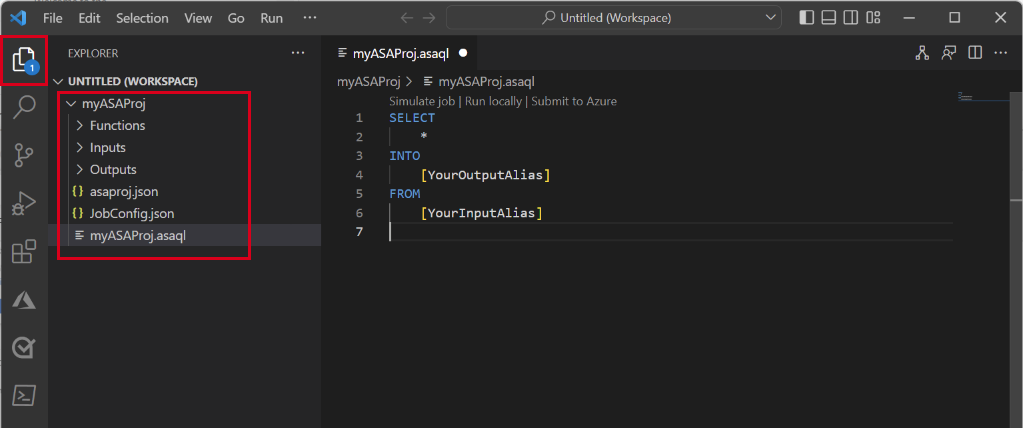
The asaproj.json file contains the inputs, outputs, and job configuration settings for submitting the Stream Analytics job to Azure.
Note
When you're adding inputs and outputs from the command palette, the corresponding paths are added to asaproj.json automatically. If you add or remove inputs or outputs on disk directly, you need to manually add or remove them from asaproj.json. You can choose to put the inputs and outputs in one place and then reference them in different jobs by specifying the paths in each asaproj.json file.
Define the transformation query
Open myASAproj.asaql file and add the following query:
SELECT *
INTO Output
FROM Input
WHERE Temperature > 27

Configure job input
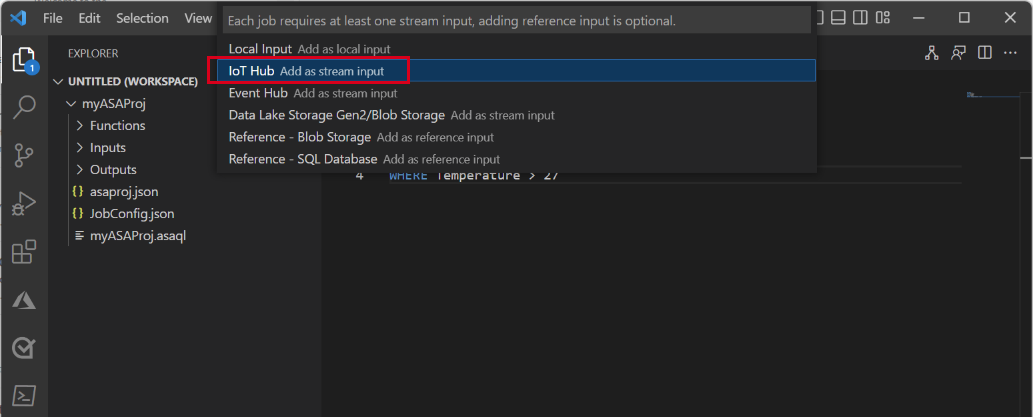
Right-click the Inputs folder in your Stream Analytics project. Then select ASA: Add Input from the context menu.
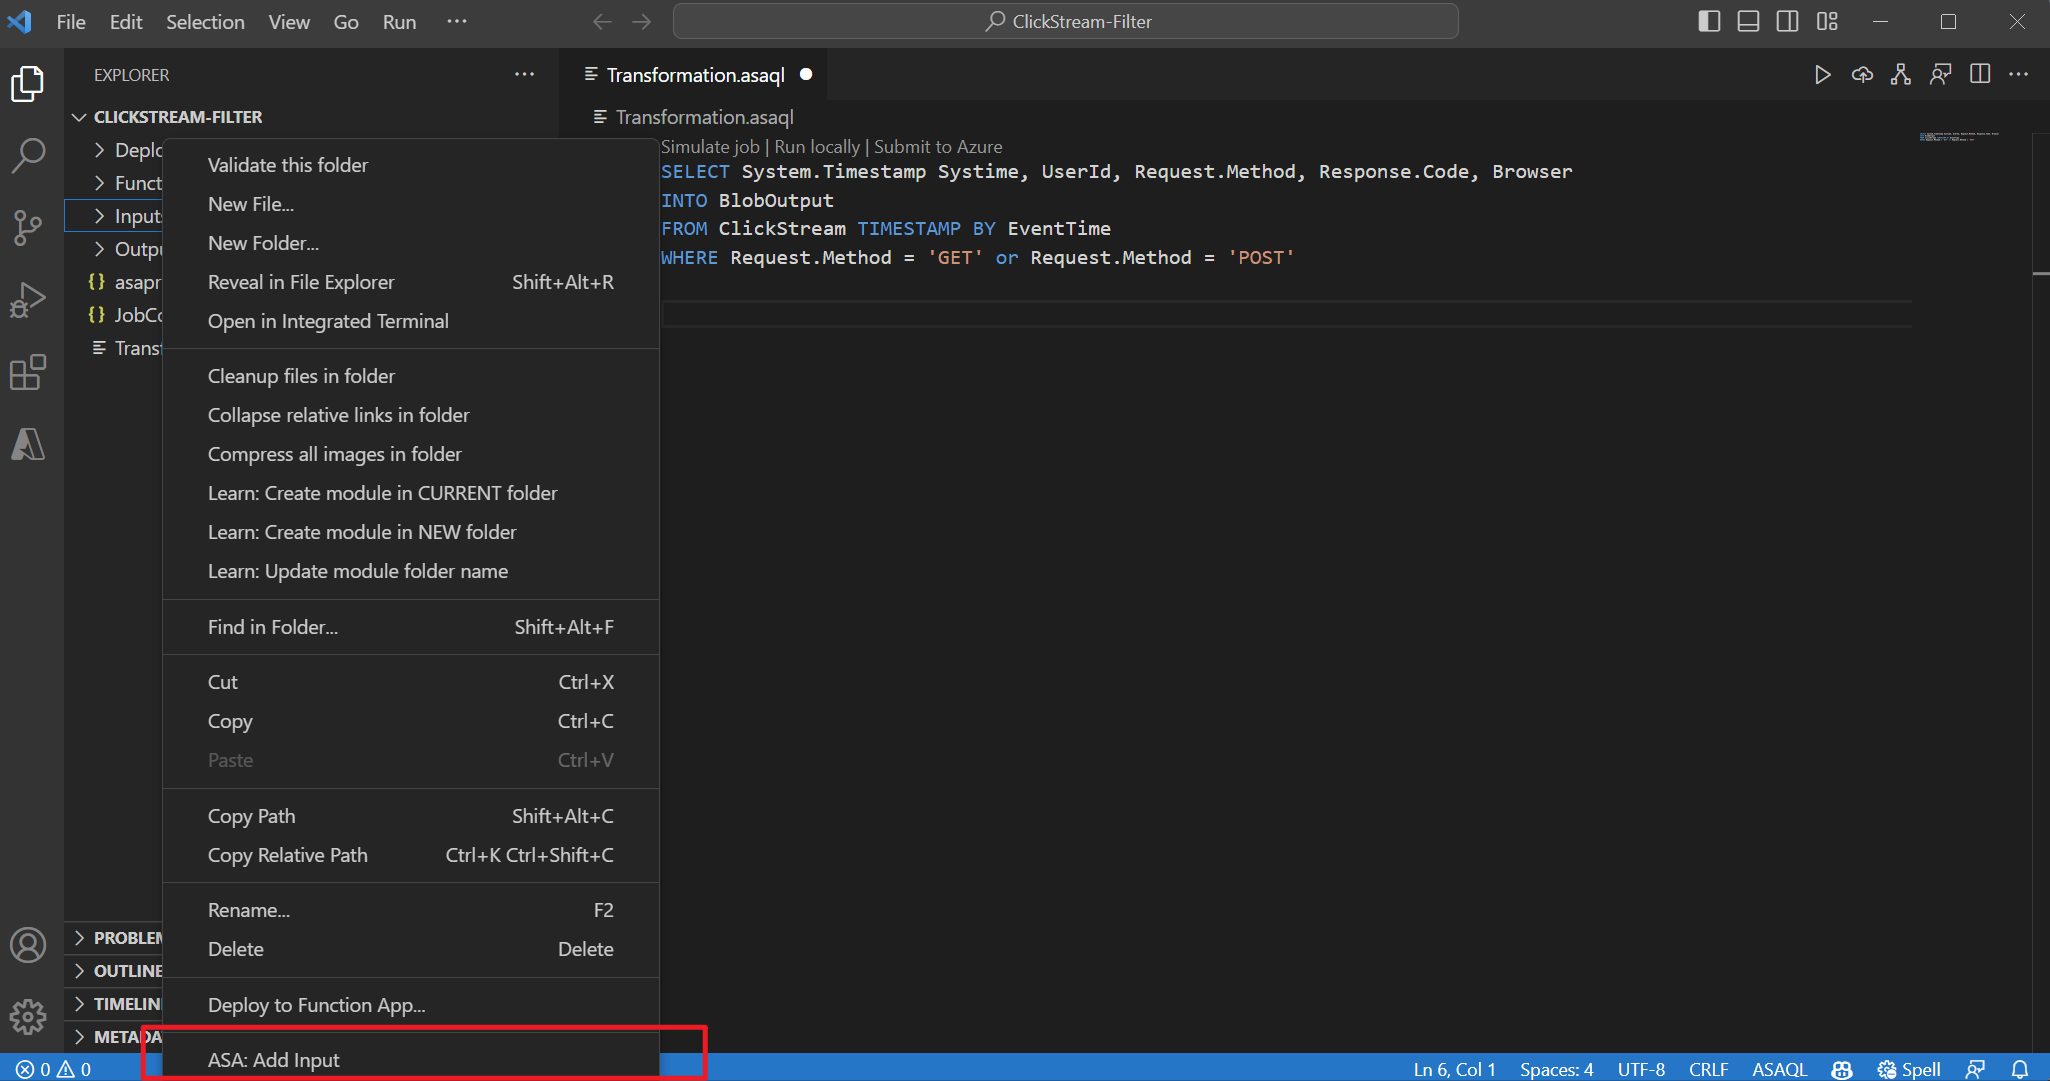
Or press Ctrl+Shift+P to open the command palette and enter ASA: Add Input.
Choose IoT Hub for the input type.
Select an ASA script *.asaql and Azure Subscriptions from the drop-down menu, and then press ENTER.
Under Inputs folder, you see an IoTHub1.json file is created. Replace settings with following suggested values and keep default values for fields not mentioned here.
Setting Suggested Value Description Name Input This input name is used for FROM statement in the query. IotHubNamespace spiothub Name of your IoT hub. The IoT hub names are automatically detected if you Select from your subscription. SharedAccessPolicyName iothubowner 
Select Preview data to see if the input data is successfully configured for your job. It will fetch a sample of your IoT Hub and show in the preview window.


Configure job output
Press Ctrl+Shift+P to open the command palette and enter ASA: Add Output.
Choose Data Lake Storage Gen2/Blob Storage for the sink type.
Select the query script using this output.
Enter BlobStorage1 as output file name.
Edit the settings using the following values. Keep default values for fields not mentioned here.
Setting Suggested value Description Name Output This output name is used for INTO statement in the query. Storage Account spstorageaccount0901 Choose or enter the name of your storage account. Storage account names are automatically detected if they're created in the same subscription. Container spcontainer Select the existing container that you created in your storage account.

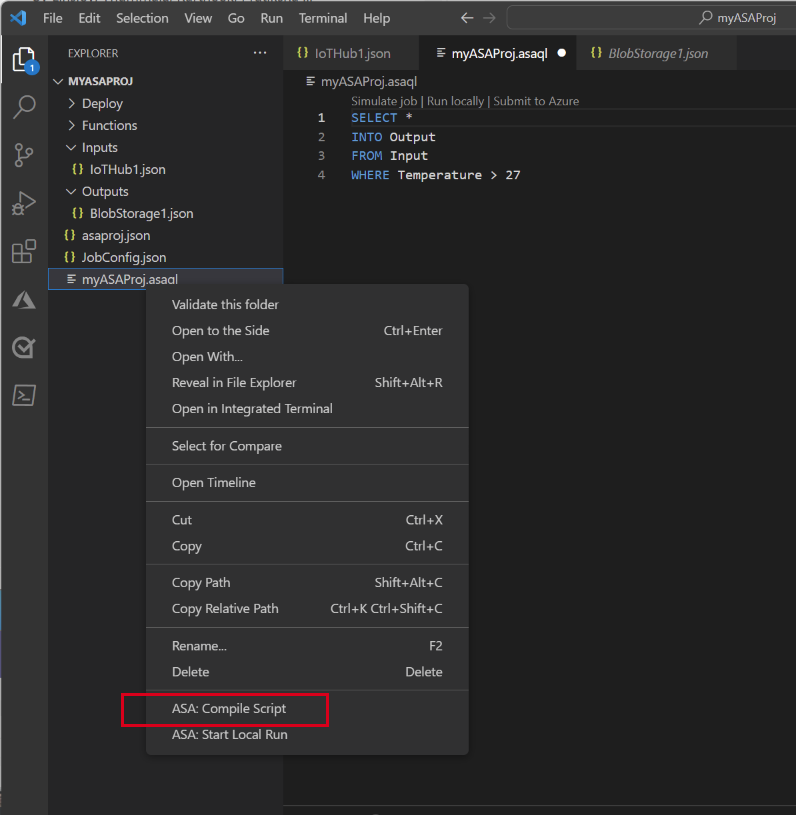
Compile the script and submit to Azure
Script compilation checks syntax and generates the Azure Resource Manager templates for automatic deployment.
Right-click the script and select ASA: Compile Script.
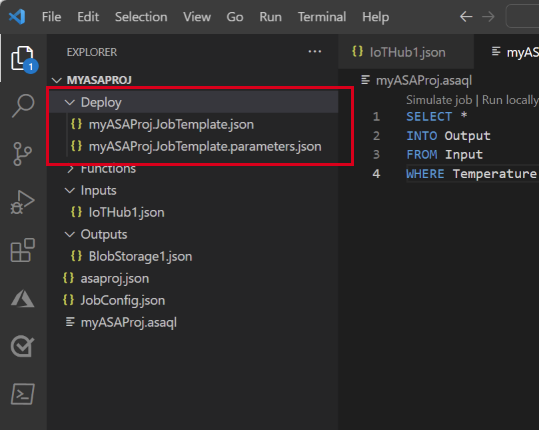
After compilation, you see a Deploy folder under your project with two Azure Resource Manager templates. These two files are used for automatic deployment.
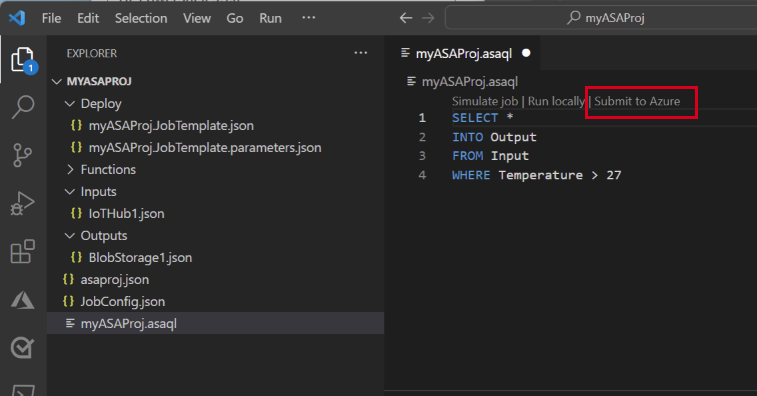
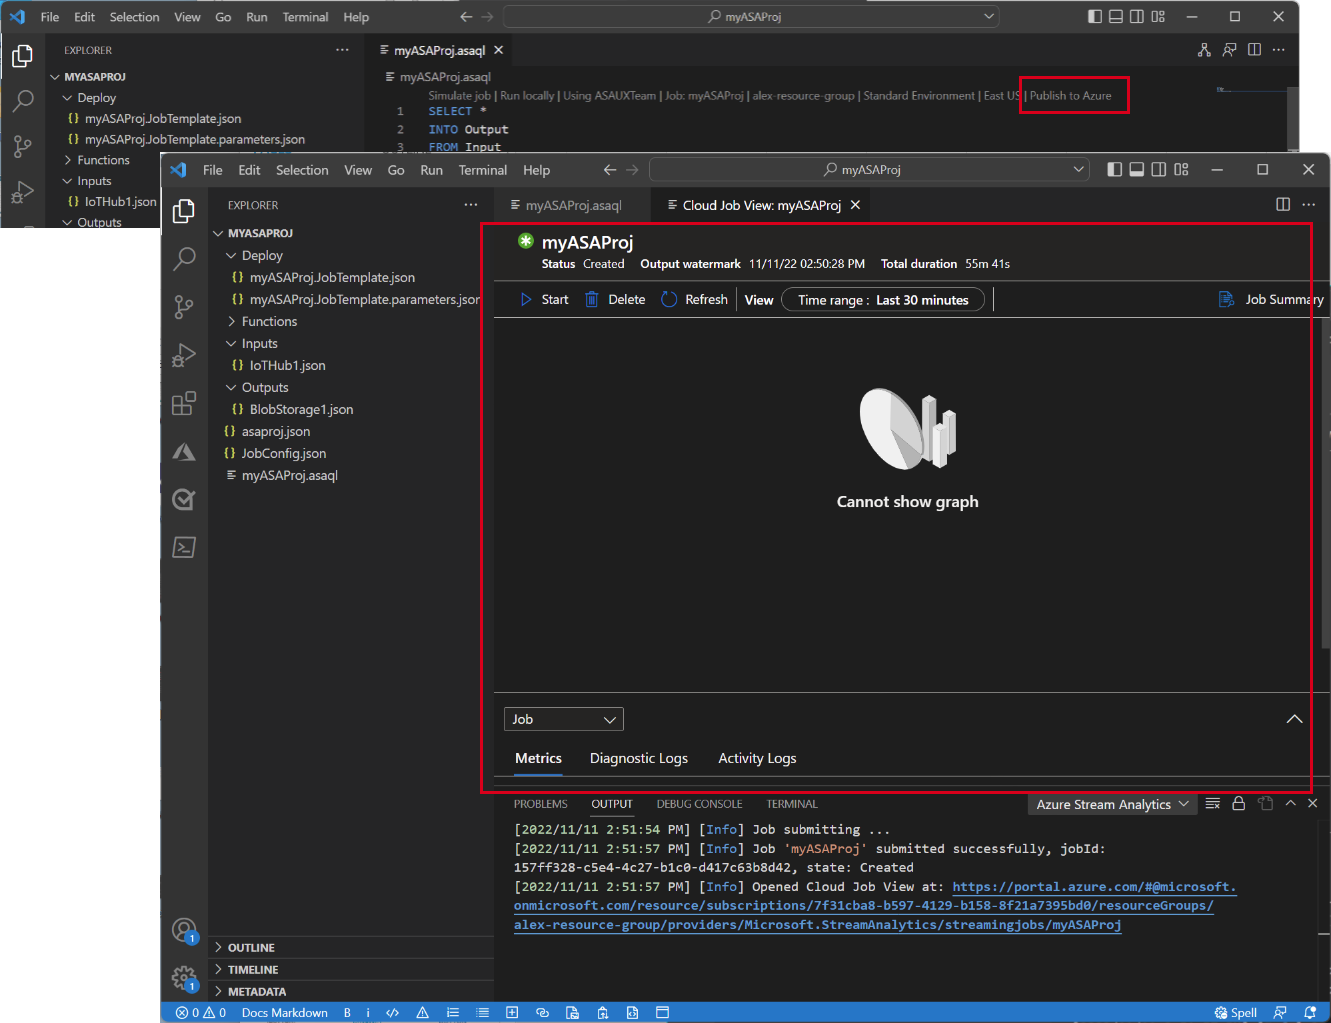
Select Submit to Azure in the query editor.
Then follow the instructions to complete the process: Select subscription > Select a job > Create New Job > Enter job name > Choose resource group and region.
Select Publish to Azure and complete. Wait for it to open a new tab Cloud Job View showing your job's status.


Start the Stream Analytics job and check output
On the Cloud Job View tab, select Start to run your job in the cloud. This process may take a few minutes to complete.
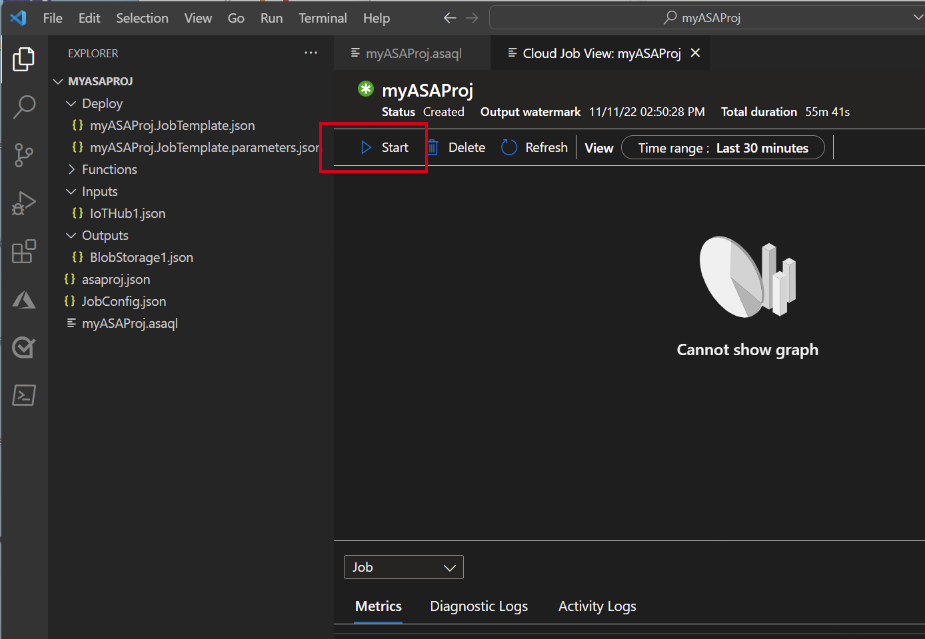
If your job starts successfully, the job status is changed to Running. You can see a logical diagram showing how your ASA job is running.

To view the output results, you can open the blob storage in the Visual Studio Code extension or in the Azure portal.

Download and open the file to see output.
{"messageId":11,"deviceId":"Raspberry Pi Web Client","temperature":28.165519323167562,"humidity":76.875393581654379,"EventProcessedUtcTime":"2022-09-01T22:53:58.1015921Z","PartitionId":3,"EventEnqueuedUtcTime":"2022-09-01T22:52:57.6250000Z","IoTHub":{"MessageId":null,"CorrelationId":null,"ConnectionDeviceId":"MyASAIoTDevice","ConnectionDeviceGenerationId":"637976642928634103","EnqueuedTime":"2022-09-01T22:52:57.6290000Z"}}
{"messageId":14,"deviceId":"Raspberry Pi Web Client","temperature":29.014941877871451,"humidity":64.93477299527828,"EventProcessedUtcTime":"2022-09-01T22:53:58.2421545Z","PartitionId":3,"EventEnqueuedUtcTime":"2022-09-01T22:53:03.6100000Z","IoTHub":{"MessageId":null,"CorrelationId":null,"ConnectionDeviceId":"MyASAIoTDevice","ConnectionDeviceGenerationId":"637976642928634103","EnqueuedTime":"2022-09-01T22:53:03.6140000Z"}}
{"messageId":17,"deviceId":"Raspberry Pi Web Client","temperature":28.032846241745975,"humidity":66.146114343897338,"EventProcessedUtcTime":"2022-09-01T22:53:58.2421545Z","PartitionId":3,"EventEnqueuedUtcTime":"2022-09-01T22:53:19.5960000Z","IoTHub":{"MessageId":null,"CorrelationId":null,"ConnectionDeviceId":"MyASAIoTDevice","ConnectionDeviceGenerationId":"637976642928634103","EnqueuedTime":"2022-09-01T22:53:19.5830000Z"}}
{"messageId":18,"deviceId":"Raspberry Pi Web Client","temperature":30.176185593576143,"humidity":72.697359909427419,"EventProcessedUtcTime":"2022-09-01T22:53:58.2421545Z","PartitionId":3,"EventEnqueuedUtcTime":"2022-09-01T22:53:21.6120000Z","IoTHub":{"MessageId":null,"CorrelationId":null,"ConnectionDeviceId":"MyASAIoTDevice","ConnectionDeviceGenerationId":"637976642928634103","EnqueuedTime":"2022-09-01T22:53:21.6140000Z"}}
{"messageId":20,"deviceId":"Raspberry Pi Web Client","temperature":27.851894248213021,"humidity":71.610229530268214,"EventProcessedUtcTime":"2022-09-01T22:53:58.2421545Z","PartitionId":3,"EventEnqueuedUtcTime":"2022-09-01T22:53:25.6270000Z","IoTHub":{"MessageId":null,"CorrelationId":null,"ConnectionDeviceId":"MyASAIoTDevice","ConnectionDeviceGenerationId":"637976642928634103","EnqueuedTime":"2022-09-01T22:53:25.6140000Z"}}
{"messageId":21,"deviceId":"Raspberry Pi Web Client","temperature":27.718624694772238,"humidity":66.540445035685153,"EventProcessedUtcTime":"2022-09-01T22:53:58.2421545Z","PartitionId":3,"EventEnqueuedUtcTime":"2022-09-01T22:53:48.0820000Z","IoTHub":{"MessageId":null,"CorrelationId":null,"ConnectionDeviceId":"MyASAIoTDevice","ConnectionDeviceGenerationId":"637976642928634103","EnqueuedTime":"2022-09-01T22:53:48.0830000Z"}}
{"messageId":22,"deviceId":"Raspberry Pi Web Client","temperature":27.7849054424326,"humidity":74.300662748167085,"EventProcessedUtcTime":"2022-09-01T22:54:09.3393532Z","PartitionId":3,"EventEnqueuedUtcTime":"2022-09-01T22:54:09.2390000Z","IoTHub":{"MessageId":null,"CorrelationId":null,"ConnectionDeviceId":"MyASAIoTDevice","ConnectionDeviceGenerationId":"637976642928634103","EnqueuedTime":"2022-09-01T22:54:09.2400000Z"}}
{"messageId":28,"deviceId":"Raspberry Pi Web Client","temperature":30.839892925680324,"humidity":76.237611741451786,"EventProcessedUtcTime":"2022-09-01T22:54:47.8053253Z","PartitionId":3,"EventEnqueuedUtcTime":"2022-09-01T22:54:47.6180000Z","IoTHub":{"MessageId":null,"CorrelationId":null,"ConnectionDeviceId":"MyASAIoTDevice","ConnectionDeviceGenerationId":"637976642928634103","EnqueuedTime":"2022-09-01T22:54:47.6150000Z"}}
{"messageId":29,"deviceId":"Raspberry Pi Web Client","temperature":30.561040300759053,"humidity":78.3845172058103,"EventProcessedUtcTime":"2022-09-01T22:54:49.8070489Z","PartitionId":3,"EventEnqueuedUtcTime":"2022-09-01T22:54:49.6030000Z","IoTHub":{"MessageId":null,"CorrelationId":null,"ConnectionDeviceId":"MyASAIoTDevice","ConnectionDeviceGenerationId":"637976642928634103","EnqueuedTime":"2022-09-01T22:54:49.5990000Z"}}
{"messageId":31,"deviceId":"Raspberry Pi Web Client","temperature":28.163585438418679,"humidity":60.0511571297096,"EventProcessedUtcTime":"2022-09-01T22:55:25.1528729Z","PartitionId":3,"EventEnqueuedUtcTime":"2022-09-01T22:55:24.9050000Z","IoTHub":{"MessageId":null,"CorrelationId":null,"ConnectionDeviceId":"MyASAIoTDevice","ConnectionDeviceGenerationId":"637976642928634103","EnqueuedTime":"2022-09-01T22:55:24.9120000Z"}}
{"messageId":32,"deviceId":"Raspberry Pi Web Client","temperature":31.00503387156985,"humidity":78.68821066044552,"EventProcessedUtcTime":"2022-09-01T22:55:43.2652127Z","PartitionId":3,"EventEnqueuedUtcTime":"2022-09-01T22:55:43.0480000Z","IoTHub":{"MessageId":null,"CorrelationId":null,"ConnectionDeviceId":"MyASAIoTDevice","ConnectionDeviceGenerationId":"637976642928634103","EnqueuedTime":"2022-09-01T22:55:43.0520000Z"}}


Clean up resources
When no longer needed, delete the resource group, the Stream Analytics job, and all related resources. Deleting the job avoids billing the streaming units consumed by the job. If you're planning to use the job in future, you can stop it and restart it later when you need. If you aren't going to continue to use this job, delete all resources created by this quickstart by using the following steps:
From the left menu in the Azure portal, select Resource groups and then select the name of the resource that you created.
On your resource group page, select Delete. Enter the name of the resource to delete in the text box, and then select Delete.
Next steps
To learn more about ASA Tools extension for Visual Studio Code, continue to the following articles:
Feedback
Coming soon: Throughout 2024 we will be phasing out GitHub Issues as the feedback mechanism for content and replacing it with a new feedback system. For more information see: https://aka.ms/ContentUserFeedback.
Submit and view feedback for