Continuous integration and delivery for an Azure Synapse Analytics workspace
Continuous integration (CI) is the process of automating the build and testing of code every time a team member commits a change to version control. Continuous delivery (CD) is the process of building, testing, configuring, and deploying from multiple testing or staging environments to a production environment.
In an Azure Synapse Analytics workspace, CI/CD moves all entities from one environment (development, test, production) to another environment. Promoting your workspace to another workspace is a two-part process. First, use an Azure Resource Manager template (ARM template) to create or update workspace resources (pools and workspace). Then, migrate artifacts like SQL scripts and notebooks, Spark job definitions, pipelines, datasets, and other artifacts by using Synapse Workspace Deployment tools in Azure DevOps or on GitHub.
This article outlines how to use an Azure DevOps release pipeline and GitHub Actions to automate the deployment of an Azure Synapse workspace to multiple environments.
Prerequisites
To automate the deployment of an Azure Synapse workspace to multiple environments, the following prerequisites and configurations must be in place.
Azure DevOps
- Prepare an Azure DevOps project for running the release pipeline.
- Grant any users who will check in code Basic access at the organization level, so they can see the repository.
- Grant Owner permission to the Azure Synapse repository.
- Make sure that you've created a self-hosted Azure DevOps VM agent or use an Azure DevOps hosted agent.
- Grant permissions to create an Azure Resource Manager service connection for the resource group.
- A Microsoft Entra administrator must install the Azure DevOps Synapse Workspace Deployment Agent extension in the Azure DevOps organization.
- Create or nominate an existing service account for the pipeline to run as. You can use a personal access token instead of a service account, but your pipelines won't work after the user account is deleted.
GitHub
- Create a GitHub repository that contains the Azure Synapse workspace artifacts and the workspace template.
- Make sure that you've created a self-hosted runner or use a GitHub-hosted runner.
Microsoft Entra ID
- If you're using a service principal, in Microsoft Entra ID, create a service principal to use for deployment.
- If you're using a managed identity, enable the system-assigned managed identity on your VM in Azure as the agent or runner, and then add it to Azure Synapse Studio as Synapse admin.
- Use the Microsoft Entra admin role to complete these actions.
Azure Synapse Analytics
Note
You can automate and deploy these prerequisites by using the same pipeline, an ARM template, or the Azure CLI, but these processes aren't described in this article.
The "source" workspace that's used for development must be configured with a Git repository in Azure Synapse Studio. For more information, see Source control in Azure Synapse Studio.
Set up a blank workspace to deploy to:
- Create a new Azure Synapse workspace.
- Grant the service principal the following permissions to the new Synapse workspace:
- Microsoft.Synapse/workspaces/integrationruntimes/write
- Microsoft.Synapse/workspaces/operationResults/read
- Microsoft.Synapse/workspaces/read
- In the workspace, don't configure the Git repository connection.
- In the Azure Synapse workspace, go to Studio > Manage > Access Control. 4. In the Azure Synapse workspace, go to Studio > Manage > Access Control. Assign the “Synapse Artifact Publisher” to the service principal. If the deployment pipeline will need to deploy managed private endpoints, then assign the “Synapse Administrator” instead.
- When you use linked services whose connection information is stored in Azure Key Vault, it is recommended to keep separate key vaults for different environments. You can also configure separate permission levels for each key vault. For example, you might not want your team members to have permissions to production secrets. If you follow this approach, we recommend that you to keep the same secret names across all stages. If you keep the same secret names, you don't need to parameterize each connection string across CI/CD environments because the only thing that changes is the key vault name, which is a separate parameter.
Other prerequisites
- Spark pools and self-hosted integration runtimes aren't created in a workspace deployment task. If you have a linked service that uses a self-hosted integration runtime, manually create the runtime in the new workspace.
- If the items in the development workspace are attached with the specific pools, make sure that you create or parameterize the same names for the pools in the target workspace in the parameter file.
- If your provisioned SQL pools are paused when you attempt to deploy, the deployment might fail.
For more information, see CI/CD in Azure Synapse Analytics Part 4 - The release pipeline.
Set up a release pipeline in Azure DevOps
In this section, you'll learn how to deploy an Azure Synapse workspace in Azure DevOps.
In Azure DevOps, open the project you created for the release.
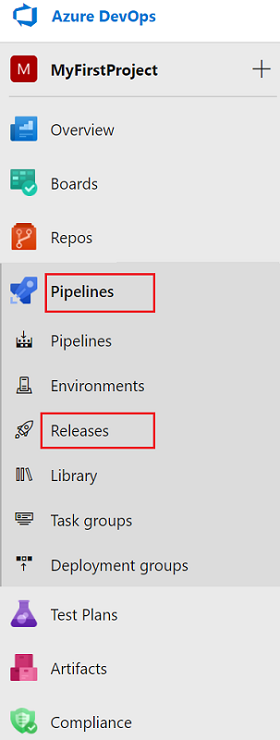
On the left menu, select Pipelines > Releases.
Select New pipeline. If you have existing pipelines, select New > New release pipeline.
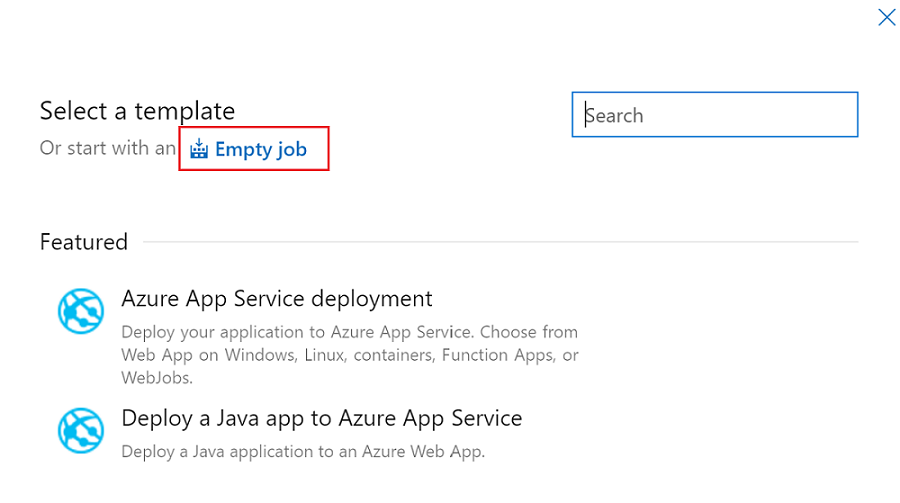
Select the Empty job template.
In Stage name, enter the name of your environment.
Select Add artifact, and then select the Git repository that's configured with Azure Synapse Studio in your development environment. Select the Git repository in which you manage your pools and workspace ARM template. If you use GitHub as the source, create a service connection for your GitHub account and pull repositories. For more information, see service connections.

Select the resource ARM template branch. For the Default version, select Latest from default branch.

For the artifacts Default branch, select the repository publish branch or other non-publish branches which include Synapse artifacts. By default, the publish branch is
workspace_publish. For the Default version, select Latest from default branch.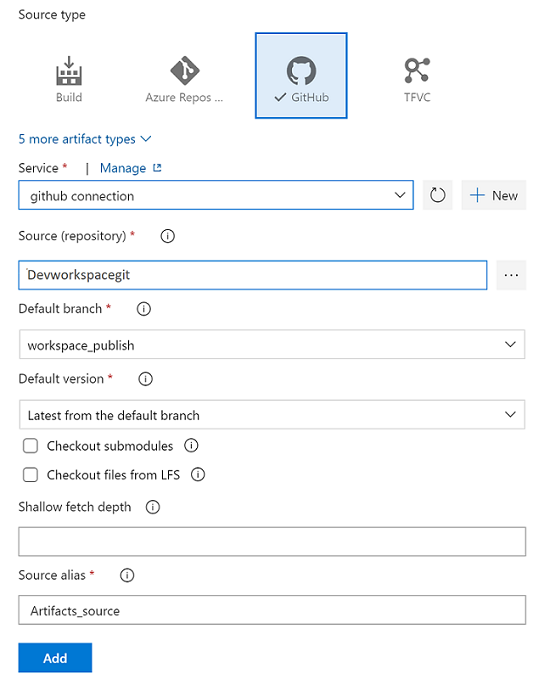

Set up a stage task for an ARM template to create and update a resource
If you have an ARM template that deploys a resource, such as an Azure Synapse workspace, a Spark and SQL pool, or a key vault, add an Azure Resource Manager deployment task to create or update those resources:
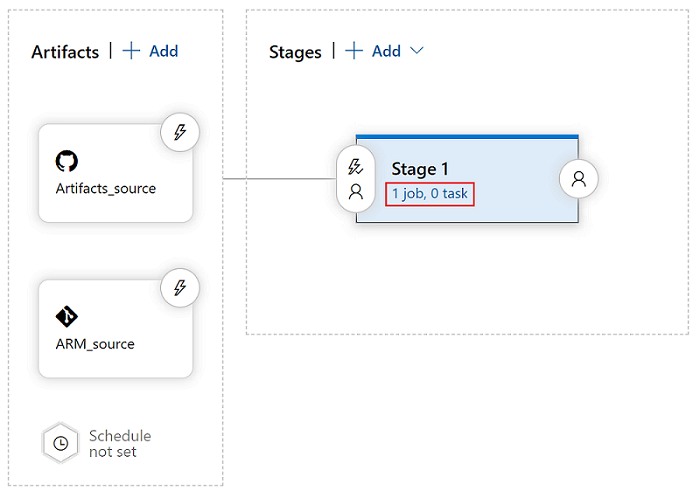
In the stage view, select View stage tasks.
Create a new task. Search for ARM Template Deployment, and then select Add.
On the deployment Tasks tab, select the subscription, resource group, and location for the workspace. Provide credentials if necessary.
For Action, select Create or update resource group.
For Template, select the ellipsis button (…). Go to the ARM template of the workspace.
For Template parameters, select … to choose the parameters file.
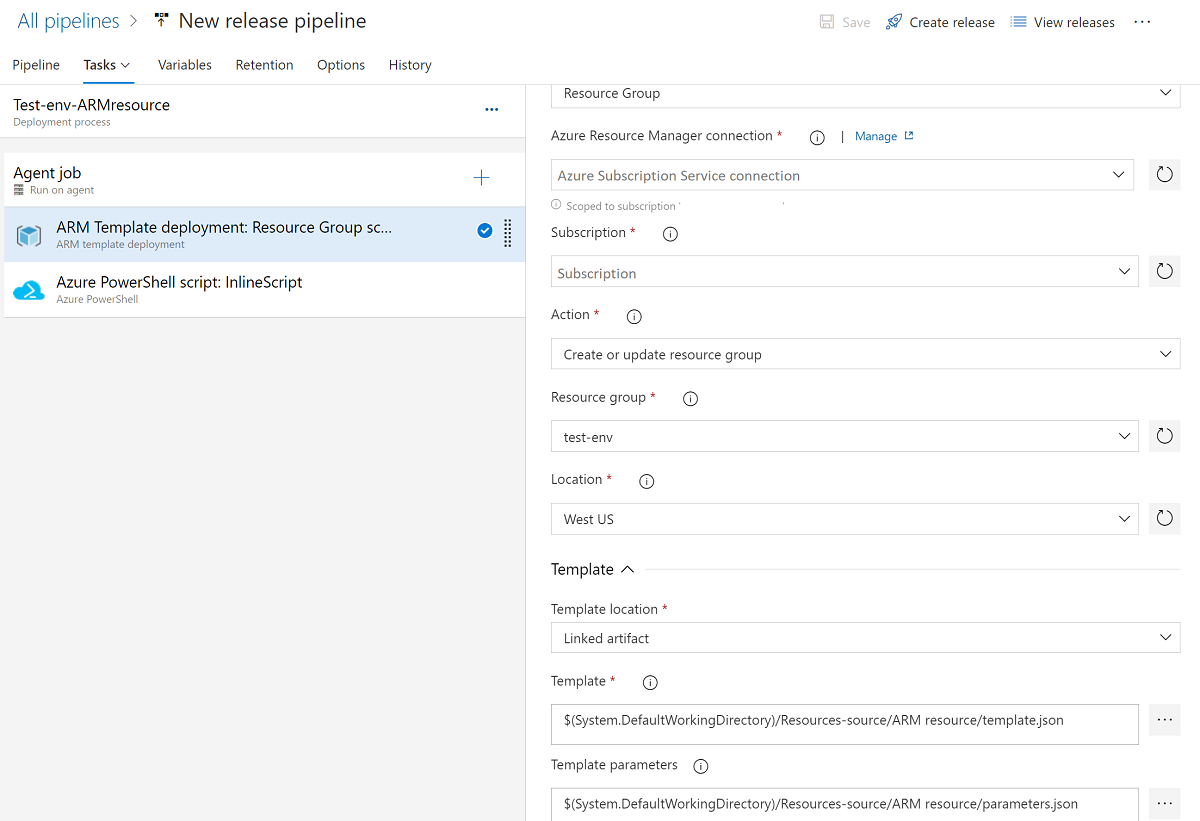
For Override template parameters, select …, and then enter the parameter values you want to use for the workspace.
For Deployment mode, select Incremental.
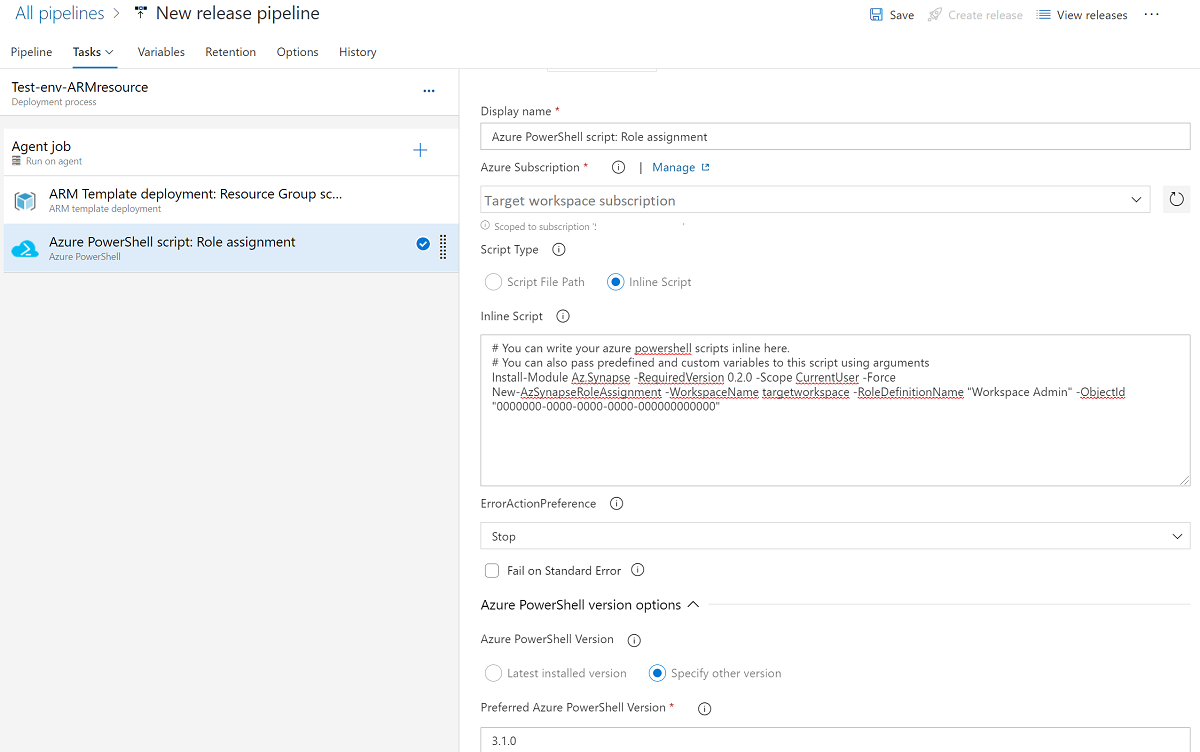
(Optional) Add Azure PowerShell for the grant and update the workspace role assignment. If you use a release pipeline to create an Azure Synapse workspace, the pipeline’s service principal is added as the default workspace admin. You can run PowerShell to grant other accounts access to the workspace.


Warning
In complete deployment mode, resources in the resource group that aren't specified in the new ARM template are deleted. For more information, see Azure Resource Manager deployment modes.
Set up a stage task for Azure Synapse artifacts deployment
Use the Synapse workspace deployment extension to deploy other items in your Azure Synapse workspace. Items that you can deploy include datasets, SQL scripts and notebooks, spark job definitions, integration runtime, data flow, credentials, and other artifacts in workspace.
Install and add deployment extension
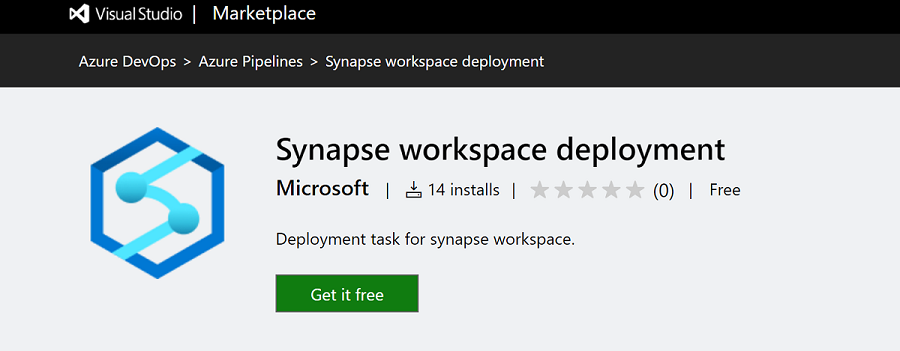
Search for and get the extension from Visual Studio Marketplace.
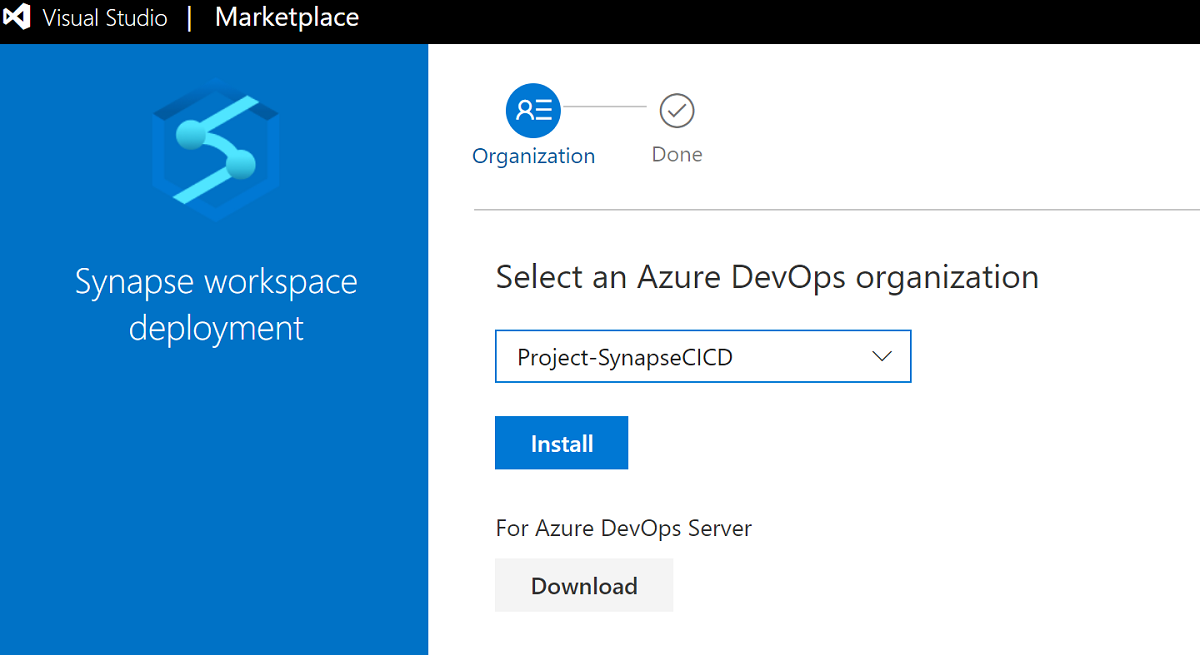
Select the Azure DevOps organization in which you want to install the extension.
Make sure that the Azure DevOps pipeline’s service principal has been granted the Subscription permission and is assigned as the Synapse workspace admin for the workspace.
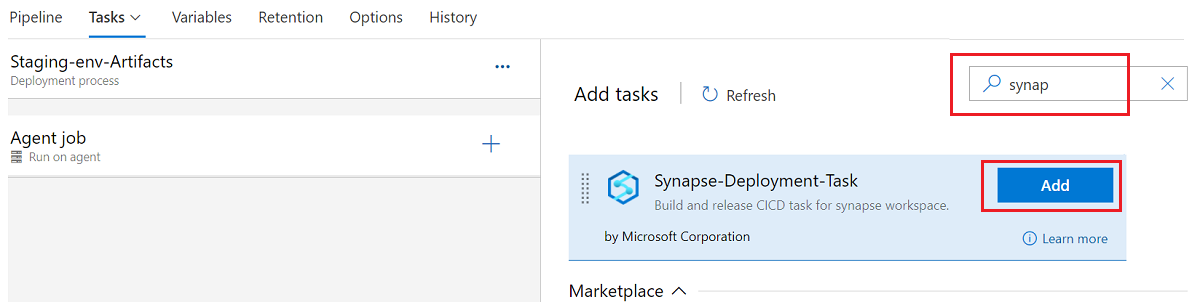
To create a new task, search for Synapse workspace deployment, and then select Add.
Configure the deployment task
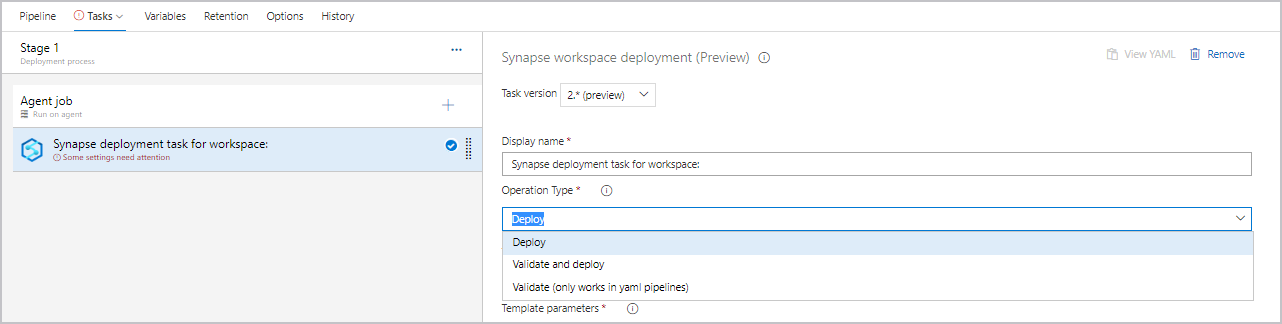
The deployment task supports 3 types of operations, validate only, deploy and validate and deploy.
Note
This workspace deployment extension in is not backward compatible. Please make sure that the latest version is installed and used. You can read the release note in overviewin Azure DevOps and the latest version in GitHub action.
Validate is to validate the Synapse artifacts in non-publish branch with the task and generate the workspace template and parameter template file. The validation operation only works in the YAML pipeline. The sample YAML file is as below:
   pool:
     vmImage: ubuntu-latest

   resources:
     repositories:
     - repository: <repository name>
       type: git
       name: <name>
       ref: <user/collaboration branch>

   steps:
     - checkout: <name>
     - task: Synapse workspace deployment@2
       continueOnError: true
       inputs:
         operation: 'validate'
         ArtifactsFolder: '$(System.DefaultWorkingDirectory)/ArtifactFolder'
         TargetWorkspaceName: '<target workspace name>'
Validate and deploy can be used to directly deploy the workspace from non-publish branch with the artifact root folder.
Note
The deployment task needs to download dependency JS files from this endpoint web.azuresynapse.net when the operation type is selected as Validate or Validate and deploy. Please ensure the endpoint web.azuresynapse.net is allowed if network policies are enabled on the VM.
The validate and deploy operation works in both classic and YAML pipeline. The sample YAML file is as below:
   pool:
     vmImage: ubuntu-latest

   resources:
     repositories:
     - repository: <repository name>
       type: git
       name: <name>
       ref: <user/collaboration branch>

   steps:
     - checkout: <name>
     - task: Synapse workspace deployment@2
       continueOnError: true
       inputs:
         operation: 'validateDeploy'
         ArtifactsFolder: '$(System.DefaultWorkingDirectory)/ArtifactFolder'
         TargetWorkspaceName: 'target workspace name'
         azureSubscription: 'target Azure resource manager connection name'
         ResourceGroupName: 'target workspace resource group'
         DeleteArtifactsNotInTemplate: true
         OverrideArmParameters: >
           -key1 value1
           -key2 value2
Deploy The inputs of the operation deploy include Synapse workspace template and parameter template, which can be created after publishing in the workspace publish branch or after the validation. It is same as the version 1.x.
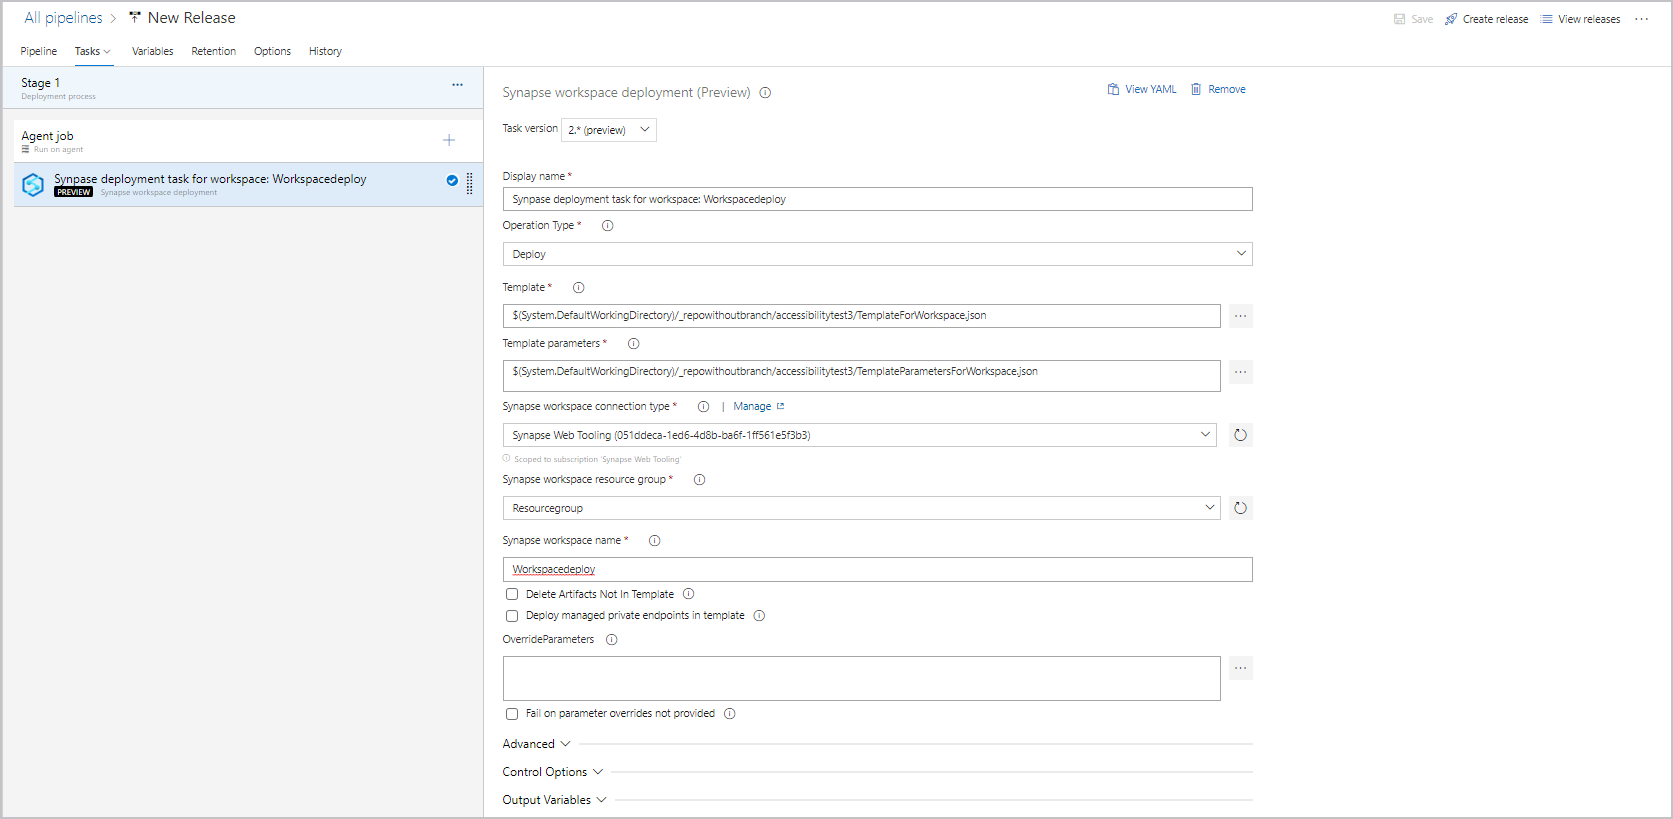
You can choose the operation types based on the use case. Following part is an example of the deploy.
In the task, select the operation type as Deploy.
In the task, next to Template, select … to choose the template file.
Next to Template parameters, select … to choose the parameters file.
Select a connection, resource group, and name for the workspace.
Next to Override template parameters, select … . Enter the parameter values you want to use for the workspace, including connection strings and account keys that are used in your linked services. For more information, see CI/CD in Azure Synapse Analytics.
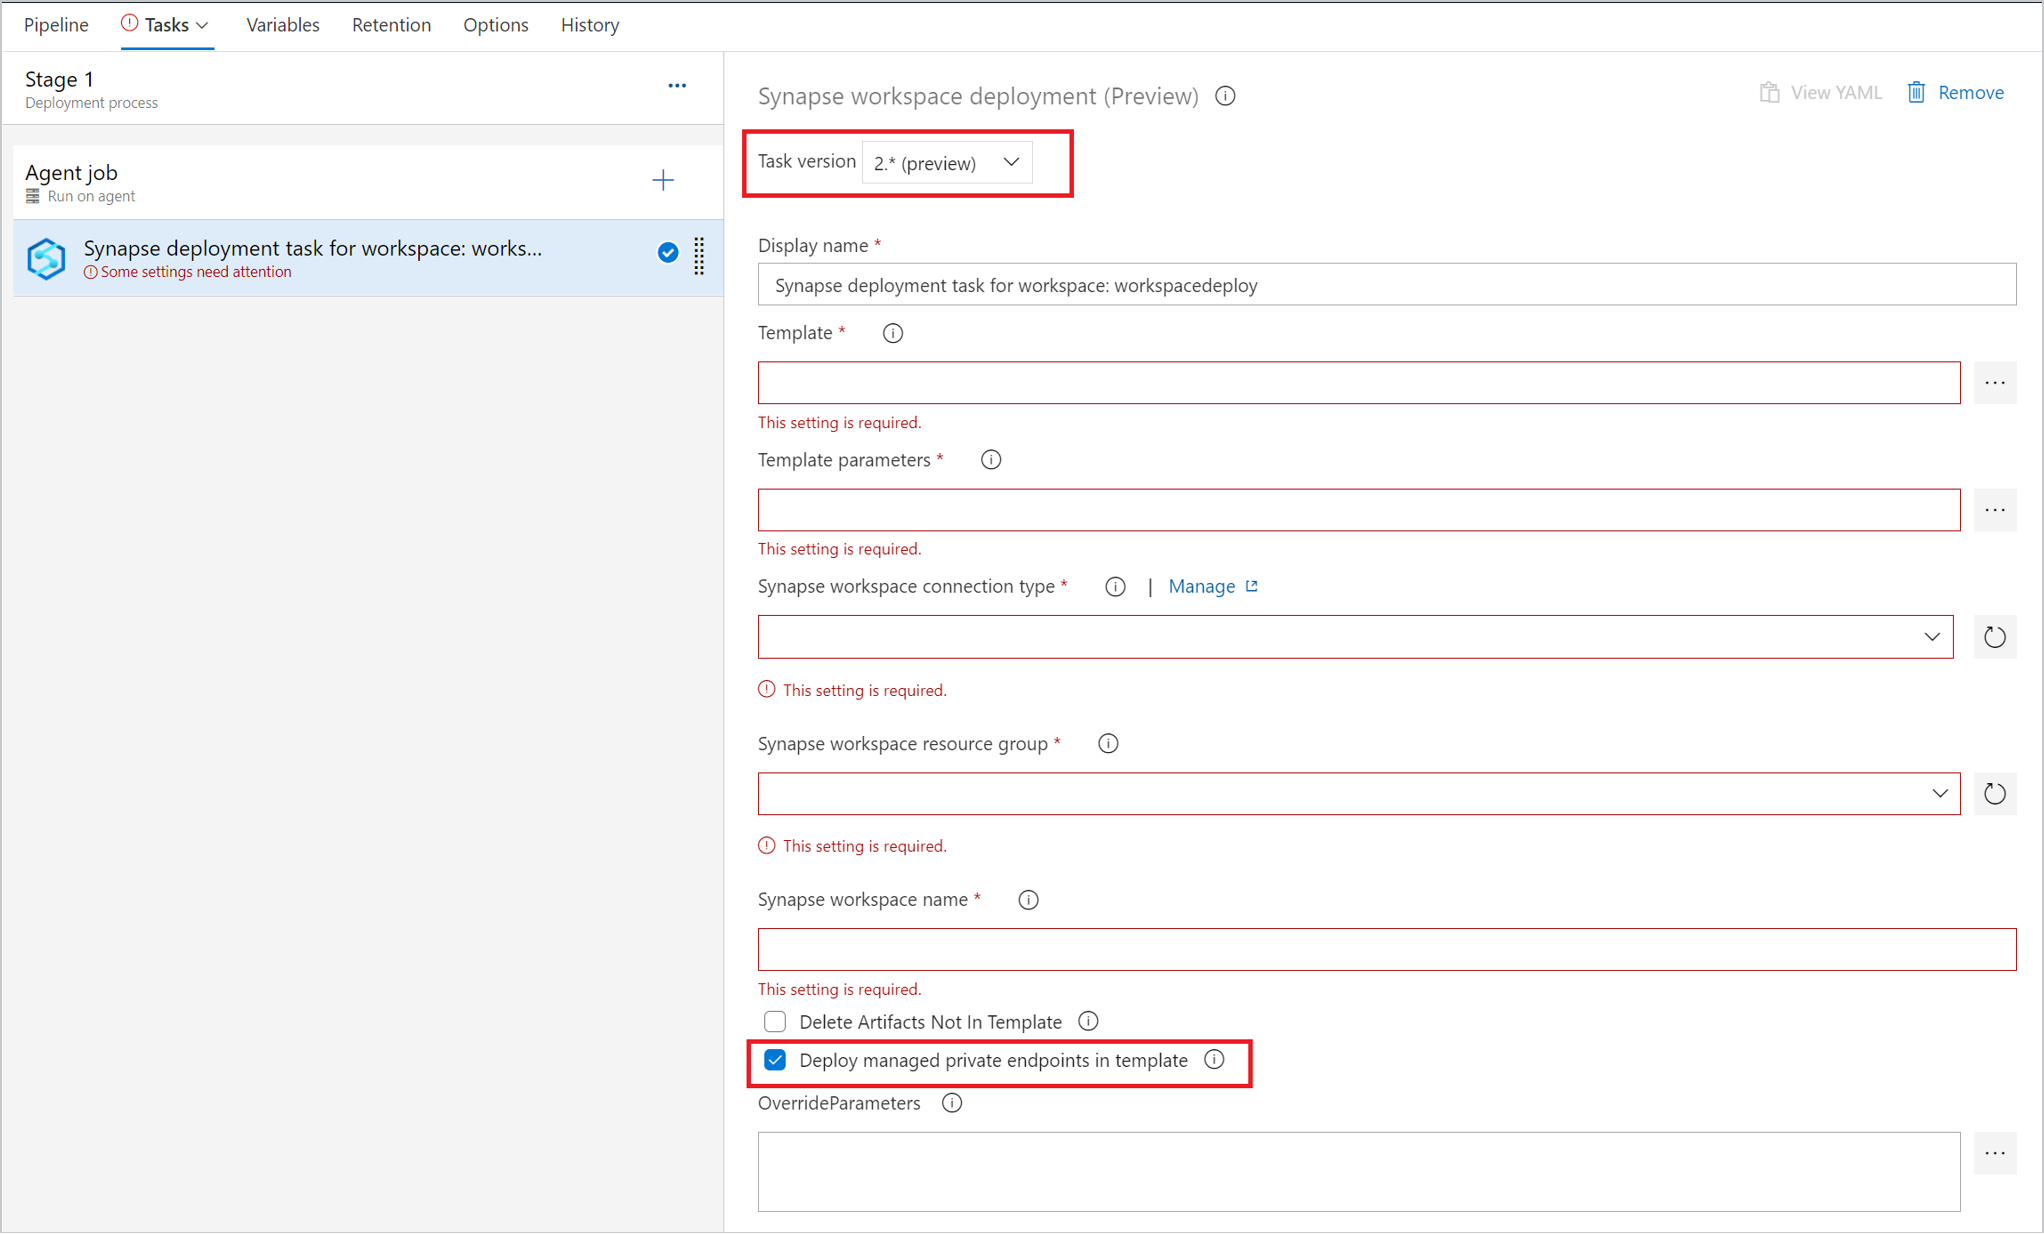
The deployment of managed private endpoint is only supported in version 2.x. please make sure you select the right version and check the Deploy managed private endpoints in template.
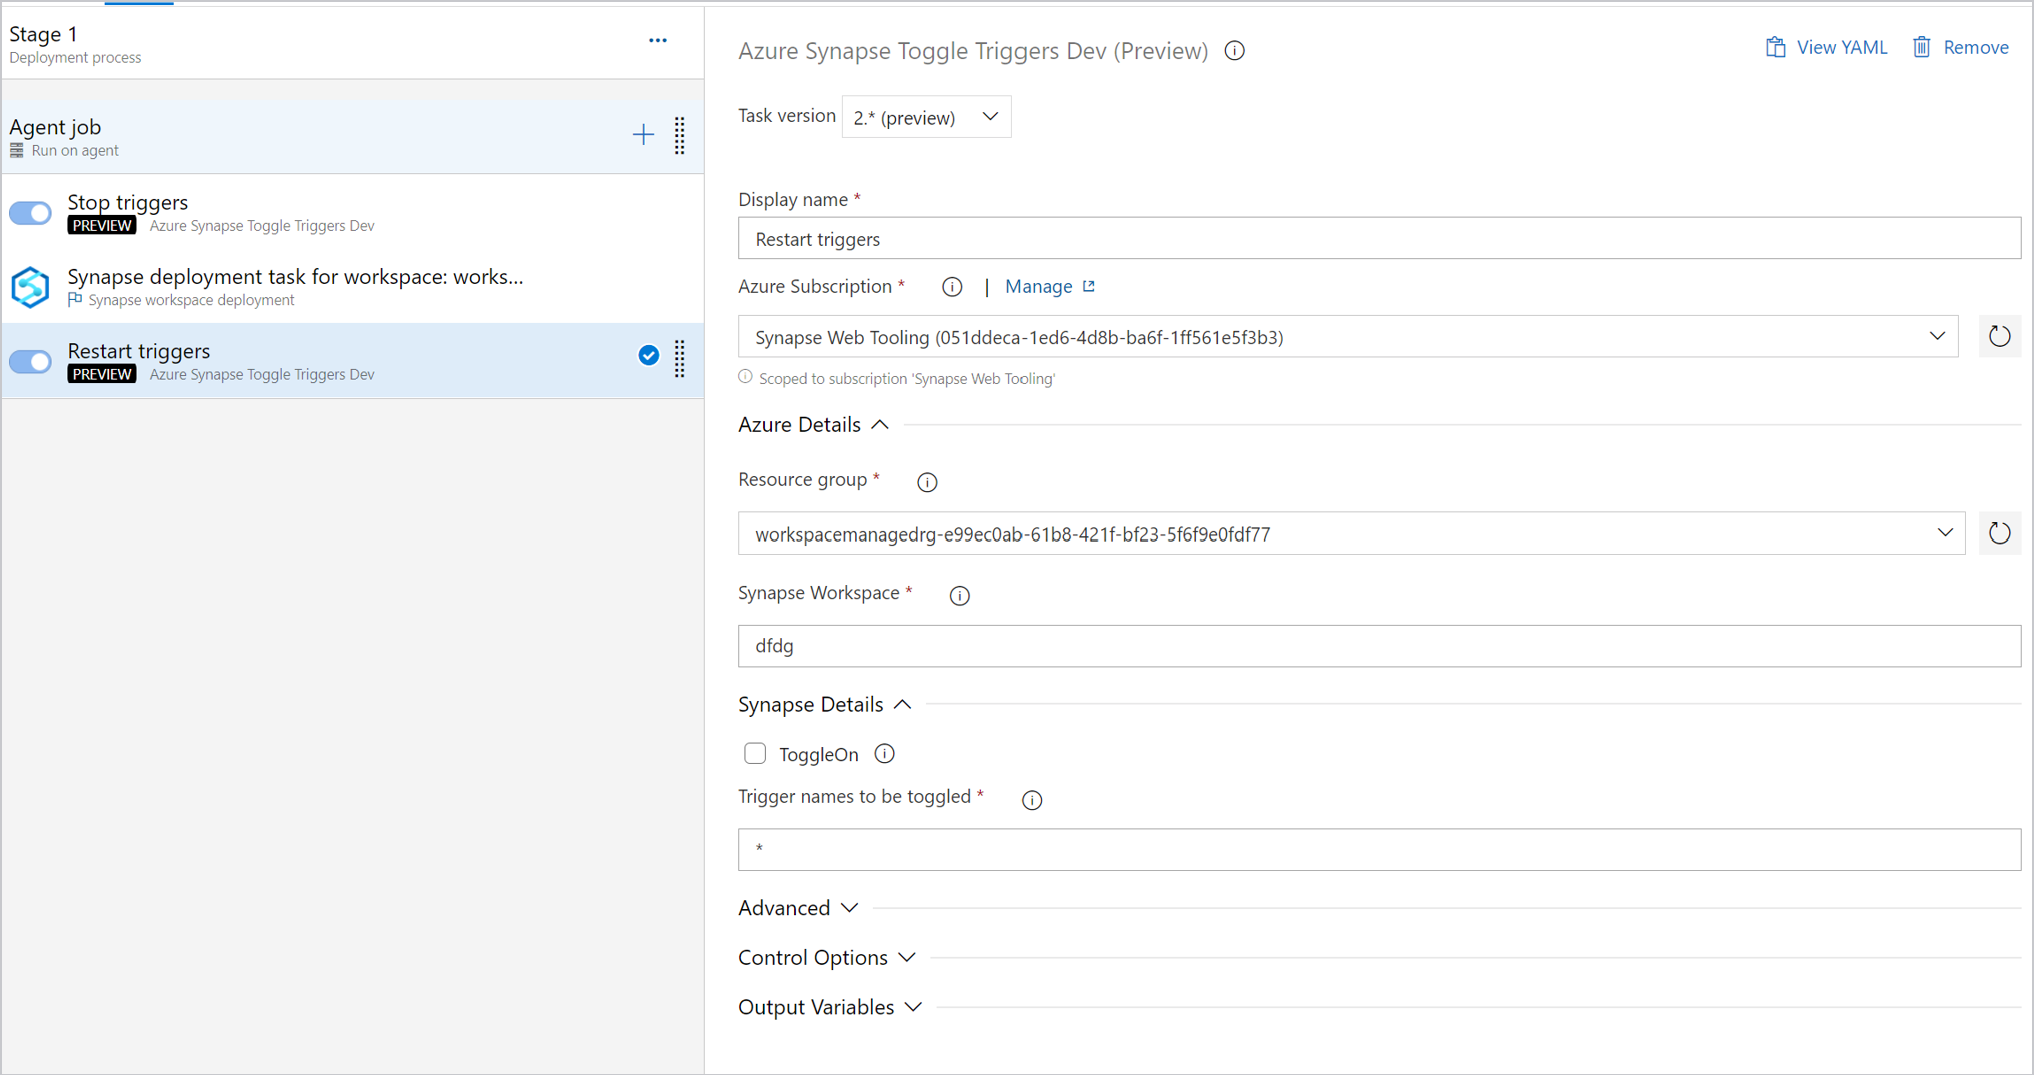
To manage triggers, you can use trigger toggle to stop the triggers before deployment. And you can also add a task to restart the triggers after the deployment task.


Important
In CI/CD scenarios, the integration runtime type in different environments must be the same. For example, if you have a self-hosted integration runtime in the development environment, the same integration runtime must be self-hosted in other environments, such as in test and production. Similarly, if you're sharing integration runtimes across multiple stages, the integration runtimes must be linked and self-hosted in all environments, such as in development, test, and production.
Create a release for deployment
After you save all changes, you can select Create release to manually create a release. To learn how to automate release creation, see Azure DevOps release triggers.

Set up a release in GitHub Actions
In this section, you'll learn how to create GitHub workflows by using GitHub Actions for Azure Synapse workspace deployment.
You can use the GitHub Actions for Azure Resource Manager template to automate deploying an ARM template to Azure for the workspace and compute pools.
Workflow file
Define a GitHub Actions workflow in a YAML (.yml) file in the /.github/workflows/ path in your repository. The definition contains the various steps and parameters that make up the workflow.
The .yml file has two sections:
| Section | Tasks |
|---|---|
| Authentication | 1. Define a service principal. 2. Create a GitHub secret. |
| Deploy | Deploy the workspace artifacts. |
Configure GitHub Actions secrets
GitHub Actions secrets are environment variables that are encrypted. Anyone who has Collaborator permission to this repository can use these secrets to interact with Actions in the repository.
In the GitHub repository, select the Settings tab, and then select Secrets > New repository secret.
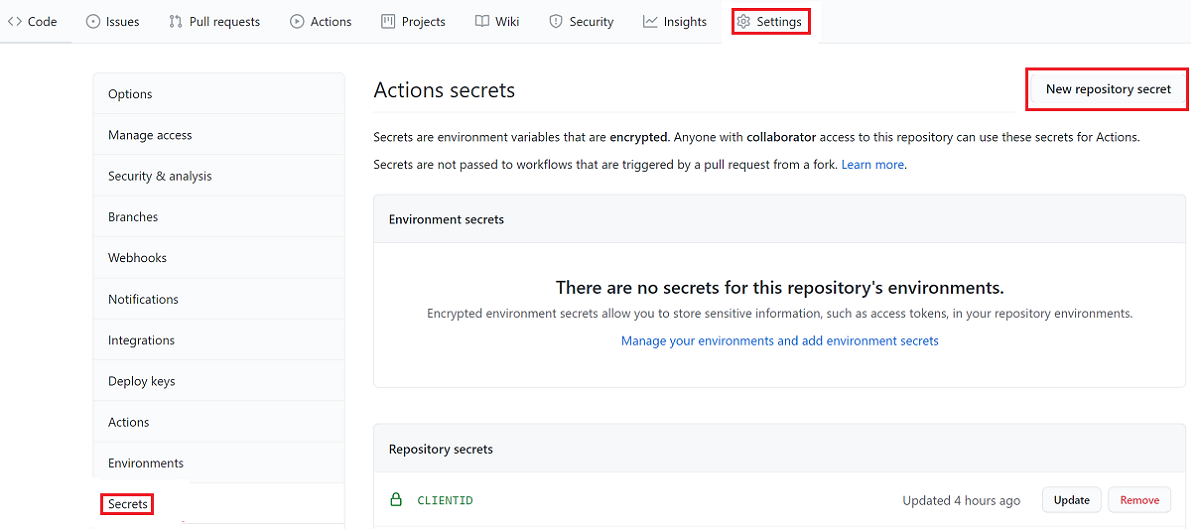
Add a new secret for the client ID, and add a new client secret if you use the service principal for deployment. You can also choose to save the subscription ID and tenant ID as secrets.

Add your workflow
In your GitHub repository, go to Actions.
Select Set up your workflow yourself.
In the workflow file, delete everything after the
on:section. For example, your remaining workflow might look like this example:name: CI on: push: branches: [ master ] pull_request: branches: [ master ]Rename your workflow. On the Marketplace tab, search for the Synapse workspace deployment action, and then add the action.

Set the required values and the workspace template:
name: workspace deployment

on:
    push:
        branches: [ publish_branch ]
jobs:
    release:
        # You also can use the self-hosted runners.
        runs-on: windows-latest
        steps:
        # Checks out your repository under $GITHUB_WORKSPACE, so your job can access it.
        - uses: actions/checkout@v2
        - uses: azure/synapse-workspace-deployment@release-1.0
        with:
          TargetWorkspaceName: 'target workspace name'
          TemplateFile: './path of the TemplateForWorkspace.json'
          ParametersFile: './path of the TemplateParametersForWorkspace.json'
          OverrideArmParameters: './path of the parameters.yaml'
          environment: 'Azure Public'
          resourceGroup: 'target workspace resource group'
          clientId: ${{secrets.CLIENTID}}
          clientSecret:  ${{secrets.CLIENTSECRET}}
          subscriptionId: 'subscriptionId of the target workspace'
          tenantId: 'tenantId'
          DeleteArtifactsNotInTemplate: 'true'
          managedIdentity: 'False'
You're ready to commit your changes. Select Start commit, enter the title, and then add a description (optional). Then, select Commit new file.
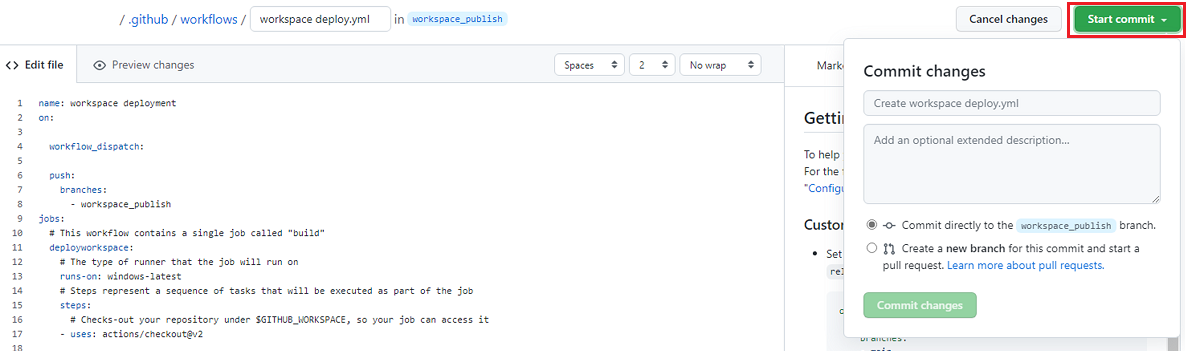
The file appears in the .github/workflows folder in your repository.
Note
Managed identity is supported only with self-hosted VMs in Azure. Be sure to set the runner to self-hosted. Enable the system-assigned managed identity for your VM and add it to Azure Synapse Studio as Synapse admin.


Review your deployment
In your GitHub repository, go to Actions.
To see detailed logs of your workflow's run, open the first result:


Create custom parameters in the workspace template
If you use automated CI/CD and want to change some properties during deployment, but the properties aren't parameterized by default, you can override the default parameter template.
To override the default parameter template, create a custom parameter template named template-parameters-definition.json in the root folder of your Git branch. You must use this exact file name. When Azure Synapse workspace publishes from the collaboration branch or the deployment task validates the artifacts in other branches, it reads this file and uses its configuration to generate the parameters. If Azure Synapse workspace doesn't find that file, is uses the default parameter template.
Custom parameter syntax
You can use the following guidelines to create a custom parameters file:
- Enter the property path under the relevant entity type.
- Setting a property name to
*indicates that you want to parameterize all properties under the property (only down to the first level, not recursively). You can set exceptions to this configuration. - Setting the value of a property as a string indicates that you want to parameterize the property. Use the format
<action>:<name>:<stype>.<action>can be one of these characters:=means keep the current value as the default value for the parameter.-means don't keep the default value for the parameter.|is a special case for secrets from Azure Key Vault for connection strings or keys.
<name>is the name of the parameter. If it's blank, it takes the name of the property. If the value starts with a-character, the name is shortened. For example,AzureStorage1_properties_typeProperties_connectionStringwould be shortened toAzureStorage1_connectionString.<stype>is the type of parameter. If<stype>is blank, the default type isstring. Supported values:string,securestring,int,bool,object,secureobjectandarray.
- Specifying an array in the file indicates that the matching property in the template is an array. Azure Synapse iterates through all the objects in the array by using the definition that's specified. The second object, a string, becomes the name of the property, which is used as the name for the parameter for each iteration.
- A definition can't be specific to a resource instance. Any definition applies to all resources of that type.
- By default, all secure strings (such as Key Vault secrets) and secure strings (such as connection strings, keys, and tokens) are parameterized.
Parameter template definition example
Here's an example of what a parameter template definition looks like:
{
    "Microsoft.Synapse/workspaces/notebooks": {
        "properties": {
            "bigDataPool": {
                "referenceName": "="
            }
        }
    },
    "Microsoft.Synapse/workspaces/sqlscripts": {
        "properties": {
            "content": {
                "currentConnection": {
                    "*": "-"
                }
            }
        }
    },
    "Microsoft.Synapse/workspaces/pipelines": {
        "properties": {
            "activities": [{
                "typeProperties": {
                    "waitTimeInSeconds": "-::int",
                    "headers": "=::object",
                    "activities": [
                        {
                            "typeProperties": {
                                "url": "-:-webUrl:string"
                            }
                        }
                    ]
                }
            }]
        }
    },
    "Microsoft.Synapse/workspaces/integrationRuntimes": {
        "properties": {
            "typeProperties": {
                "*": "="
            }
        }
    },
    "Microsoft.Synapse/workspaces/triggers": {
        "properties": {
            "typeProperties": {
                "recurrence": {
                    "*": "=",
                    "interval": "=:triggerSuffix:int",
                    "frequency": "=:-freq"
                },
                "maxConcurrency": "="
            }
        }
    },
    "Microsoft.Synapse/workspaces/linkedServices": {
        "*": {
            "properties": {
                "typeProperties": {
                    "accountName": "=",
                    "username": "=",
                    "connectionString": "|:-connectionString:secureString",
                    "secretAccessKey": "|"
                }
            }
        },
        "AzureDataLakeStore": {
            "properties": {
                "typeProperties": {
                    "dataLakeStoreUri": "="
                }
            }
        },
        "AzureKeyVault": {
            "properties": {
                "typeProperties": {
                    "baseUrl": "|:baseUrl:secureString"
                },
                "parameters": {
                    "KeyVaultURL": {
                        "type": "=",
                        "defaultValue": "|:defaultValue:secureString"
                    }
                }
            }
        }
    },
    "Microsoft.Synapse/workspaces/datasets": {
        "*": {
            "properties": {
                "typeProperties": {
                    "folderPath": "=",
                    "fileName": "="
                }
            }
        }
    },
    "Microsoft.Synapse/workspaces/credentials" : {
        "properties": {
            "typeProperties": {
                "resourceId": "="
            }
        }
    }
}
Here's an explanation of how the preceding template is constructed, by resource type.
notebooks
- Any property in the
properties/bigDataPool/referenceNamepath is parameterized with its default value. You can parameterize an attached Spark pool for each notebook file.
sqlscripts
- In the
properties/content/currentConnectionpath, both thepoolNameand thedatabaseNameproperties are parameterized as strings without the default values in the template.
pipelines
- Any property in the
activities/typeProperties/waitTimeInSecondspath is parameterized. Any activity in a pipeline that has a code-level property namedwaitTimeInSeconds(for example, theWaitactivity) is parameterized as a number, with a default name. The property won't have a default value in the Resource Manager template. Instead, the property will be required input during Resource Manager deployment. - The
headersproperty (for example, in aWebactivity) is parameterized with theobjecttype (Object). Theheadersproperty has a default value that is the same value as the source factory.
integrationRuntimes
- All properties in the
typePropertiespath are parameterized with their respective default values. For example, two properties are underIntegrationRuntimestype properties:computePropertiesandssisProperties. Both property types are created with their respective default values and types (Object).
triggers
Under
typeProperties, two properties are parameterized:- The
maxConcurrencyproperty has a default value and is thestringtype. The default parameter name of themaxConcurrencyproperty is<entityName>_properties_typeProperties_maxConcurrency. - The
recurrenceproperty also is parameterized. All properties under therecurrenceproperty are set to be parameterized as strings, with default values and parameter names. An exception is theintervalproperty, which is parameterized as theinttype. The parameter name is suffixed with<entityName>_properties_typeProperties_recurrence_triggerSuffix. Similarly, thefreqproperty is a string and is parameterized as a string. However, thefreqproperty is parameterized without a default value. The name is shortened and suffixed, such as<entityName>_freq.
Note
A maximum of 50 triggers is supported currently.
- The
linkedServices
- Linked services are unique. Because linked services and datasets have a wide range of types, you can provide type-specific customization. In the preceding example, for all linked services of the
AzureDataLakeStoretype, a specific template is applied. For all others (identified through the use of the*character), a different template is applied. - The
connectionStringproperty is parameterized as asecurestringvalue. It doesn't have a default value. The parameter name is shortened and suffixed withconnectionString. - The
secretAccessKeyproperty is parameterized as anAzureKeyVaultSecretvalue (for example, in an Amazon S3 linked service). The property is automatically parameterized as an Azure Key Vault secret and fetched from the configured key vault. You also can parameterize the key vault itself.
datasets
- Although you can customize types in datasets, an explicit *-level configuration isn't required. In the preceding example, all dataset properties under
typePropertiesare parameterized.
Best practices for CI/CD
If you're using Git integration with your Azure Synapse workspace and you have a CI/CD pipeline that moves your changes from development to test, and then to production, we recommend these best practices:
- Integrate only the development workspace with Git. If you use Git integration, integrate only your development Azure Synapse workspace with Git. Changes to test and production workspaces are deployed via CI/CD and don't need Git integration.
- Prepare pools before you migrate artifacts. If you have a SQL script or notebook attached to pools in the development workspace, use the same name for pools in different environments.
- Sync versioning in infrastructure as code scenarios. To manage infrastructure (networks, virtual machines, load balancers, and connection topology) in a descriptive model, use the same versioning that the DevOps team uses for source code.
- Review Azure Data Factory best practices. If you use Data Factory, see the best practices for Data Factory artifacts.
Troubleshoot artifacts deployment
Use the Synapse workspace deployment task to deploy Synapse artifacts
In Azure Synapse, unlike in Data Factory, artifacts aren't Resource Manager resources. You can't use the ARM template deployment task to deploy Azure Synapse artifacts. Instead, use the Synapse workspace deployment task to deploy the artifacts, and use ARM deployment task for ARM resources (pools and workspace) deployment. Meanwhile this task only supports Synapse templates where resources have type Microsoft.Synapse. And with this task, users can deploy changes from any branches automatically without manual clicking the publish in Synapse studio. The following are some frequently raised issues.
1. Publish failed: workspace arm file is more than 20MB
There is a file size limitation in git provider, for example, in Azure DevOps the maximum file size is 20Mb. Once the workspace template file size exceeds 20Mb, this error happens when you publish changes in Synapse studio, in which the workspace template file is generated and synced to git. To solve the issue, you can use the Synapse deployment task with validate or validate and deploy operation to save the workspace template file directly into the pipeline agent and without manual publish in synapse studio.
2. Unexpected token error in release
If your parameter file has parameter values that aren't escaped, the release pipeline fails to parse the file and generates an unexpected token error. We suggest that you override parameters or use Key Vault to retrieve parameter values. You also can use double escape characters to resolve the issue.
3. Integration runtime deployment failed
If you have the workspace template generated from a managed Vnet enabled workspace and try to deploy to a regular workspace or vice versa, this error happens.
4. Unexpected character encountered while parsing value
The template can not be parsed the template file. Try by escaping the back slashes, eg. \\Test01\Test
5. Failed to fetch workspace info, Not found
The target workspace info is not correctly configured. Please make sure the service connection which you have created, is scoped to the resource group which has the workspace.
6. Artifact deletion failed
The extension will compare the artifacts present in the publish branch with the template and based on the difference it will delete them. Please make sure you are not trying to delete any artifact which is present in publish branch and some other artifact has a reference or dependency on it.
8. Deployment failed with error: json position 0
If you were trying to manually update the template, this error would happen. Please make sure that you have not manually edited the template.
9. The document creation or update failed because of invalid reference
The artifact in synapse can be referenced by another one. If you have parameterized an attribute which is a referenced in an artifact, please make sure to provide correct and non null value to it
10. Failed to fetch the deployment status in notebook deployment
The notebook you are trying to deploy is attached to a spark pool in the workspace template file, while in the deployment the pool does not exist in the target workspace. If you don't parameterize the pool name, please make sure that having the same name for the pools between environments.
Feedback
Coming soon: Throughout 2024 we will be phasing out GitHub Issues as the feedback mechanism for content and replacing it with a new feedback system. For more information see: https://aka.ms/ContentUserFeedback.
Submit and view feedback for