Quickstart: Ingest data using One-click (Preview)
One-click ingestion makes the data ingestion process easy, fast, and intuitive. One-click ingestion helps you ramp-up quickly to start ingesting data, creating database tables, mapping structures. Select data from different kinds of sources in different data formats, either as a one-time or continuous ingestion process.
The following features make one-click ingestion so useful:
- Intuitive experience guided by the ingestion wizard
- Ingest data in a matter of minutes
- Ingest data from different kinds of sources: local file, blobs, and containers (up to 10,000 blobs)
- Ingest data in a variety of formats
- Ingest data into new or existing tables
- Table mapping and schema are suggested to you and easy to change
One-click ingestion is particularly useful when ingesting data for the first time, or when your data's schema is unfamiliar to you.
Prerequisites
An Azure subscription. Create a free Azure account.
Create a Data Explorer pool using Synapse Studio or the Azure portal
Create a Data Explorer database.
In Synapse Studio, on the left-side pane, select Data.
Select + (Add new resource) > Data Explorer pool, and use the following information:
Setting Suggested value Description Pool name contosodataexplorer The name of the Data Explorer pool to use Name TestDatabase The database name must be unique within the cluster. Default retention period 365 The time span (in days) for which it's guaranteed that the data is kept available to query. The time span is measured from the time that data is ingested. Default cache period 31 The time span (in days) for which to keep frequently queried data available in SSD storage or RAM, rather than in longer-term storage. Select Create to create the database. Creation typically takes less than a minute.
Create a table
- In Synapse Studio, on the left-side pane, select Develop.
- Under KQL scripts, Select + (Add new resource) > KQL script. On the right-side pane, you can name your script.
- In the Connect to menu, select contosodataexplorer.
- In the Use database menu, select TestDatabase.
- Paste in the following command, and select Run to create the table.
.create table StormEvents (StartTime: datetime, EndTime: datetime, EpisodeId: int, EventId: int, State: string, EventType: string, InjuriesDirect: int, InjuriesIndirect: int, DeathsDirect: int, DeathsIndirect: int, DamageProperty: int, DamageCrops: int, Source: string, BeginLocation: string, EndLocation: string, BeginLat: real, BeginLon: real, EndLat: real, EndLon: real, EpisodeNarrative: string, EventNarrative: string, StormSummary: dynamic)Tip
Verify that the table was successfully created. On the left-side pane, select Data, select the contosodataexplorer more menu, and then select Refresh. Under contosodataexplorer, expand Tables and make sure that the StormEvents table appears in the list.
Access the one-click wizard
The one-click ingestion wizard guides you through the one-click ingestion process.
To access the wizard from Azure Synapse:
In Synapse Studio, on the left-side pane, select Data.
Under Data Explorer Databases, right-click the relevant database, and then select Open in Azure Data Explorer.
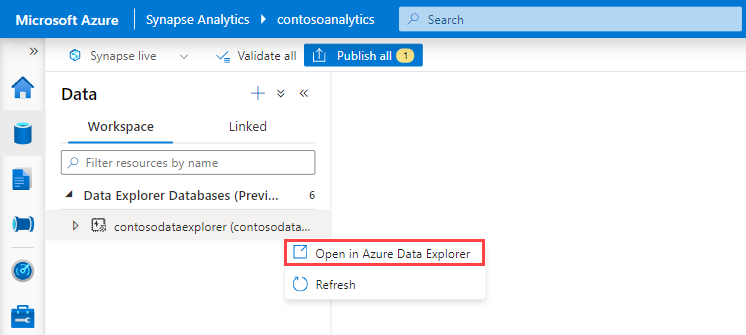
Right-click the relevant pool, and then select Ingest new data.
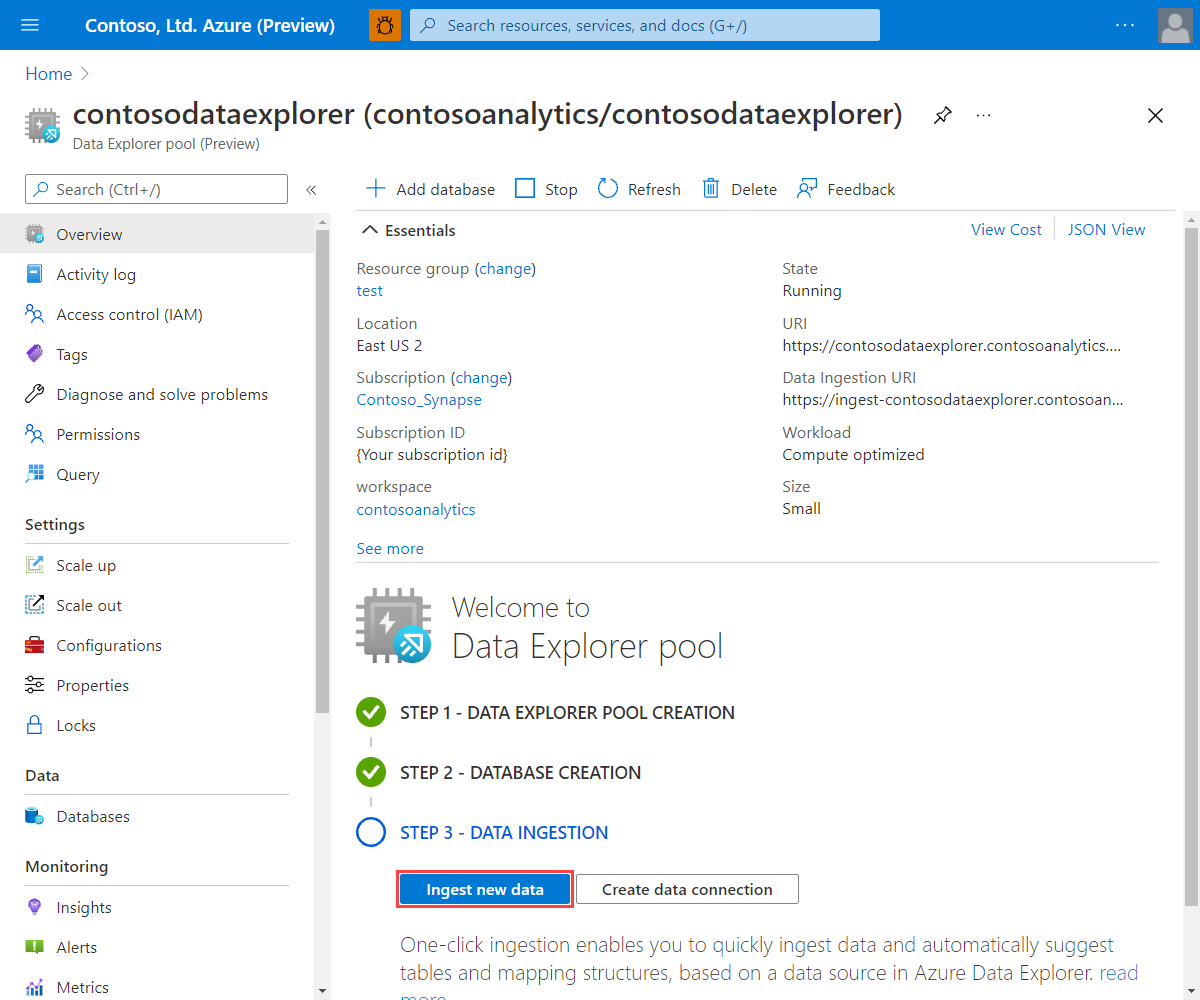
To access the wizard from the Azure portal:
In the Azure portal, search for and select the relevant Synapse workspace.
Under Data Explorer pools, select the relevant pool.
On the Welcome to Data Explorer pool home screen, select Ingest new data.
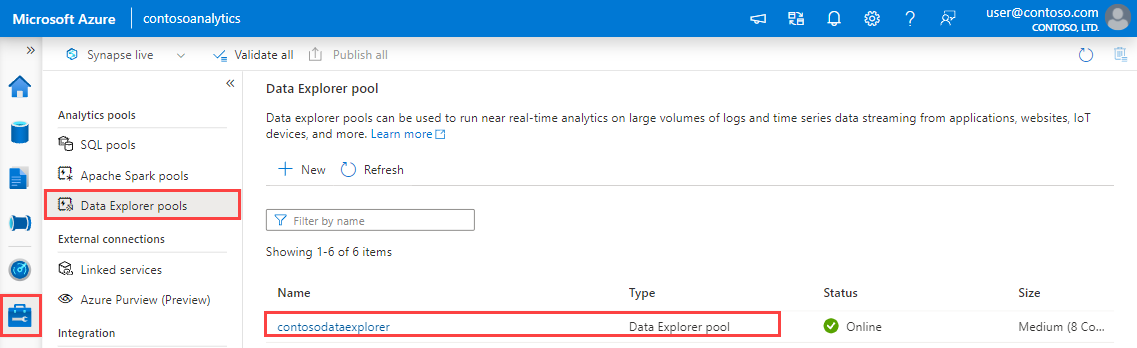
To access the wizard from the Azure Data Explorer web ui:
- Before you start, use the following steps to get the Query and Data Ingestion endpoints.
In Synapse Studio, on the left-side pane, select Manage > Data Explorer pools.
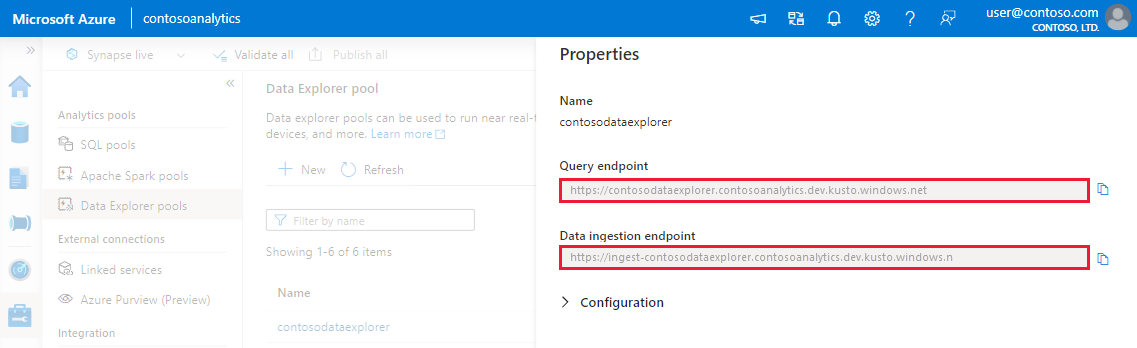
Select the Data Explorer pool you want to use to view its details.
Make a note of the Query and Data Ingestion endpoints. Use the Query endpoint as the cluster when configuring connections to your Data Explorer pool. When configuring SDKs for data ingestion, use the data ingestion endpoint.
- In the Azure Data Explorer web ui, add a connection to the Query endpoint.
- Select Query from the left menu, right-click on the database or table, and select Ingest new data.
- Before you start, use the following steps to get the Query and Data Ingestion endpoints.
One-click ingestion wizard
Note
This section describes the wizard using Event Hub as the data source. You can also use these steps to ingest data from a blob, file, blob container, and a ADLS Gen2 container.
Replace the example values with actual values for your Synapse workspace.
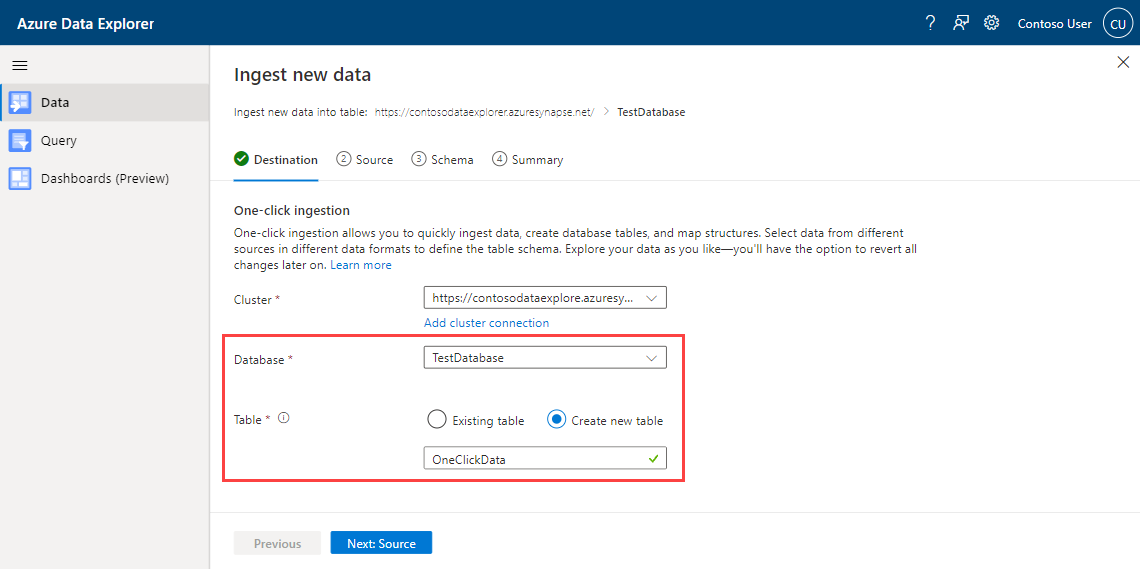
On the Destination tab, choose the database and table for the ingested data.
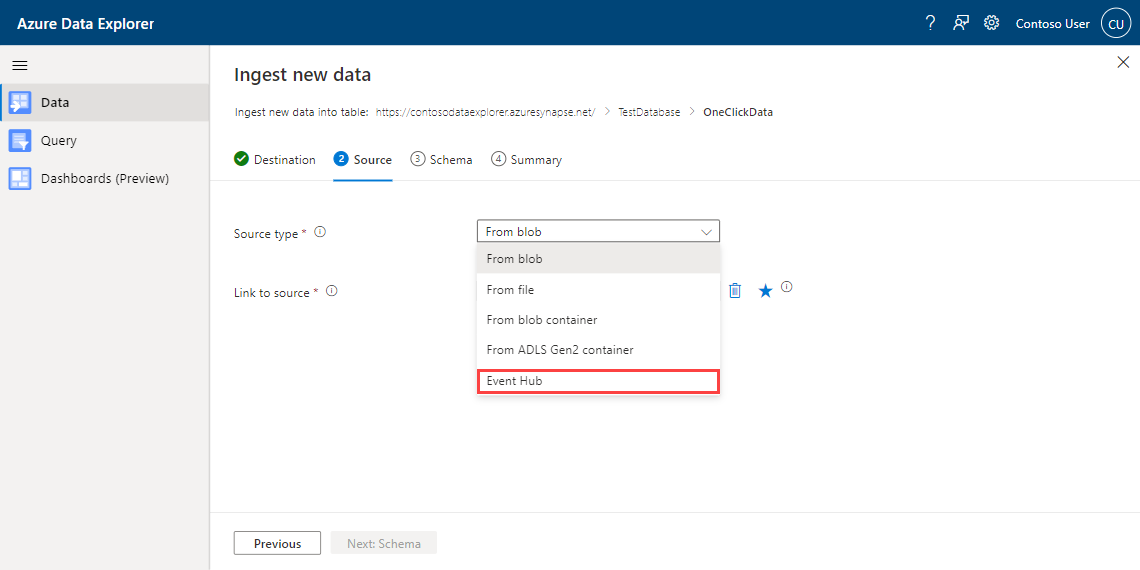
On the Source tab:
Select Event Hub as the Source type for the ingestion.
Fill out the Event Hub data connection details using the following information:
Setting Example value Description Data connection name ContosoDataConnection The name of the Event Hub data connection Subscription Contoso_Synapse The subscription where the Event Hub resides. Even Hub namespace contosoeventhubnamespace The namespace of the Event Hub. Consumer group contosoconsumergroup The name of the Even Hub consumer group. 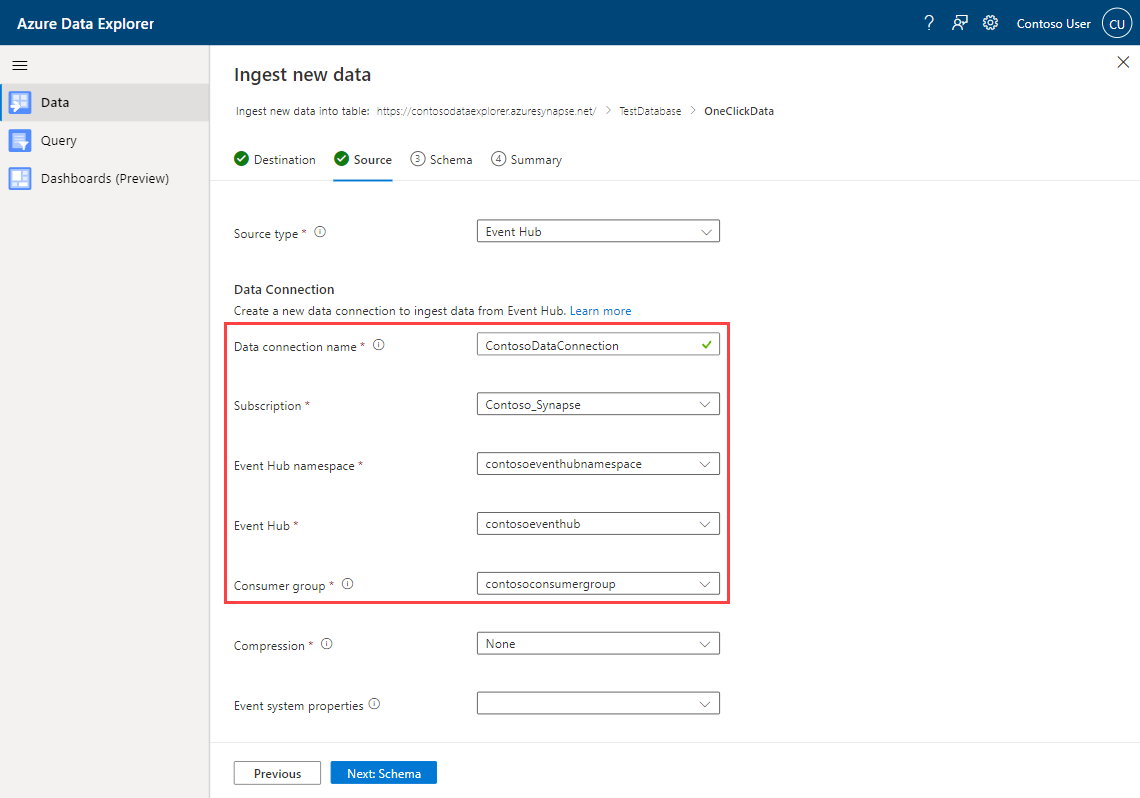
Select Next.
Schema mapping
The service automatically generates schema and ingestion properties, which you can change. You can use an existing mapping structure or create a new one, depending on if you're ingesting to a new or existing table.
In the Schema tab, do the following actions:
- Confirm the autogenerated compression type.
- Choose the format of your data. Different formats will allow you to make further changes.
- Change mapping in the Editor window.
File formats
One-click ingestion supports ingesting from source data in all data formats supported by Data Explorer for ingestion.
Editor window
In the Editor window of the Schema tab, you can adjust data table columns as necessary.
The changes you can make in a table depend on the following parameters:
- Table type is new or existing
- Mapping type is new or existing
| Table type | Mapping type | Available adjustments |
|---|---|---|
| New table | New mapping | Change data type, Rename column, New column, Delete column, Update column, Sort ascending, Sort descending |
| Existing table | New mapping | New column (on which you can then change data type, rename, and update), Update column, Sort ascending, Sort descending |
| Existing mapping | Sort ascending, Sort descending |
Note
When adding a new column or updating a column, you can change mapping transformations. For more information, see Mapping transformations
Mapping transformations
Some data format mappings (Parquet, JSON, and Avro) support simple ingest-time transformations. To apply mapping transformations, create or update a column in the Editor window.
Mapping transformations can be performed on a column of Type string or datetime, with the Source having data type int or long. Supported mapping transformations are:
- DateTimeFromUnixSeconds
- DateTimeFromUnixMilliseconds
- DateTimeFromUnixMicroseconds
- DateTimeFromUnixNanoseconds
Data ingestion
Once you have completed schema mapping and column manipulations, the ingestion wizard will start the data ingestion process.
When ingesting data from non-container sources, the ingestion will take immediate effect.
If your data source is a container:
- Data Explorer's batching policy will aggregate your data.
- After ingestion, you can download the ingestion report and review the performance of each blob that was addressed.
Initial data exploration
After ingestion, the wizard gives you options to use Quick commands for initial exploration of your data.
Next steps
Feedback
Coming soon: Throughout 2024 we will be phasing out GitHub Issues as the feedback mechanism for content and replacing it with a new feedback system. For more information see: https://aka.ms/ContentUserFeedback.
Submit and view feedback for